Posted on Leave a comment

What are the benefits of an immersion blender?

immersion blender

Introduction

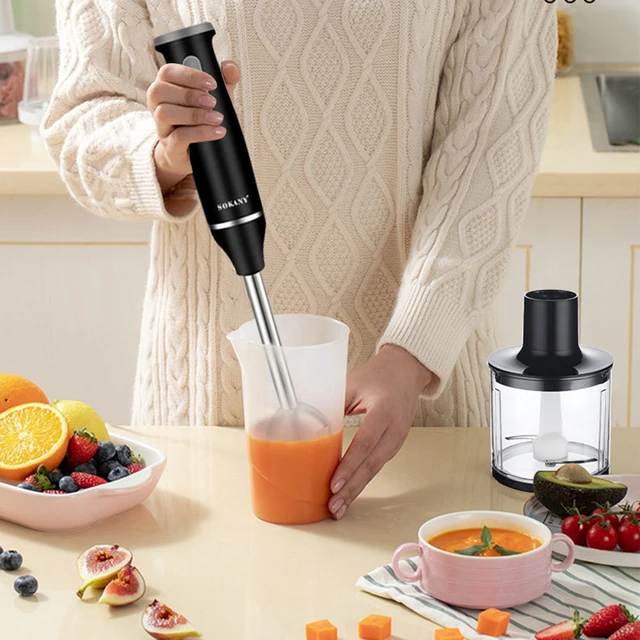
An immersion blender, also known as a hand blender or stick blender, is a versatile kitchen tool that offers a range of benefits. With its compact design and handheld operation, an immersion blender provides convenience, ease of use, and versatility in various culinary tasks. In this guide, we will explore the benefits of an immersion blender, discussing its functionality, simplicity, and advantages over other types of blenders.
immersion blender

What are the benefits of an immersion blender?

I. Versatility in the Kitchen

  1. Blending and Pureeing:

  • One of the primary functions of an immersion blender is blending and pureeing ingredients. It can effortlessly transform cooked fruits, vegetables, or even soups into smooth textures, allowing you to create silky smooth sauces, dips, marinades, and soups without transferring ingredients to a separate blender or food processor.
  1. Emulsifying Dressings and Sauces:

  • Immersion blenders excel in emulsifying dressings and sauces. With their powerful motor and blade design, they can quickly and thoroughly combine oil and vinegar or other ingredients, creating creamy and well-incorporated dressings, mayonnaise, or vinaigrettes.
  1. Whipping Cream and Beating Eggs:

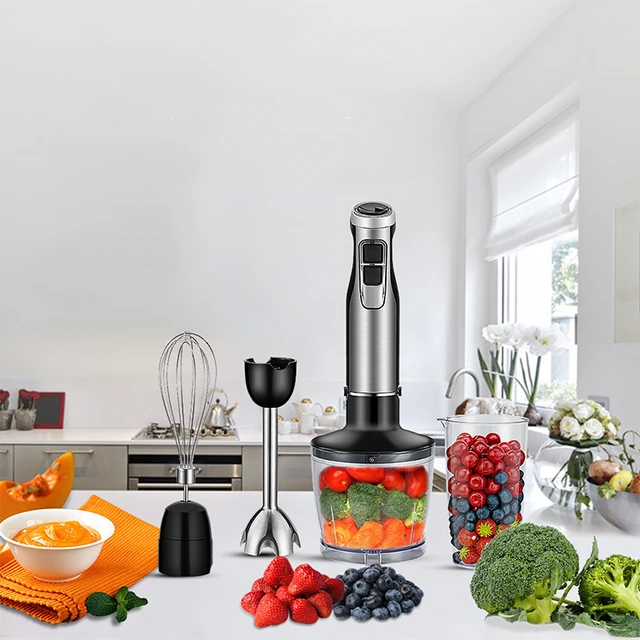
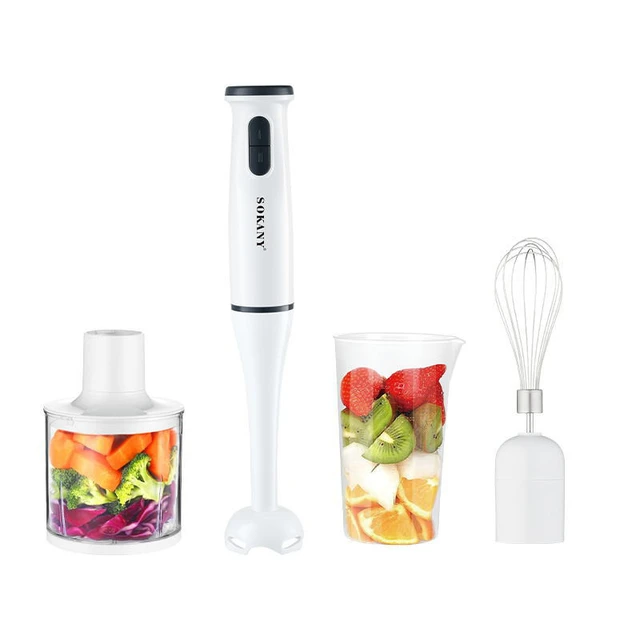
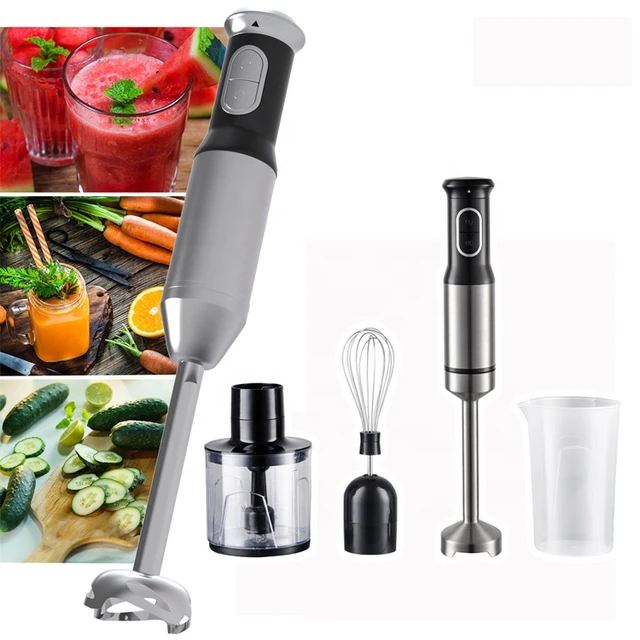
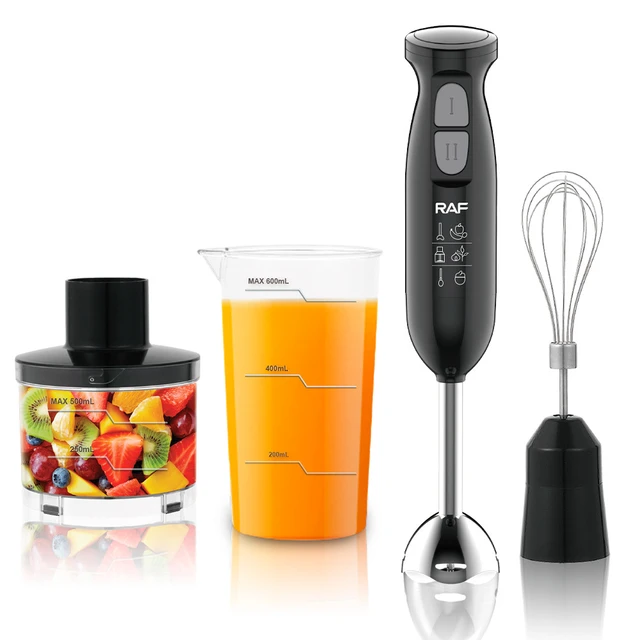
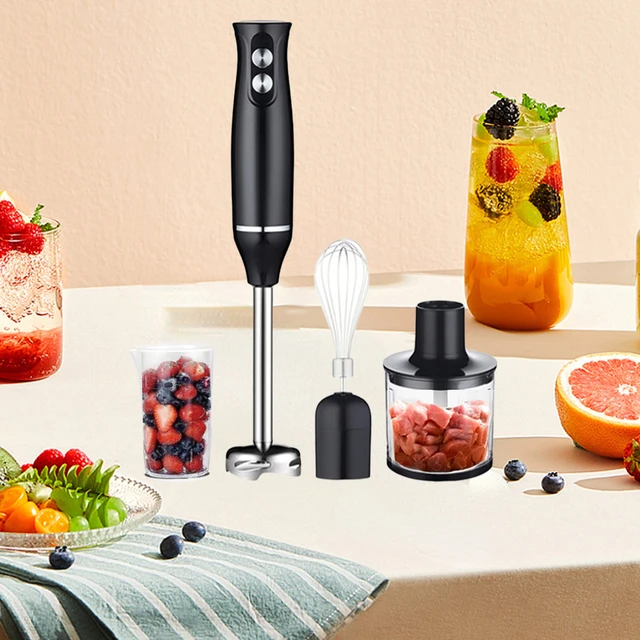
  • Some immersion blenders come with additional whisk attachments, enabling them to whip cream, beat eggs, or create light and fluffy batters for pancakes, waffles, or desserts. This versatility eliminates the need for a separate hand mixer, saving both time and storage space.
  1. Chopping and Grinding:

  • Some immersion blenders offer attachments such as choppers or mini food processors that can chop onions, herbs, nuts, or grinding spices like cinnamon or coffee beans. This feature provides added versatility in food preparation, eliminating the need for additional kitchen gadgets.
immersion blender

II. Convenience and Portability

  1. Compact Size:

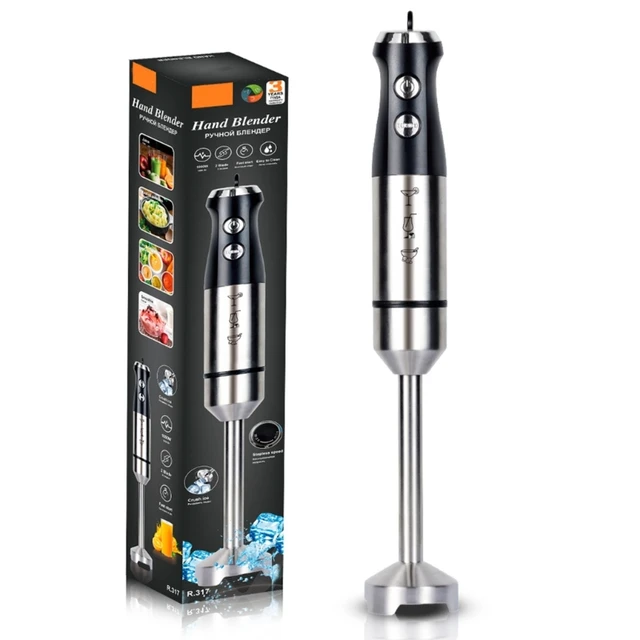
  • Immersion blenders have a compact and streamlined design, taking up minimal space in the kitchen. Unlike bulky countertop blenders or food processors, they can be easily stored in a drawer or cabinet, making them an ideal choice for those with limited kitchen space.
  1. Portability:

  • The handheld nature of immersion blenders enhances their portability. They are lightweight, making them convenient for travel or outdoor use, such as tailgating, camping, or preparing meals in vacation rentals.
  1. Easy Handling:

  • Immersion blenders are user-friendly and straightforward to operate. They have a comfortable grip and ergonomic design, allowing you to easily control and maneuver the blender throughout various kitchen tasks.
  1. Avoiding Transfer of Ingredients:

  • With an immersion blender, you can blend ingredients directly in the container they are being prepared in, eliminating the need to transfer hot soups or liquids between different vessels. This not only saves time but also reduces the risk of spills and messy cleanup.
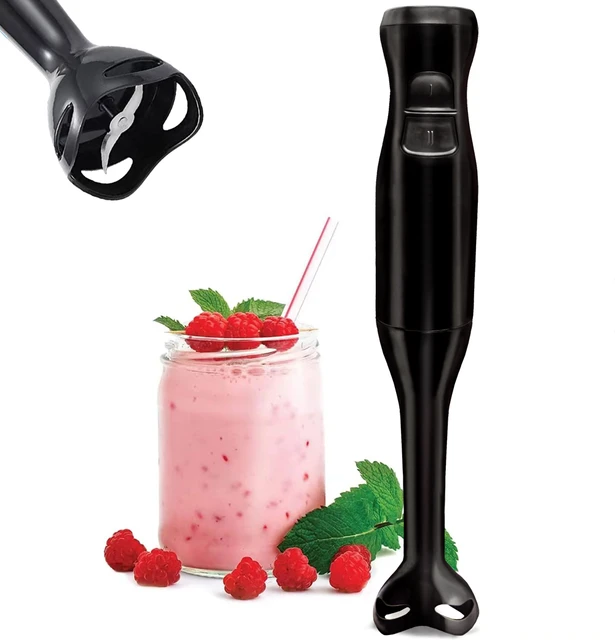
immersion blender

III. Simple Operation

  1. One-Handed Operation:

  • Immersion blenders can be operated with one hand, leaving your other hand free to hold the container or perform other tasks. The single-handed operation allows for greater control and flexibility during blending.
  1. Variable Speed Settings:

  • Many immersion blender models offer variable speed settings, allowing you to adjust the blending speed to suit different recipes or ingredients. This flexibility is particularly beneficial when blending delicate or thick substances, ensuring optimal results.
  1. Quick and Easy Cleanup:

  • Cleaning an immersion blender is often as simple as detaching the blending shaft and rinsing it under water or placing it in the dishwasher. This easy cleanup process saves time and effort compared to cleaning a larger countertop blender or food processor.

IV. Cost-Effective Option

  1. Affordability:

  • Immersion blenders are generally more affordable than larger countertop blenders or food processors. They offer a cost-effective option for those who want the convenience and functionalities of a blender without investing in a more expensive appliance.
  1. Space and Multifunctional Savings:

  • By combining multiple functions in one handheld device, immersion blenders help save space in the kitchen and eliminate the need for purchasing additional kitchen gadgets or appliances like food processors or hand mixers.

V. Comparison to Countertop Blenders

  1. Versatile and Quick:

  • Immersion blenders provide versatility and quick operation compared to countertop blenders. They eliminate the need for transferring ingredients and offer precise control over blending consistency. Countertop blenders may be better suited for larger batches or heavy-duty blending tasks.
  1. Convenience and Ease of Cleanup:

  • Immersion blenders excel in terms of convenience and cleanup. Their compact size and handheld operation make them easy to handle, store, and clean. Countertop blenders often require more effort and time for assembly, operation, and cleanup.
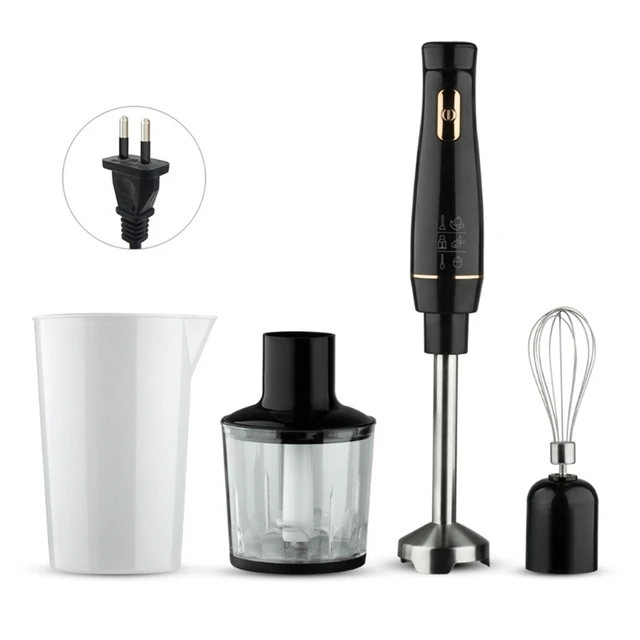
immersion blender

VII. Tips for Using an Immersion Blender

  1. Choose the Right Container:

  • When using an immersion blender, ensure that the container or vessel you’re blending in has sufficient depth and capacity to accommodate the blending attachment. Avoid using shallow or narrow containers that may cause splattering or hinder effective blending.
  1. Immerse the Blender Fully:

  • For optimal blending results, immerse the blending attachment fully into the ingredients. This allows the blades to reach all the ingredients, ensuring even blending and avoiding pockets of unblended or lumpy textures.
  1. Use the Correct Speed:

  • Depending on the ingredients and the desired texture, adjust the speed setting of the immersion blender accordingly. Start with a lower speed and gradually increase if needed. This helps prevent splattering and allows for better control over blending consistency.
  1. Blend in Short Bursts:

  • Instead of continuously blending for long periods, apply the blender in short bursts. This technique helps prevent overheating of the motor and gives you more control over the blending process. Pause between bursts to assess the texture and make any necessary adjustments.
  1. Tilt the Blender for Aerating:

  • If you want to incorporate air into your mixture, such as when making whipped cream or frothy drinks, tilt the immersion blender to the side during blending. This technique helps aerate the mixture and achieve a lighter texture.
  1. Avoid Over-Blending:

  • Be cautious not to over-blend ingredients with an immersion blender, especially when it comes to delicate foods like fruits or herbs. Over-blending can lead to excessive oxidation or release of unwanted flavors, affecting the overall taste and appearance of the final dish.

immersion blender

VI. Conclusion: Enhancing Culinary Experiences with an Immersion Blender

The benefits of an immersion blender are manifold. It offers versatility in the kitchen, allowing you to blend, puree, emulsify, chop, and grind ingredients with ease. The convenience and portability of the immersion blender, along with its simple operation and quick cleanup, make it a favorite among home cooks and professional chefs alike.

Whether you’re preparing soups, sauces, dressings, or even whipping cream, an immersion blender provides a cost-effective and space-saving solution. While countertop blenders excel in larger batches and heavy-duty blending, an immersion blender offers simplicity, precision, and efficiency for a wide range of culinary tasks.

Consider the versatility and convenience of an immersion blender when looking to streamline your kitchen tools and enjoy effortless blending experiences. With an immersion blender in your culinary arsenal, you can enhance your cooking creations and explore new possibilities in the realm of homemade sauces, soups, smoothies, and more.
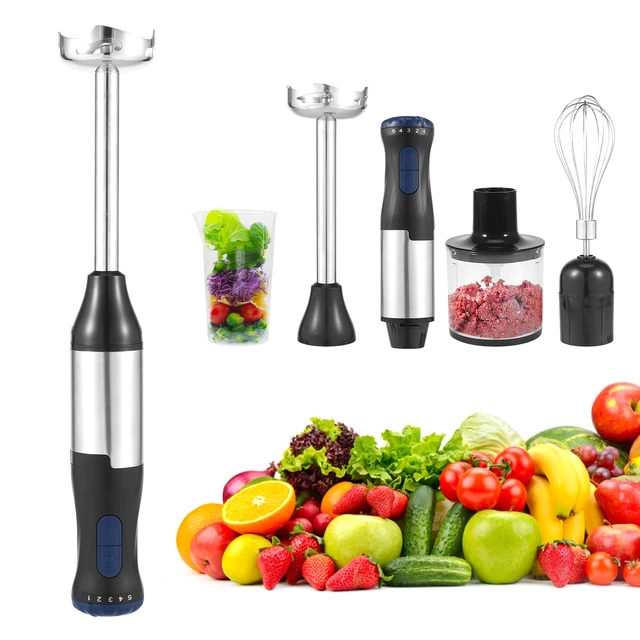
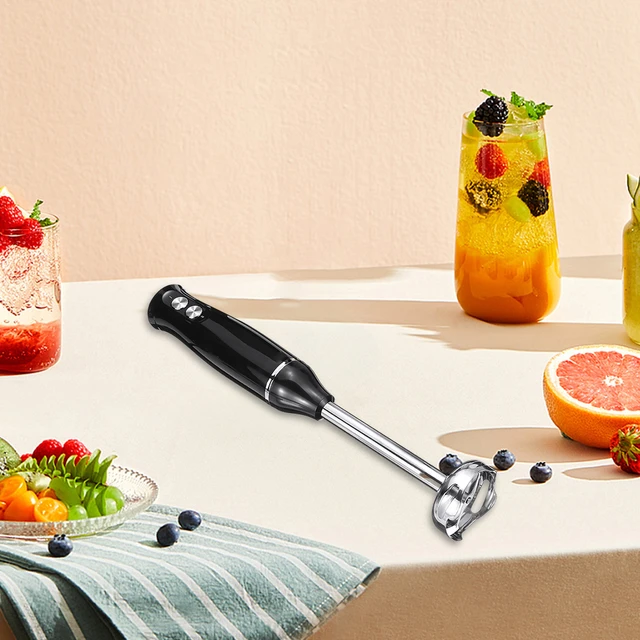
Posted on Leave a comment

Can you use immersion blender for smoothie?

immersion blender

Introduction

When it comes to making smoothies, traditional countertop blenders are often the go-to appliance. However, you may wonder if an immersion blender, also known as a hand blender or stick blender, can be used as an alternative. In this guide, we will explore whether you can use an immersion blender for making smoothies, discussing the benefits, limitations, and techniques for achieving smooth and creamy results.

immersion blender

Can you use immersion blender for smoothie?

I. Understanding Immersion Blenders

  1. Versatile Kitchen Tool:

  • An immersion blender is a handheld appliance consisting of a motor at one end and a blending attachment at the other. It is convenient for pureeing, blending, and emulsifying various ingredients, providing flexibility in the kitchen.
  1. Key Components:

  • Immersion blenders typically consist of a motor housing, a removable blending shaft, and different types of blades or attachments. Some models also offer additional features, such as variable speed settings or attachments for chopping or whisking.

II. Benefits of Using an Immersion Blender for Smoothies

  1. Convenience and Portability:

  • Compared to countertop blenders, immersion blenders are more compact and portable, making them ideal for small kitchens or on-the-go use. They can be easily stored and require less countertop space.
  1. Quick and Easy Operation:

  • Immersion blenders offer a straightforward and hassle-free blending experience. With a simple press of a button, you can blend ingredients directly in the container, minimising the need to transfer liquids and clean multiple components.
  1. Smoothie Customization:

  • Immersion blenders allow you to have greater control over the texture of your smoothie. You can easily adjust the blending time and immersion depth to achieve your desired consistency, whether you prefer a smooth and creamy texture or a chunkier blend.

immersion blender

III. Limitations of Using an Immersion Blender for Smoothies

  1. Capacity:

  • Immersion blenders are generally suited for blending smaller quantities of ingredients. If you frequently make large batches of smoothies or have several servings to prepare, a countertop blender may be a more suitable choice due to its larger capacity.
  1. Ice and Frozen Ingredients:

  • Immersion blenders may have difficulty handling large ice cubes or frozen ingredients effectively. The blades and motor of immersion blenders are not always as robust as those of countertop blenders, making it more challenging to crush ice or blend frozen ingredients into a smooth texture.
  1. Fiber and Seeds:

  • Some immersion blender blades may struggle with tougher ingredients, such as fibrous fruits, tough greens, or small seeds. Inadequate blending can result in a grainy or less than desirable texture in your smoothie.

immersion blender

IV. Tips for Achieving Smooth and Creamy Smoothies

  1. Prepping Ingredients:

  • To ensure smoother blending, pre-cut ingredients into smaller pieces. This step is particularly important for denser foods like frozen fruits, large chunks of vegetables, or fibrous greens.
  1. Liquid Base:

  • Add a sufficient amount of liquid to the blending container before adding the other ingredients. This will aid the blending process and prevent the immersion blender from stalling or splattering.
  1. Blending Technique:

  • When using an immersion blender, it is advisable to move the blender up and down in a gentle, slow, and steady motion. This technique allows the blades to blend evenly and helps achieve a smoother consistency.
  1. Gradual Blending:

  • Start by blending the liquid and soft ingredients before gradually adding the more solid or challenging ingredients. This approach helps prevent strain on the immersion blender and ensures thorough blending.
  1. Use Pre-Frozen or Smaller Ice:

  • If you want to incorporate ice into your smoothie, consider using pre-crushed ice or smaller ice cubes. This choice makes it easier for the immersion blender to blend the ice effectively without straining the motor.
  1. Soaking Seeds or Nuts:

  • If you plan to blend seeds or nuts into your smoothie, consider soaking them in water beforehand. Soaking helps soften their texture and makes them easier to blend with the immersion blender.

V. Optional Accessories and Attachments

  1. Blending Containers:

  • Some immersion blender models come with additional blending containers or cups, allowing you to blend directly into a portable container for on-the-go convenience.
  1. Whisk Attachment:

  • Certain immersion blenders offer a whisk attachment that can be useful for incorporating air into your smoothies or whisking ingredients such as egg whites or cream.

immersion blender

VI. Cleaning and Maintenance

  1. Detachable Parts:

  • Most immersion blenders have detachable blending shafts or blades that can be easily removed for cleaning. Follow the manufacturer’s instructions for cleaning and maintaining these parts.
  1. Motor Housing:

  • Clean the motor housing of the immersion blender by wiping it with a damp cloth. Avoid submerging the motor housing or exposing it to water.

VIII. Comparing Immersion Blenders and Countertop Blenders

  1. Immersion Blenders vs. Countertop Blenders:

  • It is worth comparing the capabilities and features of immersion blenders with those of countertop blenders to determine which option better suits your smoothie-making needs.
  1. Capacity and Batch Size:

  • Countertop blenders generally have larger capacity jars, making them suitable for preparing multiple servings or larger batches of smoothies. If you frequently make smoothies for multiple people, a countertop blender may be more efficient.
  1. Power and Motor Strength:

  • Countertop blenders typically have more powerful motors compared to immersion blenders. This allows them to handle tougher ingredients, crush ice more effectively, and maintain consistent blending power throughout the entire jar.
  1. Texture and Consistency:

  • Countertop blenders tend to provide smoother and velvety textures due to their powerful blades and higher speed settings. If achieving a perfectly smooth texture is crucial to your smoothie enjoyment, a countertop blender may be the preferable choice.
  1. Additional Functions:

  • Countertop blenders often offer more versatility with various speed settings, pre-programmed cycles, and additional functions such as grinding spices, making nut butters, or even heating soups. If you require a blender that can handle multiple tasks beyond smoothie making, a countertop blender might be the better option.

immersion blender

VII. Conclusion: Immersion Blenders and Smoothie Making

Using an immersion blender for making smoothies is possible, but it comes with certain limitations. While immersion blenders offer convenience, portability, and customization options, they may struggle with large batches, ice crushing, and blending tougher ingredients.

To achieve smooth and creamy smoothies with an immersion blender, ensure proper ingredient preparation, use a liquid base, employ blending techniques, and consider optional accessories or attachments. While immersion blenders may not match the power or capacity of countertop models, they can still provide satisfactory results for smaller quantities and simpler recipes.

Consider your specific smoothie-making needs, the desired texture, and the frequency of use before deciding whether an immersion blender is the right choice for you. By understanding their capabilities and following the provided tips, you can enjoy the convenience and versatility of an immersion blender for your smoothie creations.

Posted on Leave a comment

How do you use a bionic blender?

bionic blade blender

Introduction

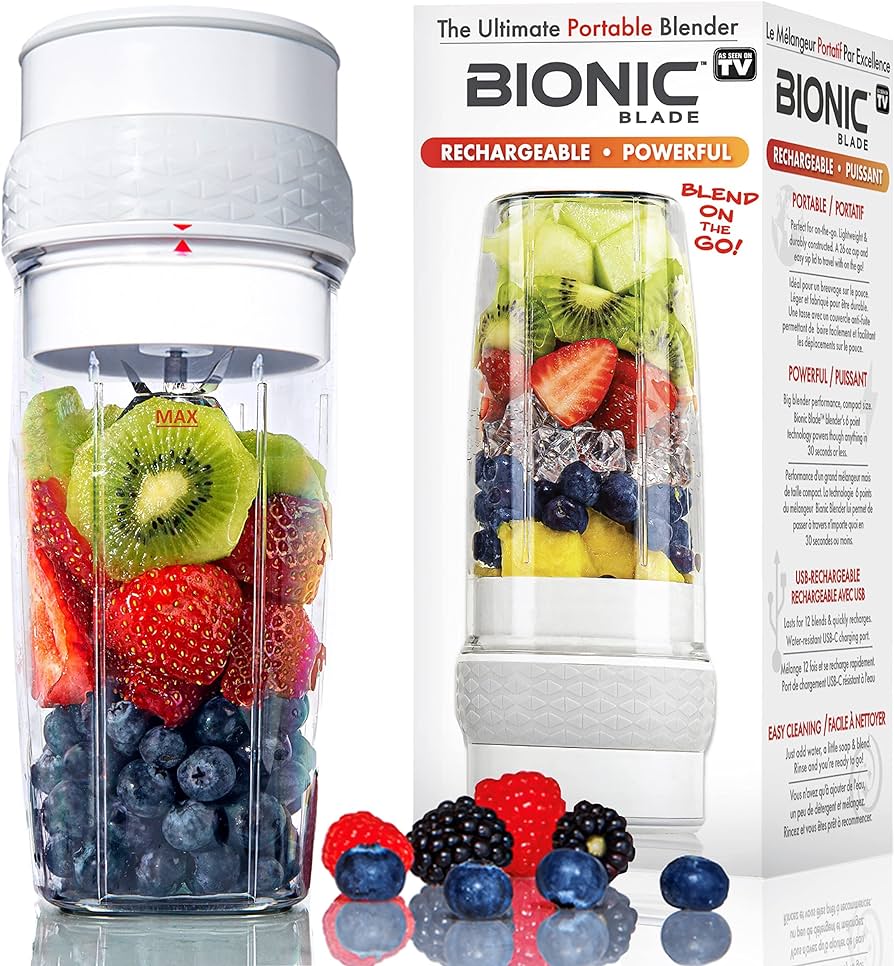
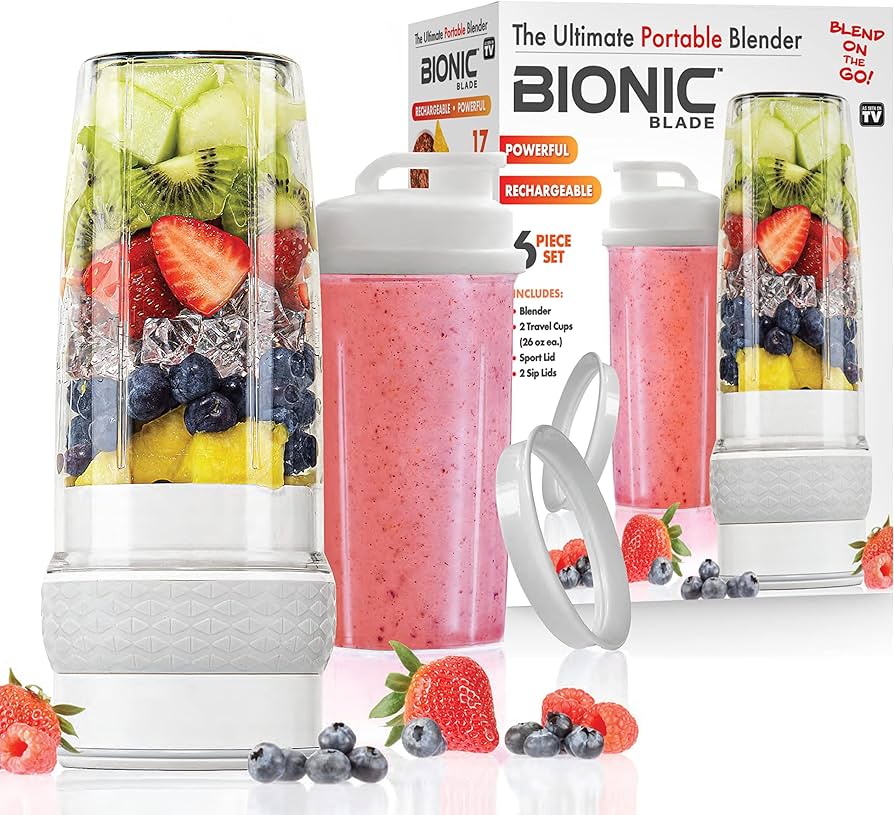
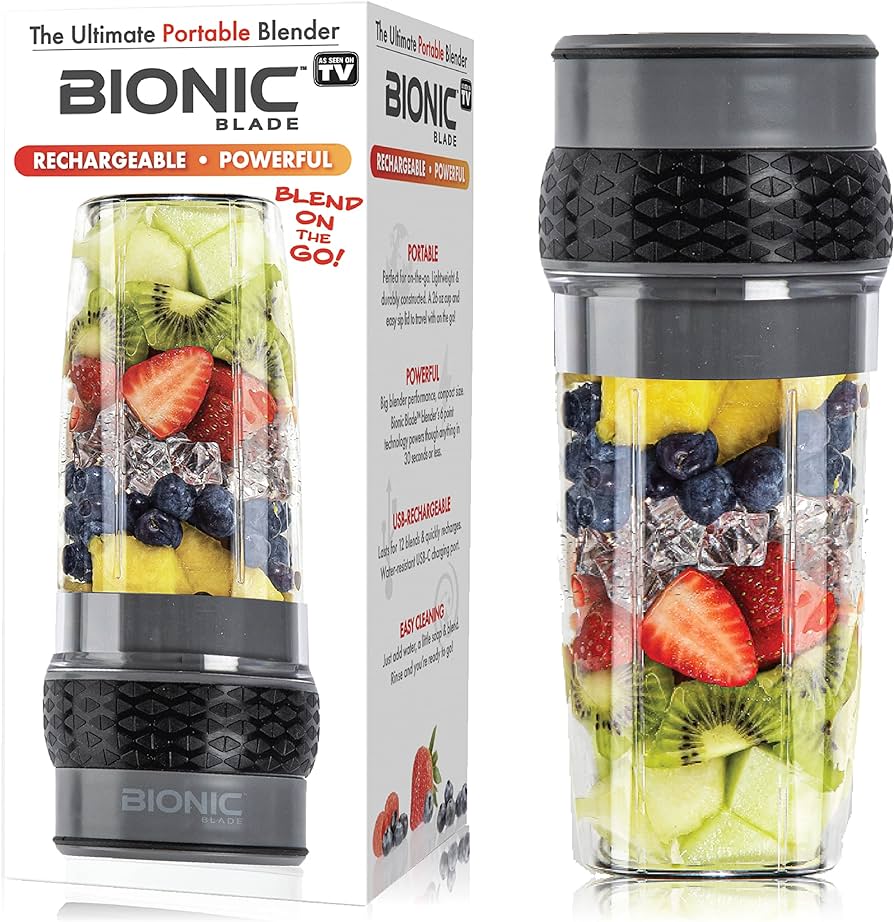
The Bionic Blender is a versatile and efficient kitchen appliance designed to simplify your food preparation tasks. Whether you’re blending smoothies, creating sauces, or crushing ice, understanding how to use the Bionic Blender properly will enhance your blending experience. In this article, we will provide specific and detailed instructions on how to use a Bionic Blender effectively, allowing you to unlock its full potential and achieve fantastic blending results.

bionic blade blender

How do you use a bionic blender?

I. Familiarizing Yourself with the Components

Understanding the Blender Components:

  • Take a moment to familiarize yourself with the various parts of the Bionic Blender. These typically include the base unit, blender jar, lid, blade assembly, and control panel. Refer to the user manual provided by the manufacturer for specific details on your blender model.

II. Preparing the Blender for Use

  1. Choosing the Right Location:

  • Select a sturdy and flat surface in your kitchen to place the Bionic Blender. Ensure that it is near an electrical outlet for easy access.
  1. Assembling the Blades and Jar:

  • Prior to use, assemble the blade assembly onto the blender jar. Place the blade assembly securely onto the jar, ensuring it is properly aligned with the jar’s bottom.

bionic blade blender

III. Adding Ingredients and Liquid in the Blender Jar

  1. Check the Capacity:

  • Ensure that the amount of ingredients you plan to blend does not exceed the maximum capacity recommended by the manufacturer. Overfilling the blender jar can hinder proper blending and lead to spillage.
  1. Add Ingredients:

  • Place the desired ingredients into the blender jar. This can include fruits, vegetables, liquids, or any other ingredients specified by your recipe.
  1. Adding Liquid:

  • To aid in the blending process, it is recommended to add a sufficient amount of liquid, such as water, milk, juice, or any other liquid suitable for your recipe. The specific amount of liquid required will depend on the recipe and desired consistency.

IV. Lid Placement and Safety Precautions

  1. Securing the Lid:

  • Place the lid securely onto the blender jar, ensuring it is properly locked in place. The lid should have a rubber gasket or seal to prevent leaks during blending.
  1. Safety Lock Features:

  • Many Bionic Blender models have safety lock features. Make sure the lid is correctly aligned with the blender jar and the safety lock is engaged before operating the blender. This prevents the blender from starting unless all components are correctly assembled.
  1. Holding the Lid:

  • For added safety, it is recommended to hold the lid firmly while operating the blender. This ensures that the lid remains in place and prevents any accidental opening or splattering of contents.

bionic blade blender

V. Operating the Bionic Blender

  1. Selecting Blending Modes or Speeds:

  • Depending on your blender model, choose the appropriate blending mode or speed setting for your desired result. Settings may include options for ice crushing, smoothies, sauces, or manual speed control.
  1. Starting the Blender:

  • Once you have selected the desired blending mode or speed, press the power button or start button to begin blending. The blender will initiate the blending process.
  1. Monitoring the Blending Process:

  • Keep an eye on the blending process to ensure that the ingredients are being properly blended. Depending on your recipe and desired consistency, you may need to adjust the blending time or speed.
  1. Utilizing Pulse Mode:

  • Many Bionic Blenders feature a pulse mode that allows for quick bursts of blending power. Use the pulse mode for precise blending control, especially when dealing with ingredients that require shorter blending durations or a coarse texture.

VI. Adjusting Speeds and Durations

  1. Increasing or Decreasing Speed:

  • Some recipes may require adjustments to the blending speed during the process. Most Bionic Blenders offer speed control options that allow you to increase or decrease the blending speed as needed.
  1. Blending Duration:

  • The duration of the blending process will depend on the specific recipe and desired consistency. Follow the instructions provided in your recipe, or use your judgment based on the desired outcome.

bionic blade blender

VII. Pausing and Scraping Down the Sides

  1. Pausing the Blender:

  • If needed, pause the blender during the blending process to check the consistency or scrape down the sides of the blender jar. This ensures that all ingredients are evenly blended.
  1. Scraping Down the Sides:

  • Use a spatula or spoon to scrape down the sides of the blender jar, especially if any ingredients have stuck to the sides. This helps incorporate any particles that may not have been fully blended.

VIII. Testing and Adjusting Consistency

  1. Testing the Blend:

  • After the initial blending process, stop the blender and carefully remove the lid. Test the blend’s consistency by observing its texture, smoothness, and taste.
  1. Adjusting the Blend:

  • If the blend is too thick, add small amounts of liquid and blend again until you reach the desired consistency.

IX. Safety Precautions and Cleaning

  1. Unplugging the Blender:

  • Once you have finished using the Bionic Blender, unplug it from the power source for safety.
  1. Cleaning the Blender:

  • Refer to the manufacturer’s instructions and our separate guide on how to clean a Bionic Blender effectively. Proper cleaning ensures hygiene, longevity, and optimal performance.


XI. Tips for Getting the Best Results

  1. Start with Liquid:

  • When blending, it is often helpful to start with the liquid ingredients at the bottom of the blender jar. This allows for easier blending and smoother results.
  1. Gradually Add Ingredients:

  • For better blending and to prevent overloading the blender, gradually add solid ingredients to the blender jar. This ensures that everything is evenly blended and prevents the motor from straining.
  1. Blend in Batches:

  • If your recipe requires blending a large quantity of ingredients, it may be necessary to blend in batches. Overfilling the blender jar can hinder the blending process and result in an inconsistent blend.
  1. Use the Pulse Function for Control:

  • The pulse function on the Bionic Blender provides short bursts of blending power, allowing for precise control over the texture of your blend. Utilize this function when you need to create a coarse texture or incorporate mix-ins, such as nuts or chocolate chips.
  1. Avoid Over-Blending:

  • Be mindful not to over-blend your ingredients as this can result in a loss of texture or flavor. Stop the blending process once you achieve the desired consistency, taste, and texture.
  1. Blend with Care:

  • While the Bionic Blender is a powerful appliance, it is essential to handle it with care. Avoid excessive force or aggressive movements while operating the blender to prevent damage to the blades or motor.

XII. Common Troubleshooting Tips

  1. Blender Not Starting:

  • If the blender does not start when the power button is pressed, ensure that all components are securely assembled, including the lid and safety lock. Check that the power cord is properly plugged into an electrical outlet.
  1. Food Not Blending Properly:

  • If your ingredients are not blending evenly or there are large chunks remaining, stop the blending process and scrape down the sides of the blender jar. Adjust the speed or blending time if necessary.
  1. Unusual Noises or Vibrations:

  • If you encounter unusual noises or excessive vibrations during blending, stop the blender immediately.

bionic blade blender

X. Conclusion: Mastering the Art of Blending

By following these specific instructions and guidelines, you can effectively utilize your Bionic Blender and achieve fantastic blending results in your culinary endeavors. Remember to read the user manual provided by the manufacturer for model-specific instructions and safety precautions.

From assembling the blender and adding ingredients to utilizing different speeds and monitoring the blending process, you now have the knowledge to make the most of your Bionic Blender. Embrace creativity, experiment with recipes, and enjoy the convenience and versatility of this innovative kitchen appliance.

Posted on Leave a comment

How do you clean a bionic blade blender?

bionic blade blender

Introduction

The Bionic Blade Blender is an innovative kitchen appliance designed to make blending tasks effortless. To ensure optimal performance and longevity, regular cleaning is crucial. Understanding how to clean a Bionic Blade Blender properly will help you maintain its functionality and hygienic standards. In this article, we will provide specific and detailed cleaning tips to keep your Bionic Blade Blender in top condition.

bionic blade blender

How do you clean a bionic blade blender?

I. Safety Precautions

  1. Unplug the Blender:

  • Before cleaning the Bionic Blade Blender, always make sure it is unplugged from the power source. This ensures your safety and prevents accidental operation during the cleaning process.

II. Cleaning the Blade Assembly

  1. Disassemble the Blade Assembly:

  • Start by carefully removing the blade assembly from the blender jar. Most Bionic Blade Blenders have a removable blade assembly for easier cleaning.
  1. Rinse Under Warm Water:

  • Rinse the blade assembly under warm running water to remove any leftover food particles or residue. Use your fingers or a soft brush to gently scrub the blades and remove any stubborn debris.
  1. Use Dish Soap:

  • Apply a small amount of mild dish soap to a sponge or brush. Gently clean the blade assembly, paying attention to the blades themselves and the areas around them. Ensure that all surfaces are thoroughly cleaned, including any small crevices or nooks.
  1. Rinse Thoroughly:

  • Rinse the blade assembly under warm water to remove any soap residue. Ensure there is no leftover soap, as it can affect the taste and odor of future blends.
  1. Air Dry or Towel Dry:

  • After cleaning, allow the blade assembly to air dry completely before reassembling. Alternatively, you can use a clean, dry cloth or towel to carefully dry the blades and assembly.

bionic blade blender

III. Cleaning the Blender Jar

  1. Empty and Rinse:

  • Empty the blender jar of any remaining contents. Rinse the jar thoroughly under warm water to remove any residue or food particles.
  1. Use Warm, Soapy Water:

  • Fill the blender jar with warm water and add mild dish soap. Swirl the water around to create a soapy solution that will help break down any stuck-on residue.
  1. Scrub with a Sponge or Brush:

  • Use a sponge or soft brush to scrub the inside of the blender jar, paying special attention to the bottom and sides. Scrubbing in gentle circular motions helps dislodge any stubborn residue or stains.
  1. Rinse Thoroughly:

  • Rinse the blender jar under warm water to remove any soap residue. It’s important to ensure that no soap remains, as it can affect the taste and odor of future blends.
  1. Air Dry or Towel Dry:

  • Allow the blender jar to air dry completely before using it or reassembling the Bionic Blade Blender. Alternatively, use a clean, dry cloth or towel to ensure it is thoroughly dried.

bionic blade blender

IV. Wiping the Base Unit

  1. Unplug the Blender:

  • Before cleaning the base unit of the Bionic Blade Blender, make sure it is unplugged from the power source.
  1. Use a Damp Cloth:

  • Dampen a clean cloth with warm water and wring out any excess moisture. Gently wipe the base unit exterior, taking care to remove any spills, stains, or fingerprints.
  1. Dry the Base Unit:

  • Use a clean, dry cloth to wipe and dry the base unit thoroughly. This ensures the prevention of any water damage and helps maintain the appearance of the blender.

V. Additional Cleaning Tips

  1. Clean Immediately After Use:

  • To prevent food residue from drying and becoming harder to remove, it is best to clean the Bionic Blade Blender immediately after each use. This ensures easier and more efficient cleaning.
  1. Avoid Immersing the Base Unit in Water:

  • The base unit of the Bionic Blade Blender contains electrical components and should never be submerged in water. Always clean the base unit using a damp cloth and avoid any contact with water.
  1. Avoid Harsh Abrasives or Chemicals:

  • When cleaning the Bionic Blade Blender, refrain from using harsh abrasives, scouring pads, or aggressive chemicals. These can damage the blender’s surfaces and compromise its functionality.
  1. Clean the Rubber Seal:

  • If your Bionic Blade Blender has a rubber seal, regularly inspect and clean it. Remove the seal if possible and wash it with warm, soapy water. Rinse thoroughly and allow it to dry completely before reinserting it into the blender jar.

VI. Regular Maintenance

  1. Blade Lubrication:

  • Periodically lubricate the Bionic Blade Blender’s blade assembly according to the manufacturer’s instructions. This helps maintain smooth rotation and optimal blending performance.
  1. Check for Wear and Tear:

  • Regularly inspect the blade assembly, blender jar, and base unit for any signs of wear and tear. If you notice any damaged or worn parts, contact the manufacturer for replacement options. If it is under warranty, you can contact customer service for prompt repair.

bionic blade blender

VIII. Troubleshooting Cleaning Challenges

  1. Removing Stains or Discoloration:

  • If you encounter stubborn stains or discoloration on the blade assembly, blender jar, or base unit, there are a few methods you can try:
    • Baking Soda Paste: Create a paste using baking soda and water. Apply it to the stained area, let it sit for a few minutes, then scrub gently with a sponge or brush. Rinse thoroughly.
    • Lemon Juice: Squeeze fresh lemon juice onto the stained area and let it sit for a few minutes. Scrub the area gently with a sponge or brush before rinsing with warm water.
    • Vinegar Solution: Mix equal parts of vinegar and water in a spray bottle. Spray the solution onto the stained area and let it sit for a few minutes. Scrub gently and rinse thoroughly.
  1. Dealing with Lingering Odors:

  • If your Bionic Blade Blender retains unpleasant odors, you can use these methods to freshen it up:
    • Lemon or Citrus Solution: Squeeze fresh lemon juice or add a few drops of lemon essential oil into the blender jar. Fill the jar with warm water and blend for a few seconds. Rinse thoroughly.
    • Baking Soda: Place a tablespoon of baking soda into the blender jar. Add warm water and allow the mixture to sit for a few hours or overnight. Rinse thoroughly.

IX. Deep Cleaning and Descaling

  1. Deep Cleaning:

  • Periodically, it is recommended to perform a more thorough deep cleaning of your Bionic Blade Blender. This process helps remove any buildup or residue that may have accumulated over time.
    • Fill the blender jar halfway with warm water and add a few drops of dish soap. Blend the mixture for a few seconds, then let it sit for a few minutes.
    • Scrub the blender jar, blade assembly, and base unit with a soft brush or sponge. Pay careful attention to any areas with stubborn residue or buildup.
    • Rinse all components thoroughly with warm water to remove any soap or residue.

bionic blade blender

VII. Conclusion: Maintain a Clean and Efficient Bionic Blade Blender

Proper cleaning and maintenance of your Bionic Blade Blender are crucial for its longevity and performance. Following the detailed cleaning tips provided, from disassembling the blade assembly to cleaning the blender jar and wiping the base unit, will help ensure that your blender remains in top condition.

Remember to clean the blender immediately after each use, avoid harsh abrasives or chemicals, and properly maintain the blade assembly. By incorporating these cleaning practices into your routine, you can enjoy a clean, hygienic, and efficient Bionic Blade Blender for all your blending needs.

Posted on Leave a comment

How do you shred chicken fast in blender?

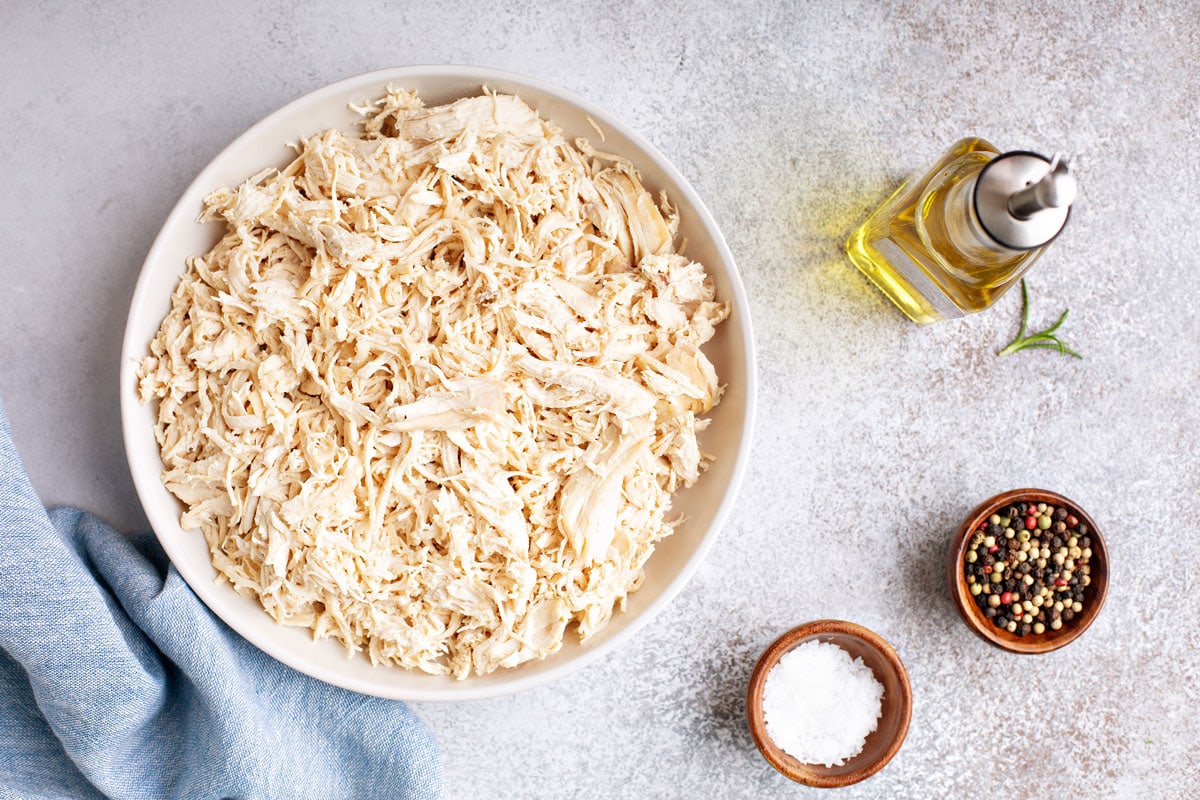
shred chicken in a blender

Introduction

Shredding chicken can be a time-consuming task, especially when done manually. Using a blender can provide a quick and efficient method to shred chicken in seconds, saving you valuable time in the kitchen. In this guide, we will explore step-by-step techniques to help you shred chicken fast and effectively in a blender, ensuring consistent results and convenience.

How do you shred chicken fast in blender?

I. Preparing the Chicken

  1. Cook the Chicken:

  • Begin by cooking the chicken until it reaches the desired doneness. You can boil, bake, grill, or even use leftover cooked chicken. Ensure that the chicken is fully cooked to the recommended internal temperature for safety.
  1. Let the Chicken Cool:

  • After cooking, allow the chicken to cool slightly before transferring it to the blender. This will make it easier to handle and reduce the risk of steam-related injuries.

II. Choosing the Right Blender

  1. Blender Capacity:

  • Ensure that your blender is large enough to accommodate the quantity of chicken you plan to shred. Overfilling the blender can lead to uneven results and strain the motor.
  1. Blade Sharpness:

  • Sharp blades are essential for efficient and effective shredding. Ensure that your blender’s blades are sharp and in good condition before starting the shredding process.

III. Shredding Techniques

  1. Cut the Chicken:

  • Cut the cooked chicken into smaller, manageable pieces using a sharp knife. This will make it easier for the blender to process the chicken and ensure even shredding.
  1. Blend in Batches:

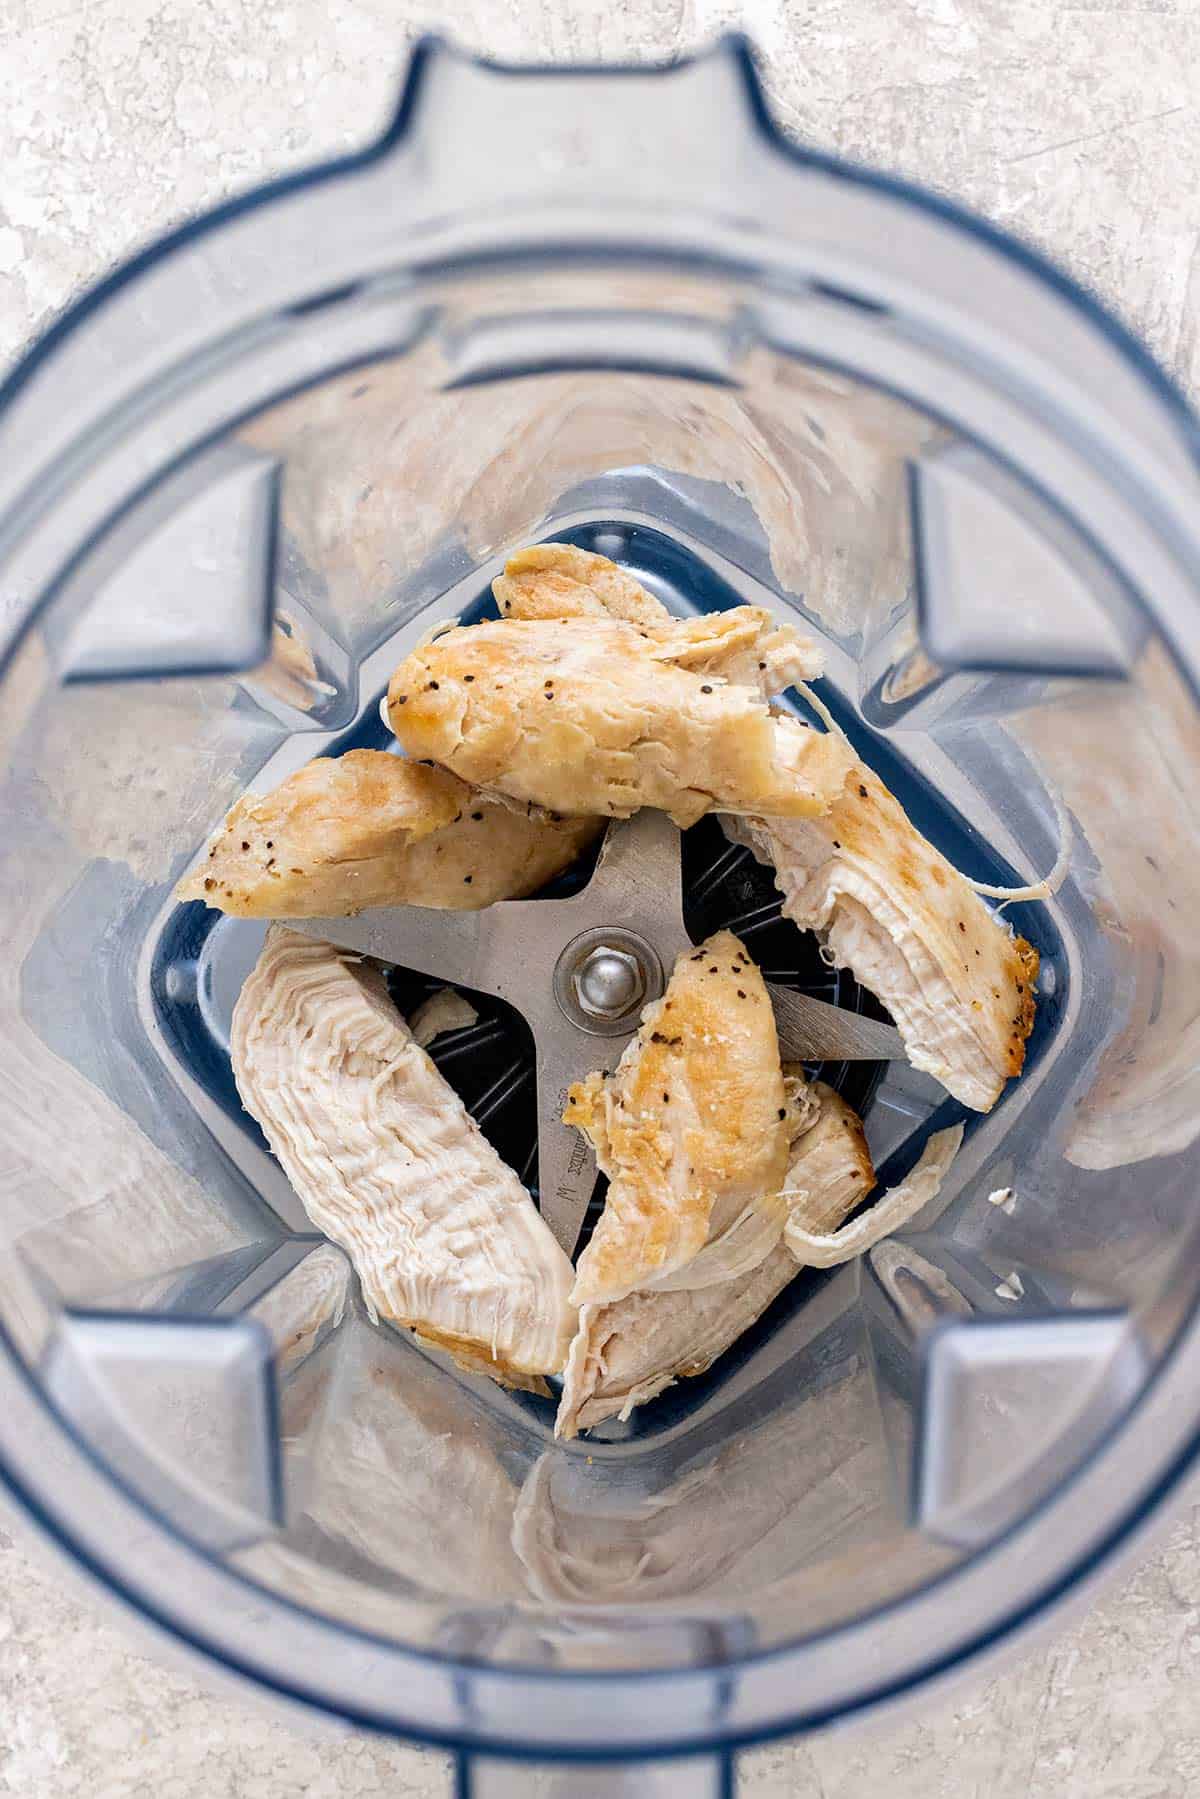
  • Working in batches will ensure that the chicken is evenly shredded and prevent overfilling the blender. Place a portion of the cut chicken into the blender jar, leaving enough space for the blades to effectively rotate.
  1. Pulse in Short Bursts:

  • Start with the blender on a low setting and pulse in short bursts. This allows the blades to come into contact with the chicken and shred it without overprocessing or turning it into a mushy consistency.
  1. Shake and Stir:

  • To ensure even shredding, occasionally stop the blender and give it a gentle shake or stir the chicken with a spoon. This helps redistribute any larger pieces or clumps of chicken and ensures consistent results.
  1. Adjust Speed and Duration:

  • Depending on your desired shredded chicken texture, you can adjust the blending speed and duration. Keep an eye on the progress and texture while blending to achieve the desired consistency without over-shredding.

IV. Evaluating Shredded Chicken Texture

  1. Visual Inspection:

  • Pause the blending process and visually inspect the shredded chicken’s texture. Look for even shredding with consistent-size pieces. If necessary, pulse or blend for additional time to achieve the desired texture.
  1. Manual Check:

  • Occasionally check the texture of the chicken by removing a small amount from the blender and feeling its consistency between your fingers. This tactile evaluation allows for greater control over the shredding process.

V. Testing and Adjusting

  1. Recipe Compatibility:

  • Consider the recipe you plan to use the shredded chicken in. If the recipe calls for a specific shredded chicken texture, test a small portion to ensure it meets the recipe requirements.
  1. Fine-Tuning:

  • If the shredded chicken is not to your desired consistency after blending, you can make adjustments. Blend for a little longer or use a fork or knife to manually shred any larger pieces before using it in your recipe.

VI. Cleaning Your Blender

  1. Disassembly:

  • To clean your blender after shredding the chicken, disassemble the blender jar and carefully remove the blades. This will allow for thorough cleaning and prevent any leftover residue from lingering.
  1. Soaking:

  • Soak the blender jar, blades, and any additional removable parts in warm soapy water to loosen any meat residue. This will make cleaning easier and more effective.
  1. Scrubbing and Rinsing:

  • Use a soft brush or sponge to scrub away any remaining residue from both the blender jar and the blades. Rinse all parts with warm water until they are thoroughly clean and free from any chicken traces.
  1. Drying:

  • Allow all parts to dry completely before reassembling or storing them. Proper drying helps prevent the growth of mold or bacteria and ensures the longevity of your blender.

VII. Safety Considerations

  1. Blade Safety:

  • Exercise caution when handling the blender blades. Take care to avoid contact and use protective gloves or handle the blades with care to prevent accidental injuries.
  1. Electrical Safety:

  • Always unplug or disconnect your blender from the power source when assembling, disassembling, cleaning, or handling the blades. This reduces the risk of electrical accidents or injuries.
  1. Blender Capacity:

  • Be mindful of your blender’s capacity and follow its guidelines for maximum filling levels. Overloading the blender can strain the motor and affect the shredding efficiency.


IX. Alternative Methods for Shredding Chicken

  1. Fork Method:

  • The fork method offers a manual alternative to using a blender. Hold a cooked chicken breast with one fork and use another fork to pull the meat apart, creating shreds. While this method may take longer, it provides control over the texture and allows for customization.
  1. Knife Method:

  • The knife method involves using two knives or a knife and a fork to cut and shred the chicken into desired sizes. This method offers flexibility and precision in creating shredded chicken with varied textures, from coarse to finely shredded.
  1. Stand Mixer Method:

  • An alternative to using a blender is utilizing a stand mixer fitted with a paddle attachment. Place the cooked chicken in the mixing bowl and let the stand mixer run on low speed until the desired consistency is achieved. This method allows for hands-free shredding.
  1. Hand Mixer Method:

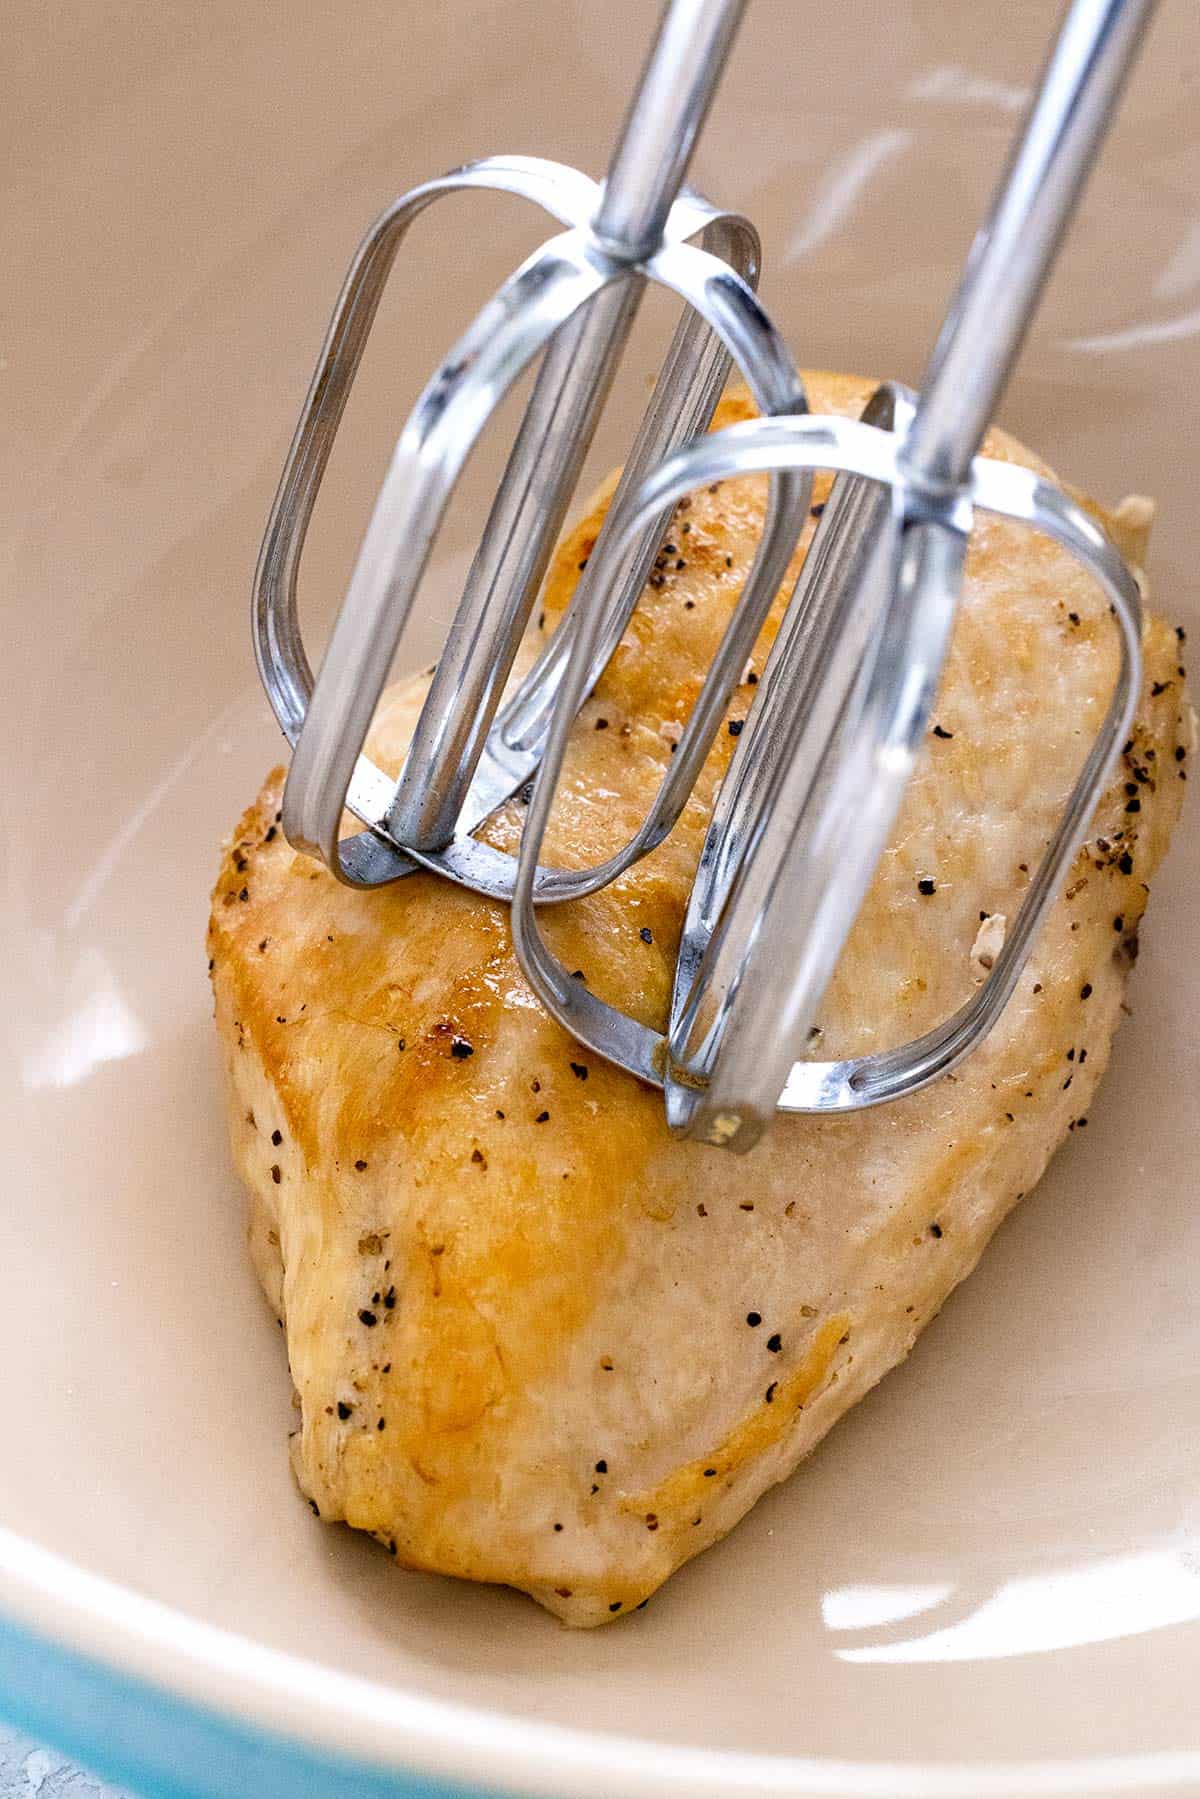
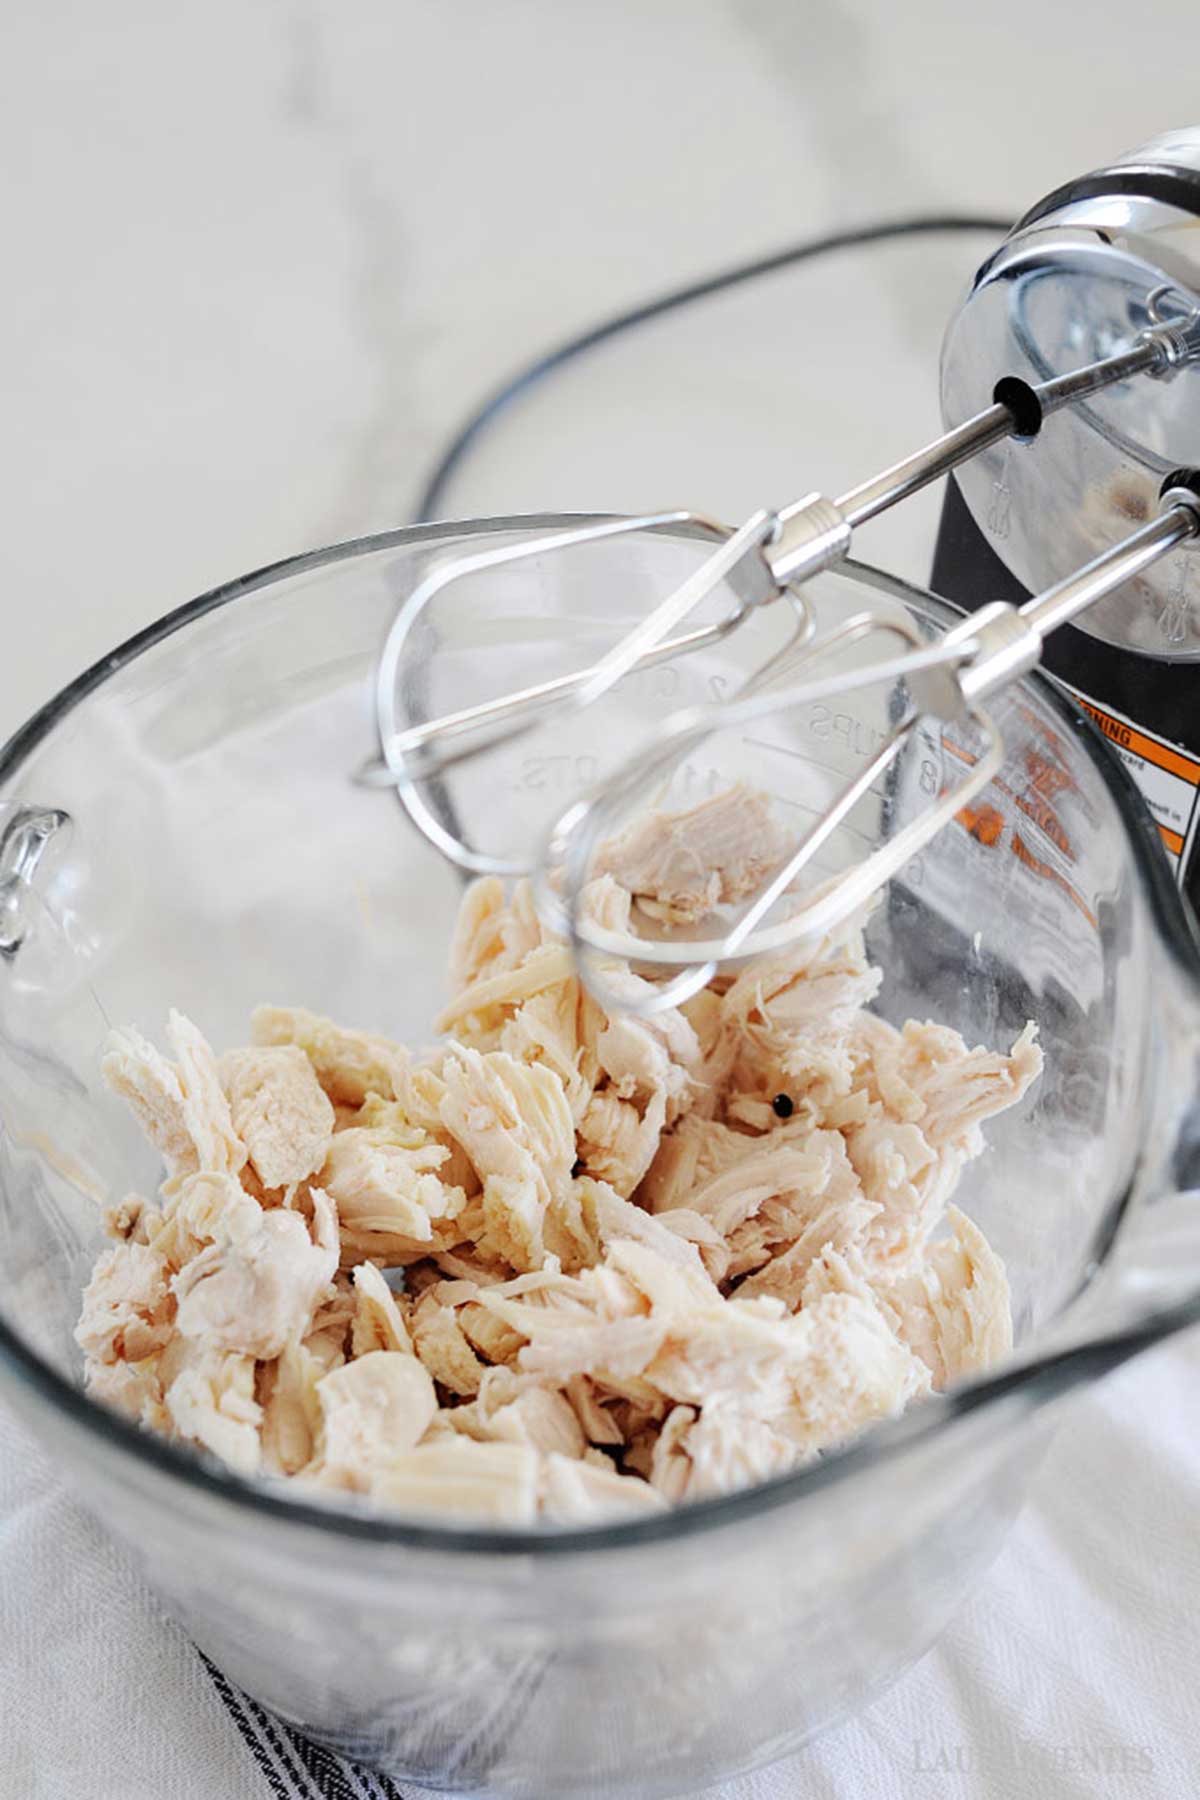
  • Similar to the stand mixer method, a hand mixer with beaters can be used to shred chicken. Place the cooked chicken in a deep bowl or mixing container and use the hand mixer on low speed until the chicken is shredded to your preference. This method offers convenience and versatility.

X. Choosing the Right Shredding Method

  1. Time Efficiency:

  • If time efficiency is a priority, using a blender is the fastest option for shredding chicken. Its efficient blending action allows for quick and consistent results compared to manual methods.
  1. Textural Preferences:

  • Consider the specific texture you desire for your shredded chicken. A blender tends to produce finer and more uniform shreds, while manual methods such as forks or knives allow for customization and the creation of a variety of textures.


VIII. Conclusion: Quick and Efficient Chicken Shredding

Using a blender can be a fast and efficient method to shred chicken, saving you time and effort in the kitchen. By following the outlined techniques, you can achieve consistent and desired shredding results without compromising texture.

Remember to prepare the chicken properly, cut it into manageable pieces, blend in batches, pulse in short bursts, and evaluate the shredded chicken’s texture throughout the process. Adjust blending speed and duration as needed to achieve your desired consistency. Clean your blender thoroughly after shredding to maintain its longevity and ensure safety.

With these techniques, you can enjoy the convenience of quickly shredded chicken to enhance a variety of recipes, from sandwiches and tacos to soups and casseroles.

Posted on Leave a comment

Should I shred chicken in a blender?

shred chicken in a blender

Introduction

Shredded chicken is a versatile and convenient ingredient used in a variety of recipes, from sandwiches to salads and soups. While traditional methods like using forks or knives can be time-consuming and labor-intensive, some people wonder if a blender can be used to shred chicken quickly and efficiently. While a blender can help achieve shredding consistency, there are certain considerations to keep in mind. In this guide, we will explore the pros and cons of using a blender to shred chicken, along with alternative methods that may suit your needs.

shred chicken in a blender

Should I shred chicken in a blender?

I. Understanding the Shredding Process

  1. Shredded Chicken Texture:

  • Shredded chicken is characterized by its fine, stringy texture, commonly achieved by separating the cooked chicken into thin, thread-like pieces.
  1. Traditional Shredding Methods:

  • The most common traditional methods for shredding chicken include using forks or knives to manually pull or cut the chicken into desired sizes. These methods are relatively simple but can be time-consuming, especially when dealing with larger quantities of chicken.

II. Pros of Using a Blender to Shred Chicken

  1. Time Efficiency:

  • Using a blender can significantly reduce the time required to shred chicken. With the proper technique, a blender can efficiently shred a larger quantity of chicken in seconds, saving valuable time in the kitchen.
  1. Consistent Shredding:

  • Blenders can provide consistent results by ensuring that the chicken is shredded into uniformly sized pieces. This consistent texture can be desirable in recipes where even distribution of shredded chicken is important.
  1. Convenience:

  • For those with limited mobility or hand dexterity, using a blender to shred chicken can be a more accessible option. It requires less physical effort compared to manual shredding methods, making it easier and more efficient.

shred chicken in a blender

III. Cons of Using a Blender to Shred Chicken

  1. Texture Alteration:

  • When using a blender, the sharp blades and rapid blending action can quickly break down the chicken into fine particles, resulting in a texture that is finer than traditional shredded chicken. This altered texture may not be suitable for all recipes or dishes.
  1. Over-blending Risks:

  • It is crucial to exercise caution when using a blender to shred chicken to avoid over-processing the meat. Over-blending can turn the chicken into a mushy consistency, which may not be desirable for recipes requiring distinct shreds.
  1. Loss of Moisture and Juiciness:

  • The rapid blending action and heat generated in the blender can cause the chicken to lose moisture and natural juices, potentially leading to a drier end result. This can affect the overall flavor and mouthfeel of the shredded chicken.
  1. Blender Cleanup:

  • Blenders can be difficult to clean, particularly when dealing with sticky or greasy meat residues. The small crevices and sharp blades can make thorough cleaning a challenge, extended cleanup time, and requiring some disassembly.

shred chicken in a blender

IV. Tips for Shredding Chicken in a Blender

  1. Cook and Cool the Chicken:

  • Ensure the chicken is fully cooked before attempting to shred it in a blender. Let the cooked chicken cool slightly to avoid excessive steam or moisture while blending.
  1. Cut Chicken into Smaller Pieces:

  • Cut the chicken into smaller pieces, such as strips or bite-sized chunks. This will help ensure that the blender effectively processes the chicken and aids in achieving desired shredding consistency.
  1. Pulse and Blend Technique:

  • To avoid over-processing and turning the chicken into a mushy texture, use a pulse and blend technique. Pulse the blender in short bursts, continuously checking the texture and stopping before reaching an undesirable consistency.
  1. Monitor Time and Blending Intervals:

  • Keep a close eye on the chicken’s texture and progress during blending. Monitor the time and blending intervals to prevent over-blending and maintain a desirable shredded texture.

V. Alternative Methods for Shredding Chicken

  1. Fork Method:

  • The fork method involves holding a cooked chicken breast with one fork and using another fork to pull the meat apart, creating shreds. This method allows for control over the texture and is suitable for smaller amounts of chicken.
  1. Knife Method:

  • The knife method involves using two knives or a knife and a fork to cut and shred the chicken into desired sizes. This method provides more control and allows for greater customization of the shredded chicken’s consistency.
  1. Stand Mixer Method:

  • An alternative to using a blender is to use a stand mixer fitted with a paddle attachment. Place the cooked chicken in the bowl and let the mixer run on low speed until the desired shredding consistency is achieved.
  1. Hand Mixer Method:

  • Similar to the stand mixer method, a hand mixer with beaters can be used to shred chicken. Place the cooked chicken in a deep bowl or mixing container and use the hand mixer on low speed until the chicken is shredded to your preference.

VI. Considering the Recipe and Personal Preferences

  1. Recipe Requirements:

  • Consider the specific recipe you plan to use the shredded chicken in. Some recipes may call for traditional shredded chicken, while others may benefit from a finer, blender-shredded consistency. Choose the method that best suits the specific recipe’s requirements.
  1. Personal Texture Preference:

  • Take into account your personal preference for shredded chicken texture. If you enjoy chunkier or larger shreds in your dishes, manual shredding methods with forks or knives may be more suitable. If consistent, finer shreds are desirable, a blender may be a better choice.

shred chicken in a blender

VIII. Cleaning and Caring for Your Blender

  1. Immediate Rinse:

  • After blending the chicken, immediately rinse the blender jar or container with hot soapy water to remove any residue. This will help prevent the meat from drying and sticking to the blender, making it easier to clean later.
  1. Dismantle and Soak:

  • For thorough cleaning, disassemble the blender by removing the blades, gasket, and other removable parts. Soak these parts in warm soapy water to loosen any grease or remaining meat particles. Use a soft brush or sponge to scrub away any stubborn residue.
  1. Clean the Blender Base:

  • Wipe down the blender base with a damp cloth or sponge to remove any residue or spills. Be cautious not to immerse the base in water or expose it to excessive moisture, as this can damage the motor or electrical components.
  1. Dry Thoroughly:

  • After cleaning, ensure that all blender parts are thoroughly dried before reassembling or storing them. This will help prevent the growth of mold or bacteria and prolong the lifespan of your blender.

shred chicken in a blender

VII. Conclusion: A Matter of Preference and Practicality

Choosing whether to shred chicken in a blender ultimately depends on personal preferences, recipe requirements, and practical considerations. While a blender can offer time efficiency and consistent results, it may result in altered texture and require additional cleanup. Alternatively, traditional manual methods using forks or knives, as well as alternative methods like a stand mixer or hand mixer, offer greater control and customization.

Consider the specific recipe, desired shredded chicken texture, and the practicality of each method to determine which approach best suits your needs. Whatever method you choose, the goal is to enjoy the convenience and versatility of shredded chicken in your culinary creations.

Posted on Leave a comment

Are Ninja blenders noisy?

ninja blender

Introduction

Blenders are valuable kitchen appliances that offer convenience and versatility. However, one concern many people have is the noise generated by blenders during operation. If you’re considering purchasing a Ninja blender, it’s important to understand the noise levels associated with these appliances. In this guide, we will explore and evaluate the noise levels of Ninja blenders, discuss factors that contribute to blender noise, provide tips for managing noise, and offer insights into specific Ninja blender models known for their quieter operation.

ninja blender

Are Ninja blenders noisy?

I. Understanding Blender Noise Levels

  1. Perception of Noise:

  • Noise is subjective, and individuals have different tolerances to sound. What may be considered noisy to one person might be acceptable to another. Thus, a blender’s noise level can be perceived differently by users based on their personal preferences and environmental factors.
  1. Relative Noise Comparison:

  • Blenders, including Ninja models, generally produce a certain level of noise during operation. Comparisons between different blender models and brands can give an indication of relative noise levels.

ninja blender

II. Factors Contributing to Blender Noise

  1. Motor Power:

  • The power and speed of the blender’s motor play a significant role in determining the noise output. Higher-powered motors tend to generate more noise due to the increased speed and force needed to blend ingredients efficiently.
  1. Blade Design and Material:

  • The design and composition of the blender blades can impact noise levels. Blades made of harder materials, such as stainless steel, may produce more noise during blending compared to blades made of softer materials.
  1. Jar Material:

  • The material of the blender jar can affect noise levels. Jars made of glass or thicker, non-transparent plastic tend to dampen sound better than thinner or lighter plastic materials, which may amplify noise.
  1. Ingredient Consistency:

  • The consistency and hardness of the ingredients being blended can influence noise levels. Harder ingredients, such as ice or frozen fruits, typically require more power to blend, resulting in increased noise.
  1. Operational Speeds:

  • Blender noise can vary at different operational speeds. Higher speed settings often generate more noise due to the increased motor power and blade rotation.

III. Strategies for Managing Blender Noise

  1. Blend in Short Bursts:

  • Instead of blending continuously for an extended period, try blending in short intervals, allowing breaks in between. This not only helps manage noise levels but also prevents the motor from overheating.
  1. Place Blender on a Stable Surface:

  • Position the blender on a stable, non-slip surface to minimize vibrations and reduce noise transmission. Placing it on a rubber mat or dampening pad can further help reduce vibrations and noise.
  1. Choose Blending Times:

  • Consider blending during quieter times of the day when noise is less likely to disturb others. For example, avoid blending early in the morning or late at night in noise-sensitive settings.
  1. Use Sound-Absorbing Materials:

  • Surrounding the blender with sound-absorbing materials, such as placing a silicone mat or towel underneath or around the blender, can help dampen noise and reduce its propagation.

ninja blender

IV. Quieter Ninja Blender Models

  1. Ninja Professional Blender (BL610):

  • The Ninja Professional Blender (BL610) is known for its relatively quieter operation compared to some other models. Its 1000-watt motor and well-designed jar contribute to a more controlled noise level.
  1. Ninja Professional Plus Kitchen System with Auto-iQ (BN801):

  • The Ninja Professional Plus Kitchen System with Auto-iQ (BN801) is another model recognized for quieter operation. It features a 1400-watt motor and comes with a more substantial jar that reduces noise output.

V. User Experiences and Reviews

  1. Noise Perception:

  • User experiences and reviews provide valuable insights into the noise levels of Ninja blenders. While noise perception can vary, many users have reported that Ninja blenders operate at an acceptable noise level, especially considering their blending power.
  1. Personal Sensitivities:

  • Keep in mind that noise tolerance varies from person to person. Reading multiple reviews and considering a range of opinions can give a more comprehensive view of the noise levels experienced by users.

ninja blender

VII. Noise-Reducing Features and Technologies

  1. Sound Enclosures:

  • Some high-end blenders, including certain models of Ninja blenders, may come with sound enclosures or shields. These enclosures are designed to minimize noise levels by creating a physical barrier around the blending unit, effectively containing and reducing sound.
  1. Vibration Dampening:

  • Certain blender models incorporate features to reduce vibrations, which can contribute to noise transmission. These features may include rubberized bases or motor mounts that help absorb vibrations and minimize noise.
  1. Sound-Reducing Design:

  • Blender manufacturers often focus on designing blenders with noise reduction in mind. This includes optimizing the airflow and ventilation systems to reduce air turbulence and noise generated by the motor.

VIII. Importance of Regular Maintenance

  1. Cleaning and Maintenance:

  • Proper cleaning and maintenance of your Ninja blender can help ensure optimal performance and minimize noise levels. Regularly clean the blender jar, blades, and other removable parts according to the manufacturer’s instructions to prevent residual buildup that can affect blender operation and increase noise.
  1. Lubrication:

  • If you notice any unusual noises coming from your blender, such as squeaking or grinding sounds, consider lubricating the blender’s moving parts as recommended by the manufacturer. This can help reduce friction and noise during operation.

IX. Managing Expectations

  1. Realistic Noise Levels:

  • While manufacturers strive to create quieter blenders and implement noise-reducing technologies, it is important to set realistic expectations for blender noise levels. Blending tough or frozen ingredients will still generate noise due to the required motor power. However, a well-designed blender can help minimize excessive noise and vibrations.
  1. Individual Sensitivity:

  • Keep in mind that individual sensitivity to noise can vary. Some individuals may have a higher tolerance for blender noise, while others may be more sensitive to it. Consider your own personal preferences and the noise tolerance of those around you when evaluating noise levels.

ninja blender

VI. Conclusion: Managing Blender Noise and Choosing the Right Model

Noise levels can be a concern when selecting a blender, including Ninja models. While blenders inherently generate noise during operation, there are strategies for managing and minimizing their impact. By blending in short bursts, placing the blender on a stable surface, choosing appropriate blending times, and utilizing sound-absorbing materials, you can reduce the noise level and its transmission.

Ninja blenders, such as the Ninja Professional Blender (BL610) and the Ninja Professional Plus Kitchen System with Auto-iQ (BN801), are generally recognized for their quieter operation. These models feature powerful motors and designs that help mitigate noise output.

Ultimately, considering personal tolerance for noise, specific needs, and preferences will guide you in selecting the right Ninja blender model. By adopting noise management strategies and choosing a suitable blender model, you can enjoy the benefits of blending without excessive disruption or discomfort.

Posted on Leave a comment

Why wont my Ninja blender turn on?

ninja blender

Introduction

A Ninja blender is a versatile kitchen appliance that can quickly and easily blend ingredients for smoothies, soups, and more. However, like any electrical device, it can encounter issues that prevent it from turning on. If you’re facing the frustrating problem of a Ninja blender that won’t start, there are several potential causes to consider. In this guide, we will explore common reasons why a Ninja blender may not turn on, along with troubleshooting steps to resolve the issue and get your blender up and running.

ninja blender

Why wont my Ninja blender turn on?

I. Check the Power Source

  1. Verify Power Connection:

  • Ensure that your Ninja blender is securely plugged into a functioning power outlet. Occasionally, a loose power connection can prevent the blender from turning on.
  1. Test a Different Outlet:

  • Plug the blender into a different outlet in your kitchen or another room to ensure that the issue is not with the specific outlet.
  1. Power Surge or Circuit Breaker:

  • If you recently experienced a power surge or if a circuit breaker tripped, check if the outlet is receiving power. Reset the circuit breaker or contact an electrician if necessary.

ninja blender

II. Assess the Power Cord and Plug

  1. Inspect the Power Cord:

  • Examine the power cord for any visible signs of damage, such as fraying or cuts. A damaged power cord can prevent the blender from receiving adequate power.
  1. Confirm Secure Connection:

  • Check that the power cord is securely connected to the blender’s base and that there are no loose or bent pins on the plug.
  1. Consider Replacement:

  • If you identify any damage to the power cord or plug, it may be necessary to replace them. Contact the manufacturer or an authorized service center for assistance.

III. Blender Jar and Lid Placement

  1. Align Blender Jar Correctly:

  • Ensure that the blender jar is positioned correctly on the blender’s base. The jar should align with the blades and lock securely into place.
  1. Verify Lid Placement:

  • Check that the lid is properly secured on the blender jar. Some Ninja blenders have a safety mechanism that prevents the blender from turning on if the lid is not properly in place.

ninja blender

IV. Check the Power and Pulse Buttons

  1. Inspect Buttons:

  • Examine the power and pulse buttons on the blender’s control panel. Look for any signs of damage or debris that may be obstructing the buttons’ functionality. Use a clean cloth to wipe away any dirt or residue.
  1. Press Firmly:

  • Ensure that you are pressing the buttons firmly and holding them for a few seconds to activate the blender. Sometimes, a weak or brief press may prevent the blender from starting.

V. Overheating Protection

  1. Allow Cooling Time:

  • If the Ninja blender has been running continuously for an extended period, it may have automatically shut off as a safety measure to prevent overheating. Allow the blender to cool down before attempting to turn it on again.
  1. Resetting the Blender:

  • Some Ninja blender models have a reset button located on the base. Press and hold this button for a few seconds to reset the blender. Refer to the blender’s manual for specific instructions.

VI. Blending Unit Assembly

  1. Secure Assembly:

  • Ensure that the blending unit is correctly attached to the base and securely locked into place. In some models, an improperly assembled unit may prevent the blender from turning on.
  1. Blade Blockage:

  • If the blender blade is blocked by food particles or ingredients, it may hinder the motor’s ability to start. Remove the blending unit from the base and inspect the blade for any obstructions. Clean as necessary.

ninja blender

VII. Test with Different Ingredients

  1. Ingredient Compatibility:

  • Certain ingredients, such as frozen fruits, ice, or tough fibrous materials, can strain the blender’s motor. Try blending different ingredients or adjust the blending settings to determine if the issue lies with the specific ingredients you’re using.

VIII. Contact Customer Support

  1. Manufacturer Assistance:

  • If you have exhausted all troubleshooting steps and your Ninja blender still refuses to turn on, consider contacting the manufacturer’s customer support. They can provide further guidance or instructions for repair or replacement options.
  1. Authorized Service Center:

  • If your blender is still under warranty or if the manufacturer recommends it, take your Ninja blender to an authorized service center for professional inspection and repair.


X. Preventive Measures for Future Use

  1. Proper Cleaning and Maintenance:

  • Regularly clean and maintain your Ninja blender to keep it in good working condition. Follow the manufacturer’s instructions for cleaning the blender jar, lid, and blades. Pay attention to any specific cleaning recommendations and remove any buildup or debris that may impede the blender’s functionality.
  1. Avoid Overloading:

  • Do not overload the blender with too many ingredients or fill the jar beyond the recommended capacity. Overloading can strain the motor and cause it to malfunction. Follow the manufacturer’s guidelines for maximum capacity to ensure optimal blending performance.
  1. Use Correct Blades:

  • Make sure you are using the appropriate blades for the ingredients you are blending. Ninja blenders often come with different blade attachments for different purposes, such as ice crushing or food processing. Using the correct blade for the task at hand can help prevent strain on the motor and ensure smooth blending.
  1. Allow for Cooling Periods:

  • If you are using the blender for an extended period or blending multiple batches, allow the blender to cool down between uses. This can prevent overheating and prolong the lifespan of the motor.

ninja blender

IX. Conclusion: Resolving the Issue

A Ninja blender that won’t turn on can be frustrating, but by following these troubleshooting steps, you can identify and resolve the problem. Begin by checking the power source and the power cord for any issues. Ensure that the blender jar and lid are correctly positioned, inspect the power and pulse buttons, and consider the blender’s overheating mechanism. Check the assembly and blades for proper attachment and cleanliness. Experiment with different ingredients and blending settings to rule out specific ingredient issues.

If all troubleshooting steps fail, reach out to the manufacturer’s customer support or visit an authorized service center for further assistance. With some patience and problem-solving, you’ll soon have your Ninja blender operating smoothly once again.

Posted on Leave a comment

Is it OK to blend ice in a blender?

Blender

Introduction

Blending ice is a common practice when making smoothies, frozen beverages, or slushies. However, some individuals may wonder if it is safe for their blender to handle ice. In this informative guide, we will explore the topic in detail to provide a comprehensive understanding of blending ice in a blender. By addressing concerns, providing tips, and outlining the potential impact on blender performance, we aim to help you make informed decisions and achieve successful ice blending results.

Blender

Is it OK to blend ice in a blender?

I. Understanding Blender Capabilities

  1. Blender Types and Specifications:

  • Blenders come in various types, such as countertop blenders, immersion blenders, and personal blenders, each with different capabilities and power levels. It is important to consult your blender’s user manual or specifications to determine if it is designed for blending ice.
  1. Motor Power and Blade Strength:

  • The motor power and blade strength of a blender play a crucial role in determining its ice blending capability. Blenders with higher wattage and more robust blade assemblies are generally more effective at crushing ice.

II. Assessing Blender Suitability for Ice Blending

  1. Reviewing the User Manual or Manufacturer Guidelines:

  • Consult the blender’s user manual or manufacturer guidelines to determine if it explicitly states that it can blend ice. These resources often provide specific instructions and recommendations to ensure safe and optimal blender performance.
  1. Blender Label or Markings:

  • Some blenders may have labels or markings indicating their suitability for ice blending. Look for symbols or statements, such as “Ice Crusher” or “Ice Blend” to confirm if your blender is designed for this purpose.
  1. Jar or Pitcher Material:

  • Consider the construction material of your blender’s jar or pitcher. Glass, high-quality plastic, or heavy-duty materials are typically more resistant to the impact and force exerted during ice blending.

Blender

III. Tips for Successfully Blending Ice

  1. Ice Cube Size:

  • To facilitate the blending process, use ice cubes that are relatively small in size. Large ice cubes may strain the blender’s motor and blades. If necessary, you can crush larger ice cubes using a mallet or rolling pin before adding them to the blender.
  1. Liquid Ingredients:

  • Incorporating liquid ingredients, such as water or juice, when blending ice can help create smoother results. Liquids aid in the blending process by providing a medium to move the ice around the blades, reducing the strain on the blender.
  1. Pulse Blending Technique:

  • When blending ice, utilize a pulsing technique rather than continuously running the blender. This approach allows the ice to move around and encourages even blending, reducing the strain on the blender motor.
  1. Layering Ice and Liquid:

  • To prevent the ice from forming a solid block at the bottom of the blender jar, layer the ice and liquid ingredients. Start by adding a small amount of liquid, followed by a layer of ice cubes, and repeat the process until all the ingredients are added. This method helps distribute the blending process evenly.
  1. Stopping and Stirring:

  • During the blending process, occasionally stop the blender and use a spoon or spatula to stir the mixture. This ensures that any ice chunks are evenly incorporated and encourages smoother blending results.

IV. Potential Impact on Blender Performance

  1. Motor Overload:

  • Blending ice can place additional strain on a blender’s motor, particularly if the blender is not specifically designed for ice blending or if it has a lower wattage. Continuous blending or overloading the blender with excessive ice may lead to motor overheating and potential damage.
  1. Blade Dullness or Breakage:

  • Repeatedly blending ice can dull or damage the blender’s blades over time, especially if they are not designed for ice blending. It is essential to regularly inspect the blades for signs of wear and tear and replace them if necessary.

Blender

V. Maintenance and Care

  1. Cleaning the Blender:

  • After blending ice, clean the blender thoroughly to remove any ice residue, which can potentially affect future blending results. Disassemble removable components, such as the jar, lid, and blades, and wash them with warm soapy water or follow the manufacturer’s instructions for cleaning.
  1. Regular Maintenance:

  • To ensure optimal blender performance, perform regular maintenance, such as tightening loose parts, lubricating blade assemblies (if applicable), and inspecting for any signs of wear or damage. Regular maintenance helps extend the lifespan of the blender, allowing it to handle ice blending more effectively.

VI. Alternatives to Blending Ice

  1. Pre-Crushing Ice:

  • If your blender is not suitable for blending ice or you prefer not to exert that strain on it, consider pre-crushing the ice using alternative methods. Use a manual ice crusher, mallet, rolling pin, or even a clean cloth to crush the ice before adding it to your blender.
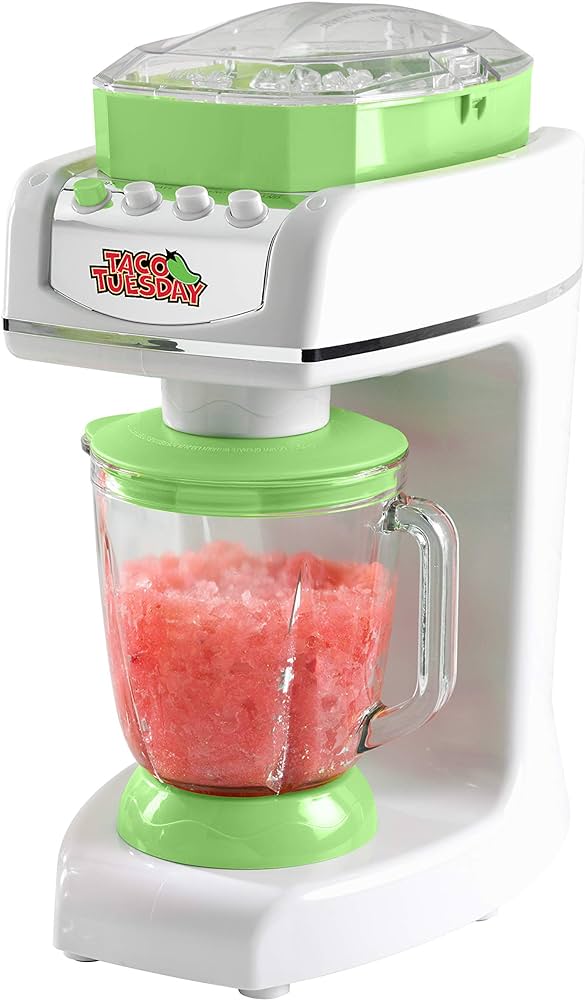
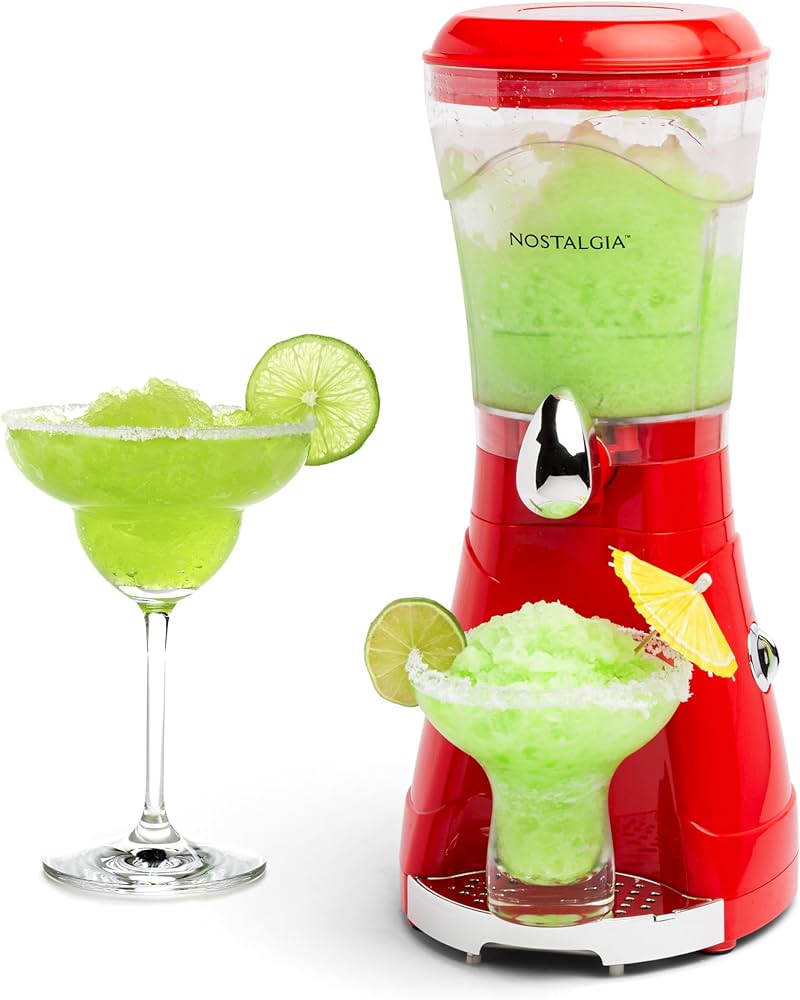
  1. Ice Shaver or Snow Cone Machine:

  • Alternatively, invest in a specialized ice shaver or snow cone machine that is specifically designed for crushing ice. These devices are dedicated to ice applications and may produce better results compared to traditional blenders.

Blender

VIII. Exploring Ice Blending Recipes and Ideas

  1. Classic Smoothies:

  • Blending ice with fruits, yogurt, and liquids can create delicious and refreshing smoothies. Experiment with different fruit combinations and add-ons, such as protein powder, nut butter, or greens, to customize your smoothie according to your preferences.
  1. Frozen Cocktails:

  • Blending ice with alcoholic beverages, mixers, and flavors can result in delightful frozen cocktails. Try popular options like margaritas, piña coladas, or daiquiris, or get creative and develop your own unique cocktail creations.
  1. Fruit Slushies:

  • Blend ice with your favorite fruit juices, fresh fruit, and sweeteners to create vibrant and fruity slushies. Mangos, strawberries, watermelons, and citrus fruits are excellent choices for flavorful slushie combinations.
  1. Coffee and Tea Blends:

  • For the coffee or tea enthusiasts, blending ice with brewed coffee or tea, milk or cream, sweeteners, and additional flavorings is a fantastic way to enjoy chilled caffeinated beverages. Try variations like mocha frappuccinos or matcha green tea smoothies.
  1. Frozen Desserts:

  • Blending ice with frozen fruits, sweeteners, and cream or yogurt can help you create luscious frozen desserts, such as sorbets or frozen yogurt. Experiment with different fruit flavors and add textural elements like nuts or chocolate chips for extra indulgence.

Blender

VII. Conclusion: Blending Ice with Caution and Consideration

Blending ice in a traditional blender is generally feasible, but it is important to exercise caution, understand your blender’s capabilities, and follow proper techniques to achieve successful results. Consult your blender’s user manual, assess its suitability for ice blending, and utilize the tips provided.

Remember, if you do not have a blender suitable for ice blending, there are alternative methods and specialized devices available to help you crush ice effectively. Prioritize maintenance and care to ensure your blender’s longevity and optimal performance over time.

With a well-suited blender, proper techniques, and a little creativity, you can enjoy delicious blended drinks, smoothies, and icy treats that will keep you refreshed and satisfied.

Posted on Leave a comment

Can you make a slushies in an electronic blender?

Blender

Introduction

Slushies are a delicious and refreshing treat, perfect for hot summer days or any time you crave a cool and icy drink. While slushies are typically associated with specialized machines, you can also make them easily at home using a blender. In this comprehensive guide, we will explore the step-by-step process of making a slushie with a blender. By covering the necessary ingredients, blending techniques, and customization options, we aim to provide you with the knowledge and confidence to create your own homemade slushies for your enjoyment.

Blender

Can you make a slushie with a blender?

I. Gathering the Essential Ingredients and Tools

  1. Ingredients:

  • Fruit juice or flavored beverage of your choice
  • Ice cubes
  • Sweetener (optional)
  • Fresh fruit or herbs for additional flavor (optional)
  • Garnishes (e.g., fruit slices, whipped cream, sprinkles) (optional)
  1. Tools:

  • Blender
  • Measuring cup or scale
  • Blender pitcher or jar with a secure lid
  • Drinking glasses
  • Straws or spoons for serving

II. Selecting the Right Blend of Ingredients

  1. Choosing the Base Liquid:

  • Select a fruit juice or flavored beverage as your base liquid for the slushie. Popular choices include orange juice, lemonade, fruit punch, or soda. Opt for a liquid that complements your desired flavor profile.
  1. Deciding on Sweeteners:

  • Determine if you need to add any sweeteners to the slushie. Depending on the sweetness of your chosen liquid and personal preference, you may want to add honey, sugar, agave syrup, or other sweeteners. Taste and adjust as needed.
  1. Adding Additional Flavor Enhancements:

  • To elevate the flavor of your slushie, consider incorporating fresh fruit, such as berries or watermelon, or herbs like mint or basil. These additions can enhance the taste and provide a burst of freshness to your creation.

Blender

III. Preparing the Ingredients

  1. Chilling the Base Liquid:

  • Pour the desired amount of base liquid into a container and refrigerate it in advance. Chilled liquid will help maintain the slushie’s icy texture when blended with ice.
  1. Preparing the Ice Cubes:

  • Ensure you have an ample supply of ice cubes ready for blending. For a more convenient approach, make extra ice cubes in advance and keep them in a freezer bag for future slushie creations.

IV. Blending and Serving the Slushie

  1. Measuring the Ingredients:

  • Measure the desired quantity of base liquid using a measuring cup or a scale. Note the amount for future reference or adjustments to achieve your preferred consistency.
  1. Adding the Base Liquid to the Blender:

  • Pour the measured base liquid into the blender pitcher or jar.
  1. Incorporating Sweeteners or Additional Flavorings:

  • If desired, add sweeteners or any additional flavor enhancements to the blender. Start with small amounts and taste as you go, adjusting to your preference.
  1. Adding the Ice Cubes:

  • Drop a generous amount of ice cubes into the blender. The precise quantity will depend on your desired slushie thickness. Remember that more ice cubes will result in a thicker and icier slushie.

Blender

  1. Blending the Mixture:

  • Securely cover the blender pitcher or jar with the lid and ensure that it is properly sealed. Begin blending the mixture by starting at a low speed and gradually increasing to high. Blend until the ingredients are thoroughly combined and the ice is completely crushed.
  1. Checking the Consistency and Adjusting as Needed:

  • Pause the blending process to check the consistency of the slushie. If it is too thin, add more ice cubes and blend again. Conversely, if it is too icy or thick, incorporate more base liquid and blend until you achieve your desired texture.
  1. Pouring and Serving the Slushie:

  • Carefully remove the blender pitcher or jar from the base. Pour the slushie into serving glasses, leaving some space at the top for garnishes or additional ingredients. Optional garnishes can include fruit slices, whipped cream, or colorful sprinkles. Offer straws or spoons for easy enjoyment.

V. Customizing Your Slushie Experience

  1. Experiment with Mix-Ins:

  • Enhance your slushie’s texture and taste by adding mix-ins. Consider including crushed fruit, chocolate chips, mini marshmallows, or cookie crumbles. Mix-ins can provide exciting surprises throughout your drink.
  1. Exploring Flavor Combinations:

  • Don’t be afraid to mix and match flavors to create unique slushie concoctions. Combine different juices or experiment with flavored syrups to add depth and complexity to your creations.
  1. Trying Alcohol-Infused Slushies (for legal drinking age only):

  • If you are of legal drinking age, you can add a splash of alcohol to your slushie for an adults-only treat. Vodka, rum, tequila, or liqueurs can be excellent additions for a refreshing cocktail-inspired slushie.

Blender

VI. Cleaning and Maintaining Your Blender

  1. After-Use Cleaning:

  • Safely disconnect the blender from the power source before cleaning. Disassemble removable components, such as the pitcher and lid, and wash them with warm soapy water. Use a scrub brush or sponge to remove any residue, and thoroughly rinse before air-drying or towel-drying.
  1. Maintenance Tips:

  • Regularly clean your blender to prevent buildup and maintain optimal functionality. Refer to the manufacturer’s instructions for specific maintenance guidelines, as some blenders may have specific requirements. Additionally, ensure that the blender’s motor base remains dry and does not come into contact with water.


VIII. Tips and Tricks for the Perfect Slushie

  1. Freezing the Base Liquid:

  • For an even icier slushie, you can freeze the base liquid in ice cube trays. This method eliminates the need for additional ice cubes and helps preserve the flavor of the liquid.
  1. Adding Citric Acid for Tartness:

  • If you enjoy a tangy or tart slushie, consider adding a small amount of citric acid to the mixture. Citric acid can be found in powdered form at grocery stores or online, and a little goes a long way in enhancing the flavor.
  1. Pre-Chilling the Blender Jar:

  • To help maintain a colder temperature during the blending process, consider placing the blender jar in the freezer for a short period before using it. This chilling step can further enhance the slushie’s icy texture.
  1. Mixing Flavors for Variety:

  • Take advantage of the versatility of your blender by mixing different flavors of liquids. Combine fruit juices, sodas, or even a splash of lemon or lime juice for a vibrant and tangy slushie experience.
  1. Adjusting the Sweetness Level:

  • If your chosen liquid is already sweetened, you may opt to reduce or omit additional sweeteners. Taste the slushie mixture as you blend and adjust the sweetness to suit your palate.
  1. Layering Different Flavors:

  • To create visually appealing slushies, consider layering different flavors. Blend each flavor separately and carefully pour them into the serving glass, one layer at a time. Use a spoon to help control the pouring and create distinct layers.

Blender

Can you make smoothies in a juicer?

Yes, it is possible to make smoothies in a juicer, although a juicer is primarily designed for extracting juice from fruits and vegetables rather than blending them into a smooth consistency. Juicers typically remove the pulp and fiber, while extracting the liquid content of the fruits and vegetables.

VII. Conclusion: Blend Your Way to a Refreshing Slushie

With a blender and a few basic ingredients, you can easily create a delightful and icy slushie at home. By selecting the right blend of liquids, incorporating optional sweeteners or additional flavor enhancements, and blending to your preferred consistency, you can enjoy a customized slushie tailored to your taste.

Experiment with various flavor combinations, mix-ins, and even alcohol-infused options (for those of legal drinking age) to expand your slushie repertoire. And remember to clean and maintain your blender to ensure its longevity and continued performance.

Embrace creativity and take advantage of the versatility of your blender to savor the pure joy of a homemade slushie, ready to cool you down and quench your thirst on hot summer days or any time you desire a refreshingly icy drink.