Posted on

Effortless Descale Tips for Keurig Duo Machines

descale keurig duo

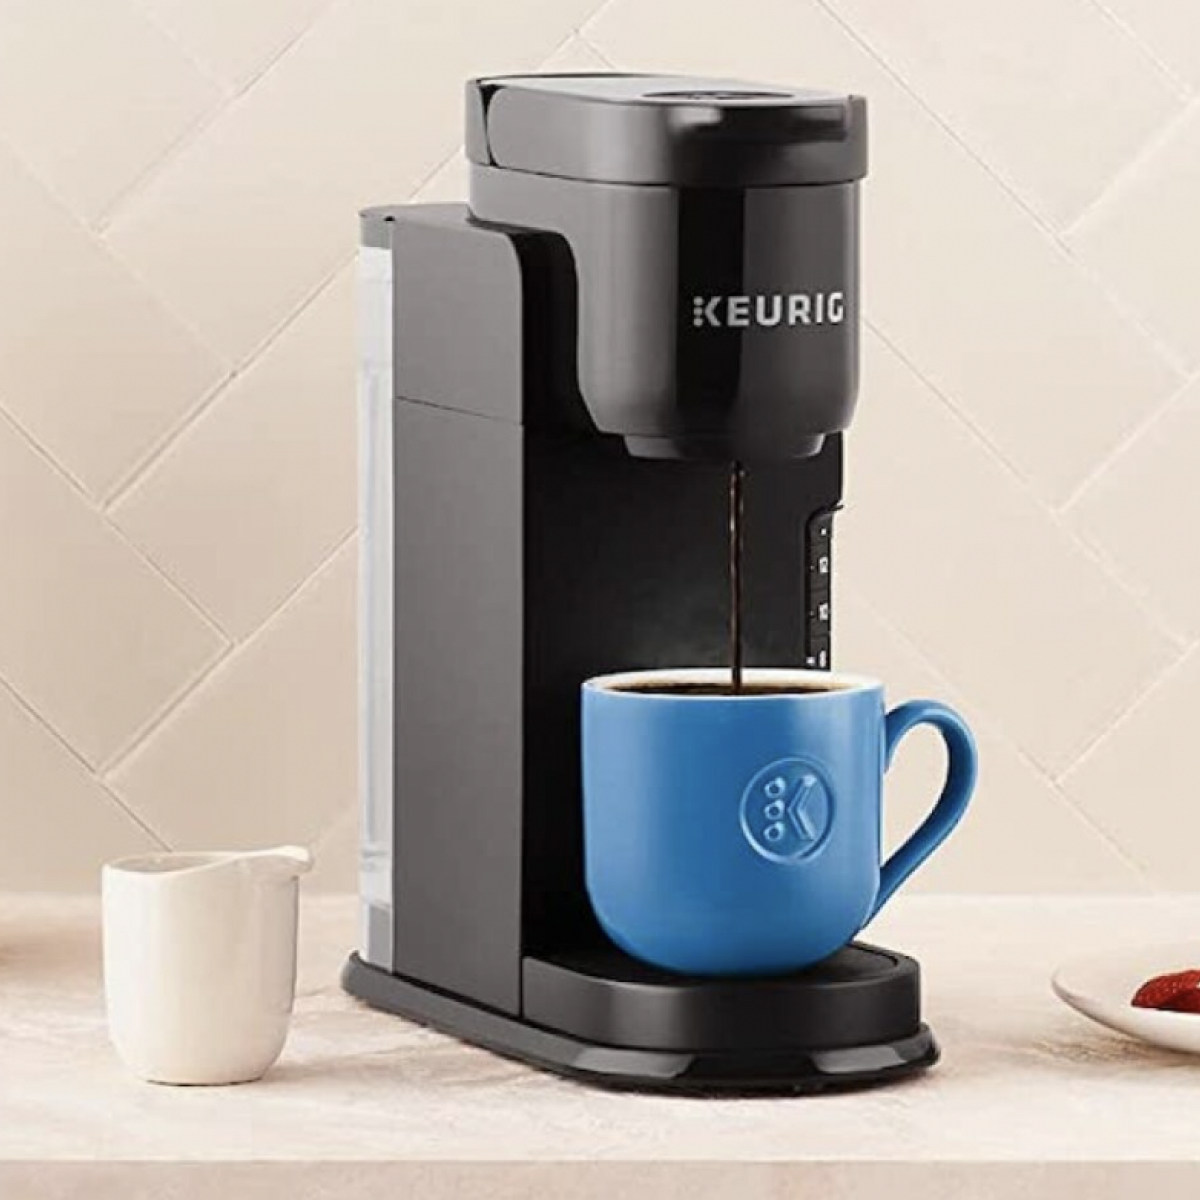
The Importance of Descaling Your Keurig Duo

Keeping your Keurig Duo in top condition requires regular descaling. This process removes calcium deposits, or scale, from your machine. These deposits come from water and can affect the machine’s performance over time. Descaling ensures your coffee tastes great and your machine operates efficiently. Without descaling, you might notice a decline in the quality of your brews. Scale buildup can also lead to clogs and longer brew times. In severe cases, it can cause your machine to stop working altogether.

descale keurig duo

By descaling your Keurig Duo, you’re extending its lifespan. You’re also making sure it runs smoothly every morning, providing that perfect cup of coffee. Descaling is not just about maintenance; it’s about preserving the quality and consistency of your coffee experience. So, remember to descale regularly to enjoy the full benefits of your Keurig Duo.

Signs That Your Keurig Duo Needs Descaling

Not sure when to descale Keurig Duo? Watch for these signs. First, if your coffee takes longer to brew, scale might be slowing it down. Second, an increase in noise during brewing can signal a scale buildup. Third, if the coffee tastes off or less flavorful, it’s time. You might also see mineral deposits in the water reservoir. Lastly, if your Keurig Duo sends a descaling message, don’t ignore it. These signs tell you it’s time to descale. Regular maintenance eliminates these issues. Your Keurig Duo will thank you with better tasting coffee and a longer life.

Materials Needed for a Successful Descale

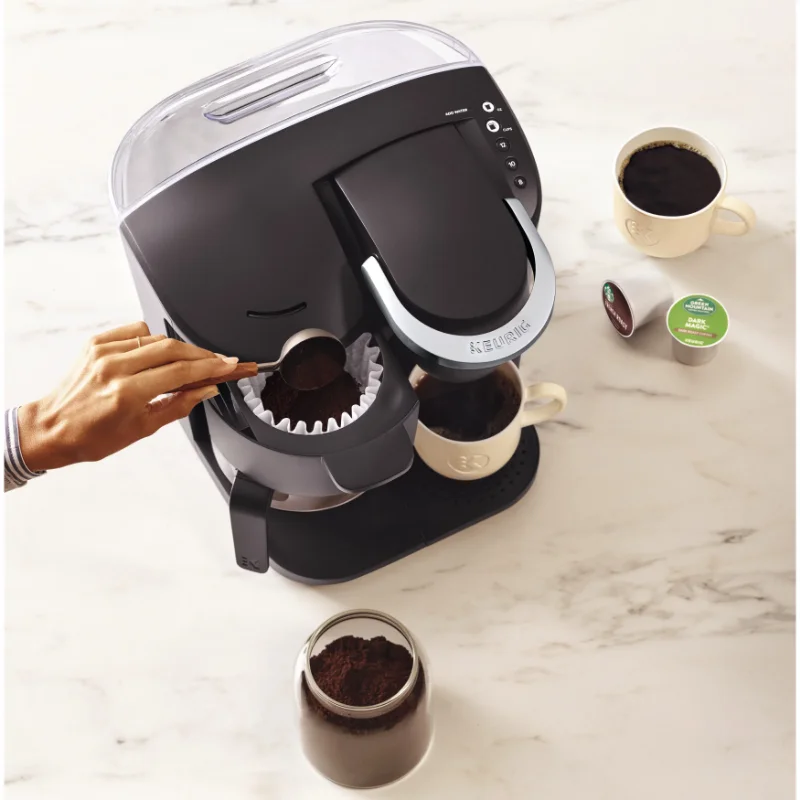
To descale your Keurig Duo effectively, you need the right materials. First, get a descaling solution. You can buy this from a store, or you can make one. If you choose to make it, mix white vinegar with water. Use equal parts of each for a homemade solution. Second, you will need fresh water. This water rinses the machine after descaling. Third, have a large ceramic mug at hand. This mug catches the descaling solution during the cleaning process. Lastly, access a sink close by. You need to empty and rinse the mug several times. Make sure all these items are ready before you start. This makes the descaling process smooth and hassle-free.

Step-by-Step Guide to Descaling Your Keurig Duo

Ready to descale Keurig Duo? Here’s your step-by-step guide. Follow these simple steps to ensure efficient cleaning and maintenance of your machine. First, turn off your Keurig Duo. Remember to unplug it as well. Then, empty the water reservoir and remove any water filter, if present. Ensure the pod holder is empty too. Now, pour the prepared descaling solution into the reservoir. If using a homemade solution, remember the one-to-one ratio of white vinegar to water.

Fill the reservoir with the solution up to the max fill line. Turn on your Keurig Duo and place the large ceramic mug you prepared on the drip tray. Run a brew cycle. Do this without inserting a pod. After the cycle completes, discard the liquid in the mug. Continue this process until the reservoir is empty. Once you’re done cycling the solution through, let your Keurig Duo sit for 30 minutes. This allows the solution to work on the scale buildup.

Now, rinse the reservoir well. Fill it with fresh water to the max fill line. Return the water filter if you had one. Run water cycles with the fresh water. Keep going until you finish the full reservoir. This step ensures that no descaling solution remains in your machine. For best results, rinse two or three times with the fresh water. Your Keurig Duo is now descaled and ready for your next cup of coffee. Descale Keurig Duo regularly to keep it running smoothly and keep your coffee tasting great.

descale keurig duoTroubleshooting Common Keurig Duo Descaling Issues

Despite following the steps to descale Keurig Duo, you might encounter issues. Here are tips to troubleshoot common problems.

Firstly, if the descaling solution doesn’t flow, check for clogs. Make sure to use the solution within the proper measurements. Too much vinegar can cause clogs.

Another problem could be the machine not turning on after descaling. Simply check the power source, ensuring the machine plugs in securely. Reset the Keurig Duo if needed.

Sometimes, a descaled Keurig Duo might still make noise. Usually, this means air is in the system. Run a few brew cycles with water to fix this.

Also, you might find your coffee still tastes bad after descaling. If so, consider a second descale. If the issue persists, replace the water filter.

Lastly, if your Keurig Duo asks for more descaling, it might not recognize the cycle’s completion. Run more fresh water through the machine to clear any remaining solution.

Encounter another problem? Refer to the Keurig Duo manual. It often has the answers. Remember, regular descale keurig duo maintenance prevents most issues. So, keep to the schedule for best results.

How Often Should You Descale Your Keurig Duo

Knowing how frequently to descale your Keurig Duo is key to keeping it in optimal condition. The general recommendation is every 3 to 6 months. However, this can vary based on water hardness and machine usage. For those using hard water, descaling may be needed more often. This is due to higher mineral content that leads to quicker scale buildup. If you notice any signs of scaling before the 3-month mark, don’t wait. Descale your Keurig Duo to maintain its performance and coffee quality.

For moderate to light users, the 6-month interval could be enough. Still, consistency is crucial. Mark the calendar or set a reminder. This ensures you don’t overlook the necessary maintenance.

To summarize, descale your Keurig Duo:

  • Every 3 months if you use hard water or use your machine frequently.
  • Every 6 months for softer water or less frequent use.
  • Whenever you observe signs of scale buildup regardless of the timeline.

Stick to this schedule, and you’ll extend your Keurig Duo’s lifespan and enjoy delicious coffee every time.

descale keurig duoPreventative Maintenance for Your Keurig Duo

Preventative maintenance is key to a long-lasting Keurig Duo. Coupled with regular descaling, it ensures your machine runs smoothly. Follow these tips to minimize scale buildup and enhance your coffee experience. Firstly, use filtered or bottled water to reduce mineral deposits. Hard tap water can increase scaling. Also, empty the water reservoir after each use; don’t let water sit overnight. Always use the correct amount of descaling solution, as overuse can cause damage. Clean removable parts weekly. This includes the water reservoir, drip tray, and K-cup holder. Use soap and water, and dry them thoroughly. Check for software updates. Some Keurig Duo models have digital updates that can improve performance. Lastly, perform a brew cycle with just water after making a cup of coffee. This cleans out any leftover coffee grounds. By following these preventative steps, you can avoid frequent descaling sessions. Plus, you’ll enjoy a Keurig Duo that lasts longer and provides consistently delicious coffee.

Conclusion

Descaling your Keurig Duo is an essential practice that should not be overlooked. By following the steps outlined in this guide, you can ensure that your coffee maker remains in excellent working condition, delivering rich, flavorful coffee with every brew. Regular maintenance, including descaling, will not only enhance the taste of your coffee but also extend the life of your machine. Don’t wait for the signs! Be proactive and make descaling a regular part of your coffee ritual. Remember, a well-maintained Keurig Duo is the key to unlocking the full potential of your coffee experience!

Posted on

Keurig Registration: Streamline Your Coffee Experience

Keurig Registration

Why Register Your Keurig Machine

Registering your Keurig machine is a crucial step after purchase. It ensures a hassle-free coffee experience and opens the door to a host of benefits. Let’s delve into why it’s important to take this step.

Keurig Registration

It’s Quick and Simple

The Keurig registration process is designed to be quick and easy. You can complete it online within minutes. All you need is your machine model and serial number.

Access to Customer Support

Once registered, you get premium access to Keurig’s customer support. Help is just a call or click away if you face any issues with your machine.

Warranty Activation

Registration activates your warranty. This is crucial for free repairs or replacements if your machine encounters problems.

Stay Updated

Keurig registration keeps you in the loop. You receive updates on new features, products, and maintenance tips to enhance your machine’s longevity.

Exclusive Perks

As a registered user, you get exclusive offers and discounts. These can include discounts on coffee pods, accessories, or updates on special promotions.

Remember, registering is key to maximizing the potential of your Keurig. It’s not just about making coffee; it’s about ensuring the best experience with your coffee maker.

How to Register Your Keurig Coffee Maker

Keurig registration is a straightforward process. To register your coffee maker, follow these simple steps. First, locate your machine model and serial number. You’ll find this information on your Keurig machine. Next, visit the Keurig website and choose the ‘Register’ option. Fill in the required details, including your model and serial number. Finally, submit the form to complete your registration. Confirm your registration through the email you receive from Keurig. Once done, you’re all set to enjoy the full benefits of being a Keurig owner.

Remember to keep your registration information updated. This ensures continuous access to support and warranty services.

Benefits of Keurig Registration

Benefiting from Keurig registration extends beyond basic warranty activation. It encompasses a variety of advantages that boost your overall coffee experience. If you’re still pondering whether to register your Keurig, consider the following benefits that come with completing this simple step:

  • Faster Customer Service: Need support? Registered users get prioritized. This means quicker response times and effective solutions for your Keurig issues.
  • Updates and Maintenance Tips: Stay informed on the latest updates. Gain access to helpful maintenance advice that can prolong your machine’s life.
  • Exclusive Deals: Enjoy special offers. Registered members often receive discounts on pods, accessories, and exclusive promotions only available to them.
  • Streamlined Warranty Service: Encounter a problem? Your warranty is already active. This makes the process of repairs or replacements fuss-free.
  • Personalized Experience: Customize your Keurig experience. Receive recommendations tailored to your preferences and usage.

Remember, keurig registration is key to enjoying these perks. It ensures that you get the most out of your coffee maker investment. So don’t hesitate, register your machine today and start reaping the rewards!

Keurig RegistrationTroubleshooting Keurig Issues After Registration

After completing the keurig registration, you may still encounter issues with your machine. It helps to know how to tackle common problems. Here’s what to do if something isn’t quite right:

  • Machine Not Brewing: Sometimes, your Keurig machine might not brew. This could be due to water line blockages or scale buildup. Perform a cleansing brew and descale your machine following the instructions in your manual.
  • Power Issues: If your machine won’t power on, check to ensure it’s plugged in properly. Also, check your circuit breaker and outlet to make sure they’re functioning.
  • Pod Issues: Are pods not fitting correctly or causing errors? Make sure you’re using the correct size and type of pod for your model. Some models are very specific about the pods they accept.
  • Display Errors: Keurig machines can sometimes show error messages. Refer to your user manual or the Keurig website for guidance on these codes.
  • Leaking Water: Leakages may occur if the water reservoir is not sealed correctly. Check the reservoir and ensure it’s properly attached and seated.
  • Maintenance Reminder: Your Keurig might remind you to descale or change the water filter. Don’t ignore these maintenance tasks as they ensure the longevity of your machine.

Always refer to the user manual for specific troubleshooting steps, or contact Keurig customer support for assistance. They prioritize registered users, so you’ll get the help you need more swiftly. By being proactive and handling issues promptly, you maintain your machine in top condition and ensure a great coffee experience every time.

Warranty and Support for Your Keurig

Registering your Keurig machine does more than just enhance your coffee experience. It unlocks a valuable warranty and dedicated support that you can rely on. Let’s look at why the keurig registration warranty and support features are essential for every Keurig owner.

  • Active Warranty: By completing your Keurig machine’s registration, you activate the manufacturer’s warranty. This warranty is vital. It covers repairs or replacements if your machine has issues.
  • Customer Support Priority: As a registered user, you get priority when you reach out for help. The support team addresses your concerns quickly and efficiently.
  • Troubleshooting Assistance: If you face problems with your coffee maker, Keurig’s support is ready to assist. Their expertise can guide you through solving many common issues.
  • Hassle-Free Help: Should your machine need service, your active warranty makes the process smoother. Keurig support will handle your needs with less hassle for you.

Access to warranty and support is just a registration away. It’s a simple step that provides peace of mind. Knowing you have backup if your machine has problems is reassuring. Register your Keurig and enjoy these benefits without worries. It’s a move you won’t regret, especially if you need quick help with your coffee maker.

Exclusive Offers and Discounts for Registered Users

One of the major perks of keurig registration is the access to exclusive offers and discounts. These benefits are specially tailored for Keurig users who have taken the time to register their machine. Here’s how you can make the most of these exclusive deals:

  • Special Promotions: Registered users receive notifications about special promotions that are not available to the general public. These promotions can offer significant savings on coffee pods, accessories, and even new Keurig machines.
  • Discount Coupons: Look out for discount coupons sent directly to your registered email. These can slash the prices on your favorite Keurig products, making your coffee habit more affordable.
  • Early Access: Get early access to new product launches and sales events. Being a registered user often means you’ll know about and can buy new products before anyone else.
  • Customized Offers: Keurig may send offers based on your registered model and your purchasing history. These customized deals ensure that you get discounts that are most relevant to you.
  • Seasonal Discounts: Throughout the year, registered users can enjoy seasonal discounts. These can range from holiday sales to special summer deals on iced coffee pods.

Remember to check your email regularly for updates from Keurig. Also, keeping your keurig registration details up to date ensures you continue receiving these valuable offers. Take full advantage of these deals and enjoy your Keurig coffee experience to the fullest.

Managing Your Keurig Account

Managing your Keurig account is key to a seamless coffee experience. Here’s how to keep your information current and ensure you never miss out on those Keurig benefits.

  • Access Your Account: Visit the Keurig website and log in to your account. This is where all your registration details live.
  • Update Personal Information: Moved or changed your email? Make sure to update your account details so you always stay in the loop.
  • Machine Details: Keep your coffee maker’s model and serial number handy in your account for easy reference.
  • Track Your Orders: View your past orders and track new ones directly from your account dashboard.
  • Customer Service Interaction: Review past support queries or raise new ones. Your account keeps all these interactions in one place.
  • Subscription Management: If you’re subscribed to pod delivery, manage your preferences and schedule easily through your account.
  • Exclusive Offers: Check your account for any exclusive offers or discounts available to you as a registered Keurig user.

Remember, taking a few minutes to manage your Keurig account can enhance your coffee experience. It’s the central hub for all things related to your Keurig registration, making it a vital part of your daily coffee ritual.

Keurig RegistrationThe Importance of Updating Your Registration Information

Maintaining current keurig registration details is essential. It ensures you keep getting all the benefits. Here’s why updating your information is important:

  • Stay in Touch: Keurig communicates via email. If your email changes, update it to continue receiving updates and offers.
  • Warranty Coverage: If you move, your warranty support might be affected. Update your address to stay covered.
  • Receive Relevant Offers: Keurig tailors offers based on your model and usage. Keep details current so offers match your needs.
  • Ensure Continuous Support: For ongoing support, accurate registration info is vital. It helps Keurig support you better.
  • Order and Subscription Accuracy: Update payment and shipping info for order accuracy. Especially if you subscribe to pod deliveries.

By routinely checking and updating your keurig registration information, you ensure a hassle-free coffee experience. It’s a small effort that makes a big difference in the quality of service you receive.

Posted on

Easy Guide to Descaling Your Keurig Slim

descaling keurig slim

Why Descaling Your Keurig Slim is Essential

Descaling your Keurig Slim is a must to keep your machine running smoothly. It’s all about removing calcium and other mineral build-ups. These deposits, often termed ‘scale’, can greatly affect your brewer’s performance. Left unchecked, they can cause clogs, reduce heating efficiency, and even shorten the lifespan of your Keurig.

descaling keurig slim

Regular descaling ensures your coffee tastes fresh and your machine brews quickly. It also helps maintain a consistent water temperature. This is key for a perfect cup every time. Most importantly, it prevents potential malfunctions that could lead from neglected maintenance. Think of descaling as a regular health check for your Keurig Slim. It’s essential for its longevity, ensuring every brew is just as good as the first.

Ignoring descaling can lead to longer brew times, less hot coffee, and even machine errors. Don’t wait for problems to arise; make descaling a part of your routine maintenance. Your Keurig Slim will thank you with every delicious cup it serves. Remember, a well-maintained machine is the secret to the best coffee experience.

Signs That Your Keurig Slim Needs Descaling

Noticing changes in your Keurig Slim’s performance? It might be time for descaling. Here are telltale signs:

  • Longer Brew Times: Your coffee is taking more time to brew than normal.
  • Temperature Issues: Your coffee isn’t as hot as it should be.
  • Weird Noises: The machine is noisier, making unusual sounds during brewing.
  • Poor Flow: The water flow is slow or interrupted.
  • Off-tasting Coffee: If your coffee starts to taste strange, it’s a red flag.
  • Scale Deposits: Visible mineral buildup around the water reservoir or other parts.
  • Error Messages: The machine displays error messages related to scaling.

If you spot any of these signs, take action. Descale your Keurig Slim to restore its peak performance and ensure the quality of your coffee remains high. Tackle the problem early to avoid more serious issues later.

What You’ll Need to Descal Your Keurig Slim

Before you start the descaling keurig slim process, gather these items:

  • White vinegar or Keurig’s descaling solution: This acts as the descaling agent.
  • Large ceramic mug: You’ll need this to catch the descaling solution.
  • Access to a sink: For discarding the used solution.
  • Water: Fresh water for rinsing after the descaling process.
  • Dry cloth or paper towel: For wiping away any spills or residue.
  • Timer or clock: To track the descaling soak time.

Once you have these supplies, you’re ready to begin. Ensure you use them as directed to avoid damage to your Keurig Slim.

descaling keurig slim
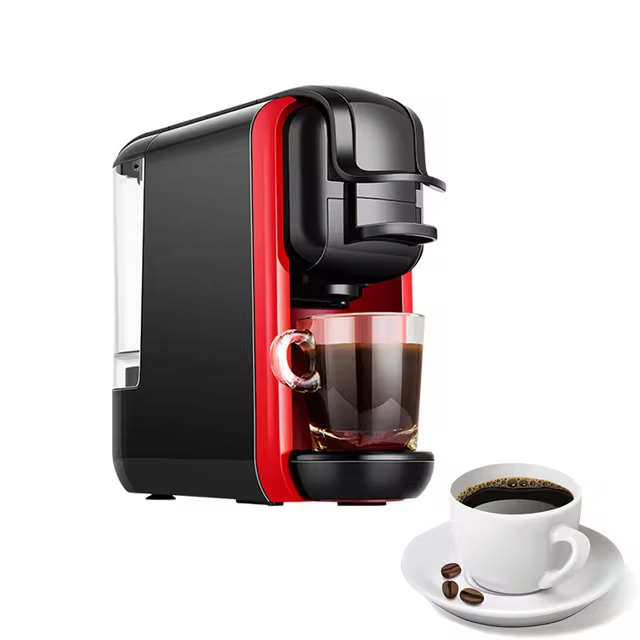
Step-by-Step Descaling Process

Descaling your Keurig Slim is simple. Follow these steps:

  1. Preparation: Turn off your Keurig Slim. Empty the water reservoir.
  2. Add Descaler: Fill the reservoir with the descaling agent – either white vinegar or Keurig’s descaling solution.
  3. Run Descaling Cycle: Power on the machine. Run a brew cycle with no K-cup inserted, catching the solution in the large mug.
  4. Repeat: Run at least two more cycles with the solution to effectively loosen and remove scale deposits.
  5. Let It Rest: After the last cycle, let your Keurig Slim sit for 30 minutes with the power on.
  6. Rinse: Empty and clean the reservoir. Fill it with fresh water. Run several brew cycles until you clear out all traces of the descaling solution.
  7. Clean Up: Wipe down the machine’s exterior with a dry cloth or paper towel.
  8. Final Check: Ensure that the water flows smoothly and the Keurig Slim heats correctly. Brew a fresh cup to confirm.

By following this descaling process, your Keurig Slim will work efficiently. Repeat this process regularly to maintain quality performance and flavorful coffee.

How Often Should You Descal Your Keurig Slim

To keep your Keurig Slim in top shape, regular descaling is key. The best practice is to descale every 3 to 6 months. However, this can vary. If you use your brewer often, scale may build up quicker. In such cases, descale every 3 months. For those who use it less frequently, every 6 months should suffice.

The hardness of your water also affects descaling frequency. Hard water leads to faster scale buildup. If you live in an area with hard water, consider descaling more often. You can buy a water hardness test kit to check your water. This will provide a better idea of descaling needs for your Keurig Slim.

Lastly, keep an eye on your machine’s performance. If you notice any signs of scale before your regular descaling time, don’t wait. Descale right away to prevent problems. Regular descaling will keep your coffee tasting great and your Keurig Slim running well.

Tips for Maintaining Your Keurig Slim After Descaling

After descaling your Keurig Slim, maintaining it is pretty straightforward. Here are some quick tips to ensure it stays in great shape:

  • Use Filtered Water: This reduces scale buildup. Filtered water limits the minerals that cause scaling.
  • Empty Water Reservoir Daily: Don’t let water sit in the machine overnight. Empty and refill with fresh water each day.
  • Regular Cleaning: Wipe your machine after use. Clean the drip tray and K-cup holder regularly.
  • Avoid Leaving Used K-Cups: Remove them right after brewing. This prevents clogs and keeps the machine clean.
  • Water Level Check: Make sure the water reservoir isn’t too full. This avoids water spills inside the machine.
  • Periodic Inspections: Look for any visible mineral deposits regularly. If you see some, it may be time for a quick descale.

By following these steps, your Keurig Slim will work well for longer. Plus, your coffee will always taste its best. Stick to this routine and enjoy hassle-free brewing every day.

descaling keurig slimTroubleshooting Common Descaling Issues

Even when you follow all the steps for descaling your Keurig Slim correctly, you might encounter some issues. Here are common troubleshooting tips for a smooth descaling process:

  • Machine Not Brewing: If your Keurig Slim doesn’t start brewing after descaling, check if the machine is plugged in and turned on. Then, ensure the water reservoir is properly seated.
  • Partial Brews: If you get only a partial cup after descaling, check for clogs. Run a few more cycles with fresh water to clear any residual scale.
  • Leakage: Seeing water on your counter? Ensure you haven’t overfilled the water reservoir. Tighten any loose parts, like the water reservoir or the drip tray.
  • Descaling Solution Smell: If a vinegar smell remains after rinsing, run more fresh water cycles until it clears.
  • Pressure Issues: If water pressure seems low, descaling may not have removed all the scale. Repeat the descaling process with a fresh solution.
  • Unresolved Errors: If you continue to see error messages or the machine doesn’t run properly, it might need professional servicing.

These tips should help you overcome common issues while descaling Keurig Slim. Regular maintenance and troubleshooting can extend the life of your brewer and keep your coffee tasting great.

Conclusion

Descaling your Keurig Slim is an essential part of your coffee-making routine that shouldn’t be overlooked. By understanding what descaling is, why it’s necessary, and following the steps outlined in this guide, you can keep your machine in excellent condition and enjoy great-tasting coffee every time. Make descaling your Keurig Slim a regular task to ensure that you can continue savoring every cup, maintaining the quality of your beloved brewing machine for years to come.

Posted on

Fix Your Keurig Shutdown Issue with Simple Steps

keurig coffee maker

Introduction to keurig shuts off when i press brew

When a Keurig shuts off during brewing, it disrupts your coffee routine. This frustrating issue is common among Keurig users. You press the brew button, and unexpectedly, the machine powers down. Not only does it prevent you from enjoying your favorite beverage, but it may also signal that maintenance is needed. Fortunately, with a bit of knowledge and the right steps, you can resolve this issue yourself. This section will explore what causes your Keurig to shut off when you press brew and how to correctly identify and troubleshoot the problems at home. Stay tuned for an easy-to-follow guide that will help keep your Keurig running smoothly.

keurig coffee maker

Common Causes for Keurig Turning Off During Brew

One of the most common frustrations for Keurig users is when the machine shuts off unexpectedly during brewing. Understanding the common causes can help you troubleshoot and solve the issue quickly. Here, we’ll discuss two frequent culprits that disrupt your Keurig’s brewing cycle: blockages in the K-Cup holder and water line, and dislodged magnets in the water reservoir.

K-Cup Holder Blockage and Water Line Clog

A prime reason your Keurig shuts off when you press brew is a blockage. Coffee grounds and tea remnants from K-Cups can jam the needle or clog the water line. This clog prevents your Keurig from brewing and causes it to shut down. Regular cleaning is essential to prevent this issue from recurring.

Dislodged Water Reservoir Magnet

Another cause for sudden shutdowns is a dislodged magnet in the water reservoir. The magnet can move out of place due to the vibrations during brewing. This movement can disrupt the machine’s ability to sense the water level, prompting the Keurig to turn off as a precaution. Reseating the water reservoir should realign the magnet and solve the problem.

Step-by-Step Troubleshooting Guide

Having identified the common causes for a Keurig shutting off during brewing, it’s time to dive into actionable solutions. This step-by-step guide will walk you through simple troubleshooting techniques to get your Keurig back to its optimal brewing state.

Cleaning the K-Cup Pod Needle

The needle that punctures your K-Cup pods can become clogged with coffee grounds or tea leaves. This blockage might cause your Keurig to shut off mid-brew. Follow these steps to clean it:

  1. Power off your Keurig and unplug it from the outlet.
  2. Open the lid where you insert the K-Cup pod.
  3. Locate the needle. It’s the sharp object that punctures the pod.
  4. Use a straightened paper clip to carefully remove any debris from the needle.
  5. Run a brew cycle with just water, without inserting a K-Cup pod, to flush out any leftover grounds.

Ensure you handle the needle carefully to avoid injury and to not damage the needle.

Reseating the Water Reservoir

A dislodged magnet in the water reservoir can also cause your Keurig to power down unexpectedly. Here’s how to reseat the water reservoir:

  1. Remove the water reservoir from your Keurig.
  2. Check if the magnet at the base is in the correct position.
  3. If it’s out of place, gently realign it.
  4. Refill the reservoir with fresh water.
  5. Place the reservoir back into the Keurig, ensuring a proper fit.

Performing these steps should re-engage the Keurig’s water level sensors, preventing unintended shutdowns. If your Keurig shuts off when you press brew, these tips are your first line of defense to ensure continuous and enjoyable brewing experience.

Resolving the ‘Not Ready’ Message on Your Keurig

When your Keurig displays a ‘Not Ready’ message, it can halt your coffee plans. This message often means the machine is not performing correctly. Fixing this can be easy if you follow a few steps.

Turn Off and Unplug the Machine

First, ensure your Keurig is off. Then, disconnect it from the power source. This resets the system and prevents any electrical issues during troubleshooting.

Detach the Water Reservoir

After shutting down, remove the water reservoir. Look for any debris that might block the sensor. Clean the reservoir if needed before reattaching it.

Wait and Reconnect

Wait for about five seconds. After that, connect your Keurig again. Reattach the water reservoir carefully, making sure it fits snugly.

Perform a Test Brew

Power on your Keurig. Lower the handle without inserting a K-Cup pod. The ‘Not Ready’ message should clear, allowing you to brew a cup. If the message persists, repeat the steps.

By following these steps, you should resolve the ‘Not Ready’ message on your Keurig. If you still face issues, it may be a sign of a deeper problem that may require professional attention or contact with Keurig’s customer service.

keurig coffee makerAddressing the Blinking Blue Light in Water Reservoir

When facing a blinking blue light in your Keurig’s water reservoir, don’t worry. It signals a simple fix is needed. Usually, this happens when water levels are too low for brewing. To tackle this, just add more water to the reservoir. Make sure you fill it to the indicated line. Doing so should get rid of the blinking light.

By maintaining adequate water levels, your Keurig stays ready for use. It’s a quick check that can save you trouble. Keep an eye on the water before you start brewing. This simple habit prevents the blinking blue light issue. Remember, your Keurig needs enough water to operate. This ensures your coffee brews without any hiccups.

If the blinking persists after refilling, double-check for proper placement. The reservoir must sit securely in the slot. A misplaced reservoir might not engage the sensor properly. If needed, remove and reposition it to ensure a snug fit. Once done, your Keurig should be back to normal and ready to brew your favorite coffee.

Installing and Maintaining Your Keurig Water Filter

Some Keurig models come with a water filter feature. A clean filter helps ensure great-tasting coffee and extends the life of your machine. Here’s how you can install and maintain this important component.

  1. Begin by soaking the filter in cold water for five seconds. This primes it for use.
  2. Place the soaked filter into the Water Handle Assembly. Make sure it fits well.
  3. Set a reminder to replace the filter every two months to keep your coffee tasting fresh.

Regular maintenance of your water filter is key to preventing issues with your Keurig. Over time, filters gather debris that can affect water flow and flavor. Follow these simple steps every few months, and your Keurig will thank you with every brew. Keep these tips in mind to enjoy every cup of coffee to the fullest.

Preventive Measures and Maintenance Tips

To keep your Keurig in top shape and prevent it from shutting off when you press brew, follow these preventive steps:

  1. Regular Cleaning: Clean your Keurig regularly to avoid the build-up of coffee grounds and tea leaves that can clog the machine’s elements.
  2. Inspect the Needle: Check the K-Cup pod needle often for clogs. Use a paper clip to clear any obstructions as part of routine maintenance.
  3. Monitor the Water Reservoir: Ensure the water reservoir is always properly seated. Check the magnet position regularly to prevent power issues.
  4. Keep It Filled: Maintain an adequate water level. This stops the blue light from blinking and ensures consistent brewing.
  5. Change the Water Filter: If your model has a water filter, replace it every two months to maintain coffee quality and machine function.
  6. Descale Your Keurig: Use a descaling solution every 3-6 months to remove any calcium deposits that might hinder performance.
  7. Avoid Using Tap Water: If possible, use filtered or bottled water to reduce the likelihood of mineral build-up.
  8. Use Only Keurig Approved Accessories: Third-party accessories might not be compatible and can cause issues.
  9. Unplug When Not in Use: Save energy and reduce wear by unplugging your Keurig when it’s not active.

By implementing these maintenance tips, you’ll reduce the chances of your Keurig shutting off unexpectedly and enjoy a better brewing experience. Consistent care is the key to longevity for your Keurig machine.

keurig coffee makerWhat to Do If keurig shuts off when i press brew After Troubleshooting

If you’ve followed all the previous steps and your Keurig still won’t brew, don’t despair. Here’s what to do next:

  1. Check the Power Source: Confirm that your Keurig is plugged into a working outlet. Try a different outlet if needed.
  2. Check for Keurig Error Messages: Some models have an LCD display with error codes. Refer to your manual for troubleshooting specific codes.
  3. Call Keurig Customer Support: If you’ve exhausted all options, get professional help. Keurig’s customer support can offer guidance.
  4. Consider Professional Repair: If your Keurig is still under warranty, reach out for repair or replacement options.
  5. Review Warranty Policy: Look into your Keurig’s warranty policy. It might cover your current issue.
  6. Buy Replacement Parts: Sometimes a specific part of your Keurig needs replacing. Check online or in-store for parts.
  7. Upgrade to a New Model: If your Keurig is old, it might be time for an upgrade. Consider investing in a new one.

Remember, regular maintenance can prevent many issues. But when they do arise, these steps can help. With patience and the right approach, you’ll get back to enjoying your coffee in no time.

Posted on

Effortless Keurig Maintenance: No Vinegar Needed

clean a keurig without vinegar

If you’re a coffee lover, chances are you own a Keurig machine or have used one at some point. These convenient devices make brewing your favorite Java incredibly simple. However, just like any kitchen appliance, regular maintenance is necessary to keep your Keurig functioning at its best. Many people rely on vinegar for cleaning due to its acidic properties, but what if you prefer to avoid that strong smell or simply don’t have any on hand? In this article, we’ll explore comprehensive steps to clean a Keurig without vinegar and how to ensure it remains a reliable part of your kitchen.

Understanding the Importance of Cleaning Your Keurig

Why Clean Your Keurig?

Cleaning your Keurig is not just about hygiene; it’s about maintaining the quality of your coffee. Over time, mineral buildup can affect the brewer’s performance, leading to slow brewing and uneven extraction. Additionally, residual coffee oils can accumulate in the system, potentially affecting the taste of your beverages.

Frequency of Cleaning

While you might be tempted to let your Keurig run on autopilot, regular cleaning is essential. It’s advisable to perform a thorough clean every 3 to 6 months, depending on how often you use the machine. If you live in an area with hard water, you may need to clean it more frequently.

clean a keurig without vinegar

Materials Needed for Cleaning

Before you dive into the cleaning process, you’ll need to gather the following materials to clean your Keurig without vinegar:

  • Distilled water: Essential for rinsing and cleaning.
  • Baking soda: A natural cleaning agent that helps neutralize odors.
  • Dish soap: To clean removable parts.
  • A scrub brush or cloth: Ideal for scrubbing areas with buildup.
  • Paper towels: For drying and wiping surfaces.
  • Q-tips or cotton swabs: Useful for getting into hard-to-reach areas.
  • A bowl or container: To catch any water or residues while cleaning.
  • Coffee filter: Recommended if you use a reusable filter.

Step-by-Step Guide on How to Clean a Keurig Without Vinegar

Cleaning your Keurig may sound daunting, but by following these simple steps, you can effectively clean your machine and continue to enjoy your coffee:

1. Gather and Prepare

Before you start, make sure to unplug your machine for safety. Remove any water left in the reservoir and dispose of leftover coffee, if any. Disassemble the removable parts such as the water reservoir, drip tray, and K-cup holder.

2. Cleaning the Water Reservoir

Rinse and Soak

Fill your water reservoir with a mixture of distilled water and two tablespoons of baking soda. Allow it to soak for about 15 to 30 minutes. This allows the baking soda to tackle any mineral buildup and odors.

Scrub the Interior

After soaking, use a sponge or cloth to scrub the interior of the reservoir gently. Pay attention to any corners where buildup may be more stubborn. Rinse thoroughly with clean water to ensure no baking soda residue remains.

3. Cleaning the Drip Tray

Remove and Wash

Take out the drip tray and wash it with soapy water. Use a sponge or soft cloth to remove any coffee stains or residue. Avoid abrasive pads, as they can scratch the surface. Rinse well and dry with a paper towel.

4. Cleaning the K-Cup Holder

Detach and Thoroughly Clean

The K-cup holder can easily accumulate coffee grounds and residue over time. Detach it from the machine and rinse it under warm water. Use a scrub brush or a toothbrush to clean the small holes thoroughly.

Soak if Necessary

If the holder appears particularly dirty or stained, soak it in a mixture of baking soda and warm water for about 15 minutes before rinsing.

5. Descaling the Heating Element

The heating element in your Keurig can become scale-ridden over time. Instead of vinegar, you can use a commercially available descaler specifically formulated for coffee machines.

Prepare the Descaler

Follow the instructions on the descaling product. Generally, it will involve mixing the descaler with water in the water reservoir.

Run the Brewing Cycle

Start a brewing cycle without inserting a K-cup. Allow the solution to pass through the machine. This will remove mineral deposits. After finishing the first cycle, run at least two cycles with distilled water to rinse out any remaining descaler.

6. Cleaning the Exterior

The exterior of your Keurig also deserves some love. Using a soft cloth and a mixture of warm soapy water, wipe down the housing of the machine, being careful not to let any liquid seep into the electrical components.

7. Cleaning the Needle

The needle that punctures K-Cups can sometimes get clogged. You can use Q-tips or cotton swabs to clean it. Simply dip the swab into a mixture of baking soda and warm water and carefully clean the needle area.

8. Rinse and Reassemble

After all parts have been washed, rinsed, and dried, reassemble them carefully. Place the K-cup holder and water reservoir back into the Keurig.

clean a keurig without vinegar

Tips for Maintaining Your Keurig

To prolong the cleanliness of your Keurig and avoid the need for an intensive clean down the line, consider the following tips:

Regular Maintenance

Make it a habit to rinse your machine with clean water after every few brews. This minimizes buildup and keeps the water path clean.

Use a Filter

Installing a water filter in your reservoir can help minimize mineral buildup from hard water. This will not only make cleaning easier but also prolong the life of the machine.

Empty the Drip Tray Regularly

Regularly emptying the drip tray can prevent overflow and minimize the growth of bacteria or mold. Check it weekly, especially if you use the machine daily.

Other Cleaning Alternatives

While we’ve focused on using baking soda and distilled water, several other household items can effectively clean your Keurig:

Lemon Juice

Lemon juice has natural acidic properties similar to vinegar. Mix lemon juice with water in a 1:1 ratio and use it similarly to the descaling method.

Hydrogen Peroxide

A diluted solution of hydrogen peroxide can serve as an antibacterial cleaner. Mix one part hydrogen peroxide with two parts distilled water for cleaning purposes.

Ice Cubes and Salt

For removing residue from the K-cup holder, you can use ice cubes mixed with coarse salt. This method can help scrub residues without damaging the surfaces.

clean a keurig without vinegarTroubleshooting Common Issues

Sometimes, despite your best efforts, you may encounter issues with your Keurig. Here are some common problems and how to address them:

Slow Brewing

If your Keurig is brewing slower than usual, it’s typically a sign of mineral buildup. Running a descaling cycle using the above methods should usually remedy this.

Unusual Tastes

If your coffee tastes off, ensure milks or creams used in the machine aren’t contributing to the flavor. Cleaning the water reservoir and brewing cycles thoroughly should also resolve this.

Machine Won’t Brew

This could be a result of a clogged needle or water filter. Follow the needle cleaning method mentioned earlier and ensure the water reservoir is filled.

Conclusion

Understanding how to clean a Keurig without vinegar is essential for maintaining the quality of your coffee and the longevity of your machine. By committing to regular cleaning and maintenance, using alternative cleaning agents like baking soda or lemon juice, and following the steps outlined above, your Keurig will continue to be a reliable source of your favorite brews for years to come. Every coffee lover deserves a clean machine, and now you have the means to achieve that without the need for vinegar. So brew on and enjoy your delicious cups of coffee!

Posted on

Simplify Keurig Descale Mode Activation

how to put keurig in descale mode

Understanding Limescale and Its Impact on Keurig Machines

Limescale is a common issue for many kitchen appliances, including Keurig coffee makers. It’s a white, chalky substance made from calcium and magnesium deposits. These minerals come from water, especially when it’s high in mineral content, known as hard water.

how to put keurig in descale mode

When you heat water in your Keurig, limescale can form. It happens when water evaporates and leaves these minerals behind. Over time, this build-up can cause problems. It may block water flow, alter the taste of your coffee, and damage the heating elements.

In Keurig machines, limescale can reduce performance. Your drinks might come out cooler or take longer to brew. The taste of your coffee could change, becoming bitter. If not handled, limescale can even lead to the machine breaking down.

To combat this, it’s important to descale your Keurig regularly. This means using a specific process to remove the build-up. Many suggest doing this every 3 to 6 months, but it depends on how often you use your Keurig and your water’s hardness.

Understanding how limescale affects your Keurig is the first step. Next, you’ll need to know how to properly descale your machine to keep it running smoothly. We will cover the process in detail in the following sections.

When to Descale Your Keurig Coffee Maker

Recognizing when your Keurig needs descaling is key to its performance. Some newer models alert you with a special indicator light. But for many, knowing the signs of limescale buildup is essential. Here are common indicators that it might be time to descale:

  • Your Keurig starts brewing more slowly than usual.
  • You notice white, chalky residue inside your coffee maker.
  • The machine drips or leaks after brewing.

These signs hint that limescale is affecting your coffee quality and brewing process. If you wait too long, your machine could suffer more severe issues. Even without these signs, regular maintenance is a good habit. Aim to descale every 3 to 6 months. Hard water may require more frequent descaling than soft water. If you’re a heavy coffee drinker, you might descale more often to keep taste and machine efficiency on point.

Don’t know if you have hard water? Look up a water quality report for your area or use a home testing kit. Knowing your water’s mineral content can help plan descaling, so your machine always brews the perfect cup.

Preparing Your Keurig for Descaling

Before you start the descaling process, get your Keurig ready. First, unplug the device from its power source. Make sure your Keurig is cool to the touch. Then, take out any K-Cups inside the machine. Next, empty the water reservoir completely. Don’t forget to remove the water filter if your model has one. All detachable parts, like the drip tray and pod holder, should come off too.

Take a soft cloth and wipe down all the parts you removed. It’s best to avoid abrasive cleaners that could harm your Keurig. If there’s any buildup of coffee grounds or residue, clean those areas extra carefully. Once everything is clean, leave the parts out to dry. Doing this ensures your Keurig is prepped and ready for a thorough descaling.

Step-by-Step Guide: How to Descaling a Keurig

If your Keurig has started to slow down or it’s been a few months since the last cleaning, it’s time to descale it. Here’s how to put your Keurig in descale mode and get it back to brewing at its best.

Step 1: Cleaning Detachable Parts

Unplug your Keurig and remove any K-Cups. Empty the water reservoir. Take out the drip tray, water filter, and pod holder. Wipe down these parts with a damp cloth. Then, let them dry.

Step 2: Descale with Solution or Vinegar

Fill the reservoir with a mix of descaling solution or white vinegar and water. Put all parts back, except the filter. This solution will tackle the limescale.

Step 3: Perform a Brewing Cycle with the Cleaning Solution

Turn on the Keurig with the solution in the tank. Place a mug on the tray. Run a brewing cycle without a pod. Repeat until the reservoir is empty. After that, let it sit for 30 minutes.

Step 4: Thoroughly Rinse the Keurig With Fresh Water

Fill the tank with fresh water and run several brewing cycles. Use a different mug or clean the same mug each time. This will remove any vinegar or solution left.

Step 5: Dry and Reassemble the Keurig

Once rinsed, take out the reservoir to air dry. Then, place all parts back in the Keurig. Now, your Keurig is ready to brew fresh coffee again.

Remember to regularly clean and descale your Keurig to prevent limescale build-up. Your coffee will taste better and your machine will last longer.

how to put keurig in descale mode
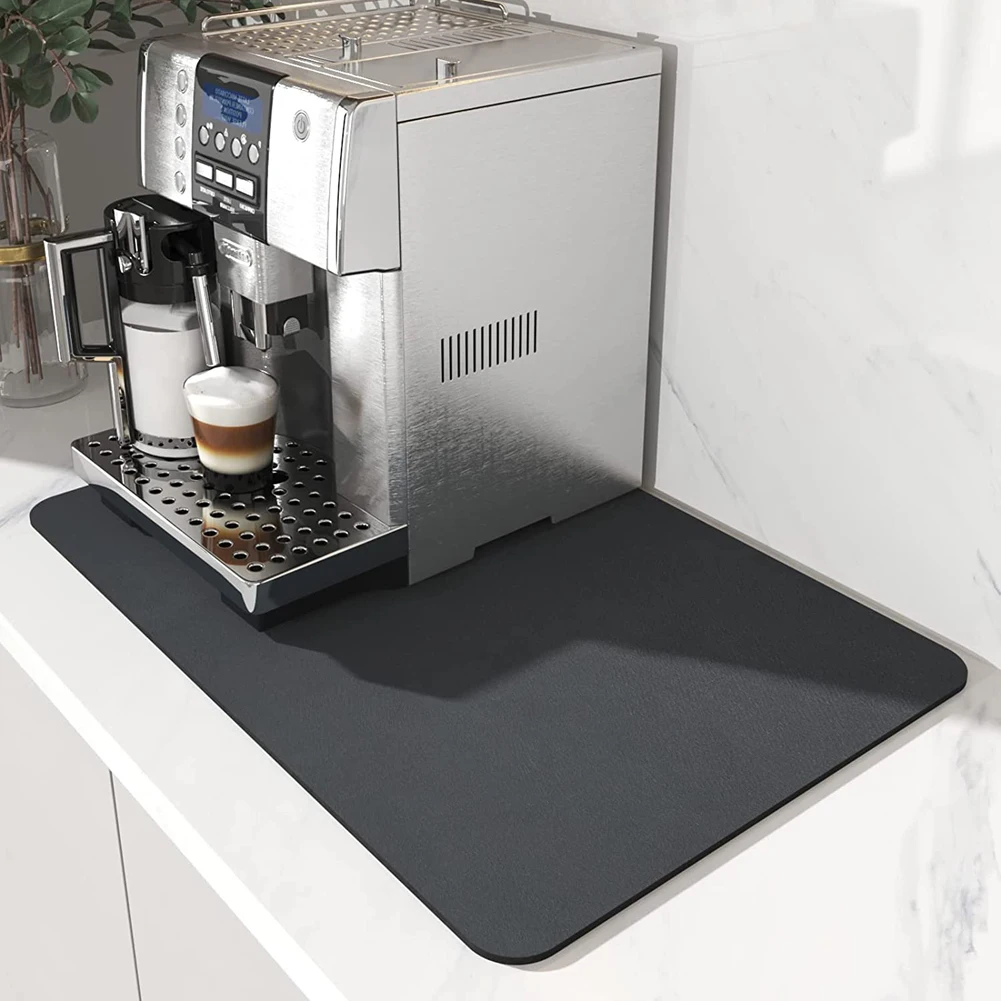
Maintaining a Clean Keurig to Minimize Descale Frequency

Maintaining your Keurig coffee maker is simpler than it might seem. Keep it clean to avoid frequent descaling. Here are some practical tips:

  • Use Filtered Water: Hard water can speed up limescale buildup. Using filtered water reduces minerals, meaning less limescale.
  • Empty the Reservoir: Don’t let water sit in the reservoir for more than a few days. Stagnant water can lead to more mineral deposits.
  • Regular Cleaning: Wipe down your machine often. Pay special attention to the area where you insert the pod. A clean Keurig is less likely to have limescale issues.
  • Fresh Water for Each Use: Refill the reservoir with fresh water before every use. Old water can cause limescale.

By following these easy steps, you can extend the time between descale sessions. Plus, your coffee will taste fresh and remain free of odd flavors caused by limescale.

Activating Keurig’s Descale Mode

To ensure your Keurig operates at its best, you might need to activate the descale mode. This process helps remove mineral build-up, known as limescale, within the machine. The descale mode provides a more effective and thorough clean compared to normal brewing cycles. Here’s a simple guide on how to activate descale mode on your Keurig coffee maker.

Firstly, make sure the coffee maker is turned off and unplugged. Remove any K-Cups or pods from inside the brewer. Empty the water reservoir and, if applicable, remove the water filter. Mix your chosen descaling solution—either the Keurig brand or a homemade vinegar solution—with fresh water. Fill the reservoir with this mixture.

After reassembling the machine without the water filter, power on your Keurig and look for the descale light or notice. On some models, this might activate automatically when limescale build-up is detected. If your machine doesn’t have this automatic feature, you might find the descale option within the menu. For models without a digital screen, hold down the brew button for a few seconds until the light starts flashing. This signal usually means that descale mode is initiated. From here, proceed with the descaling process as outlined in the previous steps of the blog.

Remember, it’s key not to forget the waiting period after running the descaling solution. This allows the mixture to break down the limescale effectively. Once you’ve finished the descale process and rinsed the machine thoroughly, your Keurig will be ready to brew fresh, delicious coffee once more.

Regular maintenance, like using filtered water and cleaning detachable parts, can reduce the frequency of descaling. However, when it’s time to descale, knowing how to activate the descale mode on your Keurig will simplify the cleaning process. Keep your coffee delicious and your Keurig in top shape by staying vigilant with descaling.

how to put keurig in descale modeTroubleshooting Common Keurig Descale Issues

Sometimes, even when you know how to put your Keurig in descale mode, problems can arise. Here are some common issues and solutions:

  • Descale Light Stays On: If the descale light remains on after you’ve descaled, rerun the process. Ensure you’ve rinsed the machine with fresh water several times.
  • Residue Left Behind: If you notice residue post descaling, repeat the fresh water rinse. Run more cycles until the water is clear.
  • Machine Won’t Descale: Check that you’re using the correct descale solution and water mix. Be sure you’re following all descaling steps carefully.
  • No Descale Alert on Older Models: If your Keurig doesn’t have an alert, rely on the timeline. Descaling every 3 to 6 months is typically recommended.
  • Descale Mode Not Activating: Make sure the machine is plugged in and the power is on. Hold the necessary button(s) until the light flashes.
  • Unpleasant Vinegar Taste Afterward: To avoid this, rinse the machine thoroughly multiple times. Always use fresh water for each rinse cycle.

Remember to refer to your Keurig’s user manual for specific guidance. Each model might have different instructions or button combinations for descale mode. Regular maintenance can help avoid these issues and keep your Keurig brewing smoothly.

Posted on

Quick Fixes When Your Keurig Coffee Maker Stalls

keurig machine not working

Introduction: keurig machine not working

Welcome to the ultimate troubleshooting manual for when your keurig machine not working. Keurigs have simplified the brewing process immensely, making it possible for coffee lovers to enjoy a fresh cup with just the press of a button. But despite their convenience, these machines aren’t without their hiccups.

keurig machine not working

If you find your Keurig machine not working as it should, you’re in the right place. Perhaps it won’t turn on, it’s not brewing properly, or it’s dispensing the wrong coffee volume. Whatever the issue, don’t let it disrupt your daily caffeine ritual. This blog post will guide you through quick fixes and preventive measures to keep your Keurig running smoothly.

In the following sections, we’ll walk you through common issues that may cause your Keurig to stall. We’ll provide you with a step-by-step troubleshooting guide, and share maintenance tips to prevent future problems. Plus, we’ll address frequently asked questions that might come up along the way. So, let’s get started and bring your Keurig back to life!

Common Reasons Why Keurigs Stop Working

Insufficient Power Supply

One of the most straightforward issues could be power-related. First, ensure your Keurig is plugged into an outlet and that the outlet is functional. If other devices work on the same outlet, but your Keurig doesn’t, the problem lies within the machine’s power supply. Check for a tripped circuit breaker or a blown fuse as well.

Issues with Water Reservoir Connection

Your Keurig won’t work if the water reservoir isn’t properly seated. Make sure it’s correctly snapped into place. Sometimes, air bubbles trapped in the reservoir can interfere with the machine’s operation. Remove the tank, give it a gentle shake, then reattach.

Scale Buildup Hindering Functionality

Scale buildup from hard water can impact your Keurig’s performance. This mineral buildup can clog water lines and affect heating elements. Regular descaling with a special solution or white vinegar can prevent these kinds of issues and extend your coffee maker’s lifespan.

Step-by-Step Troubleshooting Guide

Encountering a hiccup with your Keurig can be frustrating, but worry not. We’ve outlined a systematic approach to identify and solve the issue efficiently. Here, we address common malfunctions and guide you through resolving them with ease. Let’s dive into a step-by-step troubleshooting guide for your Keurig coffee machine.

Checking the Machine’s Setup

Before jumping to conclusions, check the basics:

  • Ensure your Keurig is firmly plugged into an active electrical outlet.
  • Verify that it’s switched on. Some Keurigs have a power button located on the lower right side or back.
  • Confirm there is water in the reservoir. If empty, refill it to the appropriate line.
  • Check that the reservoir is properly seated. If not, remove and reattach it to eliminate any air gaps.

If your Keurig machine still fails to operate correctly after these steps, it’s time to move to more involved troubleshooting.

Resetting Your Keurig

Often, rebooting the system can resolve electronic glitches. Here’s how to reset your Keurig:

  • Turn off the Keurig, then unplug it from the power source.
  • Wait a few minutes to let the machine reset itself.
  • Plug it back in and switch it on. This may clear any minor software issues.

Cleaning and Descaling Your Machine

Regular upkeep is essential for optimal performance:

  • Perform a deep clean of the Keurig’s removable components, like the drip tray and K-cup holder, with soap and water.
  • Use a descaling solution or diluted white vinegar to clear out any mineral build-up in the water lines.
  • Run a few water-only brew cycles to ensure all cleaning agents are completely rinsed out.

When to Contact Keurig Customer Service

If the issues persist after trying these solutions, Keurig’s customer service is your go-to:

  • Reach out to them for assistance if your machine isn’t fixed with a basic reset or clean.
  • Keurig support can walk you through any model-specific troubleshooting or arrange repairs if necessary.

By following this troubleshooting guide, you’re likely to get your Keurig back in action. Remember, regular maintenance can prevent many of these issues. So, keep your machine clean, descale regularly, and ensure proper setup for a smoother brewing experience.

keurig machine not working
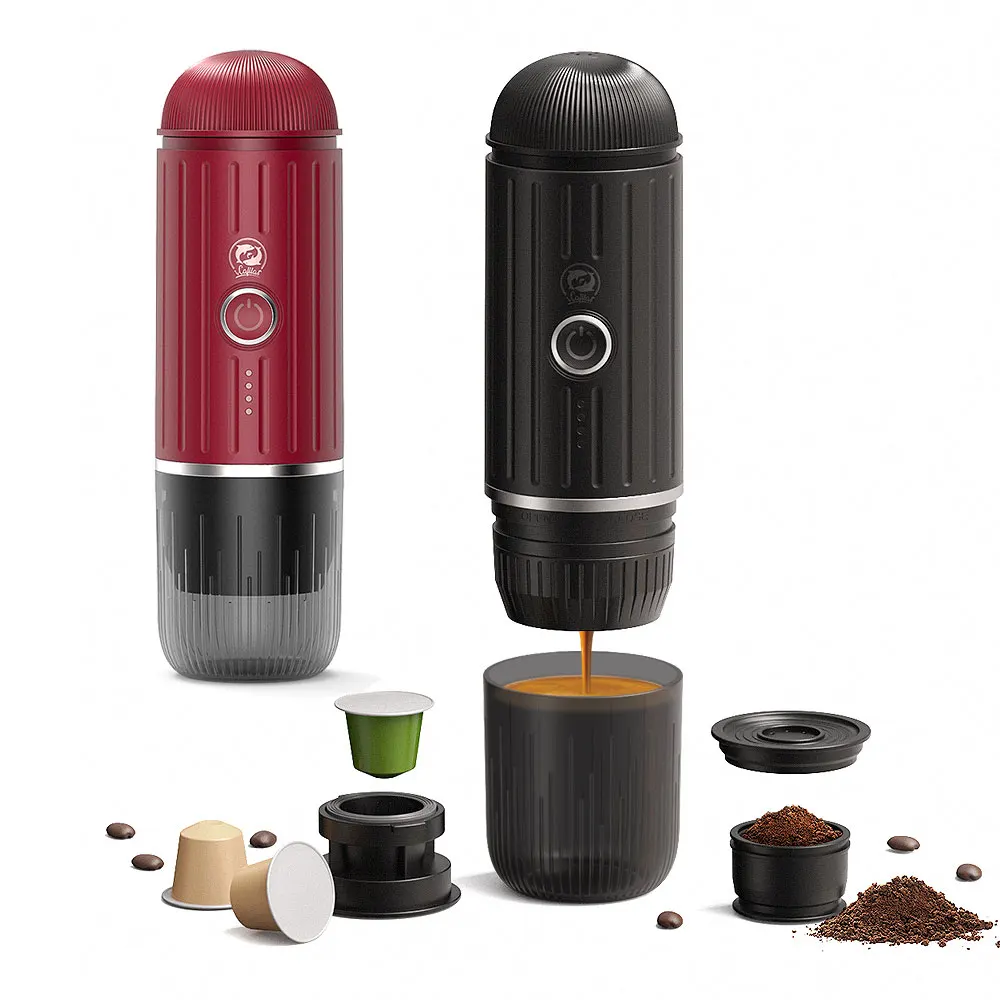
Dealing with Specific Keurig Issues

Dealing with specific issues on your Keurig can be simple if you know what to look for. Below are some common Keurig concerns, they’re possible causes, and solutions to try before contacting customer support.

Machine Won’t Turn On

If your Keurig machine is not powering up:

  • Check that it’s plugged into a working outlet.
  • Ensure the power button is firmly pressed.
  • Look for any signs of damage to the cord or unit.

Keurig Is Not Brewing Coffee

When your Keurig won’t brew:

  • Check if the machine indicates it needs water.
  • Make sure there’s no clog in the needles.
  • Run a cleansing brew cycle without a K-cup.

Keurig Dispensing Too Little or Too Much Coffee

If coffee volume is incorrect:

  • Clean the exit needle to ensure it’s not blocked.
  • Verify that the water reservoir is properly seated.
  • Check for and clear any debris from the water line.

Coffee Grounds in the Cup

If you find grounds in your cup:

  • Inspect the K-cup for puncture issues.
  • Use the correct grind size for reusable filters.
  • Clean all needles and K-cup holder regularly.

Keurig Experiencing Leakage

To deal with a leaky Keurig:

  • Check for a damaged O-ring or water reservoir.
  • Look for and seal any cracks in the unit.

Strange Noises or Beeping

For odd noises or beeping:

  • Descale the machine to remove any buildup.
  • Tighten any loose parts that may be rattling.
  • Follow reset instructions to correct any software glitches.

By taking these steps, you tackle common issues at home. Regular maintenance and knowing how to respond to specific Keurig problems can save you time and ensure you’re never too long without your coffee fix.

Maintenance Tips to Prevent Future Problems

Keeping your Keurig coffee maker in good shape requires regular attention. Here are some tips to help prevent issues and ensure your machine continues to produce great-tasting coffee.

Regular Cleaning Schedule

Maintain a consistent cleaning routine to keep your Keurig brewing smoothly:

  • Descale every 3-6 months: Use a descaling solution or vinegar to remove mineral buildup.
  • Clean after use: Wipe surfaces and remove K-cups promptly after brewing.
  • Wash removable parts weekly: Clean the drip tray, water reservoir, and K-cup holder with soapy water.

A clean machine is less likely to develop clogs or other problems that can affect its performance.

Proper Usage of K-Cups

Using K-cups correctly can impact your Keurig’s longevity and the coffee’s taste:

  • Don’t reuse K-cups: This can lead to weaker coffee and potential machine damage.
  • Check for leaks: Damaged K-cups can spill grounds into your cup or machine.

Following these steps can make a significant difference in the functioning of your Keurig.

Monitoring for Clogs and Malfunctions

Be proactive in checking for signs of trouble with your Keurig:

  • Listen for strange noises: These can indicate a clog or a mechanical issue.
  • Observe brew quality: Changes in coffee strength or temperature may signal a problem.
  • Inspect for leaks: Regularly check for water under the machine, which can hint at a malfunction.

By keeping a watchful eye on your Keurig and addressing small issues promptly, you can often prevent bigger problems down the road.

Implement these maintenance tips, and your Keurig machine not working should be a rare inconvenience. Enjoy consistent, delicious cups of coffee without the hassle of unexpected breakdowns.

Conclusion: keurig machine not working

In summary, when facing issues with your Keurig coffee maker, simple steps can often lead to a solution. Regular maintenance, proper use of K-Cups, and monitoring for potential clogs are proactive measures that can prevent many problems. However, if your Keurig is still not performing after these tips, reaching customer support is the next best step. Remember, the goal is to quickly address issues so you can get back to enjoying your coffee with minimal disruption.

Maintain your Keurig regularly, use it properly, and be vigilant for any signs of malfunction. This way, your coffee maker should serve you well, with fewer unexpected stops in your daily coffee routine. If you’ve gone through all the steps and your Keurig machine is not working, it may be time to contact the experts or consider a replacement. Enjoy your coffee moments without worry, knowing solutions are at hand when your Keurig stalls.

keurig machine not workingFAQ: Addressing Additional Keurig Concerns

In your journey with a Keurig coffee maker, you might encounter some persistent issues which simple troubleshooting or regular maintenance doesn’t seem to fix. Here, we answer further questions to help keep your brewing experience seamless.

What to Do When Descale Light Stays On

If your descale light remains lit after you’ve completed the descaling process, try the following:

  • Run one more fresh water cycle. This might clear any leftover solution.
  • Power off, then unplug your Keurig for a few minutes. This can reset the system.
  • If the light stays on, contact Keurig support for model-specific advice.

Remember, the descale light is there to ensure the longevity of your machine by prompting regular cleaning.

What If Keurig Won’t Brew Even After Troubleshooting

When you’ve tried all recommended fixes and your Keurig still won’t brew, here’s what to do:

  • Consider if it’s under warranty and if a replacement unit or part is an option.
  • Call Keurig’s customer support for step-by-step guidance. They may offer a solution you hadn’t considered.
  • Reflect on the machine’s usage length and if it might be time for a new coffee maker.

Keurig machines are reliable, but like all appliances, they have a lifespan. Assessing when to seek repairs or replacement is key to continued enjoyment of your coffee.

Posted on

Keurig Energy Consumption: Analyzing Wattage Use

keurig machine

Overview of Keurig’s Power Usage

When it comes to understanding Keurig’s energy usage, it’s essential to know that Keurig coffee machines can vary significantly in power consumption. Generally, the average wattage for these popular single-serve brewers ranges from 900 to 1500 watts. The specific amount of energy used by a Keurig can be influenced by several factors including the model type, brewing temperature, and whether the machine is brewing a cup or maintaining heat.

keurig machine

For example, during its initial startup after being off, a Keurig can reach peak usage of 1500 watts as it heats water to the right temperature for brewing coffee. If you leave the power on, the Keurig keeps the internal tank up to temperature, utilizing between 200 to 400 watts when in heating mode. While this maintenance mode consumes less power, it still contributes to the overall energy usage, particularly if the machine remains on throughout the day.

Moreover, Keurig machines incorporate modern features to manage power usage more efficiently. Certain models are equipped with auto-off functions to conserve energy when not in use, and others might offer settings that allow users to adjust the machine’s power consumption based on their preferences. Additionally, newer Keurig models are designed to be more energy-efficient, reflecting a growing consumer demand for appliances that help reduce electricity bills and environmental impact.

In sum, a Keurig’s power usage varies, but understanding the average wattage range and how the machine manages power can help individuals make informed decisions about their coffee-making habits and potential energy savings.

Factors Affecting Keurig’s Wattage Consumption

To gauge how much energy a Keurig coffee maker uses, several variables come into play. Here’s a rundown of factors that can influence Keurig’s wattage consumption:

  • Model Type: Different Keurig models use varied wattages. Standard models may use less power compared to premium ones with more features.
  • Brewing Size: Selecting a larger cup size can increase the wattage need as more water needs to be heated.
  • Brewing Frequency: More frequent use requires more energy. Each brew cycle consumes power.
  • Heat Maintenance: Keeping water hot in-between brews can add to total wattage usage throughout the day.

Understanding these factors can help you estimate the energy cost of running your Keurig. Modifying some of these aspects can lead to reduced power consumption and savings on your electricity bill.

Average Wattage Usage by Keurig Models

When examining the energy consumption of Keurig models, it’s crucial to consider the average wattage. Most Keurig coffee makers operate within a 900 to 1500 watt range. Yet, this figure can differ from one Keurig model to another.

For instance, the Keurig K-Classic, a common model, generally uses around 1500 watts when brewing coffee. By contrast, the Keurig K-Mini Plus is designed for energy efficiency, often using less than 1000 watts. The difference in wattage between models results from varying heating elements and design efficiencies.

The higher-end models with additional features, such as the Keurig K-Elite, may exceed the 1500 watt mark during peak operation, such as the initial heating phase. However, these machines usually have eco-friendly options like programmable auto-off settings to help reduce their energy footprint.

To break down the energy use further, let’s take a close look:

  • Standard Keurig Models: These typically use between 900 to 1200 watts.
  • Premium Keurig Models: With more advanced heating systems, these can use up to 1500 watts or more.
  • Compact/Mini Models: Aimed at lower power use, these models consume around 700 to 900 watts.

The wattage stated on the coffee maker’s label provides a rough idea of its power consumption during the brewing process. It’s wise to note these details when purchasing a new model if energy conservation is a priority for you.

Understanding the Cost Impact of Keurig’s Energy Consumption

How does a Keurig’s wattage usage translate to your monthly electricity bill? Let’s explore the cost impact. Keurig machines typically use between 900 to 1500 watts. This usage can affect your electricity costs, especially if the coffee maker is used frequently or left on throughout the day. Here are a few considerations:

  • Daily Use Estimate: If you use a Keurig that consumes 1500 watts daily for 10 minutes, it results in 0.25 kWh. Multiply this by 30 days, and you’ll get 7.5 kWh per month.
  • Energy Cost Calculation: To calculate the cost, multiply the monthly kWh by your local electricity rate. For example, if your rate is $0.12 per kWh, the cost would be $0.90 per month for those 10 minutes of daily use.
  • Idle Consumption: When not brewing, if your Keurig uses 200 watts to maintain heat, the cost increases. Assuming it maintains heat for 4 hours daily, it adds about 2.4 kWh per month.
  • Overall Impact: Combining brewing and idle consumption could result in a total monthly cost of a few dollars.

Keurigs, though convenient, can contribute a significant amount to the electric bill over time. This impact highlights the importance of using power-saving features and good energy practices. For example, turning off your Keurig when not in use can cut the cost. Investing in eco-friendly models with auto-off capabilities also helps reduce energy waste.

Understanding and managing the watts a Keurig uses is a simple step towards a more energy-efficient home. Moreover, it contributes to environmental well-being by reducing unnecessary power consumption.

keurig machineComparison of Keurig with Other Coffee Makers in Terms of Energy Use

When discussing a Keurig’s energy use, it’s valuable to compare it with other types of coffee makers. Different coffee makers have varying energy needs based on their design and brewing process.

  • Drip Coffee Makers: Generally, these use between 550 to 1200 watts. They’re comparable to a standard Keurig in terms of wattage.
  • Espresso Machines: High-end machines may reach up to 1500 watts. Keurigs are often in this range too.
  • Single-Serve Pod Machines (like Nespresso): These can also use 900 to 1500 watts, similar to a Keurig.
  • Percolators: They tend to be lower in energy use, often 400 to 800 watts, using less than most Keurigs.

These comparisons show that Keurigs usually fall in the mid to high range of energy use among coffee makers. Keurigs and pod-based machines have comparable energy needs, while percolators are typically more energy-efficient.

When choosing a coffee maker, it’s clear that several alternatives to Keurigs can be considered for lower energy consumption. Each person’s choice may depend on their desired brewing style and willingness to manage energy costs. Keurigs offer convenience, but other models could save more energy and money over time.

Keurig’s Power Management Features

Keurig coffee makers are designed with a number of power management features to help conserve energy. Here’s how these features work:

  • Auto-Off Function: To prevent energy waste, Keurig machines often come with an auto-off function. This feature automatically turns the brewer off after a set period of idle time. It reduces power consumption when the machine is not in use.
  • Energy-Saving Mode: Some models include an energy-saving mode. It lowers the heating element’s power draw during idle periods.
  • Programmable On/Off Times: Keurig machines with programmable settings allow users to set specific times for the machine to turn on and off. This helps ensure that the machine only uses power when needed.
  • Temperature Control: Users can often select from multiple brewing temperatures. Setting a lower temperature can save energy, as the machine works less to heat the water.

Using these features effectively can lead to a considerable reduction in a Keurig’s energy consumption. By taking advantage of auto-off, energy-saving mode, programmable times, and temperature control, you can enjoy your coffee while keeping energy use in check.

Best Practices to Reduce Keurig’s Energy Consumption

To minimize your Keurig coffee maker’s energy usage, consider the following best practices:

  1. Use the Auto-Off Feature: Take advantage of the auto-off function. Ensure it’s activated to turn your Keurig off after brewing.
  2. Limit On-Time: Avoid leaving your Keurig on all day. Only power it up for brewing, then shut it down.
  3. Brew Back-to-Back: Plan your coffee times. Brew multiple cups one after another to capitalize on the heat already generated.
  4. Pre-fill Water: Use pre-warmed water to reduce heating time. This can cut energy use per cup.
  5. Opt for Energy-Efficient Models: When buying, choose a Keurig with eco-friendly features. These models save more power.
  6. Maintain Regularly: Clean and descale your Keurig. Good maintenance keeps it running efficiently.
  7. Unplug When Not in Use: Unplugging prevents passive energy draw. Practice plugging it in only when needed.
  8. Temperature Setting: If your Keurig allows, brew at a lower temperature. Lower temperatures consume less energy.
  9. Programmable Settings: Set specific on and off times. Use programmable settings to ensure the machine runs only when necessary.
  10. Cup Size Selecting: Use smaller cup sizes if you drink less. Smaller sizes use less water, thus less energy.
  11. Insulated Cups: Serve in insulated cups to keep coffee hot longer. This avoids reheating and saves energy.

By implementing these suggestions, you can reduce the number of watts your Keurig uses. Making small adjustments can lead to noticeable savings on your electricity bill and better energy usage at home.

keurig machineSolar Power Solutions for Keurig Machines

Keurig coffee makers, while convenient, can consume a significant amount of energy. Considering the average wattage usage of Keurigs lies between 900 to 1500 watts, an eco-friendly option for brewing your coffee could be the use of solar power solutions. Solar generators convert sunlight into electrical energy, providing an excellent way to power your Keurig while reducing electricity costs and minimizing environmental impact. Here are several ways you can integrate solar power with your Keurig:

  1. Choose the Right Solar Generator: Select a solar generator with ample wattage that meets or exceeds your Keurig’s wattage. Remember, you’ll need a generator that can handle up to 1500 watts for brewing.
  2. Estimate Energy Needs: Calculate how much power your Keurig uses daily to determine the size of the solar panel system required.
  3. Portable Solar Panels: Consider portable solar panels for small-scale brewing, especially if you enjoy coffee outdoors or are often on the move.
  4. Off-Grid Systems: For those in remote areas, a complete solar power system can keep your Keurig running without relying on grid power.
  5. Battery Storage: Invest in a solar battery that stores energy, allowing you to use your Keurig even when there is no sun.
  6. Monitor Usage: Keep track of your Keurig’s energy consumption with a solar power monitoring system to manage your solar energy efficiently.

Going solar is not only good for the environment; it also provides energy independence and can lead to significant savings in the long run. As solar technology improves and becomes more affordable, more Keurig owners are turning to the sun for their daily cup of joe. Solar power is clean, renewable, and an ideal alternative for powering your beloved Keurig coffee machine.

Posted on

How to Clean Keurig 2.0: Easy Step-by-Step Guide

Keurig 2.0

Introduction to Keurig 2.0 Maintenance

Keeping your Keurig 2.0 clean is crucial for its longevity and performance. Regular maintenance does more than just extend the life of your coffee brewer – it ensures every cup of coffee tastes as fresh and delightful as possible. The Keurig 2.0 is a marvel of modern convenience, brewing up a perfect cup of coffee with ease. However, with frequent use can come the buildup of coffee oils, water minerals, and other residues that can affect both taste and functionality.

Keurig 2.0

The good news is, learning how to clean Keurig 2.0 isn’t complicated. By following a few simple steps, you can deep clean your coffee brewer and keep it in tip-top shape. Deep cleaning involves more than just a quick rinse; it includes disassembling parts, cleaning the exterior, descaling, and changing the water filter. Each step is designed to tackle different aspects of cleanliness and ensure that every nook and cranny of your Keurig is free of buildup.

Before we dive into the nitty-gritty, remember that consistent upkeep is the key to your Keurig’s performance. Aim to deep clean your brewer every 3 to 6 months, depending on your usage. Stick around, as we walk you through the process to ensure that your Keurig 2.0 continues to provide you with quick, delicious coffee every day.

Preparing Your Keurig for Deep Cleaning

Before you start the deep cleaning process, it’s essential to prepare your Keurig 2.0. Make sure to unplug the machine first for safety. A thorough deep clean requires taking apart the removable components of the coffee brewer. This step is critical as it allows you to reach areas where coffee grinds and water residues may collect over time.

Disassembling Removable Components

Begin by removing the water reservoir. Empty any remaining water. Next, take off the lid and set both aside. Locate the drip tray at the base of the unit. Slide it out carefully. The K-cup holder inside the brew chamber is next. Press on the sides gently and it should come loose. If your model has a funnel, remove it from the holder.

Some Keurigs may have additional detachable parts, so consult your user manual to make sure all components are accounted for. Usually, there is a needle that also needs cleaning, which can be gently detached. Always handle with care to avoid damaging any parts.

Place all the pieces you’ve removed into a basin of warm soapy water. Let them soak to help dissolve any buildup. This will make the parts easier to clean later on. While these components are soaking is a great time to start cleaning the main unit. Keep the user manual handy to refer to for any specific disassembly instructions for your model. Remember to wash your hands after handling the internal components, as they can be covered in coffee oils and residues.

Proceeding with caution and ensuring all parts are safely removed sets the stage for an effective deep cleaning. Proper preparation ensures your Keurig 2.0 is ready for a thorough washdown.

Cleaning External Surfaces and Appliance Exterior

Keeping the external surfaces of your Keurig 2.0 clean is as important as the internal parts. Dust, kitchen grime, and oily fingerprints can all tarnish the appearance and hygiene of your coffee brewer. To tackle this, you’ll need a reliable cleaning solution and a good microfiber cloth or sponge. Start by wiping down the entire exterior with a damp cloth to remove loose debris.

Handling Greasy Buildup and Dust

Greasy buildup is a common issue, especially if your Keurig is near the stove or in a busy kitchen. To handle it, create a solution of equal parts white vinegar and water. Add a drop of dish soap for extra degreasing power. Dip a cloth in this mix and wring it out well. Then, gently rub away the grease and buildup. If the grime is stubborn, use a bit of olive oil on a paper towel as a pre-treatment. Olive oil breaks down grease effectively, making it easier to clean off. After treating with oil, go back over the areas with the vinegar solution to ensure all oil residue is removed. Finish by wiping the entire machine with a clean, damp cloth to remove any cleaning solution. Dry it off with another cloth to prevent water spots. Remember to clean the drip tray and K-cup holder. These can be hand washed or placed in the dishwasher if they are dishwasher safe. Include this in your regular cleaning to avoid coffee stains and buildup.

A clean Keurig not only looks better but also contributes to better tasting coffee. Make sure to repeat this process regularly, and always consult your machine’s manual for any specific care instructions. Remember, a well-maintained Keurig is the secret to enjoying that perfect cup every time.

The Descale Process for Your Keurig 2.0

Descaling is key to keeping your Keurig 2.0 running smoothly. This process removes mineral buildup inside the brewer. These minerals come from water and can affect your coffee’s taste and your machine’s function. It’s a simple task, but vital to do every few months.

Running Vinegar and Water Through the System

To start the descale process, mix white vinegar with water. Use an equal amount of each. Pour this mixture into the water reservoir. Then, run the brew cycle several times without a K-cup. Doing this cleans out the system from the inside.

Use a large mug to catch the water-vinegar mix as it cycles through. Keep going until you’ve used all the mixture. The acid in the vinegar breaks down any scale that’s built up. Your Keurig might need one full reservoir of vinegar and water to get fully clean.

Be sure to do this when you can open a window. The vinegar smell can be strong. But don’t worry, it won’t last long and is a sign the cleaning is working. Regular descaling extends your Keurig’s life and makes each cup of coffee better.

Keurig 2.0Rinsing and Final Steps to Remove Vinegar Taste

After descaling with vinegar, rinsing is crucial to remove any vinegar taste. Begin by filling the Keurig 2.0 water reservoir with fresh water. Run several brew cycles with just water, as if making coffee, but without a K-cup. This flushes the internal system. It helps to discard the water-vinegar solution used for descaling. Keep running water through the system until there’s no vinegar smell. Make sure to use a large cup to catch the water.

Descaling might leave a strong scent. It is important to ventilate the area well during this step. Open windows or use a fan to help clear out any lingering vinegar odor. The goal is to make sure your next cup of coffee is as fresh as possible, free of any off-tastes from the cleaning process. Once the smell is gone, your Keurig 2.0 is ready for regular use again.

Remember, a properly rinsed Keurig ensures a pure coffee flavor in your next brew. Make rinsing a priority after descaling to maintain the taste quality of your coffee. Cleaning your Keurig 2.0 can be easy when you know how to clean Keurig 2.0 with the correct steps.

Replacing the Water Filter Cartridge

A fresh water filter ensures your coffee tastes great and your Keurig 2.0 works well. Over time, the water filter in your Keurig can collect impurities from tap water, affecting both flavor and brewer performance. To keep your coffee tasting its best, it is important to change the water filter cartridge as recommended.

Understanding Filter Change Indicators and Installation

The Keurig 2.0 will often tell you when it’s time to replace the filter. You may see alerts on the machine’s display or notice a change in the taste of your coffee. Most filters need changing every 2 months or after 60 tank refills. Check your Keurig’s manual for exact timings.

Changing the filter is quick and simple. Start by soaking the new filter in water for 5 minutes. Then, wash the mesh of the lower filter holder. Insert the new filter into the holder and snap its lid closed. Put the filter holder back in place in the water reservoir. When you next turn on your Keurig, remember to run a few water brew cycles. This will clear out any carbon particles and prime the new filter. With a new water filter in place, your next cup of coffee should be as fresh and delicious as ever.

Regularly replacing the water filter cartridge is a simple yet key step in maintaining your Keurig 2.0. Make note of when you install a new filter so you can track when to change it next. Through this, and the cleaning steps previously outlined, you’ll ensure that your Keurig 2.0 remains a reliable companion for your daily coffee routine.

Keeping Your Keurig 2.0 Clean Long-Term

A well-maintained Keurig 2.0 brewer means better coffee every day. To avoid frequent deep cleans, follow these regular maintenance tips. They’ll help keep your brewer in great shape and your coffee tasting excellent.

Regular Maintenance Tips

Keep your Keurig 2.0 performing well with these simple, regular maintenance habits:

  • Wipe it Down Daily: Quickly wipe the exterior after use. It prevents dust and splatters from building up.
  • Empty the Drip Tray: Check and empty the drip tray often. This avoids overflow and mold growth.
  • Purge After Use: Every few days, run a water-only brew cycle. It clears out leftover coffee residue.
  • Soak Removable Parts Weekly: Once a week, soak the water reservoir, drip tray, and K-cup holder in soapy water. Rinse them well.
  • Look for and Remove Debris: Occasionally check for coffee grounds or debris. They can block the needle or other parts.
  • Use Bottled or Filtered Water: This reduces mineral buildup and may extend times between descaling.

By adding these habits to your routine, you lower the chances of clogs and ensure each cup of coffee is fresh. A little bit of regular care can save you time on deep cleaning sessions and keep your Keurig 2.0 ready for your next coffee break.

Keurig 2.0Conclusion: Benefits of a Clean Keurig 2.0

Maintaining a clean Keurig 2.0 is more than just a chore; it’s an investment in your daily coffee experience. Regularly following the steps outlined, including deep cleaning and descaling, can lead to several key benefits:

  • Consistently Great Taste: Residue and buildup can make your coffee taste off. A clean brewer means a fresher, purer taste with every cup.
  • Extended Machine Life: By tackling mineral buildup and preventing blockages, you keep your Keurig 2.0 functioning longer, saving money on potential repairs or replacements.
  • Energy Efficiency: A scaled-up machine has to work harder, using more electricity. Clean parts allow for smoother operation and better energy use.
  • Healthier Brews: Keeping your machine clean minimizes the risk of mold and bacterial growth, ensuring your coffee is as healthy as it is delicious.

For optimal results, integrate the ‘how to clean Keurig 2.0’ process into your routine. Efficient maintenance not only enhances the performance and durability of your Keurig 2.0 but also contributes to the overall enjoyment of your coffee-making experience. Clean wisely and drink joyfully!

Posted on

How Much Caffeine in a Keurig Pod?

caffeine in a keurig pod

The popularity of single-serve coffee makers, particularly Keurig machines, has transformed the way many people enjoy their daily cup of coffee. As convenience becomes increasingly valued in our fast-paced lives, individuals are often left wondering about the caffeine content in their favorite Keurig pods. With so many options available, understanding how much caffeine is in a Keurig pod can be pivotal for optimizing both flavor and energy levels.

The Basics of Caffeine

Caffeine is a natural stimulant most commonly found in coffee, tea, and various energy drinks. It works by stimulating the central nervous system, which can enhance alertness and reduce the perception of fatigue. For many, a good cup of coffee is not just a morning ritual but a necessity for achieving daily productivity.

Importance of Understanding Caffeine Content

Knowing how much caffeine is in a Keurig pod not only helps coffee aficionados choose their preferred brew but also assists in managing daily caffeine intake. Some individuals may wish to limit their caffeine consumption due to health concerns or personal preference, while others actively seek it out for that extra boost during the day. Therefore, understanding the quantities involved can lead to more informed choices.

caffeine in a keurig pod

How Much Caffeine is in Specific Keurig Pods?

Keurig offers a vast array of coffee pods from various brands, each with unique flavor profiles and varying caffeine levels. Typically, the caffeine content varies with factors such as the type of coffee, brewing method, and serving size.

Standard Keurig Pod Caffeine Content

Most standard Keurig coffee pods (usually ranging from 8 to 12 ounces) contain approximately 75 to 150 milligrams of caffeine per serving. This variation largely depends on the type of coffee chosen.

  • Light Roasts: Generally, light roasts have more caffeine because the roasting process slightly diminishes caffeine content as beans are cooked longer. In a standard pod, you might find anywhere from 90 to 140 milligrams.
  • Medium Roasts: Medium roasts often fall in the range of 70 to 120 milligrams per pod. This is the most popular choice for many users, balancing flavor and caffeine content effectively.
  • Dark Roasts: While dark roasts might seem stronger in flavor, they often contain less caffeine due to the longer roasting time. Expect anywhere from 60 to 100 milligrams per pod.

Specialty Pods and Extra Caffeinated Options

For those looking for an even greater caffeine kick, Keurig also offers specialized pods. Brands such as Death Wish Coffee and other “high caffeine” variants may contain significantly more.

  • Death Wish Pods: Known for being one of the strongest coffees available commercially, their pods can pack around 200 to 300 milligrams of caffeine per serving.
  • Extra Caffeinated Brands: Some brands offer “extra caffeinated” blends, which can reach up to 190 milligrams.

Knowing this information can help consumers make choices that align with their caffeine tolerance and daily requirements.

Decaf Options

Not everyone wants a caffeine boost, and fortunately, there are decaffeinated Keurig pods available. Generally, decaffeinated coffee has about 2 to 5 milligrams of caffeine per serving. While this is significantly lower, it can still impact sensitive individuals, especially if consumed in larger quantities.

The Decaffeination Process

The decaffeination process removes caffeine from coffee beans, but it doesn’t eliminate it completely. Different methods can result in varying levels of residual caffeine. It’s essential to check the packaging for specific information if you are monitoring your intake strictly.

How Brewing Method Affects Caffeine Content

Beyond the type of coffee pod you choose, the brewing method can significantly influence how much caffeine ends up in your cup. The standard Keurig machines brew coffee quickly, usually in under a minute, which can affect extraction levels and caffeine yield.

Brew Strength Settings

Many Keurig machines come equipped with brew strength settings, allowing users to opt for a stronger or more mild cup of coffee. When set to a stronger option, you could extract more caffeine from the pod.

  • Regular Strength: This will yield a standard caffeine amount as specified by the pod’s label.
  • Strong Brew Setting: Using this setting can increase caffeine extraction, potentially raising the caffeine content by 20% or more, depending on the specific pod.

caffeine in a keurig pod

Regional Variations and Brand Differences

It’s worth noting that different coffee brands may disclose varying caffeine levels based on their proprietary blends and roasts. Depending on where they source their coffee beans, the inherent caffeine content can differ.

Factors That Influence Caffeine Variations

  • Bean Type: Arabica beans typically have less caffeine than Robusta beans. Some brands use blends, creating fluctuations in caffeine levels.
  • Roasting Level: As discussed earlier, the roast level crucially affects caffeine, with lighter roasts generally being higher in caffeine.
  • Ground Size: The grind size of the coffee used in a pod can also influence caffeine extraction. Finer grinds tend to release caffeine more effectively.

Monitoring Your Daily Caffeine Intake

For individuals looking to manage their caffeine consumption, understanding how much caffeine is in a Keurig pod becomes paramount. The FDA suggests a maximum daily intake of 400 milligrams for most adults, which equates to about 4 to 5 cups of coffee.

Tracking Consumption

To keep your caffeine levels in check, consider the following strategies:

  • Keep a Log: You could track your daily consumption by noting the caffeine content from each Keurig pod.
  • Set Limits: Decide beforehand how many cups of coffee you will have in a day, and stick to it.
  • Explore Alternatives: Switch to lower-caffeine options like decaf, tea, or herbal alternatives to reduce intake without eliminating the enjoyment of a warm beverage.

A Closer Look at Popular Keurig Brands

Some brands stand out among the multitude of options available, often due to their popular blends and buzz among coffee lovers. Below, we will examine some of the most popular Keurig pod brands to see how they stack up in terms of caffeine content.

Green Mountain Coffee

Green Mountain Coffee is one of the original Keurig brands, known for its quality and variety. Caffeine content in Green Mountain pods can range from 75 to 150 milligrams, depending on the roast.

Starbucks® by Nespresso

Starbucks® offers a unique line of K-Cups, known for their bold, rich flavors. The caffeine content in these pods typically ranges from 130 to 160 milligrams, making them a popular choice for those seeking a pick-me-up.

Dunkin’ Donuts

Dunkin’ offers a delectable selection of Keurig pods, often inspired by their flagship retail coffee. Their pods usually contain around 120 milligrams of caffeine.

Folgers

A household name, Folgers’ coffee pods provide a range of options, typically containing around 70 to 120 milligrams, allowing consumers to enjoy their classic flavors without excessive caffeine.

caffeine in a keurig podPersonal Preferences and Health

While caffeine consumption is safe for most people, it can have varying effects based on individual health circumstances, tolerance levels, and personal preference. Some individuals thrive on caffeine, while others experience jitters, anxiety, or insomnia.

Understanding Personal Tolerance

It’s essential to recognize your own caffeine tolerance. Understanding how much caffeine is in a Keurig pod and how it affects you can guide your choices. It might require some trial and error to discover the perfect balance for your needs.

Sensitivity to Caffeine

If you find that caffeine makes you anxious or disrupts your sleep patterns, it might be worth considering lower-caffeine options or adjusting the time you enjoy your coffee.

Conclusion

Knowing how much caffeine is in a Keurig pod allows coffee lovers to make informed decisions that align with their lifestyle and health requirements. Whether you’re a casual drinker seeking just a little energy boost, an aficionado looking for the perfect cup, or someone who needs to limit caffeine intake, having a clear understanding of caffeine content can enhance your coffee experience. With such a wide range of options available, you can easily tailor your Keurig experience to suit your needs while enjoying the convenience that these innovative machines provide.