Posted on

My Keurig K Supreme Plus Won’t Turn On: Troubleshooting Guide

keurig k supreme plus

The Keurig K Supreme Plus is a popular coffee maker celebrated for its convenience, speed, and rich brew options. However, like any appliance, it can encounter issues that may prevent it from functioning correctly. One common problem users face is when their Keurig K Supreme Plus won’t turn on. This guide aims to assist you in diagnosing and solving this frustrating issue, ensuring that you can enjoy your coffee without prolonged delays.

Understanding the Basics of Your Keurig K Supreme Plus

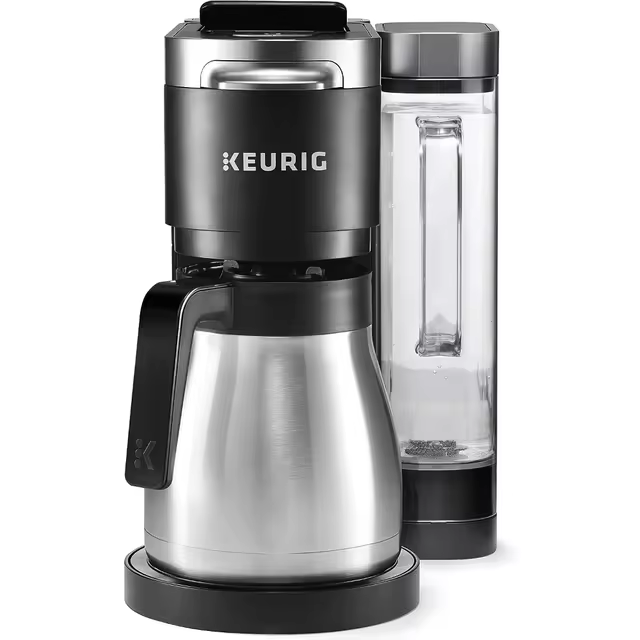
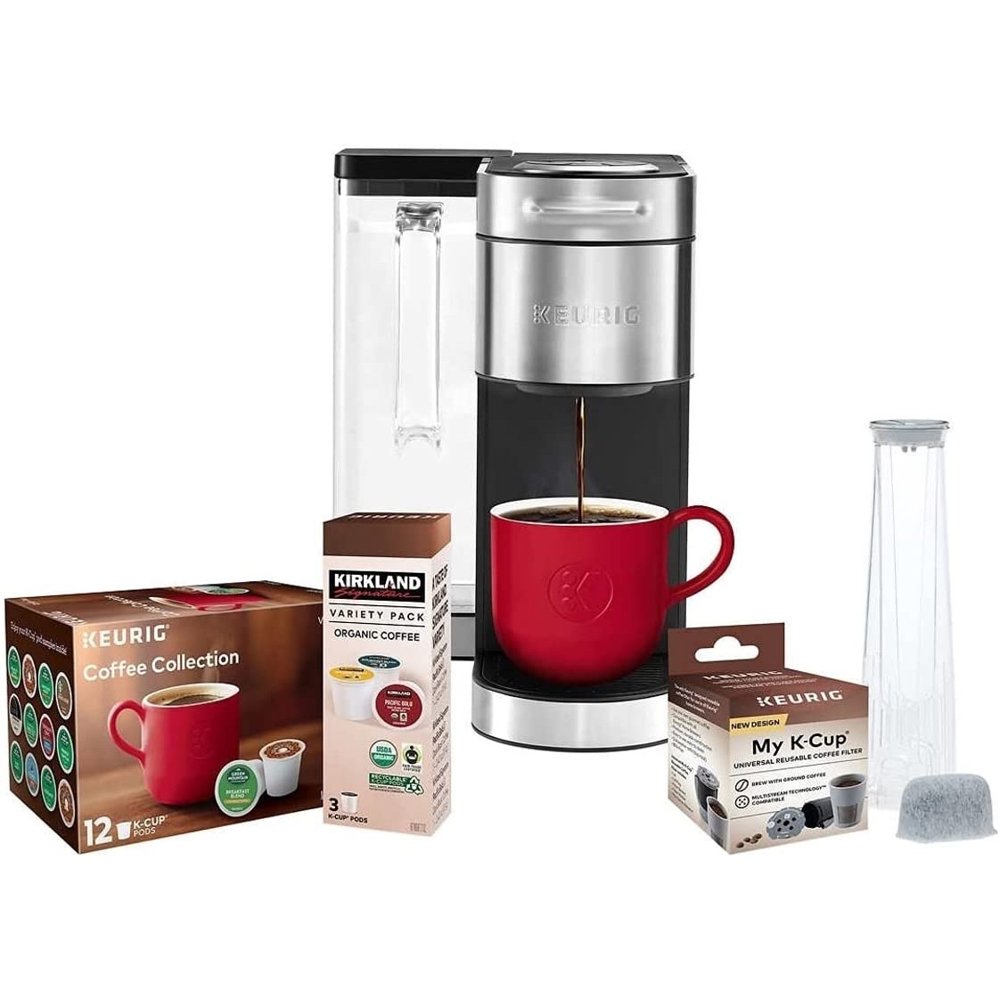
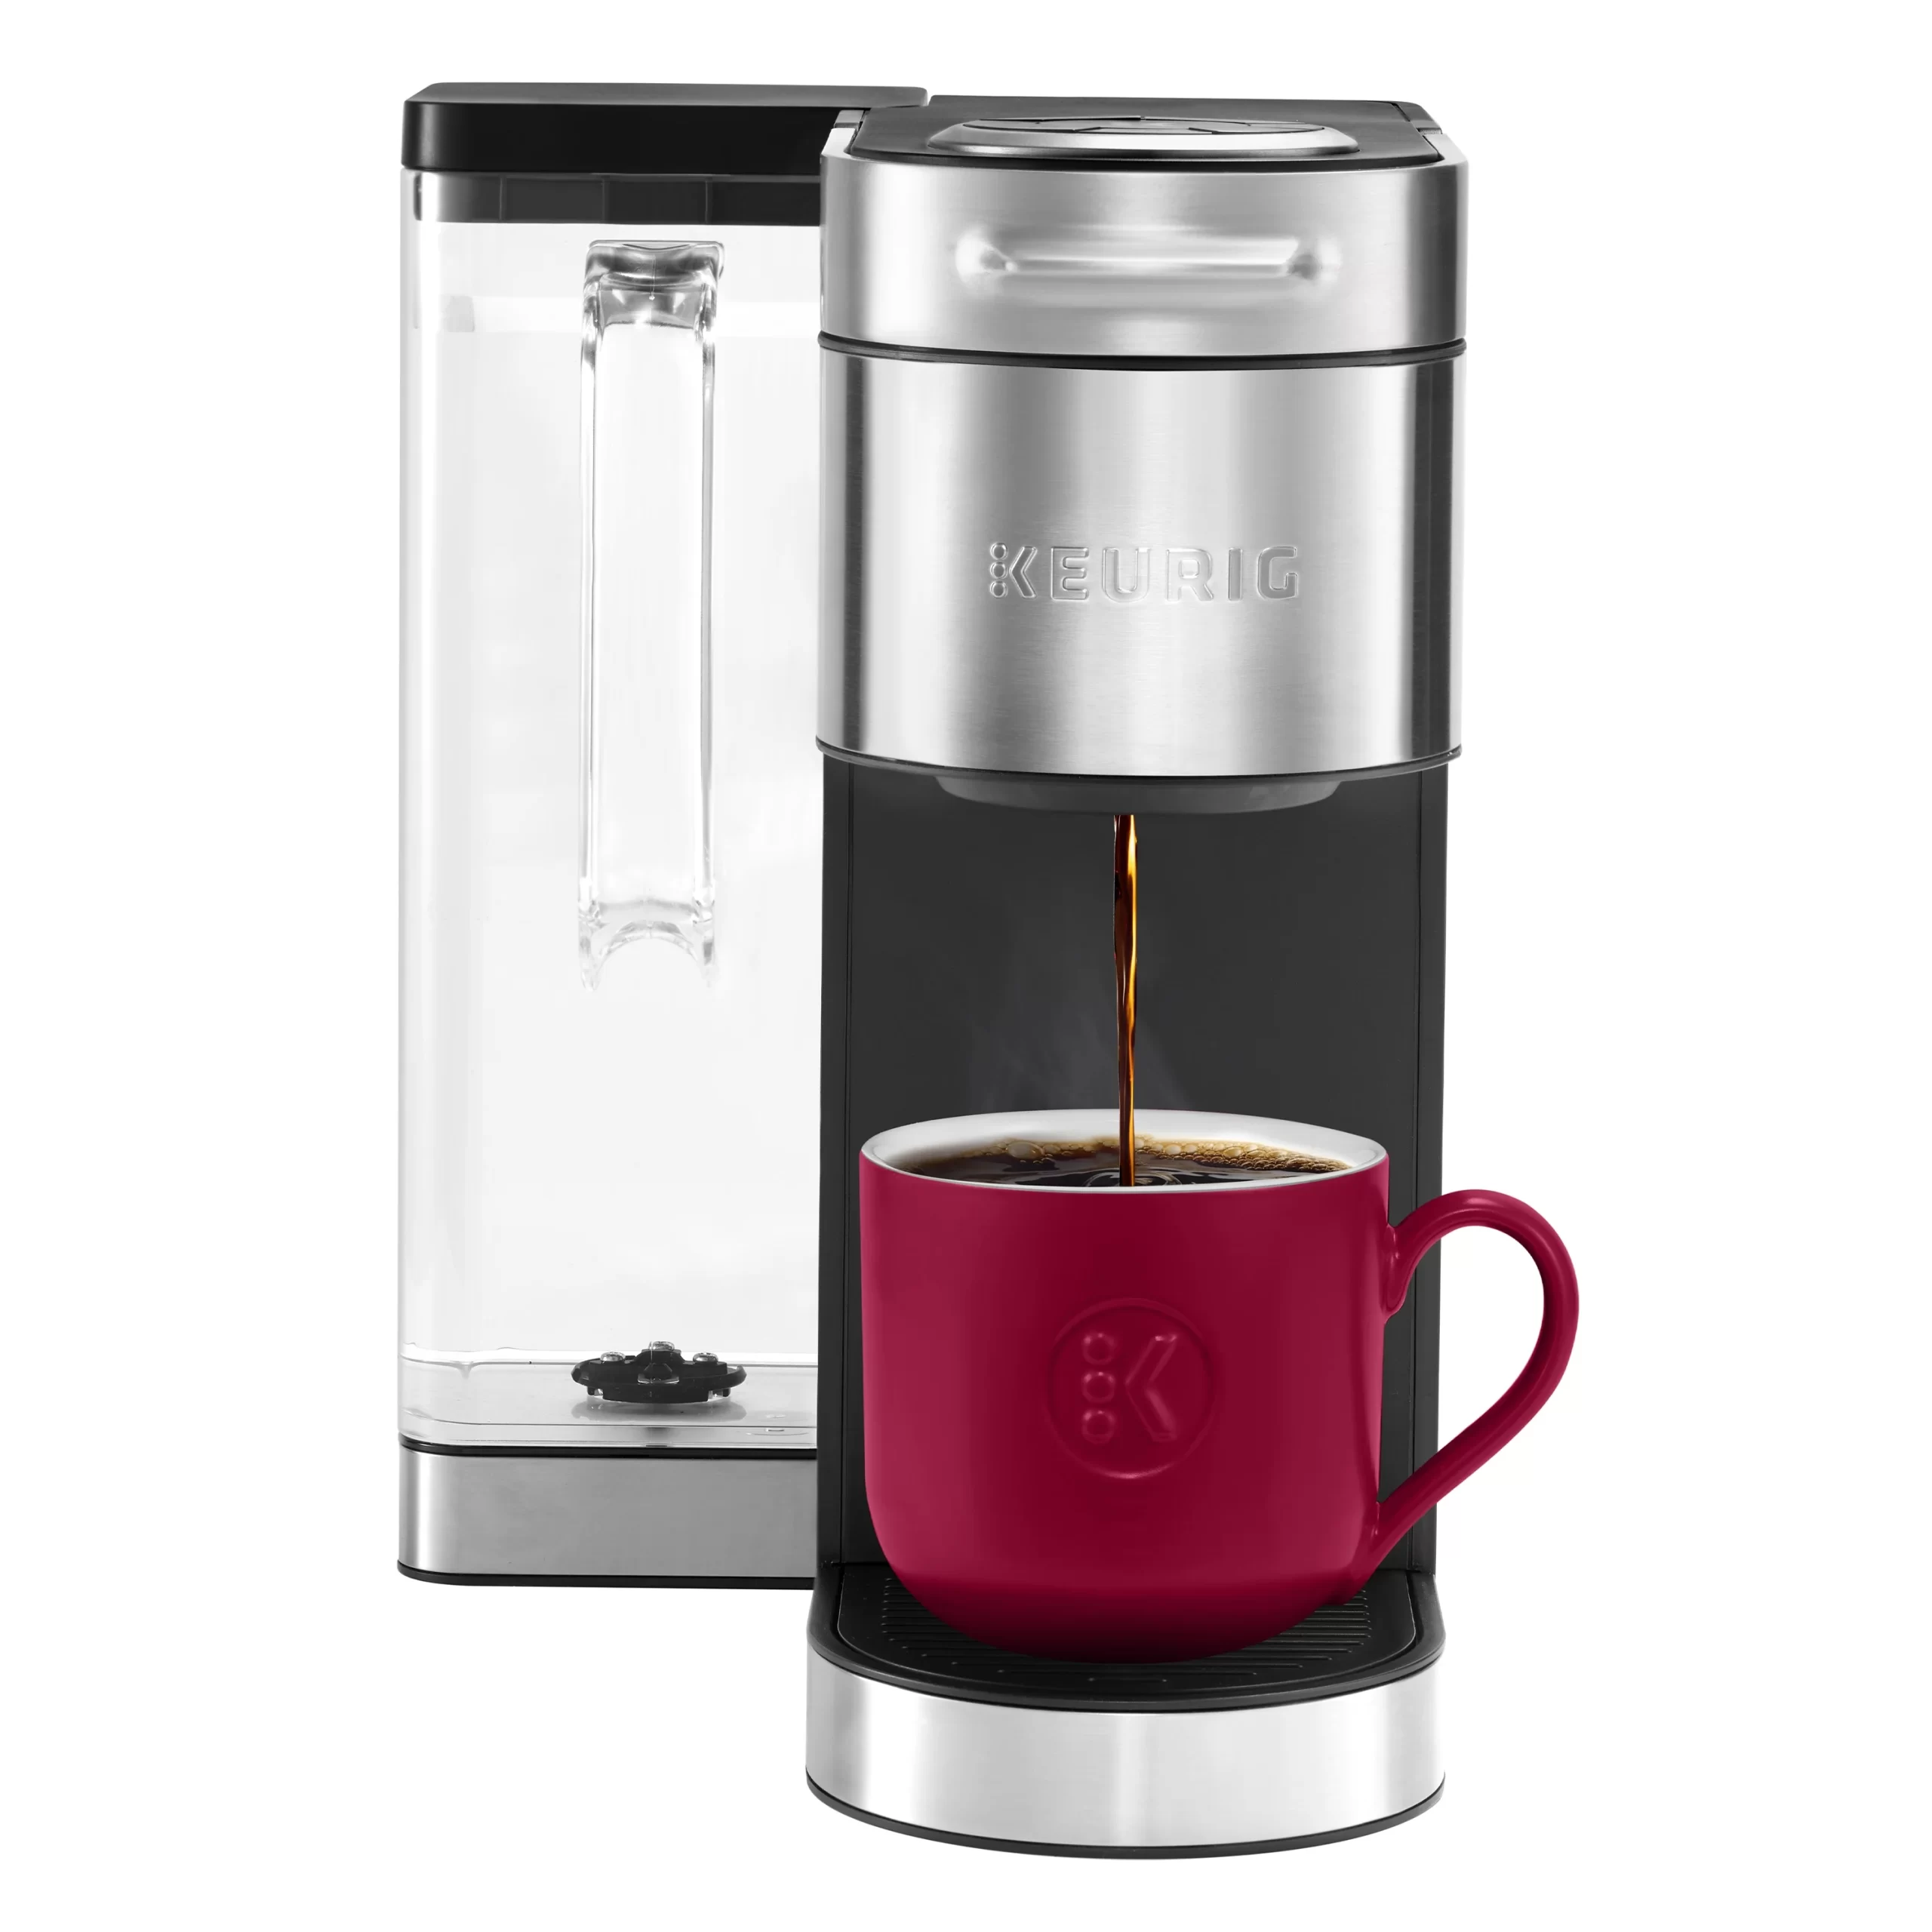
The Features of the Keurig K Supreme Plus

Before diving into troubleshooting, it’s essential to understand the features that make the Keurig K Supreme Plus a unique machine. This coffee maker is equipped with innovative technology such as the MultiStream Technology, which offers improved extraction for a more flavorful cup of coffee. Additionally, its customizable settings allow users to adjust brew sizes, strengths, and temperatures, making it suitable for a wide range of preferences.

Common Components and Their Functions

To understand why your Keurig K Supreme Plus won’t turn on, it’s helpful to know its components. Here are some common parts:

  • Power Button: The device’s primary power control, essential for turning the machine on and off.
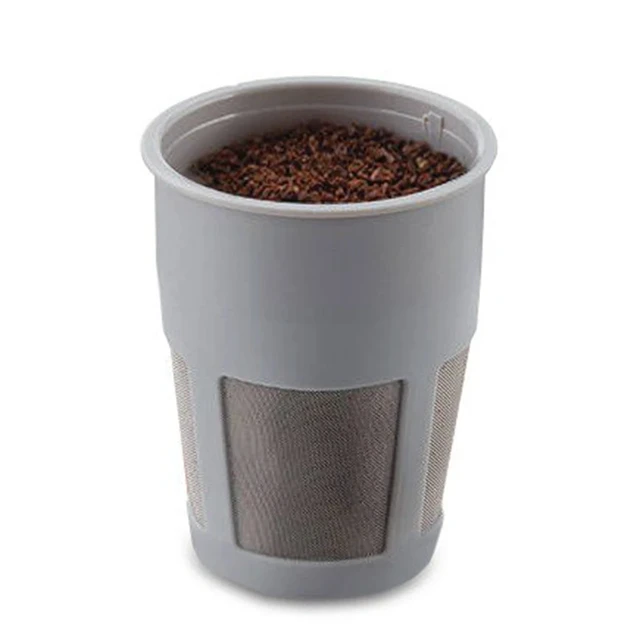
  • Water Reservoir: Holds water for brewing. If empty, your machine might behave abnormally.
  • Heating Element: Heats water during the brewing process. If it’s malfunctioning, that could prevent your machine from turning on.
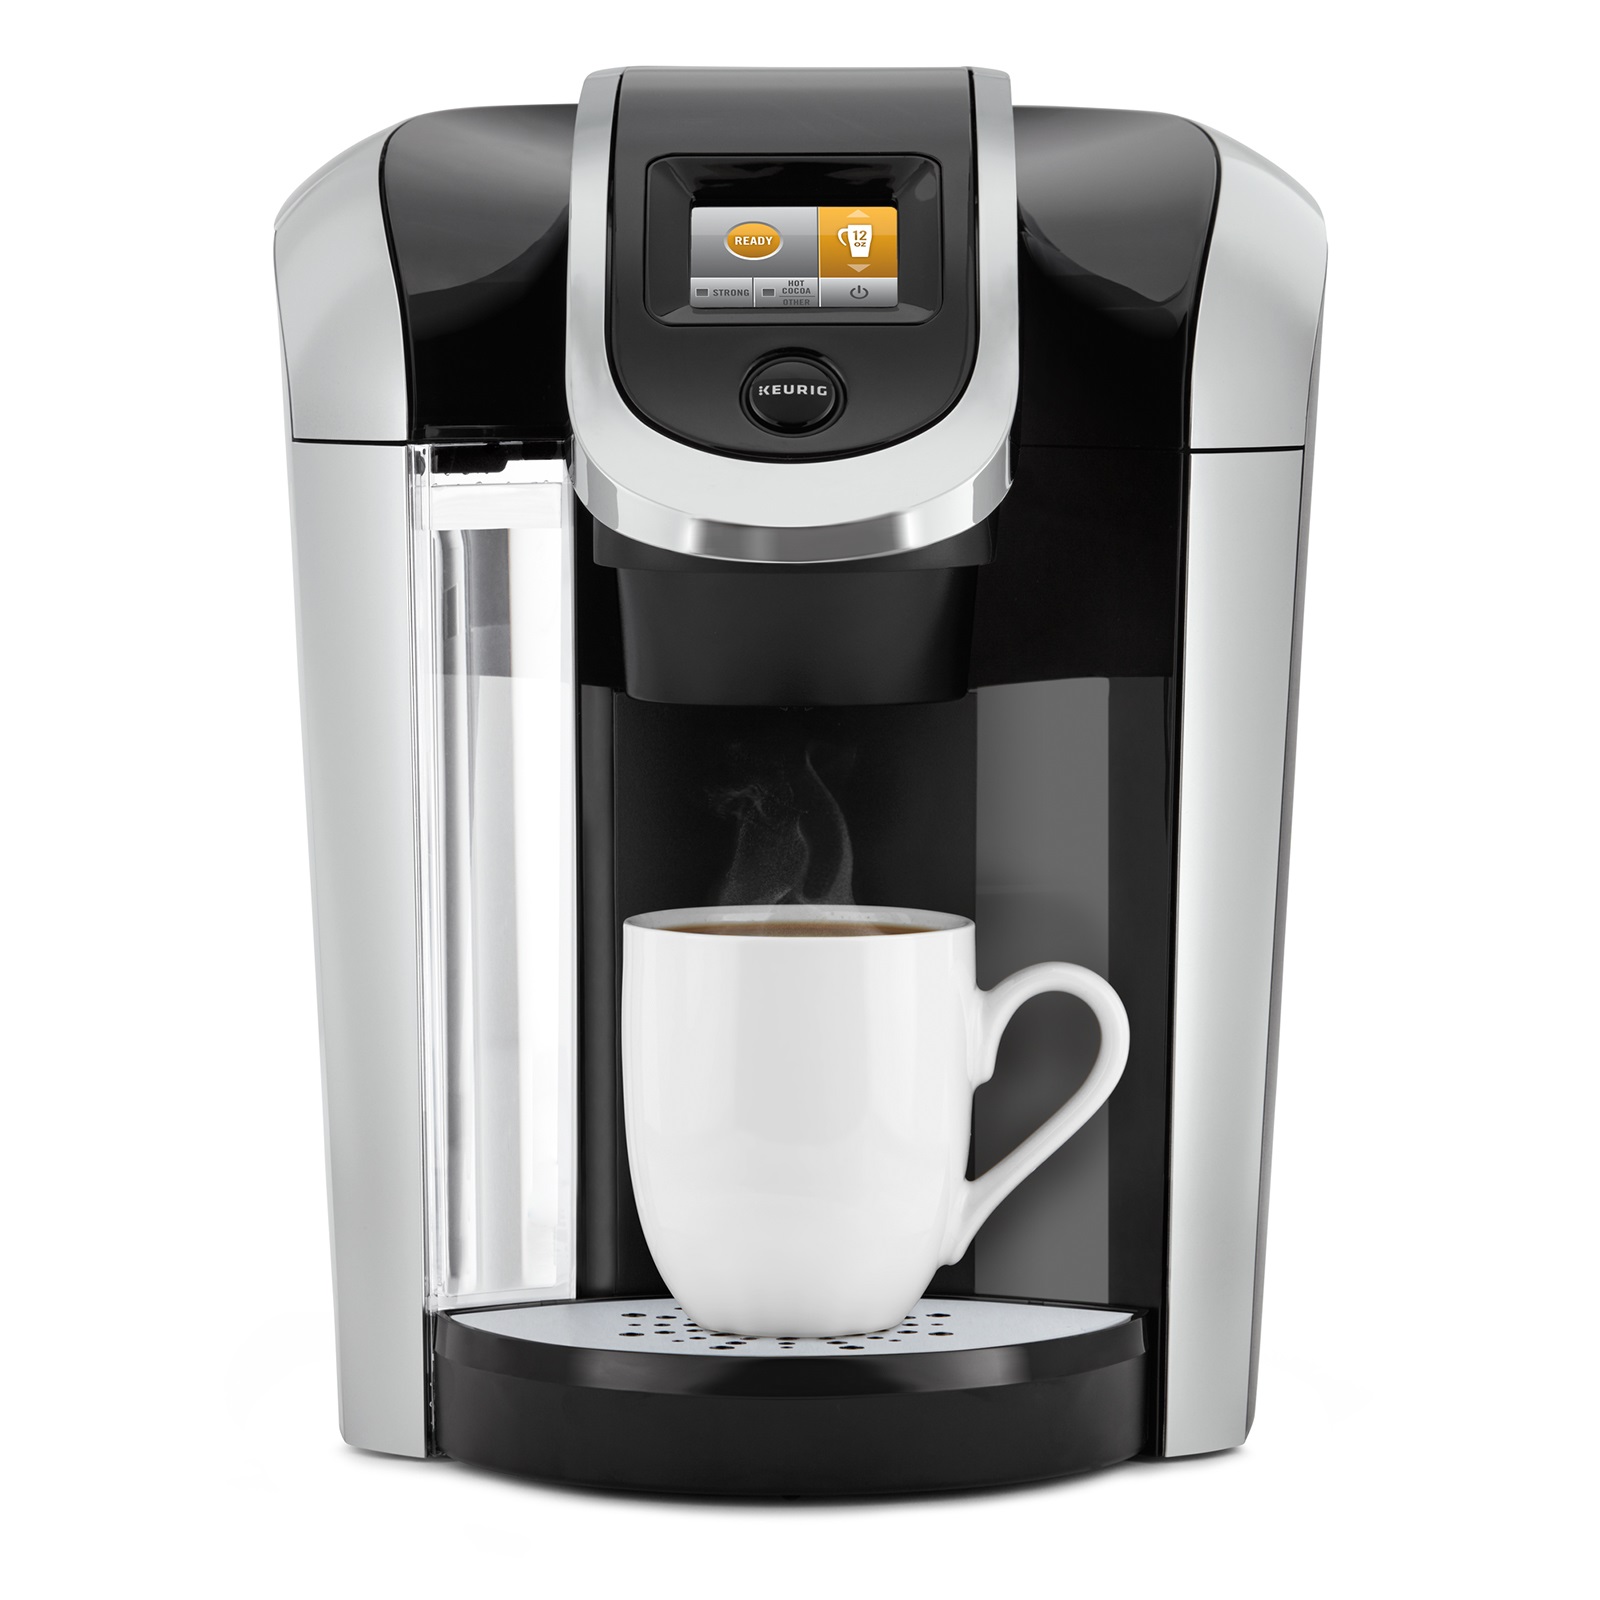
  • Control Panel: Houses the settings and customization options for your beverage.

Understanding these components will assist you in diagnosing potential issues more effectively.

keurig k supreme plus

Initial Diagnosis: Power Supply Issues

Check the Power Source

If your Keurig K Supreme Plus won’t turn on, the first step is to ensure it is receiving power. Here are steps to follow:

  1. Outlet: Ensure that your machine is plugged into a functioning electrical outlet. You can check this by plugging in another device, like a lamp, to see if it works.
  2. Power Cable: Examine the power cable for any visible damage or fraying. If the cable is damaged, it may need to be replaced.
  3. Surge Protectors: If you’re using a surge protector, try plugging the machine directly into the wall outlet.

Circuit Breaker and Fuse Check

Sometimes, a tripped circuit breaker can prevent your coffee maker from receiving power. Locate your electrical panel and check if any breakers have been flipped. If so, reset the breaker. Similarly, if your house uses fuses, inspect them to ensure they’re intact.

Exploring Internal Issues

Resetting the Machine

Sometimes, your Keurig K Supreme Plus may need a reset to function again. Follow these steps:

  1. Unplug the machine from the outlet.
  2. Wait for about 30 seconds.
  3. Plug it back in and try turning it on again.

This simple process can clear minor errors or glitches that might be keeping your machine from powering on.

Inspecting for Overheating

The Keurig K Supreme Plus features an automatic shut-off system designed to prevent overheating. If the machine has reached an unprecedented temperature, it may stay off until it cools down. Here’s what to do:

  1. Allow the machine to cool for 30-60 minutes.
  2. Once it’s cool, try turning it on.

If it powers on after cooling, the issue may have been a one-time occurrence. However, if it frequently overheats, consult a technician or the customer service department.

keurig k supreme plus

Water Reservoir and Internal Components

Ensuring a Proper Water Supply

Another common reason for your Keurig K Supreme Plus not turning on could be an empty or improperly placed water reservoir. Here’s what to check:

  1. Water Level: Make sure the water reservoir is filled to the recommended level. If it’s empty, the machine may not turn on.
  2. Placement: Ensure the reservoir is securely placed in its position. If it’s not seated correctly, the machine may not function.

Checking the Internal Components

If you’ve confirmed the external power and water supply are adequate, the issue may lie within the internal components. Here are areas to inspect:

  • Heating Element: If the heating element is damaged, the machine will not operate. This component may need servicing.
  • Sensors: Various sensors monitor the water level and temperature. If they are malfunctioning or broken, your machine may not power on.

If you are comfortable opening the unit, you can carefully check these components, but if not, it may be best to consult customer service or a technician.

Conducting Further Troubleshooting Steps

Cleaning the Machine

Sometimes, built-up residue from coffee oils and minerals can lead to operational issues. Regular cleaning can help maintain optimal performance:

  1. Descaling: Follow the manufacturer’s instructions for descaling the machine. Use a descaling solution if possible.
  2. External Cleaning: Wipe down the exterior and clean the water reservoir weekly to prevent buildup.

Checking for Software Issues

Modern appliances often come with software that can experience glitches. If your Keurig K Supreme Plus has a display panel, check for any error messages that might indicate a specific issue. Refer to the user manual to decode the message.

Sometimes, unplugging the machine for several hours may help reset the software component.

The Importance of Professional Help

When to Contact Customer Service

If you’ve followed all the logical troubleshooting steps and still find that your Keurig K Supreme Plus won’t turn on, it may be time to reach out to customer service. Here are signs you should contact them:

  • Persistent Issues: If the problem continues even after multiple attempts to troubleshoot.
  • Warranty Considerations: If your machine is still under warranty, contacting customer service might be beneficial for repairs or replacements.
  • Complex Repairs Needed: If you suspect complex internal issues, a technician may be required for further assistance.

Finding a Qualified Technician

If your machine is no longer under warranty and you wish to have it repaired, ensure you find a qualified technician. Look for someone specialized in appliance repair and preferably experienced with Keurig machines.

A good technician can quickly diagnose the problem and recommend repair options that may save you time and money in the long run.

keurig k supreme plusPreemptive Measures for Future Use

Regular Maintenance and Care

To ensure your Keurig K Supreme Plus operates smoothly and minimizes the chances of it not turning on in the future, adopt a regular maintenance schedule:

  • Descale Monthly: Depending on your water hardness, descaling monthly or bimonthly can prevent build-up.
  • Regular Clean-ups: Clean the exterior and all removable parts every week.
  • Water Checks: Frequently check and refill the water reservoir to ensure proper operation.

Understanding Usage Limitations

Be mindful of your machine’s capacity and limitations. Overusing it without allowing it to rest can lead to overheating and potential power issues. Allow your Keurig K Supreme Plus regular breaks during heavy use.

Conclusion: my keurig k supreme plus won’t turn on

Experiencing issues with a coffee maker can be disheartening, especially when you rely on it for your daily caffeine fix. If your Keurig K Supreme Plus won’t turn on, remember to work through the outlined steps for troubleshooting. From verifying power sources to checking internal components, many paths can lead you to the resolution you need.

In case the problem persists, don’t hesitate to reach out to customer service or a qualified technician to get your machine back to brewing delicious coffee. Being proactive in maintenance and addressing potential issues promptly can contribute significantly to the longevity and performance of your Keurig K Supreme Plus.

Posted on

Why Is My Keurig Not Making a Full Cup of Coffee?

keurig coffee maker

Introduction:

Keurig coffee makers have become a staple in many households, providing the convenience of brewing a quick and easy cup of coffee. However, it’s frustrating when your faithful brewing companion doesn’t deliver a full cup of coffee. This article explores various reasons why your Keurig may fail to make a complete cup and offers troubleshooting tips to get it back to its best brewing performance.

Understanding the Keurig Brewing System

Before diving into troubleshooting, it’s essential to understand how a Keurig coffee maker works. At its core, a Keurig machine heats water and forces it through a coffee pod, extracting the flavors and aromas from the coffee grounds.

Components of the Brewing System

There are several critical components inside a Keurig coffee maker:

  • Water Reservoir: This is the tank where you fill water for brewing. It can hold varying capacities depending on the machine model.
  • Heating Element: The heating element is responsible for bringing the water to the optimal brewing temperature.
  • Pump: This component applies pressure to push water through the coffee pod.
  • Coffee Pod Holder: This is where you place your K-Cup or compatible pod.

Understanding these components can help in diagnosing the issue when your Keurig fails to produce a full cup of coffee.

keurig coffee maker

Common Reasons for Insufficient Coffee Volume

In most cases, if your Keurig is not making a full cup, it’s likely due to one of several common issues. Let’s explore these reasons in detail.

Clogged Water Lines

One of the primary reasons for insufficient brewing is clogging in the water lines. Over time, coffee oils, minerals, and other residues can accumulate in the system, hindering water flow.

Identifying a Clogged Water Line

  • Weak Coffee Output: If the coffee brews but is significantly less than your usual volume, clogging could be the cause.
  • Unusual Sounds: A gurgling or sputtering sound during the brewing process can indicate that water is struggling to flow.

How to Fix Clogged Lines

  1. Descale Your Keurig: Regular descaling helps prevent mineral buildup. Use a commercial descaling solution or a mixture of equal parts vinegar and water.
  2. Run a Clean Cycle: After descaling, run at least two clean cycles with just water to flush out any remaining residues.

Incorrect Cup Size Setting

Many Keurig models allow users to select different cup sizes. If the machine isn’t set to the appropriate size, you may end up with less coffee than you expected.

Checking Your Settings

  • Cup Size Buttons: Make sure you’re pressing the button meant for your desired cup size. If you selected a smaller size by mistake, you’ll only get a fraction of a full cup.
  • User Manual: Refer to your machine’s user manual for specific instructions on changing the cup size settings.

Low Water Level in the Reservoir

It may seem obvious, but a low water level in the reservoir can hinder the amount of coffee brewed. If there’s not enough water, the system won’t yield a full cup.

How to Ensure Proper Water Levels

  1. Check the Reservoir: Generally, the reservoir needs to be filled to the “MAX” line for optimal brewing.
  2. Refill Regularly: Make it a habit to refill the water reservoir whenever you make your coffee.

keurig coffee maker

Clogged Coffee Pod Holder

Sometimes the issue could stem from the coffee pod holder itself. Coffee grounds can get stuck, creating blockages that prevent the water from flowing through the pod effectively.

Identifying a Clogged Coffee Pod Holder

  • Visual Inspection: Open the coffee pod holder and check for any visible coffee grounds or debris.
  • Brewing Issues: If you notice that coffee hasn’t brewed correctly, or if you find residual coffee grounds after brewing, it may be clogged.

Cleaning the Coffee Pod Holder

  1. Remove the Holder: Most Keurig models allow you to detach the coffee pod holder easily.
  2. Rinse it: Use warm water to rinse the holder and ensure all coffee grounds and debris are removed.

Air Bubbles in the Water Line

Air bubbles may interrupt the flow of water through the Keurig’s internal system. This can hinder the brewing process and prevent a full cup from being made.

How to Identify Air Bubbles

  • Unique Brewing Sounds: Listen for any off sounds during operation, which might suggest changes in water flow.
  • Inconsistent Coffee Output: If you notice that only some brews get the desired volume, air bubbles could be to blame.

Eliminating Air Bubbles

  1. Run Water Through the System: Brew a cycle with just water to help flush out any trapped air.
  2. Prime the System: If the machine has a prime option, use it to remove trapped air.

Problems with the Heating Element

If your Keurig isn’t heating water properly, it may result in less coffee than desired. A malfunctioning heating element will not allow the water to reach the ideal temperature for brewing.

Identifying Heating Problems

  • Cold Coffee: If your coffee isn’t hot, the heating element might not be functioning properly.
  • No Noticeable Heating: Run a clean cycle with only water and feel the reservoir afterward. If it’s not warm, the heating element is likely the issue.

What to Do about Heating Problems

  1. Check Power Supply: Ensure the machine is plugged in properly and there are no issues with the outlet.
  2. Professional Repair: If the heating element is faulty, consider reaching out to customer service for your specific device to discuss repair or replacement.

keurig coffee makerRoutine Maintenance for Optimal Performance

To prevent issues like not brewing a full cup of coffee, regular maintenance is essential. Here are some routine tasks to keep your Keurig running smoothly.

Performing Regular Descaling

Descaling your Keurig every three to six months will minimize mineral buildup.

  1. Use a Descaling Solution: Commercial descaling solutions are specially formulated for coffee machines.
  2. Follow the Instructions: Ensure you follow the manufacturer’s guidelines for descaling, including brewing cycles with water after applying the solution.

Cleaning the Exterior and Interior

Keeping the exterior clean helps maintain hygiene and device functionality.

  • Wipe Down Regularly: Use a damp cloth to clean the exterior, including buttons and surfaces.
  • Wash Removable Parts: Every few weeks, remove and wash the reservoir, drip tray, and coffee pod holder.

Checking for Software Updates

Some of the newer Keurig models are equipped with smart technology that may require software updates.

  1. Connect to Wi-Fi: If applicable, connect your machine to Wi-Fi and check for any available updates.
  2. Follow On-Screen Instructions: Updates can often enhance the brewing process and resolve existing issues.

When to Seek Professional Help

If you’ve tried all the above solutions and still find yourself asking, “why is my Keurig not making a full cup of coffee?” it may be time to call in a professional.

Warranties and Customer Support

Check whether your Keurig is still under warranty. If so, these support services can provide repairs, replacements, or troubleshooting assistance.

  1. Contact Customer Service: Have your model number and a description of the issue ready.
  2. Visit Authorized Service Centers: In some cases, an authorized service center may be your best bet for a thorough examination and repair.

Conclusion

Understanding why your Keurig is not making a full cup of coffee can significantly improve your brewing experience. By recognizing potential issues like clogged water lines, improper settings, and maintenance requirements, you can troubleshoot and resolve the problem effectively. Regular upkeep and attention to the machine’s functionality go a long way in ensuring you keep sipping great coffee from your Keurig machine. If all else fails, don’t hesitate to seek professional support to restore your coffee maker to proper working conditions. By addressing these concerns directly, you can ensure that your mornings remain caffeinated and satisfying.

Posted on

Understanding Keurig Overflowing: Causes and Solutions

keurig overflowing

If you’re a coffee lover, there’s a good chance you own a Keurig machine. This convenient device allows you to brew a fresh cup of coffee in minutes, but what happens when your delightful morning routine turns into a mess? Keurig overflowing is a common issue that can leave your kitchen counter looking like a caffeine explosion. In this detailed guide, we will explore the causes of Keurig overflow, preventive measures, and effective solutions, ensuring you can enjoy your coffee without the hassle of an overflowing machine.

The Mechanics Behind Keurig Machines

Before diving into the problem of overflowing, it’s essential to understand how Keurig machines operate. Understanding this will provide insights into why malfunctions, such as overflowing, might occur.

How a Keurig Machine Works

Keurig machines utilize a unique brewing system designed for single-serve coffee. The process generally includes:

  1. Water Reservoir: Holds water, which is pumped into the brewing chamber as needed.
  2. K-Cup Pod: A pre-packaged coffee pod that contains coffee grounds, sealed for freshness.
  3. Heating Element: Heats water to the optimal brewing temperature before passing it through the coffee grounds.
  4. Drip Tray: Collects any overflow or drips that might occur during the brewing process.

Common Parts Involved in Overflowing

When it comes to overflowing, specific components play a crucial role. These include the water reservoir, the brew chamber, and the drip tray. If any of these parts malfunction or are improperly maintained, it can lead to an overflow situation, creating a mess that no coffee lover wants to deal with.

keurig overflowing

Common Causes of Keurig Overflowing

Now that we’ve established how a Keurig machine works, let’s delve into the various factors that can lead to overflowing.

1. Clogged Needles

One of the most frequent culprits in Keurig overflowing is clogged needles. These needles puncture the K-Cup pod to allow hot water to flow through. If they become clogged with coffee grounds or debris, the water can’t pass through correctly, leading to an overflow situation.

2. Overfilled Water Reservoir

Another common cause is when the water reservoir is overfilled. If the water level exceeds the maximum fill line, any additional water will have nowhere to go but out of the machine. This can create a mess on your countertop.

3. Damaged K-Cup Pods

Using damaged or punctured K-Cup pods can also lead to overflowing. If a pod is compromised, hot water may leak out instead of flowing through the coffee grounds, causing the machine to overflow.

4. Improper Cleaning

Many people forget to clean their Keurig machines regularly. Over time, mineral deposits and coffee oils can build up, which can impede normal operation. Neglecting this maintenance can lead to clogs and ultimately overflowing.

5. High Brew Temperature

If the brew temperature is set too high, it can result in steam buildup inside the brewing chamber. This excessive pressure can lead to a malfunction, causing the machine to overflow.

6. Faulty Drip Tray

If the drip tray is not positioned correctly or has been damaged, it may not be able to catch excess liquid properly. Missing or misaligned drip trays are often overlooked and can lead to large spills on the counter.

Preventive Measures to Avoid Overflowing

Preventing Keurig overflowing is typically easier than dealing with the aftermath. Here are several actionable tips:

Regular Maintenance

  1. Clean the Needles: Use a paperclip or a specialized cleaning tool to clear out the needles regularly.
  2. Descale the Machine: Every few months, run a descaling solution through your machine to remove mineral buildup.
  3. Replace Water Filter: If your machine requires a water filter, ensure it is replaced per the manufacturer’s recommendations.

Water Level Management

Make it a habit to check the water reservoir before you brew. Always fill it below the maximum line to avoid overflow situations. This simple check can save you from a morning mess.

Pod Inspection

Take a moment to inspect your K-Cups before using them. If you notice any damage or compromise in packaging, replace the pod with a new one to avoid issues.

Temperature Settings

Familiarize yourself with the temperature settings on your machine. If you notice that your machine’s brew temperature is set unusually high, adjust it to a more moderate setting.

Drip Tray Check

Before brewing, ensure that the drip tray is correctly positioned and free from cracks or previous spills. Regularly emptying it can prevent overflow from accumulating.

keurig overflowing

Troubleshooting Keurig Overflowing Issues

If you find yourself facing an overflowing machine despite taking preventive measures, it might be time to troubleshoot. Here’s a simple guide to help diagnose and resolve the issue.

Step 1: Turn Off the Machine

Before performing any troubleshooting, turn off the machine to avoid any potential burns or injuries.

Step 2: Check the Water Reservoir

Inspect the water reservoir for overfilling. If it exceeds the maximum fill line, carefully pour out the excess water. Rinse the tank to remove any debris or scale.

Step 3: Clean the Needles

Using a paperclip or a specialized tool, clear any coffee grounds from the needles. Proceed carefully to avoid damaging the mechanism.

Step 4: Check the K-Cup Pod

Remove the K-Cup pod and inspect it for tears or punctures. If found defective, replace it with a new pod. Run a brewing cycle with water (no coffee) to clear the system.

Step 5: Inspect the Drip Tray

If the drip tray is full, empty it. Also, check for any misalignment or damage. It should fit snugly into its slot to catch excess liquid efficiently.

Step 6: Look for Blockages

Check the water lines for clogs. If you suspect a blockage, descaling the machine might help. Follow the instructions provided in your machine’s manual.

Step 7: Contact Customer Support

If the problem persists despite troubleshooting, it may be time to consult the customer service of the manufacturer. There could be an underlying issue that requires professional attention.

Tips for Cleaning Up After an Overflowing Situation

Even the most vigilant coffee lovers can find themselves dealing with an overflowing Keurig. In such cases, knowing how to clean up is essential. Here are some tips:

1. Act Quickly

The longer coffee and water sit on your counter, the more significant the mess will become. Grab some paper towels or a cloth and start cleaning immediately.

2. Use an Absorbent Cloth

An absorbent cloth can help soak up excess liquid quickly and efficiently. Avoid using sponges, as they can push liquid around rather than absorb it.

3. Clean As You Go

If you notice any coffee or water drips, clean them up as they occur to prevent the buildup of sticky residue.

4. Wipe Down the Machine

After cleaning the spill, take some time to wipe down the exterior of your Keurig machine to remove any coffee splashes or stains.

5. Check Surrounding Areas

Don’t forget to check the area beneath and behind the machine. Any spilled liquid can attract pests if left unchecked.

6. Assess the Situation

Once you’ve dealt with the immediate mess, take some time to consider the underlying cause of the overflow. Ponder on potential lifestyle changes, such as regular maintenance schedules, that can prevent future occurrences.

keurig overflowingThe Benefits of Proper Maintenance

Maintaining your Keurig machine not only helps prevent overflowing but also enhances your overall brewing experience. Proper maintenance ensures:

1. Improved Taste

A clean machine brews better-tasting coffee. Dirty components can affect the flavor of your brew, leading to a less enjoyable cup.

2. Longevity of the Machine

Taking care of your machine can extend its life, saving you money over time. Regular maintenance can prevent costly repairs or replacements.

3. Better Performance

When your machine is free from clogs and debris, it operates more efficiently, decreasing the risk of overflow and other malfunctions.

4. Hassle-Free Brewing

When well-maintained, you can brew your coffee without worry. Say goodbye to the anxiety of unexpected spills and hello to a seamless coffee experience.

Conclusion

Keurig overflowing can be a frustrating issue, but understanding the causes and implementing preventive measures can significantly reduce the likelihood of this happening. Whether it’s maintaining your machine, ensuring proper water levels, or inspecting K-Cup pods, small changes can lead to a smoother coffee experience. The next time you brew your favorite cup, rest easy knowing that you’ve taken the necessary steps to keep overflowing at bay. So, embrace your love for coffee and enjoy every moment of your brewing ritual without the fear of Keurig overflowing!

Posted on

Can You Make Espresso with a Keurig?

make espresso with a keurig

If you own a Keurig coffee machine, you might find yourself wondering: can you make espresso with a Keurig? The answer isn’t as straightforward as a simple yes or no. While Keurig machines weren’t specifically designed to brew espresso, they do offer various options to create a coffee-like beverage that mimics some of the characteristics of espresso. In this article, we will walk you through the ins and outs of using a Keurig for espresso, the characteristics of true espresso, and some tips and tricks to enhance your coffee experience.

Understanding Espresso

What Is Espresso?

Espresso is a concentrated form of coffee brewed by forcing hot water through finely-ground coffee beans at high pressure. The result is a small, robust shot of coffee, typically served in a demitasse cup. Espresso is the foundation for many coffee-based drinks, such as lattes, cappuccinos, and Americanos. The experience of drinking espresso goes beyond just the flavor; it involves aroma, crema (the reddish-brown foam on top), and the mouthfeel of the drink itself.

The Anatomy of Espresso

True espresso consists of three key components: the liquid, the crema, and the aroma.

  1. Liquid: The espresso shot is usually about one ounce and should have a rich, velvety texture.
  2. Crema: This is a silky, frothy cap that forms from the fine coffee grounds and the high pressure of the brewing process. It’s essential for authentic espresso.
  3. Aroma: The scent of espresso is complex and nuanced, often featuring notes of chocolate, caramel, or even fruit, depending on the beans used.

Why the Method of Extraction Matters

The way coffee is extracted has a significant impact on the final product. Traditional espresso machines use 9 bars of pressure to extract coffee, leading to a strong taste and distinctive texture. Many home-brewing methods can’t replicate this pressure, limiting their ability to provide an authentic espresso experience.

make espresso with a keurig

The Keurig Coffee Machine: A Quick Overview

What Is a Keurig Machine?

Keurig machines utilize single-serve pods, allowing coffee lovers to brew a cup of coffee quickly and conveniently. They were created to provide a hassle-free way to brew various beverages, including coffee, tea, and hot cocoa, without needing extensive brewing knowledge or equipment.

Different Models of Keurig Machines

Keurig offers a variety of models, from basic single-cup brewers to more advanced machines that can handle multiple beverage sizes and strengths. Some models even include steam functions to froth milk, a feature that might come in handy if you’re trying to replicate espresso-based drinks.

The Brewing Mechanism

A Keurig works by heating water and forcing it through coffee grounds located in a pod. The process is simple and quick, making Keurig machines a popular choice for coffee lovers everywhere. However, the brewing method is quite different from traditional espresso-making, which creates limitations for those who want to make espresso-like beverages.

Can You Make an Espresso-Like Beverage with a Keurig?

Brew Strength and Size Settings

Some Keurig machines offer strength settings, allowing users to brew a cup that is more concentrated than their standard settings. By selecting a smaller cup size, such as 4 or 6 ounces, you can create a stronger flavor profile that may somewhat resemble an espresso shot.

Using Espresso Pods

Keurig offers specific espresso pods, which are typically marketed under names like “Keurig Espresso” or “Keurig Specialty Brew.” These pods contain coffee that’s specially ground and blended to give a flavor more closely aligned with espresso than standard coffee.

Limitations of a Keurig for Espresso

While you can create a concentrated coffee that mimics some elements of espresso, it’s important to note that it won’t produce the same level of richness, crema, or variability in flavor. The pressure used in a Keurig is significantly lower than that in a traditional espresso machine, which means you’ll miss out on some of the nuances that come with true espresso.

make espresso with a keurig

Tips for Creating a More Espresso-Like Experience

Use Quality Pods

If you’re keen on recreating an espresso-like beverage, the quality of your coffee pod will play a crucial role. Look for brands that market themselves as espresso pods, which often feature specialty blends designed to offer deeper flavors.

Experiment with Grind Size

Though many Keurig pods come pre-ground, there are reusable pods available that allow you to use your own coffee grounds. If you opt for this method, select a finer grind; this can help elevate the richness of your brew.

Opt for Smaller Cup Sizes

Choosing a smaller cup size will give the coffee a more concentrated flavor. Always opt for the smallest available setting to achieve a fuller taste that aligns more closely with what you’d expect from a shot of espresso.

Enhance with Frothing Options

While a Keurig doesn’t come with a built-in frother, you can purchase a separate milk frother to create a creamy texture for your beverages. Frothing milk allows you to enjoy drinks like cappuccinos and lattes, providing a more authentic espresso experience.

Consider Adding Flavor

To mimic the complexity of espresso, consider incorporating other elements like syrups or flavored creamers. Adding a splash of vanilla or caramel can transform your cup into something reminiscent of a café-style drink.

Keep Your Machine Clean

The cleanliness of your Keurig machine can affect the flavor of your brew. Regularly descale and clean your machine to ensure that leftover coffee oils and residues don’t compromise your coffee’s taste.

Traditional Espresso vs. Keurig Coffee: A Direct Comparison

Flavor Profile

While a traditional espresso has a rich and complex flavor profile, many Keurig coffee options can fall flat in comparison. Espresso often has a thicker mouthfeel and nuanced flavors that come from specific brewing techniques. A Keurig coffee might be strong but usually won’t be as flavorful overall.

Pressure and Extraction

As stated earlier, the high pressure used in traditional espresso machines creates a unique extraction process that enhances both flavor and aroma. In contrast, Keurig machines generally operate at lower pressure, resulting in a different brewing experience.

Crema

The absence of crema in a Keurig brew is one of the most significant differences between Keurig coffee and espresso. Crema not only adds to the aesthetic appeal of a shot of espresso, but it also contributes to the overall flavor and mouthfeel.

make espresso with a keurigAlternatives for Espresso Lovers

Investing in an Espresso Machine

If you’re seriously craving authentic espresso, investing in a dedicated espresso machine might be worth considering. While they can be more expensive upfront, the quality of your coffee will significantly improve. Espresso machines come in various forms, from manual to semi-automatic to fully automatic machines, allowing you to choose the best option for your coffee needs.

Stovetop Espresso Makers

Stovetop espresso makers, commonly known as Moka pots, offer a budget-friendly alternative for brewing coffee that resembles espresso. While the pressure levels are still not equal to traditional espresso machines, they do create a stronger and more concentrated brew compared to regular coffee methods.

Aeropress

The Aeropress is another affordable option for coffee lovers looking to create espresso-like beverages at home. With the ability to brew coffee using pressure, the Aeropress allows you to experiment with different grind sizes, strengths, and flavors. Many coffee aficionados love it for its versatility and the rich coffee it produces.

Conclusion

So, can you make espresso with a Keurig? While the short answer is no, due to the different brewing methods and pressures involved, you can still create an espresso-like beverage using various techniques and tips mentioned in this article. While it may not replace the experience of true espresso, making adjustments like selecting quality pods and adjusting the grind size can help you make the most of your Keurig machine. If you find yourself craving a more authentic espresso experience, you might consider investing in more specialized brewing equipment. Regardless of the method you choose, coffee should always be an enjoyable and satisfying experience!

Posted on

My Keurig Wont Turn On: Troubleshooting Guide

Coffee Maker keurig

Introduction: My Keurig Won’t Turn On

Keurig coffee makers are beloved by many for their convenience and the quality of coffee they produce. However, there might come a time when you find yourself facing a frustrating issue: my Keurig wont turn on. This situation can be not only annoying but also puzzling, as you may rely on your machine for your morning brew. Before you consider replacing your beloved appliance or resorting to instant coffee, read through this comprehensive troubleshooting guide. We’ll explore possible causes and solutions to get you back to brewing delicious coffee.

Coffee Maker keurig

Understanding Your Keurig Coffee Maker

The Essential Components

Your Keurig coffee maker consists of various components that work together to brew coffee efficiently. Understanding these components can help pinpoint the issue when your machine is unresponsive.

  1. Water Reservoir: This holds the water that will be heated to brew your coffee.
  2. Heating Element: This part warms the water to the perfect brewing temperature.
  3. Pump: This moves water from the reservoir into the brewing chamber.
  4. Control Panel: This is where you interact with your Keurig, pressing buttons and selecting brew sizes.

Common Uses and Benefits

Your Keurig allows you to enjoy a fresh cup of coffee in minutes. Its pod-based system eliminates the hassle of grounding coffee beans, measuring coffee, and cleaning up messes. The ability to brew a single cup also means you can quickly cater to different coffee preferences in your household. However, when issues arise—like my Keurig won’t turn on—the convenience you typically appreciate turns into a source of frustration.

Initial Checks: Power and Connections

Is It Plugged In?

The first step in troubleshooting your Keurig is to check if it’s plugged in. It’s a simple check, but you’d be surprised how often people overlook this. The plug should be securely seated in the outlet.

Inspect the Power Outlet

If the machine seems unplugged, inspect the outlet. Is it working? Try plugging another device into the same outlet to confirm there’s power flowing. If the outlet is dead, consider resetting it or asking for help from a qualified electrician.

Check the Power Cord

Sometimes the issue isn’t with the outlet but with the power cord itself. Look for frays or cuts that might indicate damage. If the cable appears compromised, it’s essential to replace it to ensure safe operation.

Coffee Maker keurig

Resetting Your Keurig

Performing a Simple Reset

If you’ve confirmed the power supply is fine, a simple reset may resolve the problem. Unplug the machine and let it sit for about 30 seconds before plugging it back in. Sometimes, a brief break can help reset internal components that may be miscommunicating.

Factory Reset (for Wi-Fi models)

If you own a newer model with Wi-Fi capabilities, you can execute a factory reset. This action will restore all settings to their default. For specific instructions, consult your user manual, as procedures may differ among models.

Internal Problems

Water Reservoir Issues

The water reservoir has to be properly seated for your Keurig to function. If it’s not clicked in securely, the machine may assume it has no water and won’t turn on. Remove and reinsert the reservoir carefully to ensure a good fit.

Clogged Water Lines

Over time, mineral buildup can cause blockages in the water lines. This can create issues that prevent your machine from turning on or working correctly. If you suspect clogging, consider running a descaling solution through your machine.

Heating Element Failure

In some cases, the internal heating element may have failed. This part is essential for the proper functioning of your Keurig. If your machine is not heating water, it won’t turn on properly. If you suspect this is the case, contacting customer support for repair options may be your best bet.

Additional Troubleshooting Techniques

Consult the Manual

Every Keurig model comes with a user manual that offers specific information about troubleshooting problems. Check your manual for error codes or indicators that might shed light on why my Keurig wont turn on.

Regular Maintenance Checks

Taking the time to perform regular maintenance can prevent issues. Clean out the water reservoir, descaling regularly, and checking for coffee pod clogs can go a long way in keeping your Keurig in tip-top shape.

Use Quality Pods

Sometimes low-quality coffee pods can lead to complications in your machine’s functioning. Ensure you are using Keurig-approved pods or high-quality alternatives. This can minimize the risk of clogs and other issues.

When to Seek Professional Help

Warranty Considerations

If your Keurig is still under warranty, consider contacting Keurig support for professional help. Opening the machine yourself could void the warranty, limiting your options for customer service.

Replacing Components

Sometimes, the solution may involve replacing specific components rather than the entire device. If you’re comfortable, check for available parts and replace failing elements, like the heating element or pump.

Customer Service Support

If all else fails, reach out to Keurig’s customer service. They are trained to handle a variety of issues and can often guide you directly to the solution you need. They may even provide tips that are specific to your model, assisting you in getting your Keurig up and running.

Coffee Maker keurigThe Importance of Regular Cleaning and Maintenance

Preventative Measures

Keeping your Keurig clean is essential to its longevity. Regularly clean the parts that come into contact with water and coffee, such as the drip tray, water reservoir, and brewing chamber. Use warm soapy water for the removable parts and a damp cloth for the exterior.

Descaling Your Machine

Depending on where you live, mineral buildup can happen quickly. If you have hard water, descaling every three to six months is advisable. Many commercial descaling solutions are available, or you may choose to use a vinegar-water mixture.

Checking for Mold

Occasionally, mold can develop in damp areas of your coffee maker if it’s not properly cleaned. Regularly inspecting your machine for any signs of mold and addressing it promptly can help keep your coffee maker in good condition.

Alternative Solutions

Manual Coffee Brewing

If you find yourself in a situation where my Keurig wont turn on and you can’t troubleshoot immediately, consider alternative brewing methods for the time being. Manual systems like French presses or pour-over brewers offer a rewarding coffee experience. While they may not have the instant grace of a Keurig, you’ll still enjoy a fresh brew.

Exploring Other Coffee Makers

If your Keurig continues to be troublesome despite troubleshooting, this might be a good time to consider other coffee-making options. Explore alternatives that suit your brewing style, whether it’s a single-serve machine, a traditional drip coffee maker, or even a stovetop percolator.

Conclusion: My Keurig Wont Turn On

Experiencing issues with your coffee maker such as my Keurig wont turn on can be frustrating, especially when the craving for your morning coffee strikes. However, by understanding the common problems and performing systematic troubleshooting, you can often resolve the issue yourself. Regular maintenance, cleaning, and knowing when to seek professional help can extend the life of your machine. If all else fails, don’t hesitate to explore alternative brewing methods or consider upgrading to a new coffee maker that meets your needs. With a bit of patience, you’ll be back to sipping your favorite cup of coffee in no time.

Posted on

How to Turn the Descale Light Off on a Keurig?

turn the descale light off on a keurig

Introduction:

If you own a Keurig coffee maker, you might have encountered the dreaded descale light. This light indicates that your machine needs to be descaled to ensure optimal performance. But how do you turn the descale light off on a Keurig once you’ve done the necessary maintenance? In this guide, we will discuss the causes of the descale light activation, how to properly descale your machine, and the steps to turn that pesky light off for good.

turn the descale light off on a keurig

Understanding the Descale Light

What Does the Descale Light Mean?

The descale light on your Keurig is your machine’s way of signaling that mineral buildup, primarily calcium and scale, has accumulated within. This is a common issue, especially if you live in an area with hard water. The accumulation can lead to slower brewing times, inconsistent brew temperature, and could even damage your machine if left unattended. Therefore, it is crucial to heed the warning and take action.

Why Is Descaling Important?

Descaling not only helps to maintain the coffee quality but also extends the life of your Keurig machine. Over time, if scaling is not addressed, you could face performance issues that could necessitate expensive repairs or even a replacement of the unit. Regular maintenance helps to keep the internal components functioning well, ensuring that every cup of coffee you brew is just as delicious as the last.

 turn the descale light off on a  keurig

Preparation for Descaling

Gather Necessary Supplies

Before you can turn the descale light off on a Keurig, you must first gather your equipment. Below are the items you will need:

  1. Descaling Solution: You can purchase a specific Keurig descaling solution, which is highly effective, or you can use a mixture of equal parts water and white vinegar.
  2. Water: Fresh, clean water will be needed for diluting the descaling solution.
  3. A Large Container: This is where you’ll collect the descaling solution as it flows through the machine.
  4. Coffee Mug: For the final brewing process to ensure everything is functioning well.

Prepare Your Machine

Before you start the descaling process, ensure that your machine is turned off and unplugged. This not only ensures safety but also allows any residual water to drain out, making the process more efficient.

  1. Empty Water Reservoir: Remove the water reservoir from your machine and empty any remaining water. Rinse it out to ensure that all contaminants from previous brews are eliminated.
  2. Remove the K-Cup Pod: If you have a pod in the machine, make sure to remove it.

Steps to Descale Your Keurig

Step 1: Mixing the Solution

Follow the instructions provided on your descaling solution packaging. Generally, you will mix equal parts of the solution and water. If you’re using vinegar, fill the water reservoir halfway with vinegar and the other half with water.

Step 2: Filling the Reservoir

Pour the prepared descaling solution into the water reservoir. Make sure not to exceed the maximum fill line to avoid spills during the brewing process.

Step 3: Start the Descaling Process

Plug in your Keurig and turn on the machine. Select the largest cup size to ensure that the entire solution is brewed through. Place your large container underneath the coffee spout to catch the liquid.

  1. Run the Brew Cycle: Begin brewing without a K-Cup pod in the machine. Allow the solution to brew into the container.
  2. Repeat: After the first brew cycle, discard the liquid collected in the container and refill the reservoir with the remaining solution. Continue brewing until the reservoir is empty.
  3. Let it Sit: Pause for about 30 minutes after you’ve completed brewing the descaling solution. This allows the solution to dissolve any mineral buildup inside the machine.

Step 4: Rinse the Machine

To ensure any leftover descaling solution or vinegar is removed, you must run a rinse cycle:

  1. Empty the Reservoir Again: Discard any remaining solution in the water reservoir and rinse it well.
  2. Fill with Fresh Water: Refill the reservoir with clean, fresh water.
  3. Brew Water: Just like before, run several brew cycles with only water until the reservoir is empty. This step is crucial to ensure that there are no lingering tastes or odors from the descaling solution or vinegar.

Turning Off the Descale Light

Steps to Turn Off the Descale Light

After successfully descaling your Keurig, you may find that the descale light is still illuminated. To turn the descale light off on a Keurig, follow these straightforward steps:

  1. Reset the Machine: While the descaling process will typically reset the descale light, sometimes your Keurig may need a manual reset. For many models, turn off the machine and unplug it from the power source for about 5 minutes. This can help drain any residual power and reset internal systems.
  2. Check the Lights: After 5 minutes, plug your machine back in and turn it on. Check to see if the descale light remains on.
  3. Run a Brew Cycle: If the descale light is still illuminated, run a brew cycle with just water to help clear any remaining signals.
  4. Monitor: Keep an eye on the descale light for the next few brews. In most cases, it should turn off after completing the descaling process successfully.

What to Do If the Light Still Remains On

If, after descaling, you find that the light persists, it could indicate further issues. Here are some suggestions:

  • Recheck the Descaling Process: Perhaps you missed a step in the descaling process. Make sure you’ve followed all the steps mentioned.
  • Contact Customer Service: If the descale light remains on despite completing the process, consider reaching out to Keurig customer service or consult your specific model’s user manual for additional troubleshooting tips.

turn the descale light off on a keurig Best Practices for Preventive Maintenance

Regular Descaling Schedule

Establish a routine when it comes to maintaining your Keurig. The manufacturer generally recommends descaling every 3 to 6 months, depending on the hardness of your water. The more minerals in your water, the more frequently you should schedule descaling.

Use Filtered Water

To prevent the buildup of minerals in the first place, consider using filtered or bottled water for your brews. This is particularly important if you live in an area known for hard water.

Clean the Coffee Maker Regularly

Aside from descaling, your Keurig should be cleaned regularly. This includes:

  • Cleaning the Water Reservoir: At least once a week, remove and clean the water reservoir with warm soapy water.
  • Cleaning the Brew Head: Check the brew head for any coffee grounds or blockages regularly. Wipe it with a damp cloth.
  • Cleaning External Surfaces: The external parts of your Keurig can also accumulate dirt and grime. A quick wipe with a damp cloth can go a long way.

Conclusion: how to turn the descale light off on a keurig

Now that you know how to turn the descale light off on a Keurig coffee maker, you can enjoy a flawless brewing experience without interruptions. Regularly maintaining your machine and descaling it when needed is vital for prolonging its life and ensuring that you make the best coffee possible. Follow the steps outlined in this guide, and you should find that your Keurig remains in great working order. Developing a routine for cleaning and descaling will pay off in delicious cups of coffee for years to come. Don’t underestimate the importance of this simple maintenance task; your taste buds will thank you.

Posted on

The Best Water to Use in Keurig

best water to use in keurig

When it comes to brewing the perfect cup of coffee, the water you use is just as important as the coffee itself. Especially in a Keurig, where the machine utilizes water to create a quick and delicious brew, choosing the right type of water can make a significant difference in both flavor and machine longevity. In this article, we will delve into the best water to use in a Keurig and discuss various factors that affect not just your coffee’s flavor but also the health of your machine.

best water to use in keurig

Why Water Quality Matters

The quality of the water you use directly influences the taste of your coffee. Water acts as a solvent that extracts flavors, acids, and oils from coffee grounds. Poor quality water can lead to a flat or bitter brew, while high-quality water enhances the coffee’s aromas and flavors. Here are some critical aspects of water quality:

Taste and Aroma

Any impurities or additives in water can drastically change its taste. Chlorine, for example, is commonly found in tap water and can give your coffee an undesirable flavor. Using filtered or purified water that is free of such impurities can dramatically enhance the flavor profiles of various coffee beans.

Mineral Content

The mineral content in water plays a pivotal role in how it interacts with coffee. Essential minerals like calcium and magnesium can improve extraction, contributing to a fuller taste. Conversely, water that is too soft (lacking minerals) may not extract flavors effectively, resulting in a weak or insipid brew.

pH Levels

The pH level of water can also influence coffee flavor. Ideal water for brewing coffee has a pH level close to neutral (between 6.5 and 7.5). Water that is too acidic or too alkaline can negatively impact flavor extraction and overall taste.

Best Types of Water for Brewing

Given the importance of water quality, several options stand out when considering the best water to use in a Keurig. Below are some of the top choices:

Filtered Water

Using filtered water is often regarded as one of the best options. Water filters remove chlorine, sediment, and other impurities that can affect flavor, making it a viable choice for those who want to enhance their coffee experience.

Advantages of Filtered Water

  1. Improved Taste: Filtered water typically tastes better than tap water, making for a more enjoyable cup of coffee.
  2. Machine Longevity: Filters can help reduce mineral build-up in your Keurig, minimizing the frequency of descaling.

Disadvantages of Filtered Water

  1. Cost: Investing in a quality water filtration system can be pricey.
  2. Maintenance: Regularly replacing filters can be inconvenient.

Spring Water

Spring water comes from natural springs and usually contains a balanced mineral content that is beneficial for brewing coffee. It’s often considered a premium option.

Advantages of Spring Water

  1. Balanced Minerals: Often rich in beneficial minerals that enhance coffee flavor.
  2. Natural Source: The natural filtration process can result in cleaner water than many municipal sources.

Disadvantages of Spring Water

  1. Cost: Bottled spring water can be expensive.
  2. Environmental Impact: Purchasing bottled water creates additional plastic waste.

best water to use in keurig

Distilled Water

Distilled water is created by boiling water and then condensing the steam back into a liquid. This process removes impurities and minerals.

Advantages of Distilled Water

  1. Purity: Almost entirely free from contaminants.
  2. Flavor Neutral: Distilled water won’t interfere with the taste of your coffee.

Disadvantages of Distilled Water

  1. Lack of Minerals: Without minerals, it might not extract the flavors effectively, leading to bland coffee.
  2. Machine Issues: Over time, using distilled water can result in corrosion or other problems due to lack of essential minerals.

Reverse Osmosis Water

Reverse osmosis (RO) water is semi-purified through a filtration process that removes a wide range of contaminants and minerals.

Advantages of Reverse Osmosis Water

  1. Purity: Extremely effective at removing impurities.
  2. Adjustable Minerals: You can add minerals back into the water for an improved flavor profile.

Disadvantages of Reverse Osmosis Water

  1. Cost: Installing an RO system can be expensive.
  2. Complexity: It may require a more in-depth understanding of water chemistry if you’re adjusting mineral levels.

Tap Water

Tap water is the most convenient option for many, but it comes with pros and cons.

Advantages of Tap Water

  1. Convenience: Easily accessible and requires no additional equipment.
  2. Cost-Effective: Typically low in cost compared to bottled or filtered options.

Disadvantages of Tap Water

  1. Chemical Additives: Contains chlorine and other chemicals that may alter the taste.
  2. Variable Quality: Water quality can vary significantly from one municipality to another.

Tips for Choosing the Best Water

When it comes to choosing the best water to use in a Keurig, consider the following tips:

Conduct a Taste Test

Experiment with different types of water to determine which enhances your favorite coffees the most. Make sure to brew the same coffee using different water types and note the differences in flavor.

Check for Compatibility

Some types of water may not be compatible with your Keurig. Always refer to the owner’s manual to ensure the water you use won’t void any warranties.

Regularly Maintain Your Machine

No matter what type of water you choose, regular maintenance of your Keurig is essential. This includes descaling every few months to remove mineral build-up and ensuring that any filters are replaced according to manufacturer recommendations.

Monitor Water Quality

Different seasons or weather conditions can affect municipal water quality. Stay vigilant and adjust your water choice as needed.

The Impact of Water Temperature

Another factor worth discussing is the temperature of the water used for brewing. Most coffee experts agree that the optimal water temperature for brewing coffee is between 195°F and 205°F. If the water is too hot, it can cause bitter flavors; if it’s too cold, the coffee might be under-extracted and weak. While Keurig machines generally have optimal heating systems, the type of water can influence how well the temperature is maintained.

best water to use in keurigCommon Myths About Using Water in Keurig

There are several myths surrounding the use of water in coffee brewing, particularly concerning Keurig machines.

Myth 1: Only Bottled Water Is Acceptable

While bottled water can enhance flavor, it is not the only option. As discussed, filtered water and certain types of municipal water can also provide an excellent brewing experience.

Myth 2: All Tap Water Is Bad

While many tap waters contain chlorine and other impurities, others are relatively clean and safe for brewing, depending on local water quality.

Myth 3: Distilled Water Is Always the Best Choice

Using distilled water is not universally regarded as the best option due to its lack of minerals. It may result in a coffee that lacks complexity and flavor.

Conclusion

In conclusion, the best water to use in a Keurig significantly influences your coffee’s flavor and the longevity of your machine. Filtering your water, opting for spring water, or even ensuring your tap water meets quality standards can lead to a more satisfying brew. Understanding the intricacies involved in selecting the right water—from its mineral content and purity to its temperature—can make all the difference in your coffee experience. Whether you choose filtered water, spring water, or another option, investing time in understanding how water affects your coffee will ultimately lead to a better cup every time. Remember, the best water to use in a Keurig is one that best meets your taste preferences while ensuring the health of your machine.

Posted on

The Rise of Electric Cleaning Brushes for Showers

electric cleaning brush for shower

In recent years, the demand for efficient cleaning tools has surged, particularly in household settings. One remarkable innovation that stands out is the electric cleaning brush for shower use. As homes become busier and lifestyles more hectic, many people are seeking alternatives that can save time and energy when tackling scrub-resistant mold, soap scum, and grime.

The electric cleaning brush combines modern technology with everyday practicality, making a powerful tool in the battle against bathroom dirt. In this comprehensive article, we will explore the features, benefits, how-to-use techniques, and best practices for selecting the right electric cleaning brush for your shower. By the end, you will fully understand why this tool is becoming a must-have in every cleaning toolkit.

electric cleaning brush for shower

The Anatomy of Electric Cleaning Brushes

Electric cleaning brushes are designed for effortless and efficient cleaning. Let’s dive deep into the components of these brushes to understand their effectiveness better.

Key Components

  1. Motor: At the heart of any electric cleaning brush is the motor, which powers the spinning or oscillating bristles. This motor varies in strength, and the more robust the motor, the more effective the brush is at tackling tough stains.
  2. Bristles: Electric brushes come with various types of bristles—soft, medium, or hard. The choice of bristles will depend on the surface you are cleaning. For example, soft bristles are ideal for delicate surfaces, while stiff bristles are perfect for tough tasks, such as grout lines.
  3. Battery: Many electric brushes are cordless, powered by rechargeable batteries. This allows for easier maneuverability, especially in tight spaces like showers.
  4. Handle: An ergonomic handle ensures comfort during use. Some brushes come with adjustable lengths, making them easier to use for individuals of different heights.
  5. Interchangeable Heads: Many electric brushes come with various interchangeable heads designed for different cleaning tasks. From flat surfaces to corners, the right head can make cleaning easier and more efficient.

Cleaning Modes

Some electric cleaning brushes offer multiple cleaning modes, allowing users to choose a speed or intensity level that suits their needs. Higher speeds may be more effective for deep cleaning, while lower settings are kinder to delicate surfaces.

electric cleaning brush for shower

Benefits of Using an Electric Cleaning Brush for Shower

Using an electric cleaning brush transforms your shower cleaning routine. Below are the primary benefits that make this tool indispensable.

Time Efficiency

Cleaning a shower manually can be a time-consuming task, often taking up to an hour or more, depending on how dirty the surfaces are. An electric cleaning brush can significantly reduce this time, allowing you to complete the job in mere minutes. The powerful cleaning action of these brushes means you won’t need to scrub as hard, reducing your labor in the process.

Enhanced Cleaning Power

The mechanical action of the electric brush allows it to clean deeper than traditional scrubbing tools. The rapid motion can dislodge stubborn soap scum, hard water stains, and mildew that might remain even after a manual scrub. Many users report that their showers look brand new after just one cleaning session with an electric cleaning brush.

Ergonomics

One of the primary advantages of electric cleaning brushes is that they are designed with user comfort in mind. Many models have ergonomic handles that reduce strain on your wrists and arms. This is especially beneficial for individuals with joint issues or those who spend an extended amount of time cleaning.

Versatile Applications

While designed for showers, electric cleaning brushes can serve multiple purposes. You can use them to clean sinks, tubs, tiles, and even kitchen surfaces. Some brushes come with attachments or specific heads that can be used for various cleaning tasks around the home. This versatility adds considerable value, making it an economical choice for household cleaning.

Eco-friendly Options

Many electric cleaning brushes allow you to use your cleaning solutions, making them more eco-friendly compared to disposable cleaning pads and harsh chemical cleaners. You can choose eco-friendly cleaning solutions that are gentle on the environment, enhancing sustainability while keeping your home clean.

Less Physical Effort

This might be one of the most significant advantages—an electric cleaning brush reduces the physical effort required for scrubbing. With the brush doing the majority of the work, you won’t feel as exhausted or sore afterward, making cleaning a more pleasant experience.

How to Use an Electric Cleaning Brush for Shower Cleaning

The effectiveness of an electric cleaning brush largely depends on how well you use it. Follow these steps to ensure optimum results.

Preparation

  1. Gather Supplies: Before starting, gather all necessary supplies, including your electric cleaning brush, cleaning solution, microfiber cloths, and gloves to protect your hands.
  2. Choose Your Cleaning Solution: Select a cleaning agent appropriate for your surfaces. Some cleaning brushes work well with both liquid and gel cleaners, while others may be designed for dry cleaning.

electric cleaning brush for shower

Cleaning Steps

  1. Apply Cleaner: Apply your chosen cleaning solution on the surfaces you intend to clean. Depending on the product, it may be effective to let it sit for a few minutes to penetrate tough stains.
  2. Power Up: Switch on your electric cleaning brush, selecting your preferred speed or mode, if applicable.
  3. Start Cleaning: Begin cleaning from the top and work your way down. This ensures that any drips or debris fall onto areas you will clean later. Use gentle pressure; the brush will do the work for you.
  4. Use Different Attachments: Take advantage of interchangeable heads for different surfaces. Use a stiff brush for tiles and a softer one for glass doors.
  5. Rinse Thoroughly: Once you’re finished, rinse the area thoroughly with water to remove any leftover cleaning solution.
  6. Final Wipe Down: Use a microfiber cloth to dry surfaces and prevent water spots for a polished look.

Maintenance of the Brush

To ensure your electric cleaning brush remains in good condition:

  • Clean the Brush After Each Use: Make sure to remove any residual cleaning solution or debris from the bristles.
  • Charge Properly: Always adhere to the manufacturer’s guidelines for battery charging to maximize battery life.
  • Store Safely: Keep your brush in a dry place away from excessive moisture to protect its electrical components.

electric cleaning brush for shower

Top Features to Look for in an Electric Cleaning Brush

When choosing the right electric cleaning brush for your shower, consider several important features:

Battery Life

A longer battery life allows for extended cleaning sessions without interruption. Look for models that offer quick charging time as well.

Cordless Option

Cordless models provide the flexibility to move around without getting tangled in cords, making them far more convenient for cleaning showers.

Weight

A lightweight brush will be easier to handle, especially during extended cleaning sessions. Opt for ergonomic designs that minimize wrist strain.

Versatility

Look for models with interchangeable heads for different cleaning tasks, as well as various speeds for various surfaces.

Waterproof Design

Ensure your electric cleaning brush is designed for wet use, as this will allow you to use it directly in the shower without worrying about damaging the unit.

Extending the Use of Electric Brushes to the Kitchen

Tackle Grime in the Kitchen

Just like the shower, the kitchen is another area that can quickly accumulate dirt, grease, and grime. Electric cleaning brushes can easily transition from the bathroom to the kitchen, making them a versatile addition to your cleaning arsenal.

Areas of the Kitchen to Clean

  1. Counters: Electric brushes can effectively clean granite, quartz, and laminate surfaces.
  2. Microwave: Use a scouring pad head to tackle burnt-on food particles inside your microwave.
  3. Sinks: Clean stainless steel and porcelain sinks with the soft brush head.
  4. Faucets: Electric brushes can polish and clean mineral deposits around faucets.

electric cleaning brush for showerStep-by-Step Guide to Cleaning the Kitchen

  1. Preparation: Gather necessary cleaning supplies, including your electric brush and suitable cleaning solutions for each surface.
  2. Countertops: Apply the cleaner and scrub with the appropriate brush head. Rinse after scrubbing.
  3. Oven Cleaning: For tougher oven grime, use a scouring pad brush. Apply cleaner, let it sit for the recommended time, then scrub thoroughly.
  4. Sink and Faucet: Scrub your sink with a soft brush head to avoid scratching the surface, then turn to the faucet for a thorough polish.
  5. Regular Upkeep: A simple clean-up after cooking sessions can keep everything looking fresh and prevent tough stains from forming.

Advantages of Using Electric Brushes in the Kitchen

  1. Time-Saving: Speed up cleaning chores when you have guests.
  2. Better Hygiene: Decreasing grime can help reduce the risk of bacteria.
  3. Multi-Surface Use: Switch between brush heads depending on the surface type, enhancing cleaning capabilities.

Conclusion

In conclusion, the electric cleaning brush for shower use is an invaluable addition to any cleaning arsenal. With their ability to save time, enhance cleaning power, offer ergonomic benefits, and provide versatility, these brushes make cleaning a more efficient and streamlined process.

Whether you choose a model with several attachments for varied tasks or a simple yet effective design, the right electric cleaning brush can significantly transform your cleaning routine. As consumers increasingly prioritize efficient cleaning methods, the electric cleaning brush for shower tasks is likely to continue gaining popularity, making it an investment worth considering for modern household needs. Embrace this handy tool, and watch your shower cleaning tasks become a breeze!

Posted on

Keurig K Duo Troubleshooting: A Comprehensive Guide

keurig k duo

The Keurig K Duo is a versatile coffee maker that allows users to brew both a single cup and a carafe of coffee, providing a flexible solution to suit various coffee-drinking needs. However, like any appliance, it can encounter issues that may disrupt your brewing experience. In this article, we will delve into common problems associated with the Keurig K Duo and provide thorough troubleshooting tips to help you diagnose and fix these issues.

keurig k duo

Understanding Your Keurig K Duo

Before diving into the troubleshooting aspects, it’s essential to understand how the Keurig K Duo operates. The machine combines single-serve functionality with a carafe option, allowing you to brew anywhere from a single cup up to 12 cups of coffee, making it perfect for both solo drinkers and families.

The K Duo is equipped with a 60-ounce water reservoir, multiple brew sizes, and a strong brew feature for those who appreciate a bolder taste. Knowing these details can aid you in identifying the root cause of the problem when troubleshooting.

Common Issues and Symptoms

Recognizing the symptoms your coffee maker is exhibiting is the first step in troubleshooting. Here are some common issues that users may encounter:

  • Failure to Brew: The machine doesn’t produce coffee when prompted.
  • Inconsistent Brews: Coffee may come out weak or over-extracted.
  • Water Reservoir Issues: Problems with filling or draining the water reservoir.
  • Brewing Errors: The coffee maker displays error messages.
  • Difficulty with K-Cup Pods: Pods may not puncture correctly or may get stuck.
  • General Maintenance Problems: The machine may require descaling due to mineral build-up.

Failure to Brew

One of the most frustrating issues is when your Keurig K Duo refuses to brew. This can stem from many sources.

Check the Power Source

First, ensure that the machine is plugged in and the outlet is functioning. Test the outlet by plugging in another device. If the outlet works, inspect the power cord for any apparent damage.

Water Reservoir Level

A common oversight is a low water level. Make sure the water reservoir is filled to at least the minimum fill line. If the machine is using a water filter, make sure that it is properly positioned as per the manufacturer’s instructions.

Previous Brew Mode

If you previously brewed in carafe mode, ensure that you’ve switched back to the single-serve mode if intending to brew just a cup. Sometimes, the machine might not engage fully in the selected brew mode.

No Clogs in Needled Area

The needle that punctures the K-Cup pod may accumulate coffee grounds. To check this, remove the K-Cup holder and clean the needle with a straightened paperclip or similar tool to ensure it is free from any blockage.

Inconsistent Brews

If your coffee does not taste the same from one brew to the next, the following tips can help enhance consistency.

Check Your Coffee Grounds

Inconsistent taste can arise from the type and amount of coffee used. For optimal results, use coarsely ground coffee, particularly when brewing with the carafe. Additionally, consider the age and quality of the coffee beans; fresh, high-quality coffee beans enhance flavor.

Brew Temperature

Another reason for inconsistent brews could be the water temperature. The ideal brewing temperature for coffee is between 195°F and 205°F. If your coffee maker is brewing at a lower temperature, it may not extract the right flavors.

Maintenance of the Brewer

Regularly cleaning your K Duo prevents build-up that might affect brewing consistency. Follow the manufacturer’s instructions for cleaning the brew basket, water reservoir, and any removable parts to maintain optimal performance.

keurig k duo

Water Reservoir Issues

Problems with the water reservoir can lead to a host of issues, ranging from the inaccurate brew size to system errors.

Proper Placement

Ensure the water reservoir is seated correctly on the machine. Remove it and reseat it to check if this resolves the issue. Sometimes improper alignment can cause the machine to think the reservoir is empty or disconnected.

Water Quality

Using hard water can lead to mineral build-up, which affects the performance of the machine. Consider installing a water filter or using filtered water rather than tap water. If you notice mineral deposits, perform a descaling cycle regularly.

Cleaning the Reservoir

Make sure to clean the reservoir often to prevent algae or mold growth. Use a mix of vinegar and water for cleaning and rinse well to ensure no residue remains.

Brewing Errors

The Keurig K Duo may display error messages that can lead to confusion about what to do next.

Interpret the Error Message

Refer to the user manual for information on error codes displayed on the screen. Each message usually provides insights on the specific issue, whether it’s a brewing error or maintenance advice.

Resetting the Machine

If you encounter persistent error messages, try resetting the machine. To do this, unplug the brewer for at least five minutes before plugging it back in. This may resolve temporary glitches. Once reset, try brewing again.

Firmware Updates

Some newer models come with firmware that may need updating. Check the manufacturer’s website for any updates available for your model. Follow the steps provided to complete the update if necessary.

Difficulty with K-Cup Pods

If K-Cup pods are getting stuck or not puncturing effectively, it can disrupt your brewing experience.

Use Compatible Pods

Make sure you’re using compatible K-Cups specifically made for the Keurig K Duo. Using off-brand pods can sometimes lead to compatibility issues.

Inspect the K-Cup Holder

The K-Cup holder may require cleaning. Remove it and rinse it under water, ensuring that no coffee grounds are lodged in the needle holes.

Regular Check for Wear and Tear

Inspect the K-Cup holder for signs of wear. If necessary, consider replacing it to ensure optimal function. A worn holder can struggle to puncture pods effectively, leading to incomplete brews.

keurig k duoGeneral Maintenance Problems

To maintain your Keurig K Duo, regular maintenance is essential. Neglecting your machine can lead to performance degradation and other issues.

Descaling Your Brewer

Hard water can lead to mineral build-up, compromising the performance of your machine. It’s important to descale every 3-6 months based on usage. You can use a mixture of equal parts white vinegar and water to perform this function.

  1. Fill the water reservoir with the vinegar solution.
  2. Brew without a K-Cup using the largest cup setting.
  3. Repeat until the reservoir is empty.
  4. Rinse the reservoir thoroughly and refill with fresh water.
  5. Brew two to three cycles with fresh water to remove all vinegar residue.

Cleaning the Brew Basket and Drip Tray

Regularly remove the brew basket and drip tray and clean them using warm soapy water. This helps remove oils and residues that can affect flavor and performance.

Follow Manufacturer’s Recommendations

Always adhere to the manufacturer’s guidelines for maintenance. This includes recommended cleaning agents and methods to avoid voiding any warranties.

Conclusion

Regular troubleshooting of your Keurig K Duo is crucial to ensure the longevity of your coffee maker and the quality of your brews. From understanding the machine’s basic functions to tackling common issues, knowing how to troubleshoot effectively saves you both time and frustration. Whether you are dealing with power issues, brewing inconsistencies, or general maintenance, adopting the right practices will keep your coffee flowing smoothly.

With this comprehensive guide on Keurig K Duo troubleshooting, you now have a robust arsenal to tackle any challenges that may arise, ensuring that you always enjoy your perfect cup of coffee. Remember, taking care of your coffee maker and addressing issues promptly will enhance your overall brewing experience. Happy brewing!

Posted on

My Keurig Will Not Turn On: Troubleshooting and Solutions

my keurig will not turn on

When you wake up in the morning, the last thing you want is a brewing machine that refuses to turn on. If you’ve found yourself in the frustrating situation of “my Keurig will not turn on,” you are not alone. Many users face this dilemma, and while it can be annoying, there are various troubleshooting steps and solutions you can take to get your beloved coffee maker back in action. In this article, we will explore common reasons for Keurig issues, provide troubleshooting steps, discuss preventive maintenance, and consider the possibility of professional repair or replacement.

Understanding the Types of Keurig Machines

Before we dive into troubleshooting, it’s essential to recognize the different types of Keurig machines on the market, as their functionalities and features can vary.

Keurig Classic Series

The Classic series includes models like the Keurig K-Classic and K-Elite. They focus on simplicity, offering a straightforward brewing experience. These machines usually have fewer complicated features, making them a favorite for those seeking quick access to their morning brew.

Keurig Plus Series

The Plus series features models that can connect to Wi-Fi and allow for smartphone compatibility. These machines often have customizable brew sizes and strengths, making them suitable for tech-savvy users who enjoy a more tailored coffee experience.

Keurig K-Supreme Series

The K-Supreme models boast advanced technology that includes multi-stream brewing. This feature ensures better extraction of flavor from coffee grounds, leading to a richer cup of coffee. These machines are designed for users who prioritize flavor quality.

Understanding the specific type of Keurig machine you own can help you identify the right troubleshooting steps.

my keurig will not turn on

Common Reasons Your Keurig Won’t Turn On

If you’re facing the issue of “my Keurig will not turn on,” it’s essential to narrow down the potential causes to address the problem effectively. Here are some common reasons your Keurig may be unresponsive:

Power Supply Problems

One of the most straightforward reasons behind a Keurig not turning on is a power issue. Check if the power cord is securely plugged into a working electrical outlet. You can test the outlet with another appliance to confirm it’s functional.

Insufficient Water Levels

Many Keurig models have built-in sensors that will prevent the machine from operating without enough water in the reservoir. If your reservoir is empty or not securely attached, the machine may not turn on.

Internal Component Malfunctions

Over time, components within the machine may become faulty. This may include issues with the heating element, water pump, or internal wiring. If these parts are malfunctioning, the machine may be unable to start.

Blocked Pods or Needles

Sometimes, a blocked needle or coffee pod can prevent the machine from functioning. If grounds are jammed, it can trigger a safety feature that stops the machine from turning on.

Software Glitches

Modern machines often come with software that can sometimes run into glitches. Power surges or improper shutdowns can cause the software to malfunction, preventing the machine from turning on.

Age of the Machine

If your Keurig is several years old, it may simply be reaching the end of its lifespan. Just like all electronic devices, Keurigs can wear out and may require either repair or replacement.

my keurig will not turn on

Step-by-Step Troubleshooting Guide

If you find yourself facing the dilemma of “my Keurig will not turn on,” don’t fret. Here is a comprehensive troubleshooting guide to help you identify and solve the problem.

Step 1: Check the Power Source

Make sure the machine is properly plugged in. If it is, ensure that the electrical outlet is functioning by trying other devices. If the outlet works but the Keurig does not, proceed to check the power cord for any visible signs of damage.

Step 2: Examine the Water Reservoir

Open the water reservoir and ensure that it is filled to the appropriate level. Remove and securely reattach it to the machine to confirm proper contact. Some models won’t operate if they detect an incomplete connection.

Step 3: Inspect for Blockages

Turn the machine off and disconnect it from the power source. Remove the pod holder and check for any clogs or debris. Clean the needle, which is located in the pod holder, using a paperclip or brush designed for this purpose.

Step 4: Reset the Machine

In some cases, resetting the machine can resolve software-related issues. To perform a reset, unplug the machine for at least 5 minutes. Plug it back in and try turning it on again.

Step 5: Check for Malfunctions

If the machine still doesn’t turn on, look for any error codes or unusual sounds. If you hear strange noises or see error messages, consult the user manual for additional troubleshooting steps.

Step 6: Contact Customer Service

If you have tried all the above steps to no avail, it may be time to consult the manufacturer’s customer service. They can provide specific troubleshooting advice tailored to your particular model.

Preventing Future Issues

Once you resolve the issue of “my Keurig will not turn on,” it’s vital to take steps to keep your machine in good working condition.

Regular Cleaning

Regularly clean your Keurig according to the manufacturer’s instructions. This should include descaling to remove mineral buildup, as well as cleaning the external surfaces.

Use Fresh Ingredients

Always use the freshest coffee pods and ensure they are stored correctly. Old or expired pods can clog the machine or lead to poor-quality coffee.

Monitor Water Quality

If your local water supply has high mineral content, consider using filtered water. Removing excess minerals can reduce the likelihood of buildup that may cause performance issues.

Avoid Overloading

Don’t try to brew more than the machine is capable of. Overloading the water reservoir or using a pod not specified for your machine can lead to problems.

Keep It Turned Off When Not in Use

If your Keurig isn’t designed for constant use, remember to turn it off when not in use. This will help save energy and may prolong the machine’s lifespan.

my keurig will not turn onWhen to Seek Professional Help

If after all troubleshooting attempts, your Keurig still does not turn on, it may be time to consider professional help or a new unit. Understanding when to seek expert assistance can save you time and money.

Evaluate the Age of the Machine

If your unit is older than five years, it may not be worth investing in expensive repairs. Many manufacturers have warranties; check if yours can still be covered.

Consider Repair Costs vs. Replacement

Get estimates for repair costs versus the price of a new machine. In some cases, it might be more economical to purchase a new model instead of attempting to fix an old one.

Warranty Consultation

If your machine is still under warranty, consult customer service about your options. They might offer repairs or replacement options based on their policies.

Conclusion

Dealing with the frustration of “my Keurig will not turn on” can be an annoying experience, but understanding the common issues, leveraging troubleshooting steps, and practicing preventive maintenance can significantly increase the longevity and reliability of your machine. Whether it’s a quick check of your power source or seeking professional help, you have avenues to explore. So, don’t lose hope; a steaming cup of coffee could be just a step away. By being proactive and aware of the potential issues, you can enjoy your coffee without interruption.