Posted on

How to Make Frozen Margaritas in a Blender?

blender

Introduction:

Frozen margaritas are a popular and refreshing cocktail, perfect for warm weather or celebratory gatherings. Making them in a blender ensures a smooth, frosty texture that is hard to resist. This comprehensive guide explores the steps, ingredients, variations, and tips for crafting the perfect frozen margarita. By understanding the correct methods and creative touches, you can elevate your cocktail game and enjoy a delightful frozen treat.
blender

How to Make Frozen Margaritas in a Blender?

Choosing the Right Ingredients

The quality and selection of ingredients play a critical role in crafting an excellent frozen margarita. Here’s what you need to know about choosing the best components.

High-Quality Tequila: The tequila is the star of the margarita, so choose a good-quality blanco or silver tequila. These types of tequila are light, fresh, and ideal for blending. Avoid inexpensive or low-quality tequilas, as they can negatively impact the flavor.

Fresh Lime Juice: Freshly squeezed lime juice provides the best flavor and aroma. Avoid bottled lime juice, which often contains preservatives and lacks the vibrant taste of fresh limes. Use ripe, juicy limes for the best results.

Orange Liqueur: Orange liqueur, such as Triple Sec, Cointreau, or Grand Marnier, adds a subtle sweetness and depth to the margarita. Choose a liqueur that balances well with the tequila and lime juice.

Sweetener: A touch of sweetness balances the tartness of the lime juice. Options like simple syrup, agave nectar, or honey work well. Adjust the sweetness to suit your taste preferences.

Ice: Use plenty of ice to achieve the frosty, slushy consistency of a frozen margarita. Crushed ice blends more easily than whole ice cubes, but both can be used effectively.

Optional Flavor Enhancers: Consider additional ingredients like fresh fruit (strawberries, mangoes, peaches), herbs (mint, basil), or spices (chili powder, cayenne) to create unique variations of frozen margaritas.

Basic Blending Method for Frozen Margaritas

Following a step-by-step blending method ensures that your frozen margaritas are smooth, well-mixed, and perfectly chilled. Here’s how to make them.

Prepare the Rim: Begin by preparing the margarita glass. Rub the rim of the glass with a lime wedge to moisten it, then dip the rim in coarse salt or sugar to coat it. Set the glasses aside until ready to use.

Measure the Ingredients: In a high-speed blender, add the following:

  • 2 cups of ice
  • 2 ounces of tequila
  • 1 ounce of orange liqueur
  • 1 ounce of fresh lime juice
  • 1/2 ounce of simple syrup or agave nectar

Adjust the quantities based on the number of servings or to suit your taste preferences.

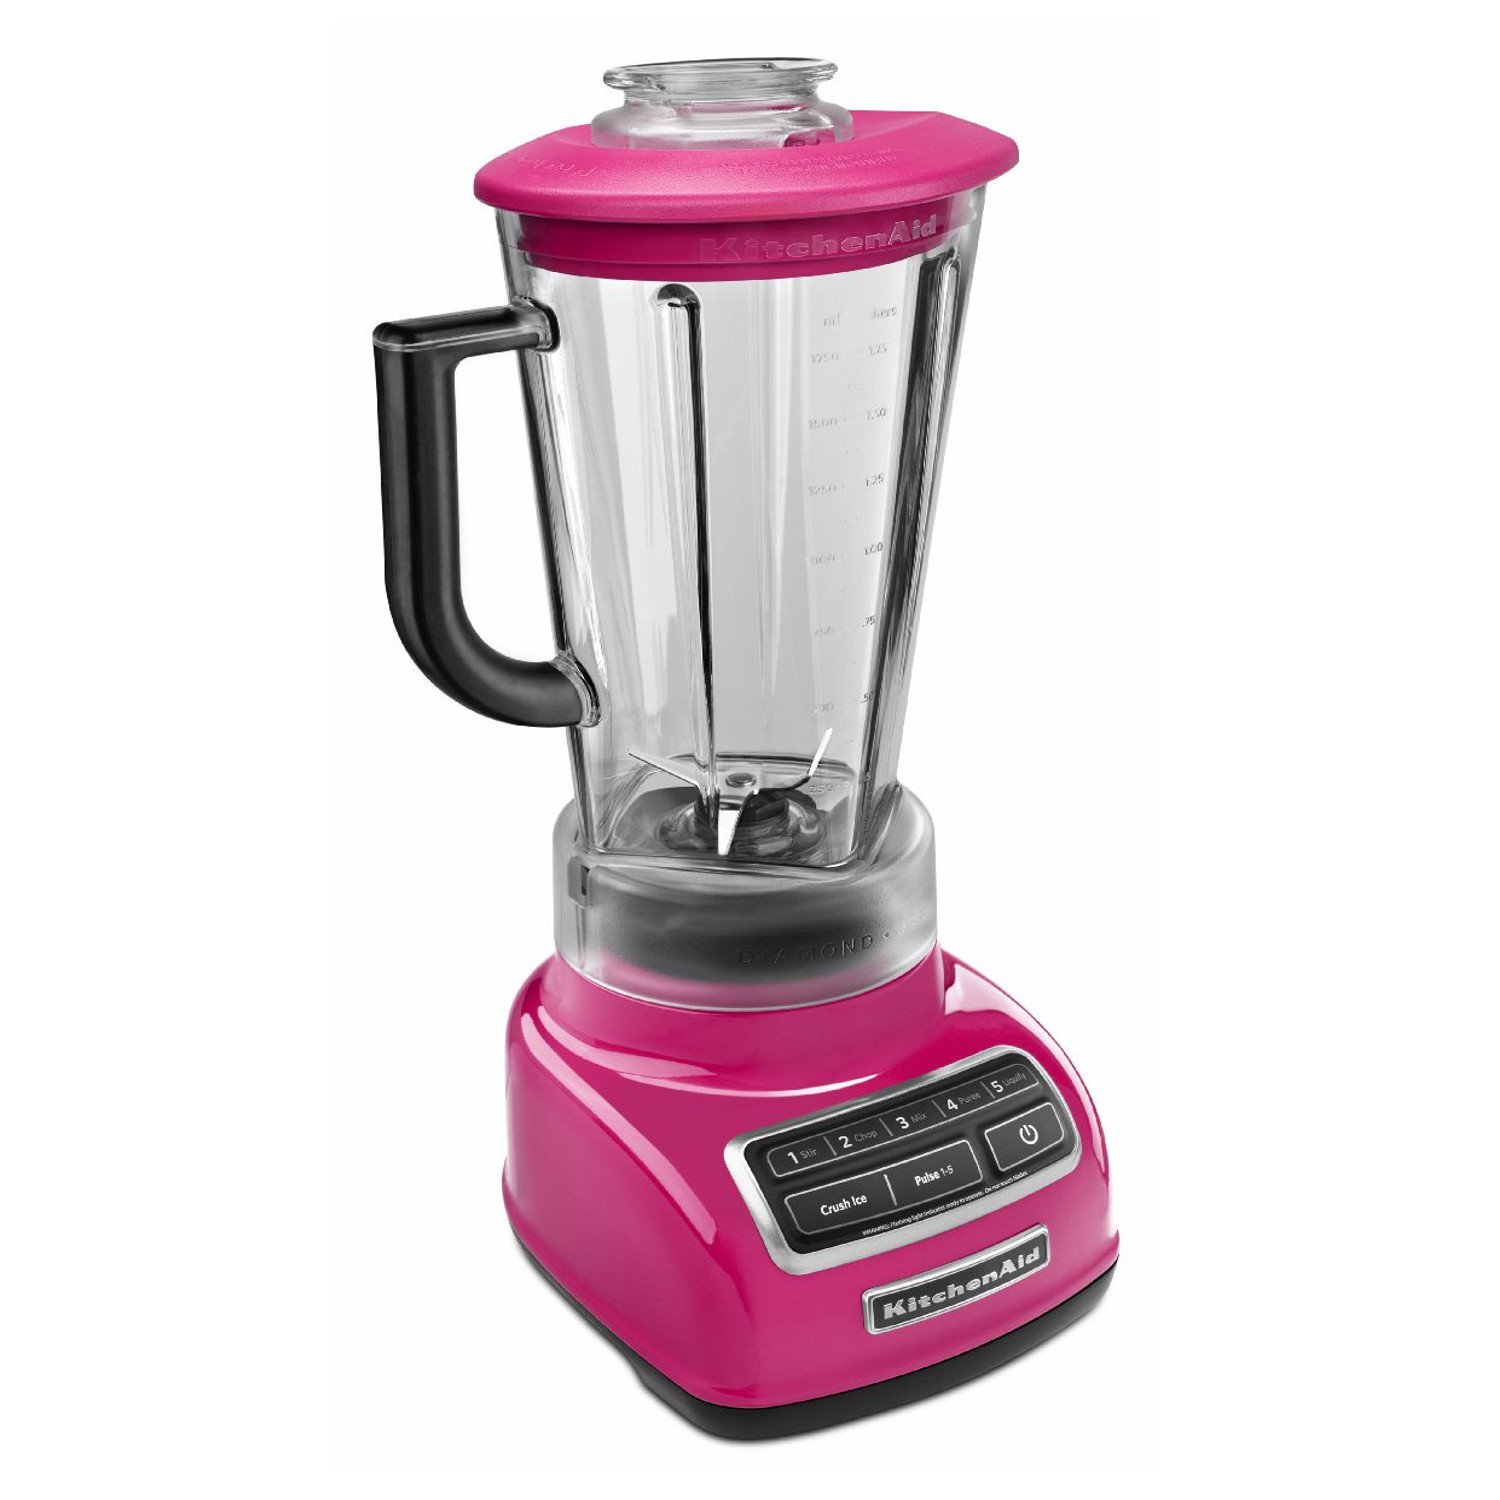
Blending Process: Blend the mixture on high speed until it reaches a smooth, slushy consistency. This usually takes 30 to 60 seconds, depending on the power of your blender. Pause to scrape down the sides if necessary to ensure all ingredients are well-incorporated.

Consistency Check: Check the consistency of the margarita. It should be thick, frosty, and pourable. If it’s too thick, add a small amount of water or lime juice and blend again. If it’s too thin, add more ice and blend until desired thickness is achieved.

Serve Immediately: Pour the frozen margarita into the prepared glass, taking care not to disturb the salted or sugared rim. Garnish with a lime wheel or wedge if desired. Serve immediately to enjoy the perfect icy refreshment.
blender

Creative Variations for Frozen Margaritas

Exploring creative variations allows you to customize frozen margaritas to suit different tastes and occasions. Here are some popular and inventive ideas.

Strawberry Frozen Margarita: Add 1 cup of fresh or frozen strawberries to the blender along with the basic ingredients. The strawberries add a fruity sweetness and vibrant color to the margarita. Adjust the sweetness if needed.

Mango Frozen Margarita: Blend in 1 cup of fresh or frozen mango chunks for a tropical twist. Mango pairs wonderfully with tequila and lime, creating a refreshing and exotic drink.

Peach Frozen Margarita: Incorporate 1 cup of fresh or frozen peach slices for a juicy and aromatic variation. Peaches add a natural sweetness that complements the citrus elements.

Spicy Frozen Margarita: For a kick of heat, add a slice or two of fresh jalapeño or a dash of chili powder to the blender. The spice enhances the margarita’s complexity, creating a perfectly balanced flavor.

Mint Citrus Margarita: Add a handful of fresh mint leaves to the basic recipe for a refreshing and herbaceous twist. The mint adds a cooling element that pairs beautifully with lime and tequila.

Coconut Frozen Margarita: Replace the orange liqueur with coconut cream or coconut milk for a creamy, tropical variation. Coconut adds richness and a hint of sweetness, transforming the classic margarita into a luxurious treat.

Safety Tips for Blending Frozen Margaritas

Blending frozen margaritas requires attention to safety and proper handling of equipment. Follow these safety tips to ensure a smooth and accident-free process.

Use a High-Speed Blender: A high-speed blender is ideal for crushing ice and blending frozen ingredients. Ensure your blender is designed to handle ice to prevent damage and achieve a smooth consistency.

Secure the Lid: Always make sure the blender lid is securely in place before blending. An improperly secured lid can cause the contents to spill during blending, making a mess and posing a risk.

Avoid Overfilling: Do not overfill the blender pitcher. Leave some space to allow for expansion and proper blending. Overfilling can strain the motor and reduce blending efficiency.

Handle with Care: The edges and blades of the blender are sharp. Assemble and disassemble the blender carefully, and always unplug it before cleaning or handling the blades.

Monitor Blending: Keep an eye on the blending process. If the blender struggles or makes unusual noises, stop and check for any issues. Continuous monitoring helps prevent motor burnout and ensures even blending.
blender

Serving and Garnishing Frozen Margaritas

Presentation and garnishing enhance the overall experience of enjoying a frozen margarita. Here’s how to serve and garnish them attractively.

Chilled Glasses: Chill the margarita glasses in the freezer for 15-20 minutes before serving. This helps maintain the icy consistency of the drink and adds a refreshing touch.

Lime Wedges or Wheels: Garnish each glass with a lime wedge or wheel. A simple twist on the glass rim or floating on the top adds visual appeal and a hint of extra lime.

Fresh Fruit: Add fresh fruit slices or berries to the glass for an appealing and flavorful garnish. Options like strawberries, mango slices, or peach slices complement the drink’s flavors.

Herb Sprigs: A sprig of fresh mint, basil, or rosemary adds an aromatic touch and enhances the presentation. Herbs also pair well with the citrus and tequila flavors.

Edible Flowers: Edible flowers like pansies, violets, or hibiscus flowers are a beautiful and elegant garnish. Ensure the flowers are safe for consumption and pesticide-free.

Making Frozen Margaritas for Different Diets

Adapting frozen margaritas for various dietary preferences ensures everyone can enjoy this delightful cocktail. Here are some ideas for modifications.

Sugar-Free Margaritas: Use a sugar-free sweetener like stevia or erythritol instead of simple syrup or agave nectar. This modification reduces the sugar content without compromising sweetness.

Vegan Margaritas: Ensure all ingredients, including any added flavor enhancers, are vegan-friendly. Most margarita ingredients are naturally vegan, but check labels to confirm.

Low-Calorie Margaritas: Reduce the calorie content by using fresh fruit juices instead of sweeteners and opting for lighter versions of liqueurs. Diluting with sparkling water also helps.

Gluten-Free Margaritas: Most traditional margarita ingredients are gluten-free. Ensure any additional flavorings or liqueurs are certified gluten-free to accommodate dietary restrictions.

Fruit-Only Sweetened Margaritas: Sweeten the margarita naturally with fresh or frozen fruits. Blended fruits add natural sugars and flavors, eliminating the need for added sweeteners.
blender

Batch-Making Frozen Margaritas

Making frozen margaritas in large batches is ideal for parties and gatherings. Here’s how to scale up the recipe and ensure consistent quality.

Multiply the Ingredients: Multiply the basic recipe ingredients by the number of servings you need. For example, for 4 servings, use 8 cups of ice, 8 ounces of tequila, 4 ounces of orange liqueur, etc.

Use a Large Blender: Ensure your blender can handle the increased quantity of ingredients. If it’s too large for one load, blend in multiple batches and mix them together in a pitcher.

Pre-Chill Ingredients: Keep the tequila, liqueur, and lime juice chilled before blending. Pre-chilled ingredients help maintain the icy consistency of the margaritas.

Stir Before Serving: If making in advance, keep the margaritas in the freezer and stir well before serving to redistribute the ingredients and maintain even consistency.

Provide Garnish Station: Set up a garnish station where guests can personalize their margaritas with lime wedges, fruit slices, herbs, and other enhancements.
blender

Conclusion

Creating frozen margaritas in a blender is a fun and rewarding process that yields a refreshing and delightful cocktail. By choosing high-quality ingredients, following a precise blending method, and experimenting with creative variations, you can enjoy perfect frozen margaritas every time. Adhering to safety tips, considering dietary modifications, and preparing for larger gatherings ensures that everyone can savor this icy treat. With the comprehensive information provided in this guide, you can confidently make frozen margaritas that impress and satisfy, making any occasion special. Cheers to crafting the perfect frozen margarita!
Posted on Leave a comment

Are Ninja blenders noisy?

ninja blender

Introduction

Blenders are valuable kitchen appliances that offer convenience and versatility. However, one concern many people have is the noise generated by blenders during operation. If you’re considering purchasing a Ninja blender, it’s important to understand the noise levels associated with these appliances. In this guide, we will explore and evaluate the noise levels of Ninja blenders, discuss factors that contribute to blender noise, provide tips for managing noise, and offer insights into specific Ninja blender models known for their quieter operation.

ninja blender

Are Ninja blenders noisy?

I. Understanding Blender Noise Levels

  1. Perception of Noise:

  • Noise is subjective, and individuals have different tolerances to sound. What may be considered noisy to one person might be acceptable to another. Thus, a blender’s noise level can be perceived differently by users based on their personal preferences and environmental factors.
  1. Relative Noise Comparison:

  • Blenders, including Ninja models, generally produce a certain level of noise during operation. Comparisons between different blender models and brands can give an indication of relative noise levels.

ninja blender

II. Factors Contributing to Blender Noise

  1. Motor Power:

  • The power and speed of the blender’s motor play a significant role in determining the noise output. Higher-powered motors tend to generate more noise due to the increased speed and force needed to blend ingredients efficiently.
  1. Blade Design and Material:

  • The design and composition of the blender blades can impact noise levels. Blades made of harder materials, such as stainless steel, may produce more noise during blending compared to blades made of softer materials.
  1. Jar Material:

  • The material of the blender jar can affect noise levels. Jars made of glass or thicker, non-transparent plastic tend to dampen sound better than thinner or lighter plastic materials, which may amplify noise.
  1. Ingredient Consistency:

  • The consistency and hardness of the ingredients being blended can influence noise levels. Harder ingredients, such as ice or frozen fruits, typically require more power to blend, resulting in increased noise.
  1. Operational Speeds:

  • Blender noise can vary at different operational speeds. Higher speed settings often generate more noise due to the increased motor power and blade rotation.

III. Strategies for Managing Blender Noise

  1. Blend in Short Bursts:

  • Instead of blending continuously for an extended period, try blending in short intervals, allowing breaks in between. This not only helps manage noise levels but also prevents the motor from overheating.
  1. Place Blender on a Stable Surface:

  • Position the blender on a stable, non-slip surface to minimize vibrations and reduce noise transmission. Placing it on a rubber mat or dampening pad can further help reduce vibrations and noise.
  1. Choose Blending Times:

  • Consider blending during quieter times of the day when noise is less likely to disturb others. For example, avoid blending early in the morning or late at night in noise-sensitive settings.
  1. Use Sound-Absorbing Materials:

  • Surrounding the blender with sound-absorbing materials, such as placing a silicone mat or towel underneath or around the blender, can help dampen noise and reduce its propagation.

ninja blender

IV. Quieter Ninja Blender Models

  1. Ninja Professional Blender (BL610):

  • The Ninja Professional Blender (BL610) is known for its relatively quieter operation compared to some other models. Its 1000-watt motor and well-designed jar contribute to a more controlled noise level.
  1. Ninja Professional Plus Kitchen System with Auto-iQ (BN801):

  • The Ninja Professional Plus Kitchen System with Auto-iQ (BN801) is another model recognized for quieter operation. It features a 1400-watt motor and comes with a more substantial jar that reduces noise output.

V. User Experiences and Reviews

  1. Noise Perception:

  • User experiences and reviews provide valuable insights into the noise levels of Ninja blenders. While noise perception can vary, many users have reported that Ninja blenders operate at an acceptable noise level, especially considering their blending power.
  1. Personal Sensitivities:

  • Keep in mind that noise tolerance varies from person to person. Reading multiple reviews and considering a range of opinions can give a more comprehensive view of the noise levels experienced by users.

ninja blender

VII. Noise-Reducing Features and Technologies

  1. Sound Enclosures:

  • Some high-end blenders, including certain models of Ninja blenders, may come with sound enclosures or shields. These enclosures are designed to minimize noise levels by creating a physical barrier around the blending unit, effectively containing and reducing sound.
  1. Vibration Dampening:

  • Certain blender models incorporate features to reduce vibrations, which can contribute to noise transmission. These features may include rubberized bases or motor mounts that help absorb vibrations and minimize noise.
  1. Sound-Reducing Design:

  • Blender manufacturers often focus on designing blenders with noise reduction in mind. This includes optimizing the airflow and ventilation systems to reduce air turbulence and noise generated by the motor.

VIII. Importance of Regular Maintenance

  1. Cleaning and Maintenance:

  • Proper cleaning and maintenance of your Ninja blender can help ensure optimal performance and minimize noise levels. Regularly clean the blender jar, blades, and other removable parts according to the manufacturer’s instructions to prevent residual buildup that can affect blender operation and increase noise.
  1. Lubrication:

  • If you notice any unusual noises coming from your blender, such as squeaking or grinding sounds, consider lubricating the blender’s moving parts as recommended by the manufacturer. This can help reduce friction and noise during operation.

IX. Managing Expectations

  1. Realistic Noise Levels:

  • While manufacturers strive to create quieter blenders and implement noise-reducing technologies, it is important to set realistic expectations for blender noise levels. Blending tough or frozen ingredients will still generate noise due to the required motor power. However, a well-designed blender can help minimize excessive noise and vibrations.
  1. Individual Sensitivity:

  • Keep in mind that individual sensitivity to noise can vary. Some individuals may have a higher tolerance for blender noise, while others may be more sensitive to it. Consider your own personal preferences and the noise tolerance of those around you when evaluating noise levels.

ninja blender

VI. Conclusion: Managing Blender Noise and Choosing the Right Model

Noise levels can be a concern when selecting a blender, including Ninja models. While blenders inherently generate noise during operation, there are strategies for managing and minimizing their impact. By blending in short bursts, placing the blender on a stable surface, choosing appropriate blending times, and utilizing sound-absorbing materials, you can reduce the noise level and its transmission.

Ninja blenders, such as the Ninja Professional Blender (BL610) and the Ninja Professional Plus Kitchen System with Auto-iQ (BN801), are generally recognized for their quieter operation. These models feature powerful motors and designs that help mitigate noise output.

Ultimately, considering personal tolerance for noise, specific needs, and preferences will guide you in selecting the right Ninja blender model. By adopting noise management strategies and choosing a suitable blender model, you can enjoy the benefits of blending without excessive disruption or discomfort.

Posted on Leave a comment

How do you thicken cream in a blender?

blender

Introduction


Thickened cream has a variety of uses in cooking and baking, adding richness and texture to dishes. If you find yourself with a runny or thin cream, using a blender can be an effective method to thicken it. In this guide, we will explore different techniques for thickening cream using a blender. From chilling the cream beforehand to incorporating stabilizers, we will provide specific instructions and tips to help you achieve the desired consistency and texture in your cream.

blender

How do you thicken cream in a blender?

Chilling the Cream

1.1. Importance of Chilling

Chilling the cream before blending is essential for achieving a thicker consistency. Cold cream is more stable, allowing it to emulsify and hold its shape better during the blending process.


1.2. Preparing the Cream

Start by placing the cream in the refrigerator for at least 1-2 hours, or until it is thoroughly chilled. Ensure that the cream is cold all the way through before proceeding with the blending process.


Gradual Blending

2.1. Blender Selection

Choose a blender that is capable of handling liquids and has adjustable speeds. A blender with a lower speed setting is preferable for gradually thickening the cream.


2.2. Blending Technique

Start blending the chilled cream at a low speed, allowing it to emulsify gradually. Slowly increase the speed as the cream thickens, ensuring that it reaches the desired consistency without over-blending.


2.3. Scraping Down the Sides

Periodically pause the blending process to scrape down the sides of the blender jar. This ensures that any cream that has stuck to the sides is incorporated into the mixture, resulting in a more consistent texture.

blender

Incorporating Stabilizers

3.1. Stabilizer Options

Stabilizers help maintain the structure and texture of the cream, preventing it from separating or becoming runny. There are various stabilizer options to consider, including gelatin, cornstarch, or powdered sugar.


3.2. Gelatin

To incorporate gelatin as a stabilizer, bloom the gelatin in a small amount of water according to the package instructions. Once bloomed, gently heat the gelatin mixture until it becomes liquid. Gradually add the liquid gelatin to the cream while blending, ensuring thorough incorporation.


3.3. Cornstarch

To use cornstarch as a stabilizer, create a slurry by mixing cornstarch with a small amount of cold liquid, such as milk or water. Heat the mixture on the stovetop until it thickens, then allow it to cool. Gradually add the cooled cornstarch slurry to the cream while blending, ensuring even distribution.


3.4. Powdered Sugar

Incorporating powdered sugar is another option for stabilizing cream. Gradually add powdered sugar to the cream while blending, adjusting the amount to reach the desired level of sweetness and thickness.


Incorporating Cream Cheese

4.1. Cream Cheese Option

Adding cream cheese to the cream can help thicken and stabilize it. The natural thickness and texture of cream cheese contribute to the overall consistency of the cream.


4.2. Softening Cream Cheese

Before blending, ensure that the cream cheese is soft and at room temperature. Let it sit out for some time or gently microwave it in short intervals until it reaches a soft and spreadable consistency.


4.3. Blending Technique

Blend the softened cream cheese with the chilled cream, gradually increasing the speed to achieve a smooth and well-incorporated mixture. Adjust the blending time to reach the desired thickness.

blender

Tips and Considerations

5.1. Gradual Thickening

Thickening cream in a blender is a gradual process. It is important to be patient and avoid over-blending, as this can lead to an undesirable texture or even the separation of the cream.


5.2. Monitoring Consistency

Regularly check the consistency of the cream during the blending process. Pause and scrape down the sides of the blender jar to ensure even blending and to monitor the thickness of the cream.


5.3. Maintaining Cold Temperatures

To prevent the cream from warming up during blending, work quickly and efficiently. If necessary, pause the blending process and return the cream to the refrigerator for a few minutes to maintain its cold temperature.


5.4. Adjustments and Re-Blending

If the cream is not thick enough after the initial blending, make adjustments by adding more stabilizers, chilled cream cheese, or alternative thickeners. Blend again, gradually increasing the speed until the desired thickness is achieved.


Applications of Thickened Cream

6.1. Whipped Cream

Thickened cream serves as an excellent base for whipped cream. After achieving the desired thickness, continue blending until soft peaks form. Add sugar or flavorings if desired.


6.2. Dessert Toppings

Thickened cream can be used as a luscious topping for desserts such as pies, cakes, or parfaits. Spoon or pipe the thickened cream onto the dessert before serving to add a creamy and decadent touch.


6.3. Sauces and Soups

Thickened cream can enhance sauces and soups by adding richness and body. Incorporate the thickened cream into warm sauces or soups, stirring gently to ensure smooth integration.

blender

Alternative Thickening Agents

8.1. Heavy Cream or Whipping Cream

If you don’t have access to stabilizers or cream cheese, simply blending chilled heavy cream or whipping cream can also result in a thicker consistency. The fat content in these creams lends itself to natural thickening when blended properly.


8.2. Instant Pudding Mix

Another option for thickening cream is to incorporate instant pudding mix. Choose a flavor that complements your dish and gradually add the mix to the chilled cream while blending. This method adds both thickness and flavor to your cream.


8.3. Fruit Purees or Coulis

For a fruity twist, incorporate fruit purees or coulis into the cream. Blend chilled cream with the desired fruit puree until well combined. The natural pectin in the fruit can help thicken the cream while imparting a delightful flavor.


Flavoring and Sweetening

9.1. Adding Flavor Extracts

To enhance the taste of the thickened cream, consider adding flavor extracts such as vanilla, almond, or mint. Gradually incorporate the desired extract into the cream while blending to achieve a well-balanced flavor.


9.2. Sweetening the Cream

If you prefer a sweetened cream, gradually add powdered sugar, honey, or maple syrup while blending. Adjust the amount based on your desired level of sweetness. Taste test as you go to ensure the sweetness is to your liking.

blender

Conclusion

Thickening cream in a blender is a versatile and effective method for achieving the desired consistency and texture. Chilling the cream before blending, using adjustable speed settings, and gradually increasing the speed help ensure a smooth and thickened result. Incorporating stabilizers or cream cheese can further enhance the thickness and stability of the cream. It is important to monitor the blending process, scrape down the sides of the blender jar, and adjust as needed to achieve the desired thickness. Experiment with different applications for thickened cream, such as whipped cream or dessert toppings, to add richness and texture to your culinary creations. Enjoy the versatility and creativity that comes with thickened cream made in a blender.

Posted on Leave a comment

Do dogs feel better after a haircut with human clippers?

Hair Clippers

Introduction:

Grooming plays a vital role in a dog’s overall well-being, and haircuts are an important part of their regular grooming routine. While human clippers may seem like a convenient option for cutting a dog’s hair, it is essential to consider the impact on their comfort and happiness. In this guide, we will explore whether dogs feel better after a haircut with human clippers, taking into account factors such as their comfort, stress levels, and overall grooming experience. By understanding these factors, you can make an informed decision about the best grooming methods for your furry friend.

Hair Clippers

Do dogs feel better after a haircut with human clippers?

Considerations for Dog Haircuts:

Before discussing the impact of using human clippers on a dog’s well-being, it is important to consider some general aspects of dog haircuts:

a. Breed and Coat Type: Different dog breeds have varying coat types, such as long, short, curly, or wiry. Each coat type requires specific grooming techniques and tools to ensure the best results and the comfort of the dog.

b. Comfort and Safety: A dog’s comfort and safety should always be the top priority during grooming. Haircuts should be done in a manner that minimizes stress, avoids injury, and ensures the dog’s well-being.

c. Professional Assistance: Some dogs have complex coat types or specific grooming needs that may be best handled by a professional groomer. Professional groomers have the necessary skills, experience, and tools to provide the most comfortable and suitable haircuts for dogs.

Hair Clippers

Human Clippers vs. Dog Clippers:

When it comes to cutting a dog’s hair, using clippers specifically designed for dogs is generally recommended. Here are some key differences between human clippers and dog clippers:

a. Blade Design and Speed: Dog clippers are designed with blades that are suitable for various coat types and provide the necessary speed to achieve efficient and comfortable grooming. Human clippers may have different blade designs and speeds, which may not be as effective or comfortable for dog haircuts.

b. Noise and Vibration: Human clippers can be louder and produce more vibration than dog clippers. The noise and vibrations of human clippers may startle or stress dogs, making the grooming experience less pleasant for them.

c. Safety Features: Dog clippers often have safety features, such as rounded blade tips and guards, to minimize the risk of accidentally cutting the dog’s skin. Human clippers may lack these safety features, increasing the risk of injury during grooming.

d. Adjustability: Dog clippers usually offer adjustable blade lengths, allowing for different haircuts and varying coat lengths. Human clippers may not have the same level of adjustability, limiting the options for grooming different areas of a dog’s body.

Hair Clippers

Impact on Dog Comfort and Happiness:

The comfort and happiness of dogs during and after a haircut are key indicators of the success of the grooming experience. While the use of human clippers may not necessarily harm dogs, it is important to consider the potential impact on their overall well-being. Here are some factors to consider:

a. Noise and Vibrations: As mentioned earlier, human clippers may produce louder noise and stronger vibrations than dog clippers. This can cause anxiety, stress, and discomfort for some dogs, making the grooming process less enjoyable for them.

b. Heat and Discomfort: Human clippers may heat up more quickly with extended use, potentially causing discomfort or even burns to the dog’s skin. Dogs have more sensitive skin than humans, so it is crucial to monitor the temperature of the clippers throughout the grooming session.

c. Grooming Experience: The overall grooming experience, including the handling, movements, and tools used, can significantly impact a dog’s comfort and happiness. Human clippers may not provide the same level of smoothness, precision, and ease of use as dog clippers, potentially leading to a less comfortable and satisfactory haircut.

d. Stress Levels: Dogs may experience varying levels of stress during grooming. It is important to minimize stress and anxiety as much as possible to create a positive grooming experience. Using appropriate grooming tools, providing breaks, and employing gentle handling techniques can help reduce stress levels during the haircut.

e. Post-Grooming Behavior: Observing a dog’s behavior after a haircut can provide insights into their comfort and happiness. If a dog appears more relaxed, content, and exhibits playful or positive behaviors, it can be an indication that they feel better after the grooming session. However, every dog is unique, and their individual behavior should be taken into account.

Hair Clippers

Enhancing the Grooming Experience:

To ensure that dogs feel better after a haircut, regardless of the clippers used, consider the following tips to enhance the grooming experience:

a. Positive Reinforcement: Use positive reinforcement techniques such as treats, praise, and rewards throughout the grooming process. Rewarding calm behavior and offering treats as a form of encouragement can help create a positive association with grooming.

b. Familiarization and Desensitization: Introduce your dog to grooming tools, including clippers, in a safe and positive environment. Gradually acclimate them to the sound, vibrations, and movements associated with grooming. This helps desensitize them and minimizes anxiety or fear during haircuts.

c. Comfortable Environment: Ensure a comfortable and calm grooming environment for your dog. Choose a quiet, well-lit space, preferably free from distractions or other potential stressors. Providing a comfortable grooming surface or mat can also contribute to their overall comfort.

d. Regular Grooming Routine: Establishing a regular grooming routine helps dogs become more familiar with the process over time. Consistency and repetition can reduce anxiety and make future grooming sessions more comfortable.

e. Professional Assistance: If you are unsure about using human clippers or if your dog has specific grooming needs, consider seeking professional assistance. Professional groomers have the necessary expertise, tools, and experience to ensure a comfortable and satisfactory haircut for your dog.

Hair Clippers

Conclusion:

While dogs may not necessarily feel worse after a haircut with human clippers, it is important to consider their comfort and overall grooming experience. Using clippers specifically designed for dogs can provide a more suitable and comfortable grooming process. Dog clippers offer specialized features, adjustability, and safety measures that contribute to a positive experience. However, regardless of the clippers used, creating a calm and positive grooming environment and employing gentle handling techniques is crucial for ensuring that dogs feel better after a haircut. By prioritizing the comfort and happiness of dogs during grooming, you can help them maintain a healthy, well-groomed coat while fostering a positive relationship with the grooming process.

Posted on Leave a comment

What is the easiest way to cut a dog’s hair with clippers?

Hair Clippers

Introduction:

Cutting a dog’s hair with clippers can be a convenient and cost-effective way to maintain their grooming. However, it is important to approach the process with care and ensure the safety and comfort of your furry friend. In this guide, we will explore the easiest way to cut a dog’s hair with clippers, providing step-by-step instructions, safety tips, and techniques to make the process smoother. By following these guidelines, you can achieve a well-groomed and comfortable result while minimizing stress for both you and your dog.

Hair Clippers

What is the easiest way to cut a dog’s hair with clippers?

Preparing Your Dog:

Before starting the haircut, it is crucial to properly prepare your dog. Consider the following steps:

a. Brushing the Coat: Thoroughly brush your dog’s coat to remove any tangles, mats, or debris. This not only makes the clipping process easier but also ensures a more even and polished result.

b. Bathing and Drying: If necessary, give your dog a bath and fully dry their coat before clipping. Clean and dry hair is easier to work with and reduces the risk of the clippers becoming clogged.

c. Calming and Familiarizing: Spend some time calming and familiarizing your dog with the clippers. Turn them on briefly in the vicinity of your dog to help them become accustomed to the sound and vibrations.

Choosing the Right Clippers:

Selecting the appropriate clippers for your dog is crucial to ensure a smooth and comfortable grooming experience. Consider the following factors:

a. Dog Size and Coat Type: Different dog breeds and sizes require specific clippers designed for their coat type. Determine the appropriate clippers based on your dog’s size and the texture of their coat (e.g., long, short, thick, or wiry).

b. Noise Level: Opt for clippers with a lower noise level, as loud noises can startle and stress some dogs. Clippers with quieter motors can help create a more relaxed environment during the grooming process.

c. Corded or Cordless: Decide whether you prefer corded or cordless clippers. Corded clippers provide consistent power but may limit maneuverability, while cordless clippers offer greater freedom of movement at the expense of battery life.

d. Blades: Ensure the clippers come with appropriate blades for your desired hair length. Different blades can be attached to achieve varying lengths, allowing for customized grooming.

Hair Clippers

Safety Precautions:

When cutting your dog’s hair with clippers, it is important to prioritize their safety and well-being. Consider the following safety precautions:

a. Clippers Maintenance: Ensure the clippers are in good working condition and properly maintained. Sharpen or replace blades as needed to prevent discomfort or accidental cuts.

b. Clipper Temperature: Monitor the temperature of the clippers throughout the grooming process. Clippers can heat up with extended use, potentially causing discomfort or burns. Pause periodically to allow the clippers to cool down and check the temperature against your skin before continuing.

c. Avoid Sensitive Areas: Exercise caution when clipping sensitive areas such as the face, ears, genitals, or paws. These areas require gentle handling and may require alternative grooming techniques or professional assistance.

d. Skin Check: Regularly check your dog’s skin for any irritations, redness, or signs of discomfort during the grooming process. If you notice any issues, consult a veterinarian before proceeding with the haircut.

e. Patience and Breaks: Be patient and allow for breaks during the grooming process. This helps alleviate any stress or discomfort your dog might experience and allows them to relax before continuing.

Hair Clippers

Clipping Techniques:

To cut your dog’s hair with clippers, follow these step-by-step techniques:

a. Introduce the Clippers: Before starting the clipping process, allow your dog to become familiar with the clippers. Turn them on and let your dog sniff and investigate them. Reward any positive interaction with treats or praise.

b. Start with Familiar Areas: Begin clipping in areas your dog is already accustomed to being touched, such as the back or sides. Use gentle, smooth strokes in the direction of hair growth.

c. Gradual Approach: Gradually move to more sensitive areas, using a calm and reassuring tone to keep your dog relaxed. Use shorter strokes and gentle pressure when grooming sensitive areas such as the face, legs, or tail.

d. Pay Attention to Angles: Adjust the angle of the clippers to follow the contours of your dog’s body. This allows for a more even and natural-looking haircut.

e. Monitor Clipper Temperature: Regularly check the temperature of the clippers throughout the grooming process. If they become too hot, pause and allow them to cool down before proceeding.

f. Use Comb Attachments: Attach the appropriate comb attachment to the clippers to achieve the desired hair length. This helps maintain consistency and ensures an even cut.

g. Gradual Haircut: Trim the hair gradually, starting with longer comb attachments and working your way to shorter ones for a more precise finish. Take breaks as needed to allow your dog to rest and readjust.

h. Check for Evenness: Regularly check the haircut for evenness and adjust as necessary. Take extra care around difficult areas, ensuring a smooth transition between different hair lengths.

i. Foot and Paw Care: Pay special attention to your dog’s feet and paws. Use smaller clippers or grooming scissors to trim the hair in these areas, taking care not to cut the delicate skin or nails.

j. Final Touches: After completing the main haircut, use grooming scissors to make any necessary touch-ups or refine the overall appearance. Trim any stray hairs or uneven sections for a polished finish.

Hair Clippers

Post-Grooming Care:

After the haircut, provide your dog with extra care and attention. Consider the following:

a. Reward and Praise: Reward your dog with treats, praise, or playtime to associate the grooming experience with positive reinforcement.

b. Treatments and Soothing: Apply any necessary post-grooming treatments, such as calming sprays or skin-soothing products, if recommended by your veterinarian. This can help alleviate any irritation or discomfort.

c. Clean Up: Clean up the grooming area and dispose of any clipped hair. Ensure that the space is tidy and free of any potential hazards or irritants.

d. Regular Grooming Schedule: Establish a regular grooming schedule to maintain your dog’s coat and prevent matting or excessive hair growth. Consistent grooming helps keep your dog comfortable and healthy.

Hair Clippers

Conclusion:

Cutting your dog’s hair with clippers can be made easier by following proper preparation, safety precautions, and grooming techniques. By preparing your dog, choosing the right clippers, and prioritizing their safety, you can create a comfortable and stress-free grooming environment. Utilize gradual clipping techniques, monitor clipper temperature, and pay attention to sensitive areas. Remember to reward and praise your dog throughout the process and provide post-grooming care to keep them comfortable and happy. With patience, practice, and a gentle touch, you can achieve a well-groomed and stylish haircut for your furry companion.

Posted on Leave a comment

How do costco’s hair clippers compare in price to other brands?

Hair Clippers

Introduction:

Costco offers a wide range of hair clippers from various brands at competitive prices. Comparing the prices of Costco’s hair clippers to other brands can help you make an informed decision and find the best value for your money. In this guide, we will explore how Costco’s hair clipper prices compare to other brands, highlighting the factors that affect pricing, the range of prices available, and the overall value offered. By understanding the pricing landscape, you can confidently choose the hair clippers that meet your needs and budget.

Hair Clippers

How do costco’s hair clippers compare in price to other brands?

Factors Affecting Hair Clipper Pricing:

Before comparing prices, it is important to understand the factors that influence the pricing of hair clippers. Consider the following aspects:

a. Brand Reputation: Established and well-known brands tend to command higher prices due to their reputation for quality and reliability. The brand’s history, customer reviews, and market position contribute to its perceived value.

b. Features and Performance: Hair clippers with advanced features and superior performance typically come at a higher price point. Additional features such as cordless operation, adjustable blades, or specialized cutting attachments may result in a higher price tag.

c. Build Quality and Durability: Hair clippers made with premium materials and superior craftsmanship often come with a higher price. Higher-quality materials and construction contribute to the durability and longevity of the clippers.

d. Included Accessories: The number and quality of accessories included with the hair clippers can affect the pricing. More accessories, such as comb attachments, scissors, cleaning brushes, and storage cases, may justify a higher price due to their added value and convenience.

e. Professional or Consumer Grade: Hair clippers designed for professional use generally come at a higher price compared to those intended for home use. Professional-grade clippers often offer enhanced performance, durability, and precision, making them more expensive.

Hair Clippers

Range of Hair Clipper Prices at Costco:

Costco offers a variety of hair clippers from different brands, catering to various budgets and needs. The price range of hair clippers at Costco typically varies based on the factors mentioned above. Consider the following categories:

a. Budget-Friendly Options: Costco carries affordable hair clippers suitable for those on a tight budget. These clippers generally offer basic features, reliable performance, and a lower price point. Prices for budget-friendly options at Costco can range from around $15 to $30.

b. Mid-Range Selection: Costco also offers a range of hair clippers in the mid-price range. These clippers often feature more advanced features, improved build quality, and better performance. Prices for mid-range options at Costco typically fall between $30 and $70.

c. Professional-Grade Clippers: For individuals seeking high-performance and professional-grade clippers, Costco offers premium options. These clippers are designed for professional use and incorporate advanced features, durability, and precise cutting capabilities. Prices for professional-grade clippers at Costco can range from $70 to over $200, depending on the brand and model.

Hair Clippers

Comparing Costco’s Hair Clipper Prices to Other Brands:

When comparing the prices of hair clippers at Costco to other brands, it is important to consider the factors mentioned earlier. Here are some key points to keep in mind:

a. Competitive Pricing: Costco is known for providing competitive prices across its product range, including hair clippers. While prices may vary between brands and models, Costco generally offers competitive pricing compared to other retailers.

b. Exclusive Deals and Bundles: Costco often negotiates exclusive deals and discounts with manufacturers, allowing them to offer attractive prices to their members. This means that you may find hair clippers at Costco at a lower price compared to other stores.

c. Brand Options: Costco carries a variety of reputable hair clipper brands, including well-known names in the industry. This allows you to compare prices and features within the Costco range, ensuring you find the best fit for your needs and budget.

d. Member Benefits: Costco’s membership program offers additional benefits such as discounts, extended warranties, and exclusive promotions. These benefits can further enhance the value for money when purchasing hair clippers from Costco.

e. Price Comparison: To accurately compare prices, it is recommended to research prices from various sources, including online retailers and local stores. Compare the features, performance, and included accessories to determine the best value for your specific requirements.

Considerations for Value:

While price is an important factor, it is equally important to consider the overall value offered by hair clippers. Value is determined by factors such as build quality, performance, durability, included accessories, and customer reviews. Consider the following when assessing the value of hair clippers:

a. Build Quality and Durability: Investing in hair clippers with superior build quality and durability ensures long-term usage and reduces the need for frequent replacements.

b. Performance and Features: Evaluate the performance and features offered by the hair clippers. Look for features that align with your needs and ensure efficient, precise, and comfortable cutting.

c. Included Accessories: Assess the quality and usefulness of the included accessories. Consider whether the accessories meet your needs and add value to the overall package.

d. Customer Reviews and Ratings: Read customer reviews and ratings to gain insights into the experiences of other users. Pay attention to feedback regarding performance, durability, and overall satisfaction.

e. Warranty and Customer Support: Consider the warranty offered by the manufacturer and the level of customer support available. A longer warranty and responsive customer support can contribute to the overall value of the product.

Hair Clippers

Additional Considerations for Comparing Hair Clipper Prices:

In addition to the factors mentioned earlier, there are a few more considerations to keep in mind when comparing hair clipper prices at Costco to other brands:

a. Package Deals: Costco is known for offering package deals that may include additional accessories or products alongside the hair clippers. These deals can provide extra value and make Costco’s prices more competitive compared to purchasing individual items separately.

b. Promotional Offers: Costco frequently runs promotions and discounts on various products, including hair clippers. Keep an eye out for special offers, seasonal sales, or member-exclusive deals that may further reduce the price of hair clippers.

c. Product Warranty: Check the warranty provided by both Costco and other brands. A longer warranty period can add value to your purchase, providing peace of mind and protection against potential defects or issues.

d. Return Policy: Familiarize yourself with Costco’s generous return policy, which allows members to return products for a full refund if they are not satisfied. This policy can be advantageous if you encounter any problems with the hair clippers after purchase.

e. Brand Reputation and Reviews: Consider the reputation of both the hair clipper brand and the specific model you are interested in. Look for customer reviews and ratings to gauge the reliability, performance, and overall satisfaction of the product.

f. After-Sales Support: Evaluate the level of after-sales support provided by both Costco and other brands. Consider factors such as customer service availability, ease of contact, and responsiveness to inquiries or issues.

Hair Clippers

Conclusion:

Costco offers a range of hair clippers from various brands at competitive prices. When comparing the prices of Costco’s hair clippers to other brands, factors such as brand reputation, features, build quality, and included accessories should be considered. Costco’s hair clipper prices generally fall within the budget-friendly to mid-range categories, with options available for both home use and professional-grade needs. It is essential to evaluate the overall value offered by hair clippers, considering factors such as build quality, performance, included accessories, and customer reviews. By carefully considering these aspects, you can make an informed decision and find the best hair clippers that meet your needs and provide excellent value for money.

Posted on Leave a comment

How do the hair clippers from costco work?

Hair Clippers

Introduction:

Hair clippers from Costco are a popular choice for individuals who prefer to cut their hair at home. These clippers are typically sold as part of a kit that includes various attachments, scissors, combs, and other accessories. While specific models may vary, hair clippers from Costco generally operate in a similar manner. In this guide, we will explore how hair clippers from Costco work, including their components, usage instructions, and maintenance tips. By understanding the functionality of these clippers, you can confidently use them to achieve professional-looking haircuts at home.

Hair Clippers

How do the hair clippers from costco work?

Understanding the Components:

To comprehend how hair clippers from Costco work, it is essential to familiarize yourself with their components. Consider the following parts commonly found in hair clippers:

a. Clipper Body: The main body of the clipper houses the motor, power button, and other controls. It is typically ergonomically designed to provide a comfortable grip during use.

b. Blades: The blades are the cutting component of the clipper and are responsible for trimming the hair. Hair clippers from Costco usually come with detachable blades that can be easily removed and replaced.

c. Comb Attachments: Comb attachments, also known as guards or guide combs, are plastic attachments that determine the hair length or cutting grade. These attachments clip onto the blades and ensure a consistent length throughout the haircut.

d. Power Cord or Battery: Hair clippers from Costco may have a power cord for direct electrical connection or a rechargeable battery for cordless operation. The power source provides the necessary energy to operate the clippers.

e. Accessories: Costco hair clipper kits often include various accessories, such as scissors, combs, cleaning brushes, and lubricating oil. These accessories complement the clippers and assist in achieving desired haircuts.

Hair Clippers

Operating the Hair Clippers:

To effectively use hair clippers from Costco, follow these step-by-step instructions:

a. Preparation: Start by preparing the area where you will be cutting hair. Ensure good lighting and have a mirror available, allowing you to see the haircut progress from different angles.

b. Clean and Dry Hair: It is important to begin with clean and dry hair. Shampoo and towel-dry the hair before starting the haircut. Dry hair is easier to manage and provides better cutting results.

c. Select the Comb Attachment: Choose the desired comb attachment based on the desired hair length. Clip the chosen attachment onto the blades, ensuring a secure fit.

d. Turn On the Clippers: If your hair clippers have a power cord, plug it into a suitable power outlet. If they are cordless, make sure they are fully charged. Turn on the clippers by pressing the power button or switch.

e. Start with the Sides and Back: Begin cutting the hair on the sides and back of the head. Hold the clippers at a slight angle against the hair, moving upward from the neck to the desired hairline. Use smooth and gentle strokes to ensure an even cut.

f. Cut Against the Grain: To achieve a closer cut, consider cutting against the grain of the hair. This means moving the clippers in the opposite direction of hair growth. Be cautious when using this technique, as it may result in a shorter cut than intended.

Hair Clippers

Maintenance and Care Tips:

To keep your hair clippers from Costco in optimal condition, consider the following maintenance and care tips:

a. Regular Cleaning: Clean the clippers after each use to remove hair and debris. Detach the blades and use a cleaning brush to remove any trapped hair. Wipe down the clipper body with a clean cloth.

b. Lubrication: Regularly oil the blades of the clippers to ensure smooth operation and prevent friction. Use the provided lubricating oil or a dedicated clipper oil, applying a few drops along the teeth or cutting edge of the blade.

c. Blade Replacement: Over time, the blades may become dull or damaged. Follow the manufacturer’s instructions for blade replacement, ensuring you have the correct replacement blades for your specific model.

d. Storage: Store the clippers in a clean and dry place when not in use. Consider using the provided storage case or a suitable protective cover to prevent damage and dust accumulation.

e. Professional Servicing: If you encounter significant issues with your hair clippers or if they are not performing as expected, consider seeking professional servicing or repair. Trained technicians can address complex problems and ensure your clippers continue to function effectively.

Hair Clippers

Cleaning the Hair Clippers:

Regular cleaning is essential to maintain the hygiene and performance of your hair clippers. Follow these steps to clean the clippers properly:

a. Turn Off and Unplug: Before cleaning, ensure the clippers are turned off and unplugged for safety.

b. Remove Excess Hair: Use a small brush or toothbrush to remove any hair or debris from the blades, comb attachments, and the body of the clippers. Pay attention to hard-to-reach areas and ensure all surfaces are clean.

c. Detach Blade Assembly (if applicable): If your clippers allow for it, detach the blade assembly following the manufacturer’s instructions. This enables thorough cleaning and prevents buildup of hair and debris.

d. Wash with Soap and Water: If the blades are detachable, wash them with mild soap and warm water. Be careful not to submerge the entire clipper body in water, as this can damage the internal components. Instead, wipe the body with a damp cloth.

e. Dry Thoroughly: After washing, ensure all parts are thoroughly dried. Use a clean towel or cloth to remove any moisture, paying particular attention to the blades. Allow the parts to air dry completely before reassembling.

f. Disinfect (if necessary): If you wish to disinfect the blades and comb attachments, follow the manufacturer’s instructions for proper disinfection procedures. This step is especially important if the clippers are used by multiple individuals or if there is a risk of infections.

Hair Clippers

Conclusion:

Hair clippers from Costco are user-friendly tools that allow for professional-looking haircuts at home. Understanding the components and functionality of these clippers is crucial for their effective use. By familiarizing yourself with their parts, operating instructions, and maintenance tips, you can confidently trim and style your hair. Remember to choose the appropriate comb attachment, use gentle and even strokes, and regularly clean and lubricate the clippers. With proper care and maintenance, hair clippers from Costco can serve as reliable tools for achieving desired hairstyles in the comfort of your own home.

Posted on Leave a comment

What can I use to lubricate my clippers?

Hair Clippers

Introduction:

Properly lubricating your clippers is essential for their smooth operation and longevity. While there are various products available for clipper lubrication, it is important to choose the right one to ensure optimal performance and prevent damage. In this guide, we will explore different options for lubricating your clippers, including clipper oil, blade oil, and alternative lubricants. We will discuss their features, suitability for clippers, and how to use them effectively. By understanding these options, you can make an informed decision and keep your clippers well-maintained for years to come.

Hair Clippers

What can I use to lubricate my clippers?

Clipper Oil:

Clipper oil is specifically designed for lubricating hair clippers. It is the recommended choice for ensuring optimal performance and preventing damage. Consider the following aspects:

a. Features: Clipper oil is formulated to provide the necessary lubrication and protection for the blades and moving parts of the clippers. It is generally lightweight and has low viscosity, facilitating smooth operation and reducing friction.

b. Suitability: Clipper oil is suitable for all types of clippers, including professional-grade and home-use clippers. It is compatible with various brands and models, making it a versatile option for lubricating your clippers.

c. Usage: To use clipper oil, apply a few drops along the teeth or cutting edge of the blade. Start at one end and work your way to the other, ensuring the oil is evenly distributed along the entire length of the blade. Turn on the clippers and let them run for a few seconds to allow the oil to spread and coat the entire blade. Spread the oil further by gently moving the clippers back and forth or side to side.

d. Availability: Clipper oil is widely available at beauty supply stores, online retailers, and even some general merchandise stores. It is recommended to use a reputable brand of clipper oil to ensure quality and effectiveness.

Hair Clippers

Blade Oil:

Blade oil is another option for lubricating hair clippers. While similar to clipper oil, it may have slight differences in formula and viscosity. Consider the following aspects:

a. Features: Blade oil is specifically designed for lubricating clipper blades. It is often formulated to provide enhanced protection against rust and corrosion, extending the lifespan of the blades. Blade oil typically has similar lightweight and low-viscosity properties as clipper oil.

b. Suitability: Blade oil is suitable for all types of clippers, including professional-grade and home-use clippers. It is compatible with various brands and models, making it a reliable option for lubricating your clippers.

c. Usage: The usage of blade oil is similar to clipper oil. Apply a few drops along the teeth or cutting edge of the blade, ensuring even distribution. Turn on the clippers and let them run for a few seconds to allow the oil to spread and coat the entire blade. Gently move the clippers back and forth or side to side to spread the oil further.

d. Availability: Blade oil is available at beauty supply stores, online retailers, and some general merchandise stores. It is important to choose a reputable brand of blade oil to ensure quality and effectiveness.

Alternative Lubricants:

In certain situations where clipper or blade oil may not be readily available, there are alternative lubricants that can be used temporarily. While these alternatives can provide temporary lubrication, it is recommended to use dedicated clipper or blade oil for long-term maintenance. Consider the following options:

a. Mineral Oil: Mineral oil, commonly found in pharmacies or drugstores, can be used as a temporary lubricant for clippers. It is important to choose a food-grade or cosmetic-grade mineral oil that is safe for use on the skin and hair. Apply a small amount to the blades and moving parts, ensuring even distribution.

b. Light Machine Oil: Light machine oils, such as sewing machine oil or 3-in-1 oil, can provide temporary lubrication for clippers. These oils are generally lightweight and have low viscosity, making them suitable for reducing friction and ensuring smooth operation. Apply a small amount to the blades and moving parts, ensuring even distribution.

c. WD-40 (Limited Use): While WD-40 can provide temporary lubrication, it is not recommended for long-term use on clippers. WD-40 is a multi-purpose product that contains solvents and may not offer the same level of protection and lubrication as dedicated clipper or blade oil. If using WD-40, apply a small amount to the blades and moving parts, and wipe off any excess residue.

Hair Clippers

Choosing the Right Lubricant:

When choosing a lubricant for your clippers, consider the following factors:

a. Purpose: Select a lubricant specifically designed for hair clippers or clipper blades. These lubricants are formulated to provide the necessary protection, reduce friction, and ensure the longevity of your clippers.

b. Compatibility: Ensure the lubricant is compatible with your specific brand and model of clippers. While most lubricants are suitable for various clippers, it is always best to check the manufacturer’s recommendations or consult the user manual.

c. Quality and Authenticity: Opt for reputable brands and purchase from trusted sources to ensure the quality and authenticity of the lubricant. This helps guarantee the effectiveness and safety of the product.

Hair Clippers

Additional Maintenance Tips:

Proper lubrication is just one aspect of maintaining your clippers. Consider the following tips for overall clippers maintenance:

a. Regular Cleaning: Clean your clippers after each use to remove hair and debris. This helps prevent buildup and ensures smooth operation.

b. Disinfection: Disinfect the blades and comb attachments regularly to maintain hygiene and prevent the spread of bacteria or infections. Follow the manufacturer’s instructions for proper disinfection procedures.

c. Replace Worn Parts: Regularly inspect the blades, comb attachments, and other components for signs of wear or damage. Replace any worn or damaged parts promptly to maintain optimal performance.

d. Proper Storage: Clean and thoroughly dry your clippers before storing them in a dry and dust-free environment. Consider using a protective case or cover to prevent damage during storage.

e. Professional Servicing: If you encounter significant issues with your clippers or if they are not performing as expected, consider seeking professional servicing or repair. Trained technicians can address complex problems and ensure your clippers continue to function effectively.

Hair Clippers

Conclusion:

Proper lubrication of your clippers is crucial for their smooth operation and longevity. Clipper oil and blade oil are specifically designed for this purpose and are recommended for optimal performance. When these options are not available, alternatives such as mineral oil or light machine oil can be used temporarily. However, it is important to use dedicated clipper or blade oil for long-term maintenance. When choosing a lubricant, consider its purpose, compatibility with your clippers, and the quality and authenticity of the product. Regular maintenance, including cleaning, disinfection, and proper storage, further contributes to the performance and lifespan of your clippers. By following these guidelines, you can effectively lubricate your clippers and ensure they continue to provide reliable and efficient haircuts.

Posted on Leave a comment

How do you put oil on hair clippers?

Hair Clippers

Introduction:

Applying oil to hair clippers is an essential maintenance step to keep them running smoothly and to ensure the longevity of the blades. Proper lubrication prevents friction and heat buildup, reduces wear and tear, and helps maintain the cutting efficiency of the clippers. In this guide, we will explore how to put oil on hair clippers step by step, including preparing the clippers, applying the oil, and distributing it evenly. We will also discuss the importance of regular oiling, the types of oil suitable for clippers, and additional maintenance tips to keep your clippers in optimal condition.

Hair Clippers

How do you put oil on hair clippers?

Prepare the Clippers:

Before applying oil to your hair clippers, ensure they are clean and free from any hair or debris. Consider the following steps:

a. Turn Off and Unplug: Safety is paramount when working with hair clippers. Make sure the clippers are turned off and unplugged to avoid accidental activation during the oiling process.

b. Remove Excess Hair: Use a small brush or toothbrush to remove any loose hair or debris from the blades, comb attachments, and the body of the clippers. Ensure all surfaces are clean before proceeding.

c. Detach Blade Assembly (if applicable): Check if the blade assembly can be removed from the clippers. Some models allow for easy removal, while others may require disassembly according to the manufacturer’s instructions. If possible, detach the blade assembly to allow for easier access and oil application.

Hair Clippers

Choose the Right Oil:

Selecting the appropriate oil is crucial to ensure proper lubrication and prevent damage to your clippers. Consider the following factors:

a. Clipper Oil: Use oil specifically designed for hair clippers. Clipper oil is formulated to provide the necessary lubrication and is often included with the clippers at the time of purchase. If you don’t have clipper oil, you can purchase it from a beauty supply store or online.

b. Avoid Substitutes: Avoid using household oils, such as cooking oil or WD-40, as they are not suitable for hair clippers. These oils can cause damage to the blades, attract dirt, and lead to poor performance.

Apply the Oil:

Once you have prepared the clippers and chosen the appropriate oil, follow these steps to apply the oil:

a. Examine the Blades: Take a close look at the blades to identify any visible signs of wear, rust, or damage. If the blades are severely damaged or dull, it may be necessary to replace them or seek professional assistance.

b. Drip the Oil: Apply a few drops of oil along the teeth or cutting edge of the blade. Start at one end and work your way to the other, ensuring the oil is evenly distributed along the entire length of the blade. Use caution not to apply too much oil, as excess oil can lead to a messy and inefficient cutting process.

c. Turn On the Clippers: Turn on the clippers and let them run for a few seconds. This allows the oil to spread and coat the entire blade, ensuring thorough lubrication.

d. Spread the Oil: To ensure even distribution of the oil, gently move the clippers back and forth or side to side. This helps spread the oil across the blade surface and ensures all moving parts are properly lubricated.

e. Apply More Oil if Necessary: If you notice any areas that are not adequately coated with oil, add a few more drops and repeat the process of running and spreading the clippers.

f. Let the Oil Settle: Allow the oil to sit on the blades for a few minutes to fully penetrate and lubricate the moving parts. This resting period allows the oil to work its way into the nooks and crannies of the blades, ensuring optimal performance.

Hair Clippers

Wipe off Excess Oil:

After the oil has had time to settle, remove any excess oil from the clippers. Consider the following steps:

a. Turn Off and Unplug the Clippers: Before wiping off excess oil, make sure the clippers are turned off and unplugged to prevent accidents.

b. Use a Clean Cloth or Tissue: Take a clean cloth or tissue and gently wipe off any excess oil from the blades, comb attachments, and the body of the clippers. Ensure all surfaces are dry and free from oil residue.

c. Reassemble (if applicable): If you detached the blade assembly, carefully reattach it to the clippers according to the manufacturer’s instructions. Ensure the blades are securely in place before using the clippers.

Hair Clippers

Regular Maintenance and Additional Tips:

To keep your clippers in optimal condition, follow these additional maintenance tips:

a. Regular Oiling: Oil your clippers before each use or at least every few haircuts, depending on the frequency of use. Regular oiling ensures proper lubrication and prevents premature wear or damage to the blades.

b. Clean and Sanitize: Regularly clean the clippers by removing any hair or debris. Disinfect the blades and comb attachments according to the manufacturer’s instructions to maintain hygiene.

c. Replace Worn Parts: Keep an eye on the condition of the blades, comb attachments, and other components of the clippers. Replace any worn or damaged parts promptly to ensure optimal performance.

d. Store Properly: After each use, clean and store the clippers in a dry and dust-free environment. Consider using a protective case or cover to prevent damage.

e. Professional Servicing: If you notice any significant issues or if the clippers are not performing as expected, consider seeking professional servicing or repair. Trained technicians can address complex problems and ensure your clippers continue to function effectively.

Hair Clippers

Conclusion:

Applying oil to hair clippers is a vital maintenance step to ensure optimal performance and longevity. By preparing the clippers, choosing the right oil, and applying it properly, you can prevent friction, reduce wear and tear, and maintain the cutting efficiency of the blades. Regular oiling, along with proper cleaning, sanitization, and storage, will keep your clippers in optimal condition. Remember to follow the manufacturer’s instructions and seek professional assistance if needed. With proper care and maintenance, your hair clippers will provide reliable performance and allow you to achieve professional-quality haircuts at home.

Posted on Leave a comment

Who would benefit from using an electric toothbrush?

Introduction:

Electric toothbrushes have become increasingly popular due to their convenience and potential benefits over manual toothbrushes. While both manual and electric toothbrushes can be effective tools for maintaining oral health, electric toothbrushes offer unique advantages that make them particularly beneficial for certain individuals. In this guide, we will explore who would benefit from using an electric toothbrush, highlighting specific groups of people who can experience improved oral hygiene and dental health. By understanding these benefits, you can determine if an electric toothbrush is the right choice for you.

Electric Toothbrush

Who would benefit from using an electric toothbrush?

Individuals with Limited Mobility:

People with limited mobility due to conditions such as arthritis, Parkinson’s disease, or other physical disabilities can benefit greatly from using an electric toothbrush. The powered motion of an electric toothbrush eliminates the need for vigorous manual brushing, making it easier for individuals with limited dexterity to effectively clean their teeth and gums. The ability to hold and maneuver a manual toothbrush may be challenging for these individuals, and an electric toothbrush can provide greater control and ease of use.

Children and Teenagers:

Children and teenagers can also benefit from using an electric toothbrush. Encouraging good oral hygiene habits from an early age is crucial for their lifelong dental health. Electric toothbrushes can make brushing more fun and engaging for children, motivating them to brush regularly and more effectively. Furthermore, the built-in timers and gentle vibrations of electric toothbrushes can help children develop a consistent brushing routine and ensure that they brush for the recommended two minutes.

Individuals with Braces or Orthodontic Appliances:

For individuals with braces or other orthodontic appliances, maintaining optimal oral hygiene can be more challenging due to the presence of brackets, wires, and hard-to-reach areas. Electric toothbrushes with specialized orthodontic brush heads or brush heads designed for cleaning around braces can make brushing more efficient and effective. The powered bristle action can help remove plaque and food particles from difficult-to-reach areas, reducing the risk of tooth decay and gum disease during orthodontic treatment.

People with Gum Disease or Gum Sensitivity:

Individuals who have gum disease or gum sensitivity can benefit from using an electric toothbrush. Electric toothbrushes with gentle oscillating or sonic vibrations can provide a massaging effect on the gums, promoting blood circulation and reducing inflammation. The controlled pressure and consistent brush head motion of electric toothbrushes also help prevent aggressive brushing, which can be detrimental to the gums. Proper brushing technique and regular use of an electric toothbrush can contribute to improved gum health and a reduction in gum disease symptoms.

Individuals with Tooth Sensitivity:

Tooth sensitivity can be a common issue for many people, making brushing with a manual toothbrush uncomfortable or painful. Electric toothbrushes with sensitive mode settings or brush heads designed for sensitive teeth can be gentler on the teeth and gums, reducing the discomfort associated with brushing. The oscillating or sonic vibrations of electric toothbrushes can also help remove plaque and stains without excessive pressure, minimizing the risk of enamel damage.

Busy Professionals:

Many busy professionals lead demanding lives that leave little time for self-care. Electric toothbrushes can be beneficial for these individuals as they provide a more efficient and effective cleaning experience. The powered motion of the brush head allows for better plaque removal in a shorter amount of time. Additionally, some electric toothbrushes come with features like timers and pressure sensors that help individuals maintain a consistent brushing routine and ensure they are brushing adequately.

Individuals with Cosmetic Dentistry:

People who have undergone cosmetic dentistry procedures, such as dental implants, veneers, or crowns, can benefit from using an electric toothbrush. Electric toothbrushes with gentle vibrations and soft bristles can effectively clean around these dental restorations without causing damage or scratching the surfaces. Proper cleaning of cosmetic dental work is vital to maintain their appearance and longevity, and electric toothbrushes can help achieve this.

Individuals with a History of Cavities or Gum Disease:

Individuals with a history of cavities or gum disease may find that electric toothbrushes can help improve their oral health. The oscillating or sonic motions of electric toothbrushes, combined with the consistent brush head movement, can enhance plaque removal and reduce the risk of dental issues. Electric toothbrushes can provide a more thorough cleaning experience compared to manual toothbrushes, helping to prevent the recurrence of cavities and gum disease.

Conclusion:

While both manual and electric toothbrushes can be effective tools for maintaining oral health, electric toothbrushes offer unique advantages that make them particularly beneficial for certain individuals.