Introduction
Making homemade ice cream is a delightful culinary adventure that brings joy to both children and adults alike. While traditional methods often involve specialized equipment and lengthy processes, making ice cream in a blender offers a quick and easy alternative. In this guide, we will explore the step-by-step process of creating delicious homemade ice cream using a blender, allowing you to enjoy creamy, frozen treats in no time.

How to make ice cream in a blender?
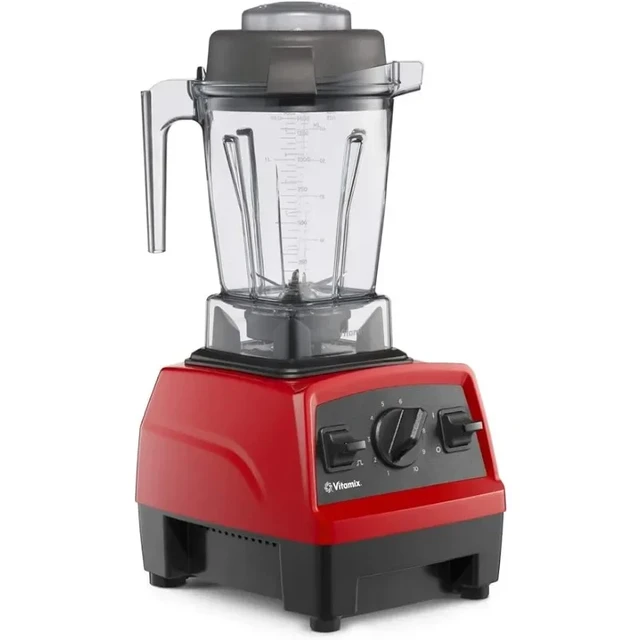
Choosing the Right Blender
1.1. Blender Capacity
Ensure that your blender has a sufficient capacity to accommodate the desired amount of ice cream mixture. Consider the quantity of ice cream you want to make, as well as the space required for expansion during freezing.
1.2. Motor Power
A blender with a powerful motor ensures smooth blending and efficient ice cream making. Look for blenders with motors specifically designed to handle frozen ingredients.
1.3. Blade Design
Opt for blenders with sturdy, sharp blades that can effectively blend and crush ice and other solid ingredients. Stainless steel blades tend to be more durable and efficient in blending frozen mixtures.

Preparing the Ice Cream Base
2.1. Ingredients
Gather the necessary ingredients for your ice cream base. This typically includes cream, milk, sugar, and flavorings of your choice, such as vanilla extract, cocoa powder, or fruit puree. Be creative and experiment with different flavors and add-ins to personalize your ice cream.
2.2. Chilling the Ingredients
For optimal results, chill the cream and milk in the refrigerator before using them in the ice cream base. Cold ingredients help achieve a smoother texture and faster freezing.
Blending the Ice Cream Mixture
3.1. Adding the Ingredients
Begin by adding the chilled cream and milk to the blender. Add sugar and any desired flavorings or mix-ins as well. The exact measurements will depend on your recipe, so refer to the specific quantities provided.
3.2. Blending Process
Place the lid securely on the blender and start blending on a low speed to combine the ingredients. Gradually increase the speed to achieve a smooth and creamy consistency. Blend for a few minutes until the mixture is well combined and all the ingredients are evenly distributed.
3.3. Scraping Down the Sides
Periodically stop blending and use a spatula or spoon to scrape down the sides of the blender jar. This ensures that any unmixed ingredients are incorporated into the mixture, resulting in a well-blended ice cream base.

Freezing the Ice Cream
4.1. Freezing Containers
Prepare a freezer-safe container or containers to store your ice cream. It can be one large container or several smaller ones, depending on your preference. Place the container(s) in the freezer to chill while you continue the process.
4.2. Chilling the Mixture
Transfer the blended ice cream base from the blender into a separate container. Cover the container with plastic wrap or a lid and refrigerate it for at least 1 hour, or until thoroughly chilled. Chilling the mixture before freezing helps improve the ice cream’s texture and consistency.
4.3. Freezing Process
Once the ice cream base is chilled, remove the containers from the freezer and pour the mixture into them. Fill the containers to about 3/4 full, as the ice cream will expand as it freezes. Leave some space at the top to allow for proper expansion.
4.4. Optional Stir-ins or Swirls
At this stage, you can add any additional ingredients, such as chocolate chips, cookie dough chunks, or fruit swirls. Gently fold them into the ice cream mixture, ensuring even distribution.
4.5. Freezing Time
Place the containers in the freezer and allow the ice cream to freeze for at least 4-6 hours, or until it reaches the desired consistency. It is recommended to check and stir the ice cream mixture every hour during the first few hours of freezing to prevent ice crystals from forming.

Serving and Enjoying Homemade Ice Cream
5.1. Softening the Ice Cream
When ready to serve, remove the ice cream from the freezer and let it sit at room temperature for a few minutes to soften. This step ensures easier scooping and a smooth, creamy texture.
5.2. Scooping and Garnishing
Using an ice cream scoop or spoon, portion out the desired amount of homemade ice cream into bowls or cones. Feel free to add toppings such as sprinkles, chocolate sauce, or fresh fruit to enhance the presentation and flavor.
5.3. Storing the Remaining Ice Cream
If there are leftovers, ensure that the remaining ice cream is stored in an airtight container in the freezer. This helps maintain its texture and prevents freezer burn. Remember to label the container with the flavor and date of preparation for future reference.

Cleaning the Blender
6.1. Safety Precautions
Before cleaning the blender, ensure that it is unplugged to prevent any accidents. Handle the blades carefully to avoid any injuries during the cleaning process.
6.2. Dismantling and Soaking
Carefully remove the blender jar, lid, and blades from the base. Fill the sink or a large container with warm soapy water and let the parts soak for a few minutes. This will help loosen any stubborn residue and make cleaning easier.
6.3. Cleaning the Components
Using a sponge or non-abrasive brush, scrub the blender parts thoroughly, paying special attention to the blades and the interior of the jar. Rinse each component with warm water to remove any soap residue.
6.4. Drying and Reassembling
After cleaning, allow the mixer parts to air dry completely. Once dry, reassemble the blender, ensuring that all components are securely in place. Store the blender in a safe and easily accessible location for future use.
Tips and Variations for Blender Ice Cream
8.1. Creamy Texture Tips
To achieve an even creamier texture, consider using a higher-fat content cream, such as heavy cream or whipping cream. You can also experiment with adding a small amount of cornstarch or a tablespoon of cream cheese to the base mixture before blending.
8.2. Sweetness and Flavor Adjustments
Tailor the sweetness and flavor of your ice cream by adjusting the amount of sugar or using alternative sweeteners such as honey, maple syrup, or stevia. Additionally, experiment with different flavor extracts, spices, or mix-ins to create unique and personalized ice cream flavors.
8.3. Vegan and Dairy-Free Options
If you prefer a vegan or dairy-free ice cream, substitute the dairy cream and milk with alternatives like coconut milk, almond milk, or cashew milk. Ensure that the consistency of the alternative milk is suitable for freezing, as some varieties may yield different results.
Conclusion
Making homemade ice cream in a blender is a fun and simple process that yields delicious frozen treats. By choosing the right blender, preparing the ice cream base, blending the mixture thoroughly, and following the freezing steps, you can easily create creamy and flavorful ice cream. Enjoy your homemade creation by serving it with your favorite toppings or storing it for later enjoyment. With experimentation and creativity, the possibilities for delightful homemade ice cream are endless.