Troubleshooting Power Problems
Encountering power issues with your Keurig coffee maker can be frustrating. However, tackling these problems can be straightforward. When your Keurig won’t turn on, several factors could be at play. It’s important to diagnose the problem step by step.
Checking the Plug and Power Outlet
Firstly, verify the coffee maker’s connection to your power source. A simple but often overlooked step is to make sure the plug is properly seated in the wall outlet. Check for any signs of damage or wear on the cord that could prevent electricity flow.
Additionally, test the outlet with another appliance to confirm it is working. A faulty outlet might not supply power, even if your Keurig is in perfect condition. If the other appliance also fails to power up, you’ll need to switch to a different outlet.
What to Do If Your Keurig Won’t Turn On
After ensuring that the plug and outlet are functioning, if your Keurig still does not turn on, there are a few more things to try. Make sure you are pressing the power button firmly and directly. On newer models with an LCD screen, the power icon often sits on the lower right corner. Tapping this should awaken the machine.
If the machine remains unresponsive, a soft reset might be necessary. To do this, disconnect the machine and leave it unplugged for a few minutes before reconnecting it. If these steps fail to resolve the issue, it may be time to consult Keurig customer support for more in-depth troubleshooting or consider a possible repair or replacement of your machine.
By addressing each potential cause methodically, you can often fix power issues without the need for professional assistance. Keep these tips in hand to promptly deal with power problems your Keurig coffee maker might experience.
Brewing Difficulties and Solutions
One of the more perplexing issues with Keurig coffee makers is brewing difficulties. Understanding and addressing these can once again lead to a satisfying cup of coffee.
Dealing with Air Bubbles and Debris
Air bubbles and debris in your Keurig can lead to brewing issues. Here’s how to fix them:
- Run your Keurig with no K-cup to clear debris.
- Fill the water reservoir, then unplug and gently shake the machine.
- Perform these steps to dislodge air bubbles and improve brewing.
These simple actions can restore your Keurig’s brewing function, enhancing your coffee experience.
Descale Procedures for Optimal Performance
Descaling is vital for removing mineral build-up and ensuring your coffee tastes great.
- Empty your Keurig’s water tank and remove any K-cups.
- Mix a descaling solution with water (1:1) and fill the tank.
- Run several brew cycles with this mixture, followed by fresh water.
Descaling every 3-6 months can prolong your Keurig’s life and maintain coffee quality. It’s a key step in overcoming common brewing problems.
Addressing Water Heating Issues
For a perfect cup of coffee, your Keurig’s water heating system needs to function effectively.
Identifying Problems with the Heating System
If your coffee is cold, the cause might be a faulty heating element. Calcium buildup or coffee residue in the machine can also affect the heating.
To check, first make sure the water pump is not damaged. Inspect the bottom of the water tank, including the valve area, for cleanlines and proper function. If the issue persists, it could mean a more serious problem with the heating equipment. This may require contacting customer support or getting a replacement part.
Steps to Take When Keurig Doesn’t Heat Water
Begin by cleaning your machine thoroughly to remove any obstructions that might be causing the problem. Don’t overlook the bottom of the tank, the valve, and the area where the tank sits.
If your Keurig still doesn’t heat water, hold the brew button for a few seconds to restart the machine. This could kickstart the heating system.
If these steps don’t work, it’s likely that the water pump is broken and you’ll need to get in touch with Keurig’s support team for assistance or a replacement part. Regular descaling and cleaning can prevent these issues and help to keep your Keurig’s heating system running smoothly.
Taste Quality Concerns
Encountering taste issues with your Keurig coffee maker can sour your coffee experience. Yet, with a few steps, you can enhance the flavor of your brew.
Improving the Flavor of Keurig Coffee
When coffee brewed by your Keurig doesn’t taste quite right, several factors could be to blame:
- Old Coffee Residue: Clean your Keurig if you’ve not done so recently.
- Type of Water: Use filtered water instead of tap to avoid unwanted flavors.
- Quality of K-cups: High-quality K-cups can make a significant taste difference.
To improve taste, start by using filtered water, as it reduces scale and grounds buildup. Next, consider trying a different brand or flavor of K-cup pods. Low-quality coffee can result in a burnt or overly acidic taste. For those already using filtered water and high-quality K-cups, you might require a descaling procedure to eliminate any mineral buildup which can affect your coffee’s flavor.
Regular Cleaning and Maintenance Tips
Keep your Keurig at peak performance with these simple cleaning habits:
- Wipe down the machine regularly to keep it dust and debris free.
- Descaling: Use a descaling solution or white vinegar mixed with water every 3-6 months.
- Change water filters as recommended to ensure freshness.
- Run water-only cycles: After brewing something like tea, this cleans out any lingering residues.
By following regular care, you reduce the risk of tainted coffee flavors. Always consult your Keurig’s manual for model-specific maintenance advice. Keeping your machine clean is not just about flavor; it’s also about extending your Keurig’s life.
Resolving Leakage and Overflow
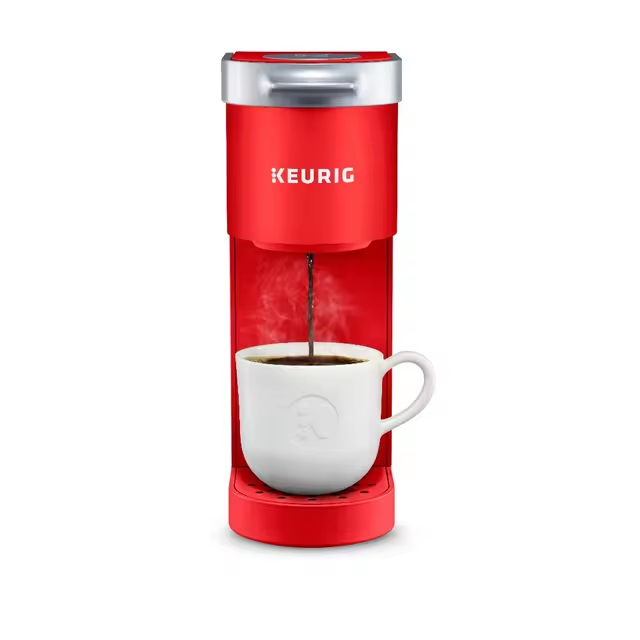
Dealing with leaks in your Keurig coffee maker can be straightforward but requires immediate attention to prevent further issues.
How to Handle Leaks from the Bottom
If you find your Keurig leaking from the bottom, start by checking the water reservoir for any cracks or damages. Also, verify that it is not overfilled. Damaged O-rings or internal water tanks can cause leaks. Replacing damaged parts is often necessary to resolve these issues.
Fixing Leaks During Heating
Leaks during heating typically involve issues with the upper gasket or build-up around the puncture needle. Tighten or replace the upper gasket if it’s loose or damaged. Regularly cleaning the puncture needle can also prevent leaks, ensuring uninterrupted heating during brew cycles.
In both cases, using distilled water for descaling, instead of tap water, minimizes residue buildup that can lead to leaks. Make sure you handle these troubleshooting steps carefully to prolong the life of your Keurig coffee maker and enjoy consistent, drip-free coffee experiences.
Indicator Light Guide
Indicator lights on your Keurig coffee maker are essential. They offer valuable clues when troubleshooting.
Understanding Blinking Lights and Their Meanings
Blinking lights point to various machine states. Each pattern has a specific meaning.
- A steady light often signals readiness.
- Blinking lights might suggest warming up or error.
Different Keurig models have unique light codes. Refer to your user manual for specifics.
Resolving Light-Related Issues
To fix blinking light issues, first identify the pattern. For some models:
- A sequence of button presses might reset the lights.
- Ensuring the water reservoir is properly in place can stop the blinking.
A persistently blinking ‘descale’ light requires descaling. Follow your manual’s instructions to perform this correctly. After descaling, continued light issues might mean filter or machine problems.
If basic troubleshooting doesn’t work, you need Keurig support. Their guidance often solves more complex light-related problems.
 Coffee Quantity Fluctuations
When your Keurig dispenses irregular amounts of coffee, it can disrupt your morning routine. Addressing this need not be difficult, however, and can often be resolved with a few simple steps.
What to Do When Keurig Dispenses Too Much or Too Little
Keurig machines may sometimes give too much or too little coffee. Here’s what you can do:
- Clean the Puncture Needle: Use a paper clip to remove blockages.
- Adjust the Water Tank: Make sure it’s seated properly.
- Descale the Machine: This can clear out clogs affecting flow.
- Check for Debris: Inspect and clear the area around the exit needle.
If your Keurig dispenses too much coffee, consider checking for and cleaning any obstructions. Inconsistent dispensing can often be a sign of a simple clog.
Cleaning and Unblocking Techniques
- Unplug and Invert Machine: Flip your Keurig gently to dislodge debris.
- Tap It Out: Firm, yet gentle taps can help clear blockages.
- Run Cleansing Brews: Use just water for several cycles to clean the internal mechanisms.
In more persistent cases, where coffee quantity is consistently off, further descaling might be necessary. If the issue persists after trying these solutions, referring to the customer service might be the next step.
Residue and Water Filter Challenges
Navigating through residue and water filter challenges with your Keurig coffee maker can improve the quality of your coffee.
Preventing Coffee Grounds in Your Cup
Occasionally, you may encounter coffee grounds in your cup. This can occur when using distilled or softened water which might not rinse away grounds as effectively as other types. To prevent this:
- Switch to bottled water: This can reduce the likelihood of residue.
- Run several water-only cycles: Do this before inserting a new K-cup.
- Check the exit needle: Ensure it’s clear of coffee grounds and debris.
- Use the correct grind size: If using a reusable filter, follow the manual for the right grind.
Regular cleaning of exit needles and using the appropriate water type are simple solutions for residue in your cup.
How to Deal with ‘Add Water’ Errors
Your Keurig might indicate it needs water even when full. To fix this:
- Reposition the reservoir: Ensure the reservoir’s magnetic contacts align with the coffee maker.
- Clean the filter and reservoir: Use warm, soapy water for the filter and a damp cloth for the reservoir.
- Inspect and clean the valve: Located beneath the machine, this can get blocked.
Start with repositioning the reservoir, followed by cleaning. Check the valve underneath for obstructions. These steps can help resolve the ‘Add Water’ errors, ensuring your machine recognizes the water level correctly.
Automatic Shut Off Features
Keurig coffee makers have auto shut off features for safety and energy efficiency.
Addressing Unwanted Machine Shutdowns
If your Keurig turns off unexpectedly, there could be simple reasons why.
- Check if the water tank magnets align properly.
- Disable any auto-off or energy-saving settings as needed.
- Inspect for debris that could interrupt power connections.
Dealing with unwanted shut downs can be as easy as adjusting a setting.
How to Disable Auto-Off Settings
You can turn off this feature on most Keurig models to stop automatic shut downs.
- For newer machines, use the LCD menu to disable auto-off.
- On older models, press the Auto-off button until the light turns off.
Disabling the auto-off feature ensures your Keurig stays ready for your next brew.
Steps for Resetting Your Keurig
When you face persistent issues with your Keurig, a reset might be needed. Here’s how to do it for different models.
Factory Reset for Newer Models
Newer Keurig models come with an easy factory reset option. Just find the reset choice in the LCD menu. Select it to return your machine to its default settings. This can clear many persistent errors and restore normal operation.
Manual Reset Instructions for Older Models
Older or more basic Keurigs like the K-Slim or K-Mini might need a manual reset. Begin by turning your machine off and unplugging it. Remove the water tank. Leave your Keurig unplugged for a few minutes or hours. This gives the machine time to reset internally. Then, plug your Keurig back in. Power it on and reattach the water reservoir, ensuring it’s in place. If this doesn’t work, try this: unplug your machine and then open and close the lid. Press and hold the power button while pressing the buttons for different cup sizes. Your Keurig should start a pump cycle and be good to go.
 Contacting Keurig Support
When you’ve run through all the troubleshooting steps for your Keurig coffee maker and issues persist, it’s time to reach out for direct support. Dealing with a non-operational Keurig can be bothersome, but Keurig’s customer support is available to assist you in finding a solution.
Getting Help through Live Chat and Customer Service
Keurig offers several means of support, allowing you to choose the method that best fits your needs. Here is how you can get in touch:
- Live Chat: This is the quickest way to talk to a representative. Go to the Keurig website and look for the chat option. It’s fast and efficient, especially for simple issues.
- Customer Service: You can call their helpline for step-by-step assistance. The phone number is available on the Keurig website.
- Support Form: Submit a detailed support ticket on their website. They will email you back promptly.
Ensure you have your coffee maker’s model number and serial number handy when you contact support. This information will speed up the process. Keurig’s team is well-trained to handle a variety of issues, from power faults to brewing inconsistencies. They’ll guide you through additional troubleshooting steps. If necessary, they can also arrange for a repair or replacement.
Guidelines for Regular Cleaning and Maintenance
To keep your Keurig coffee maker working well, regular cleaning is key. Here are steps to ensure it lasts longer and keeps making great coffee.
Ensuring Longevity and Optimal Brewing Results
- Descaling: Use a half water, half vinegar mix to descale every 3-6 months. This removes calcium deposits that can affect taste and function.
- Cleaning Needles: Use a paperclip to clean the entrance and exit needles. This prevents clogging and ensures smooth brewing.
- Water Reservoir and Lid: Wash these parts with soapy water regularly. Dry them well before putting them back.
- Drip Tray: Remove and clean it often to prevent overflow and residue build-up.
- K-Cup Holder: Take it out and rinse it under water. Check for coffee grounds or debris.
- Exterior: Wipe the machine’s surface with a damp cloth. This keeps it dust-free.
Follow these steps and use filtered water to fill up the reservoir. This minimizes buildup and ensures tasty coffee with each brew. If you hit a snag, refer to your Keurig’s manual or contact customer support for advice.
 Resolving Keurig Water Leakage Issues
 What to Do When Standard Descaling Doesn’t Work