Posted on

Draining Your Keurig Internal Tank Safely

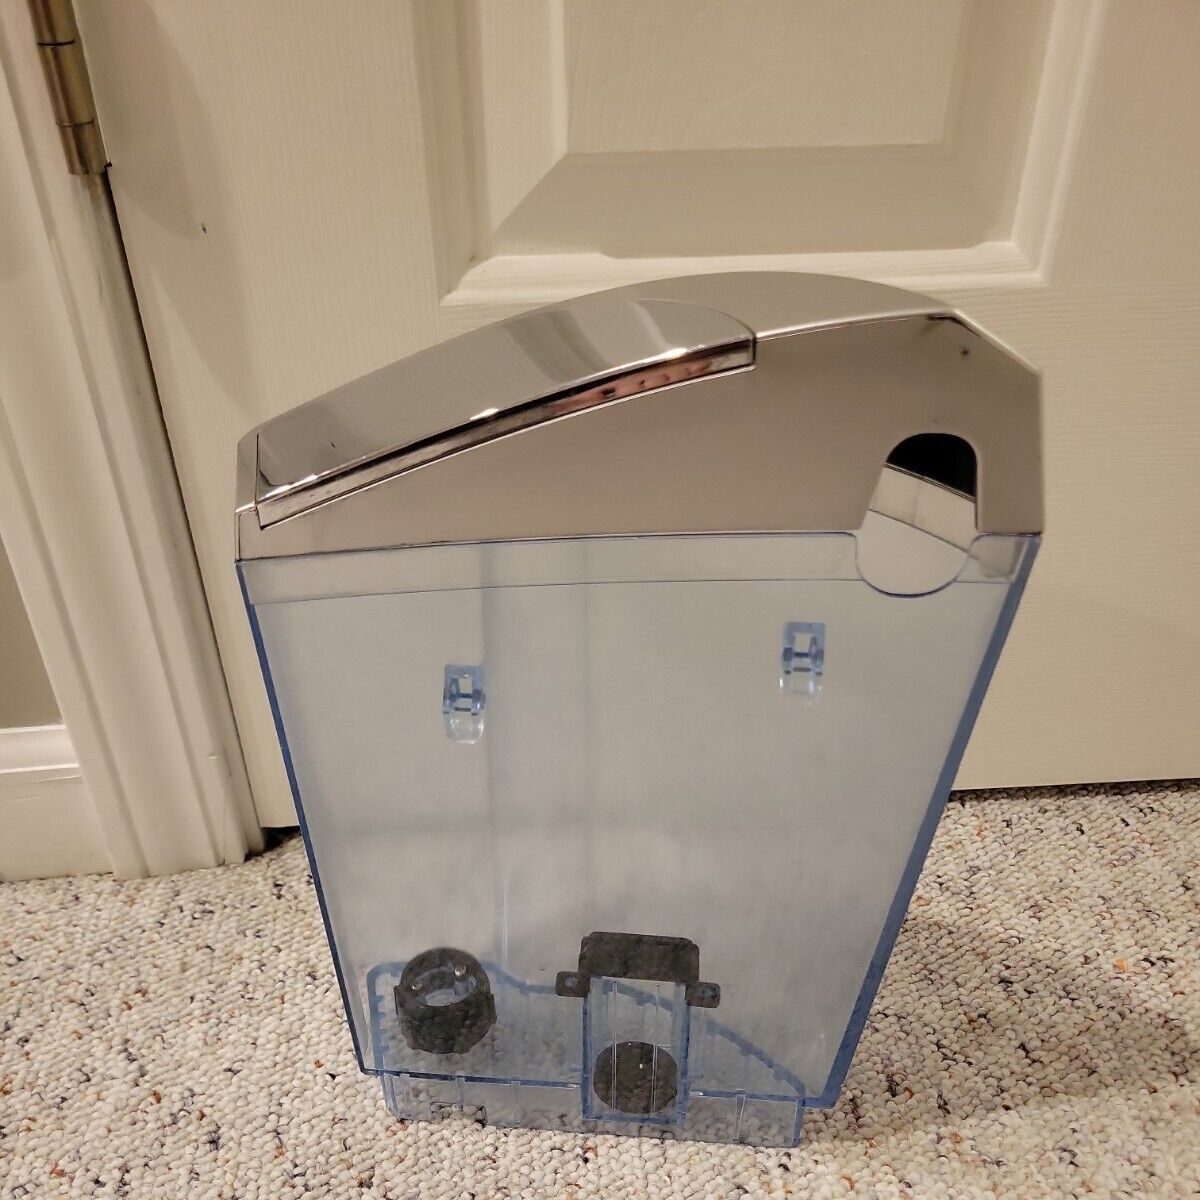
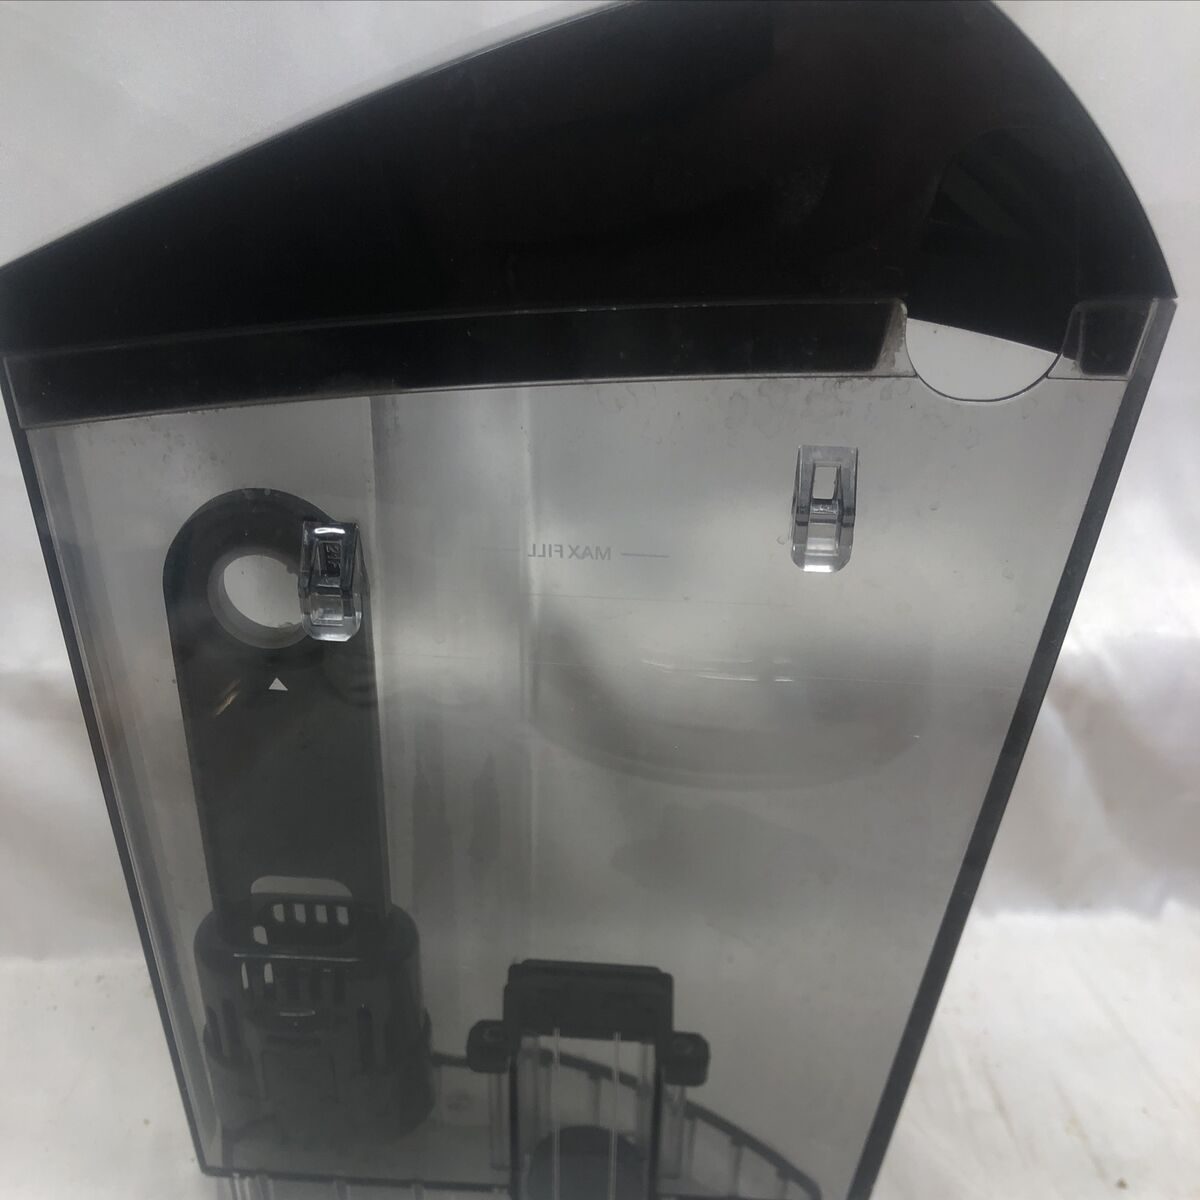
keurig internal tank

Maintaining your Keurig coffee maker is essential for ensuring the longevity and optimal performance of the machine. One crucial aspect of maintenance is knowing how to empty the Keurig internal tank. Whether you’re preparing to move the appliance, perform deep cleaning, or troubleshoot issues, understanding the correct procedure for emptying the internal tank will help keep your Keurig in excellent condition. This guide provides a detailed, step-by-step approach to effectively empty the internal water reservoir of your Keurig machine, ensuring it continues to brew delicious coffee without interruptions.

keurig internal tank

Why You Might Need to Empty the Keurig Internal Tank

Understanding the reasons behind emptying the internal tank can help you maintain your Keurig effectively.

Preventing Mineral Buildup

Over time, mineral deposits from water can accumulate inside the tank and other parts of the machine. Regularly emptying and cleaning the internal tank helps prevent these buildups, which can affect the taste of your coffee and the functionality of the machine.

Preparing for Long-Term Storage

If you plan to store your Keurig for an extended period, it’s essential to empty the internal tank to prevent mold growth and unpleasant odors. Drying out the tank ensures that no stagnant water remains that could become a breeding ground for bacteria.

Troubleshooting Brewing Issues

Sometimes, issues with brewing, such as inconsistent water flow or unexpected noises, can be traced back to the internal tank. Emptying and inspecting the tank can help identify and resolve these problems, ensuring your Keurig operates smoothly.

Enhancing Machine Longevity

Regular maintenance, including emptying the internal tank, contributes to the overall longevity of your Keurig. By keeping the tank free from debris and buildup, you reduce wear and tear on the machine’s components, extending its usable life.

Safety Precautions Before Emptying the Tank

Before you begin the process of emptying your Keurig’s internal tank, it’s essential to follow certain safety precautions to prevent accidents and ensure the machine remains in good condition.

Unplug the Machine

Always start by unplugging your Keurig from the electrical outlet. This step is crucial to prevent any risk of electric shock while you’re handling the internal components of the machine.

Allow the Machine to Cool Down

If you’ve recently brewed coffee, let the machine cool down completely before you begin. Opening and handling the tank while the machine is still hot can lead to burns or other injuries.

Gather Necessary Tools

Having all the required tools and materials on hand before you start can make the process smoother and reduce the risk of accidents. Refer to the next section for a detailed list of what you’ll need.

keurig internal tank

Tools and Materials You’ll Need

Preparing the right tools and materials ahead of time can make the process of emptying the Keurig internal tank more efficient.

Collection Containers

Prepare a large container or sink area to collect the water that will be drained from the internal tank. This helps prevent spills and keeps the workspace clean.

Cleaning Supplies

Have cleaning supplies ready, such as a soft cloth, mild dish soap, and white vinegar or a descaling solution. These will be useful for cleaning the tank after emptying it.

Screwdrivers and Tools

Depending on your Keurig model, you might need screwdrivers or other tools to access the internal tank. Check your machine’s manual to identify any specific tools required.

Gloves

Wearing gloves can protect your hands from any residual coffee or water and keep them clean throughout the process.

Instructions Manual

Having the user manual on hand can provide model-specific instructions and diagrams that can be extremely helpful during the maintenance process.

Step-by-Step Guide to Emptying the Tank

Following a systematic approach ensures that you empty the internal tank effectively and safely.

Step 1: Power Off and Unplug the Keurig

Begin by turning off your Keurig and unplugging it from the outlet. This step ensures that there is no electrical power running through the machine while you work on it.

Step 2: Remove the Water Reservoir

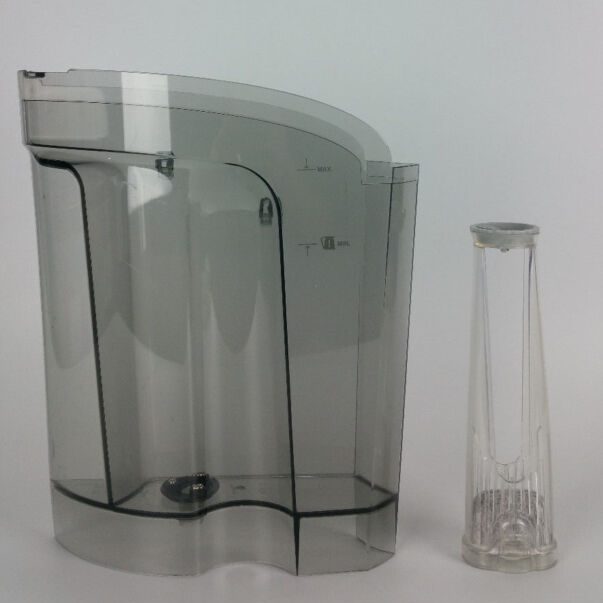
Most Keurig models have a removable water reservoir. Lift or slide the reservoir off its base carefully. Place it upside down over the sink to drain any remaining water. For some models, you may need to disconnect the reservoir from the base before removing it.

Step 3: Access the Internal Tank

If your Keurig model has an internal water tank separate from the removable reservoir, you may need to remove the top or back panel of the machine. Use the appropriate screwdriver to carefully take apart the panels, exposing the internal components.

Step 4: Locate the Drain Valve or Hose

Identify the drain valve or hose connected to the internal water tank. This is where you will direct the water to drain out. Ensure you have your collection container ready to capture the water.

Step 5: Open the Drain Valve

Carefully open the drain valve, allowing the water to flow out into your container or sink. If your machine doesn’t have a drain valve, you might need to tilt or maneuver the machine to pour out the water gently.

Step 6: Allow All Water to Drain

Ensure that all water is completely drained from the internal tank. This may take several minutes, depending on the size of your Keurig’s internal tank and the water pressure.

Step 7: Close the Drain Valve and Reassemble

Once the tank is empty, close the drain valve securely. Reassemble any panels or components you removed earlier, ensuring everything is back in its proper place.

Step 8: Refill or Store the Machine

After emptying the internal tank, you can either refill it with fresh water or prepare the machine for storage by ensuring all parts are dry.

Cleaning and Maintenance After Emptying

Emptying the internal tank is an excellent opportunity to perform a deeper clean of your Keurig, enhancing its performance and prolonging its lifespan.

Descaling the Machine

Descaling removes mineral buildup from the internal tank and other components. Use a descaling solution or a mixture of white vinegar and water to run through a brew cycle. Follow the manufacturer’s instructions for the best results.

Cleaning the Reservoir

Even after emptying, the removable water reservoir may have residues. Wash it thoroughly with mild dish soap and warm water, then rinse it multiple times to ensure all soap is removed.

Wiping Down External Surfaces

Use a damp cloth to wipe down the exterior of the Keurig, removing any spills or coffee stains. Avoid using abrasive cleaners that could damage the surface.

Inspecting for Damage

While cleaning, inspect the internal tank and other components for any signs of wear or damage. Look for cracks, leaks, or loose parts that may need repair or replacement.

Reassembling the Machine

After cleaning and drying all parts, reassemble your Keurig carefully. Ensure that all components are securely in place to prevent leaks or malfunctions during use.

Troubleshooting Common Issues

Emptying the internal tank can help resolve several common problems with Keurig machines. Here are some issues that might be fixed by properly managing the internal tank.

Water Not Flowing Correctly

If your Keurig isn’t dispensing water as it should, minerals or debris in the internal tank might be the culprit. Emptying and cleaning the tank can restore proper water flow.

Unusual Noises During Brewing

Hissing, gurgling, or other unusual sounds could indicate that air is trapped in the internal tank or that there are blockages. By emptying and inspecting the tank, you can identify and eliminate these issues.

Inconsistent Coffee Temperature

Inconsistent heating may result from mineral buildup. After emptying and descaling the internal tank, the heating mechanism can function more efficiently, ensuring consistent coffee temperature.

Leaks from the Tank Area

Leaks are often caused by loose connections or damaged parts within the internal tank system. While emptying the tank, check all connections and seals, tightening or replacing them as needed.

keurig internal tankConclusion: Mastering How to Empty Keurig Internal Tank

Knowing how to empty Keurig internal tank is fundamental for anyone who owns a Keurig coffee maker. This process is integral to maintaining the machine’s performance, ensuring the quality of your coffee, and prolonging the life of the appliance. By following the detailed steps and adhering to the safety precautions outlined in this guide, you can confidently manage the internal water reservoir of your Keurig. Regular maintenance, including emptying and cleaning the internal tank, not only prevents common brewing issues but also enhances the overall user experience. Embrace these practices to keep your Keurig functioning optimally, delivering the perfect cup of coffee every time you brew.
Posted on

Avoiding Mold in Keurig Machines: Essential Tips

keurig coffee maker

Introduction to Keurig Mold Issues

When you sip your morning coffee, the last thing you want is mold. Yet, Keurig users often report finding mold in their machines. These single-serve coffee brewers can harbor mold without regular cleaning. This post explains why Keurig machines get moldy. Also, it offers tips to keep your coffee safe and your machine clean. Discover signs of mold in Keurig machines and the health risks they pose. Learn simple steps to prevent mold from growing in your coffee maker. Keep your Keurig in good condition with our maintenance guide. Ensure the longevity of your machine and the quality of your coffee. Stay alert for when it’s time to replace your Keurig. Let’s make sure you enjoy your coffee, mold-free!

keurig coffee maker

Signs of Mold in Keurig Machines

Knowing the signs of mold in your Keurig can help you act fast.

Visible mold and discoloration

Mold often appears as black spots or areas with discoloration. Check hidden parts inside the water reservoir and on the coffee pod area. Any change in color or weird marks might mean mold.

Unusual smells or tastes

A musty or sour smell from your Keurig is not good. This could be mold. The taste of your coffee might also change. If it’s off, don’t ignore it. Your machine could need cleaning or have mold growth.

Health Risks Associated with Keurig Mold

When your Keurig becomes a mold host, your health could be at risk. Keurig sickness, caused by mold exposure, can affect you in many ways. Act fast at the first sign of symptoms to prevent worse health issues.

Symptoms of Keurig sickness

If you feel sick and have used a Keurig, consider these symptoms:

  • Stuffy nose: Blocked nasal passages may occur.
  • Watery eyes: Your eyes might tear up more.
  • Sneezing: You could start sneezing unexpectedly.
  • Wheezing: Listen for whistling sounds as you breathe.
  • Coughing: A persistent cough indicates lung irritation.
  • Skin rash: Look for any unusual redness or itchiness.
  • Headache: Be aware of any new, persistent headaches.
  • Sore throat: A scratchy or painful throat can be a sign.
  • Heartburn: Watch for any burning sensations in your chest.
  • Upset stomach: Nausea or vomiting shouldn’t be ignored.

These symptoms can mimic a cold but may actually be a reaction to mold.

Long-term health implications

Long-term effects from Keurig mold are rare but possible. Those with allergies or asthma could face serious reactions. Sensitive individuals should consult a doctor if symptoms persist. Avoid long-term exposure to mold to minimize potential health risks.

Why Keurig Machines are Prone to Mold

Keurig coffee makers are convenient, but they are also prone to mold growth. Let’s explore the reasons behind this issue and what you can do to prevent it.

Moisture and water reservoirs

Keurig machines have water reservoirs that can house moisture. If you do not clean and dry them well, mold can grow. These areas provide the perfect damp environment for mold spores to thrive.

Difficulty cleaning certain parts

Some Keurig machine parts are hard to reach. This makes cleaning difficult. If these areas are not cleaned regularly, mold and bacteria can develop. It’s important to use tools like a needle cleaner to reach these spots. Also, follow a thorough cleaning routine to prevent mold from taking hold.

Preventive Measures to Avoid Mold

To keep your Keurig free of mold, follow these key steps.

Regular cleaning routine

Develop a habit of cleaning your Keurig regularly. Wash all detachable parts weekly with soapy water. Dry them fully before putting them back. Clean hard-to-reach spots with special tools. Use a needle cleaner for the best results. Descaling solutions help remove mineral buildup; use them every three to six months.

Ensuring a dry environment for storage

After using your Keurig, leave the lid open. This lets the water tank air out and stay dry. Store your Keurig in a cool, dry place. Avoid damp areas where mold could grow.

Replacing water and filters frequently

Change the water in your Keurig’s tank often. Don’t let water sit for too long. Also, replace the machine’s filters every two months. This prevents mold from tainting your coffee. Keep these practices, and your Keurig will serve you mold-free coffee for years.

keurig coffee makerStep-by-Step Cleaning Guide for Your Keurig
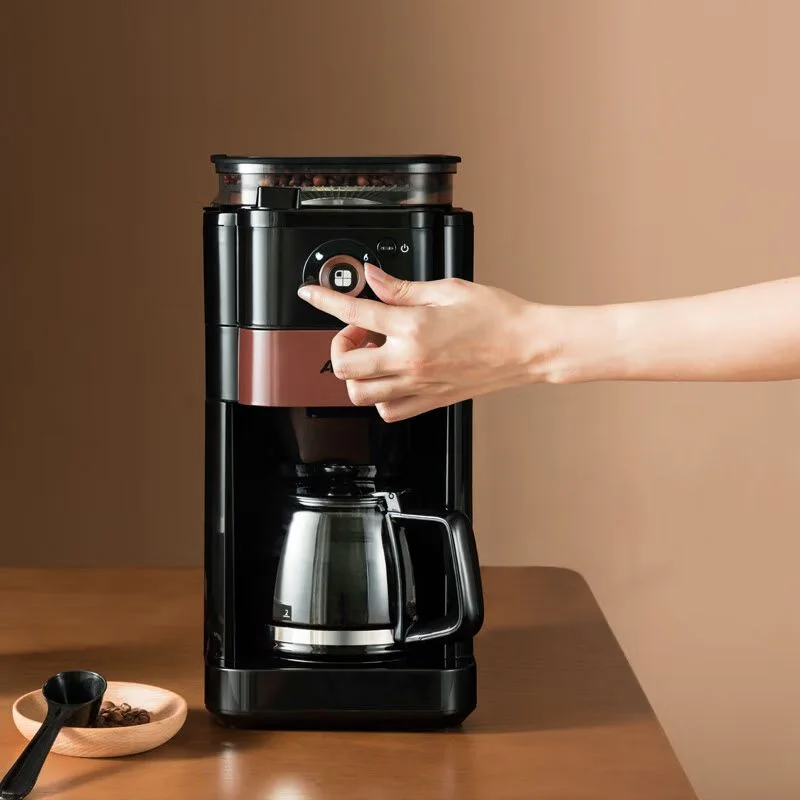
Keurig coffee makers require regular cleaning to prevent mold. Follow this guide to keep your machine in great shape.

Gather necessary supplies

Start by assembling your cleaning toolkit:

  • White vinegar or Keurig descaling solution
  • Fresh water
  • Dish soap
  • A soft cloth or sponge
  • A small brush or needle cleaner

Having these at hand makes the process smooth and efficient.

Descale and clean all removable parts

First, descale your Keurig:

  1. Mix equal parts white vinegar and water in the reservoir.
  2. Run several brew cycles without a K-cup until the reservoir is empty.

Next, focus on removable parts:

  1. Take apart pieces like the drip tray, K-cup holder, and water tank.
  2. Wash them in soapy warm water.
  3. Rinse thoroughly and let them air dry before reassembly.

Regular descaling keeps your Keurig functioning well and your coffee tasting fresh.

Clean hard-to-reach areas

To reach tricky spots:

  • Use a needle cleaner or small brush.
  • Clean any needles or tubes where coffee grounds could get stuck.
  • Be diligent with these areas as they are prone to mold development.

By following these steps, you create a hostile environment for mold and ensure your Keurig remains clean.

When to Replace Your Keurig Machine

A Keurig machine is a handy kitchen appliance. But sometimes, it needs to be replaced. How do you know the time has come? Look for signs that it’s time to get a new one.

Signs of recurring issues

Repeated problems are a clear indicator. If cleaning doesn’t fix the issues, consider a replacement. Common problems to watch for include:

  • Constant clogs and coffee grounds in your cup.
  • Water not heating or machines taking too long to brew.
  • Strange noises or leaks during brewing.

These issues suggest your Keurig may be on its last legs.

Visible damage and inefficiency

Physical damage is a sure sign. Cracks or broken parts can mean it’s time for a new machine. Also, if your Keurig uses more energy and still performs poorly, think about an upgrade. A new machine can save time and energy. Reduced performance and increased energy bills are not good.

If you notice these signs, don’t wait. It’s better to replace your Keurig before it completely fails. Keeping your coffee experience pleasant is important. Always choose the best for your health and enjoyment.

keurig coffee makerCommon Questions About Keurig Cleanliness

Many Keurig users have concerns and questions about mold in their machines. Below, we address common misconceptions and provide effective cleaning methods.

Addressing misconceptions and cleaning methods

Misconception 1: Keurigs don’t need regular cleaning.

This is false. Like any coffee maker, Keurigs can develop mold without routine care.

Misconception 2: Mold in Keurigs is rare.

Contrary to belief, mold in Keurig machines is quite common due to moisture.

Misconception 3: A quick rinse is enough.

Simple rinsing isn’t effective. Deep cleansing and descaling are essential for mold prevention.

Cleaning Method 1: Use white vinegar or a descaling solution.

Mix equal parts with water and run multiple brewing cycles.

Cleaning Method 2: Wash removable parts often.

Detachable components should be cleaned weekly with soapy water.

Cleaning Method 3: Replace filters and water.

Change the water in the reservoir frequently and filters every two months.

Cleaning Method 4: Dry the machine after use.

Leaving parts to air dry prevents damp conditions that invite mold.

Cleaning Method 5: Check and clean tough spots.

Use tools like needle cleaners for areas that are hard to reach.

By following these methods and addressing the misconceptions, you can maintain a clean and safe Keurig machine. Regular upkeep not only prevents mold but also ensures delicious coffee every time.

Posted on

Simplify Keurig Descale Mode Activation

how to put keurig in descale mode

Understanding Limescale and Its Impact on Keurig Machines

Limescale is a common issue for many kitchen appliances, including Keurig coffee makers. It’s a white, chalky substance made from calcium and magnesium deposits. These minerals come from water, especially when it’s high in mineral content, known as hard water.

how to put keurig in descale mode

When you heat water in your Keurig, limescale can form. It happens when water evaporates and leaves these minerals behind. Over time, this build-up can cause problems. It may block water flow, alter the taste of your coffee, and damage the heating elements.

In Keurig machines, limescale can reduce performance. Your drinks might come out cooler or take longer to brew. The taste of your coffee could change, becoming bitter. If not handled, limescale can even lead to the machine breaking down.

To combat this, it’s important to descale your Keurig regularly. This means using a specific process to remove the build-up. Many suggest doing this every 3 to 6 months, but it depends on how often you use your Keurig and your water’s hardness.

Understanding how limescale affects your Keurig is the first step. Next, you’ll need to know how to properly descale your machine to keep it running smoothly. We will cover the process in detail in the following sections.

When to Descale Your Keurig Coffee Maker

Recognizing when your Keurig needs descaling is key to its performance. Some newer models alert you with a special indicator light. But for many, knowing the signs of limescale buildup is essential. Here are common indicators that it might be time to descale:

  • Your Keurig starts brewing more slowly than usual.
  • You notice white, chalky residue inside your coffee maker.
  • The machine drips or leaks after brewing.

These signs hint that limescale is affecting your coffee quality and brewing process. If you wait too long, your machine could suffer more severe issues. Even without these signs, regular maintenance is a good habit. Aim to descale every 3 to 6 months. Hard water may require more frequent descaling than soft water. If you’re a heavy coffee drinker, you might descale more often to keep taste and machine efficiency on point.

Don’t know if you have hard water? Look up a water quality report for your area or use a home testing kit. Knowing your water’s mineral content can help plan descaling, so your machine always brews the perfect cup.

Preparing Your Keurig for Descaling

Before you start the descaling process, get your Keurig ready. First, unplug the device from its power source. Make sure your Keurig is cool to the touch. Then, take out any K-Cups inside the machine. Next, empty the water reservoir completely. Don’t forget to remove the water filter if your model has one. All detachable parts, like the drip tray and pod holder, should come off too.

Take a soft cloth and wipe down all the parts you removed. It’s best to avoid abrasive cleaners that could harm your Keurig. If there’s any buildup of coffee grounds or residue, clean those areas extra carefully. Once everything is clean, leave the parts out to dry. Doing this ensures your Keurig is prepped and ready for a thorough descaling.

Step-by-Step Guide: How to Descaling a Keurig

If your Keurig has started to slow down or it’s been a few months since the last cleaning, it’s time to descale it. Here’s how to put your Keurig in descale mode and get it back to brewing at its best.

Step 1: Cleaning Detachable Parts

Unplug your Keurig and remove any K-Cups. Empty the water reservoir. Take out the drip tray, water filter, and pod holder. Wipe down these parts with a damp cloth. Then, let them dry.

Step 2: Descale with Solution or Vinegar

Fill the reservoir with a mix of descaling solution or white vinegar and water. Put all parts back, except the filter. This solution will tackle the limescale.

Step 3: Perform a Brewing Cycle with the Cleaning Solution

Turn on the Keurig with the solution in the tank. Place a mug on the tray. Run a brewing cycle without a pod. Repeat until the reservoir is empty. After that, let it sit for 30 minutes.

Step 4: Thoroughly Rinse the Keurig With Fresh Water

Fill the tank with fresh water and run several brewing cycles. Use a different mug or clean the same mug each time. This will remove any vinegar or solution left.

Step 5: Dry and Reassemble the Keurig

Once rinsed, take out the reservoir to air dry. Then, place all parts back in the Keurig. Now, your Keurig is ready to brew fresh coffee again.

Remember to regularly clean and descale your Keurig to prevent limescale build-up. Your coffee will taste better and your machine will last longer.

how to put keurig in descale modeMaintaining a Clean Keurig to Minimize Descale Frequency
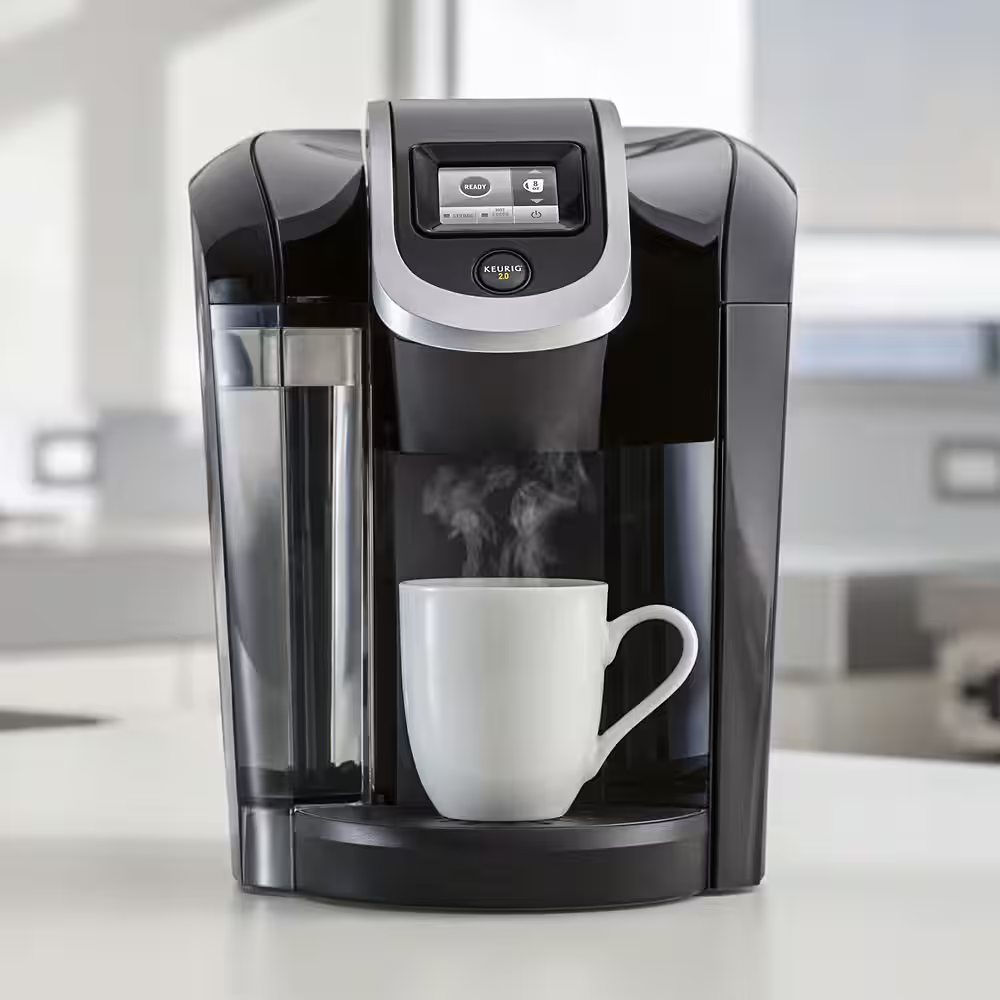
Maintaining your Keurig coffee maker is simpler than it might seem. Keep it clean to avoid frequent descaling. Here are some practical tips:

  • Use Filtered Water: Hard water can speed up limescale buildup. Using filtered water reduces minerals, meaning less limescale.
  • Empty the Reservoir: Don’t let water sit in the reservoir for more than a few days. Stagnant water can lead to more mineral deposits.
  • Regular Cleaning: Wipe down your machine often. Pay special attention to the area where you insert the pod. A clean Keurig is less likely to have limescale issues.
  • Fresh Water for Each Use: Refill the reservoir with fresh water before every use. Old water can cause limescale.

By following these easy steps, you can extend the time between descale sessions. Plus, your coffee will taste fresh and remain free of odd flavors caused by limescale.

Activating Keurig’s Descale Mode

To ensure your Keurig operates at its best, you might need to activate the descale mode. This process helps remove mineral build-up, known as limescale, within the machine. The descale mode provides a more effective and thorough clean compared to normal brewing cycles. Here’s a simple guide on how to activate descale mode on your Keurig coffee maker.

Firstly, make sure the coffee maker is turned off and unplugged. Remove any K-Cups or pods from inside the brewer. Empty the water reservoir and, if applicable, remove the water filter. Mix your chosen descaling solution—either the Keurig brand or a homemade vinegar solution—with fresh water. Fill the reservoir with this mixture.

After reassembling the machine without the water filter, power on your Keurig and look for the descale light or notice. On some models, this might activate automatically when limescale build-up is detected. If your machine doesn’t have this automatic feature, you might find the descale option within the menu. For models without a digital screen, hold down the brew button for a few seconds until the light starts flashing. This signal usually means that descale mode is initiated. From here, proceed with the descaling process as outlined in the previous steps of the blog.

Remember, it’s key not to forget the waiting period after running the descaling solution. This allows the mixture to break down the limescale effectively. Once you’ve finished the descale process and rinsed the machine thoroughly, your Keurig will be ready to brew fresh, delicious coffee once more.

Regular maintenance, like using filtered water and cleaning detachable parts, can reduce the frequency of descaling. However, when it’s time to descale, knowing how to activate the descale mode on your Keurig will simplify the cleaning process. Keep your coffee delicious and your Keurig in top shape by staying vigilant with descaling.

how to put keurig in descale modeTroubleshooting Common Keurig Descale Issues

Sometimes, even when you know how to put your Keurig in descale mode, problems can arise. Here are some common issues and solutions:

  • Descale Light Stays On: If the descale light remains on after you’ve descaled, rerun the process. Ensure you’ve rinsed the machine with fresh water several times.
  • Residue Left Behind: If you notice residue post descaling, repeat the fresh water rinse. Run more cycles until the water is clear.
  • Machine Won’t Descale: Check that you’re using the correct descale solution and water mix. Be sure you’re following all descaling steps carefully.
  • No Descale Alert on Older Models: If your Keurig doesn’t have an alert, rely on the timeline. Descaling every 3 to 6 months is typically recommended.
  • Descale Mode Not Activating: Make sure the machine is plugged in and the power is on. Hold the necessary button(s) until the light flashes.
  • Unpleasant Vinegar Taste Afterward: To avoid this, rinse the machine thoroughly multiple times. Always use fresh water for each rinse cycle.

Remember to refer to your Keurig’s user manual for specific guidance. Each model might have different instructions or button combinations for descale mode. Regular maintenance can help avoid these issues and keep your Keurig brewing smoothly.

Posted on

How to Clean Keurig 2.0: Easy Step-by-Step Guide

Keurig 2.0

Introduction to Keurig 2.0 Maintenance

Keeping your Keurig 2.0 clean is crucial for its longevity and performance. Regular maintenance does more than just extend the life of your coffee brewer – it ensures every cup of coffee tastes as fresh and delightful as possible. The Keurig 2.0 is a marvel of modern convenience, brewing up a perfect cup of coffee with ease. However, with frequent use can come the buildup of coffee oils, water minerals, and other residues that can affect both taste and functionality.

Keurig 2.0

The good news is, learning how to clean Keurig 2.0 isn’t complicated. By following a few simple steps, you can deep clean your coffee brewer and keep it in tip-top shape. Deep cleaning involves more than just a quick rinse; it includes disassembling parts, cleaning the exterior, descaling, and changing the water filter. Each step is designed to tackle different aspects of cleanliness and ensure that every nook and cranny of your Keurig is free of buildup.

Before we dive into the nitty-gritty, remember that consistent upkeep is the key to your Keurig’s performance. Aim to deep clean your brewer every 3 to 6 months, depending on your usage. Stick around, as we walk you through the process to ensure that your Keurig 2.0 continues to provide you with quick, delicious coffee every day.

Preparing Your Keurig for Deep Cleaning

Before you start the deep cleaning process, it’s essential to prepare your Keurig 2.0. Make sure to unplug the machine first for safety. A thorough deep clean requires taking apart the removable components of the coffee brewer. This step is critical as it allows you to reach areas where coffee grinds and water residues may collect over time.

Disassembling Removable Components

Begin by removing the water reservoir. Empty any remaining water. Next, take off the lid and set both aside. Locate the drip tray at the base of the unit. Slide it out carefully. The K-cup holder inside the brew chamber is next. Press on the sides gently and it should come loose. If your model has a funnel, remove it from the holder.

Some Keurigs may have additional detachable parts, so consult your user manual to make sure all components are accounted for. Usually, there is a needle that also needs cleaning, which can be gently detached. Always handle with care to avoid damaging any parts.

Place all the pieces you’ve removed into a basin of warm soapy water. Let them soak to help dissolve any buildup. This will make the parts easier to clean later on. While these components are soaking is a great time to start cleaning the main unit. Keep the user manual handy to refer to for any specific disassembly instructions for your model. Remember to wash your hands after handling the internal components, as they can be covered in coffee oils and residues.

Proceeding with caution and ensuring all parts are safely removed sets the stage for an effective deep cleaning. Proper preparation ensures your Keurig 2.0 is ready for a thorough washdown.

Cleaning External Surfaces and Appliance Exterior

Keeping the external surfaces of your Keurig 2.0 clean is as important as the internal parts. Dust, kitchen grime, and oily fingerprints can all tarnish the appearance and hygiene of your coffee brewer. To tackle this, you’ll need a reliable cleaning solution and a good microfiber cloth or sponge. Start by wiping down the entire exterior with a damp cloth to remove loose debris.

Handling Greasy Buildup and Dust

Greasy buildup is a common issue, especially if your Keurig is near the stove or in a busy kitchen. To handle it, create a solution of equal parts white vinegar and water. Add a drop of dish soap for extra degreasing power. Dip a cloth in this mix and wring it out well. Then, gently rub away the grease and buildup. If the grime is stubborn, use a bit of olive oil on a paper towel as a pre-treatment. Olive oil breaks down grease effectively, making it easier to clean off. After treating with oil, go back over the areas with the vinegar solution to ensure all oil residue is removed. Finish by wiping the entire machine with a clean, damp cloth to remove any cleaning solution. Dry it off with another cloth to prevent water spots. Remember to clean the drip tray and K-cup holder. These can be hand washed or placed in the dishwasher if they are dishwasher safe. Include this in your regular cleaning to avoid coffee stains and buildup.

A clean Keurig not only looks better but also contributes to better tasting coffee. Make sure to repeat this process regularly, and always consult your machine’s manual for any specific care instructions. Remember, a well-maintained Keurig is the secret to enjoying that perfect cup every time.

The Descale Process for Your Keurig 2.0

Descaling is key to keeping your Keurig 2.0 running smoothly. This process removes mineral buildup inside the brewer. These minerals come from water and can affect your coffee’s taste and your machine’s function. It’s a simple task, but vital to do every few months.

Running Vinegar and Water Through the System

To start the descale process, mix white vinegar with water. Use an equal amount of each. Pour this mixture into the water reservoir. Then, run the brew cycle several times without a K-cup. Doing this cleans out the system from the inside.

Use a large mug to catch the water-vinegar mix as it cycles through. Keep going until you’ve used all the mixture. The acid in the vinegar breaks down any scale that’s built up. Your Keurig might need one full reservoir of vinegar and water to get fully clean.

Be sure to do this when you can open a window. The vinegar smell can be strong. But don’t worry, it won’t last long and is a sign the cleaning is working. Regular descaling extends your Keurig’s life and makes each cup of coffee better.

Keurig 2.0Rinsing and Final Steps to Remove Vinegar Taste

After descaling with vinegar, rinsing is crucial to remove any vinegar taste. Begin by filling the Keurig 2.0 water reservoir with fresh water. Run several brew cycles with just water, as if making coffee, but without a K-cup. This flushes the internal system. It helps to discard the water-vinegar solution used for descaling. Keep running water through the system until there’s no vinegar smell. Make sure to use a large cup to catch the water.

Descaling might leave a strong scent. It is important to ventilate the area well during this step. Open windows or use a fan to help clear out any lingering vinegar odor. The goal is to make sure your next cup of coffee is as fresh as possible, free of any off-tastes from the cleaning process. Once the smell is gone, your Keurig 2.0 is ready for regular use again.

Remember, a properly rinsed Keurig ensures a pure coffee flavor in your next brew. Make rinsing a priority after descaling to maintain the taste quality of your coffee. Cleaning your Keurig 2.0 can be easy when you know how to clean Keurig 2.0 with the correct steps.

Replacing the Water Filter Cartridge

A fresh water filter ensures your coffee tastes great and your Keurig 2.0 works well. Over time, the water filter in your Keurig can collect impurities from tap water, affecting both flavor and brewer performance. To keep your coffee tasting its best, it is important to change the water filter cartridge as recommended.

Understanding Filter Change Indicators and Installation

The Keurig 2.0 will often tell you when it’s time to replace the filter. You may see alerts on the machine’s display or notice a change in the taste of your coffee. Most filters need changing every 2 months or after 60 tank refills. Check your Keurig’s manual for exact timings.

Changing the filter is quick and simple. Start by soaking the new filter in water for 5 minutes. Then, wash the mesh of the lower filter holder. Insert the new filter into the holder and snap its lid closed. Put the filter holder back in place in the water reservoir. When you next turn on your Keurig, remember to run a few water brew cycles. This will clear out any carbon particles and prime the new filter. With a new water filter in place, your next cup of coffee should be as fresh and delicious as ever.

Regularly replacing the water filter cartridge is a simple yet key step in maintaining your Keurig 2.0. Make note of when you install a new filter so you can track when to change it next. Through this, and the cleaning steps previously outlined, you’ll ensure that your Keurig 2.0 remains a reliable companion for your daily coffee routine.

Keeping Your Keurig 2.0 Clean Long-Term

A well-maintained Keurig 2.0 brewer means better coffee every day. To avoid frequent deep cleans, follow these regular maintenance tips. They’ll help keep your brewer in great shape and your coffee tasting excellent.

Regular Maintenance Tips

Keep your Keurig 2.0 performing well with these simple, regular maintenance habits:

  • Wipe it Down Daily: Quickly wipe the exterior after use. It prevents dust and splatters from building up.
  • Empty the Drip Tray: Check and empty the drip tray often. This avoids overflow and mold growth.
  • Purge After Use: Every few days, run a water-only brew cycle. It clears out leftover coffee residue.
  • Soak Removable Parts Weekly: Once a week, soak the water reservoir, drip tray, and K-cup holder in soapy water. Rinse them well.
  • Look for and Remove Debris: Occasionally check for coffee grounds or debris. They can block the needle or other parts.
  • Use Bottled or Filtered Water: This reduces mineral buildup and may extend times between descaling.

By adding these habits to your routine, you lower the chances of clogs and ensure each cup of coffee is fresh. A little bit of regular care can save you time on deep cleaning sessions and keep your Keurig 2.0 ready for your next coffee break.

Keurig 2.0Conclusion: Benefits of a Clean Keurig 2.0

Maintaining a clean Keurig 2.0 is more than just a chore; it’s an investment in your daily coffee experience. Regularly following the steps outlined, including deep cleaning and descaling, can lead to several key benefits:

  • Consistently Great Taste: Residue and buildup can make your coffee taste off. A clean brewer means a fresher, purer taste with every cup.
  • Extended Machine Life: By tackling mineral buildup and preventing blockages, you keep your Keurig 2.0 functioning longer, saving money on potential repairs or replacements.
  • Energy Efficiency: A scaled-up machine has to work harder, using more electricity. Clean parts allow for smoother operation and better energy use.
  • Healthier Brews: Keeping your machine clean minimizes the risk of mold and bacterial growth, ensuring your coffee is as healthy as it is delicious.

For optimal results, integrate the ‘how to clean Keurig 2.0’ process into your routine. Efficient maintenance not only enhances the performance and durability of your Keurig 2.0 but also contributes to the overall enjoyment of your coffee-making experience. Clean wisely and drink joyfully!