Posted on

How to Clean Keurig Mini: A Comprehensive Guide

how to clean keurig mini

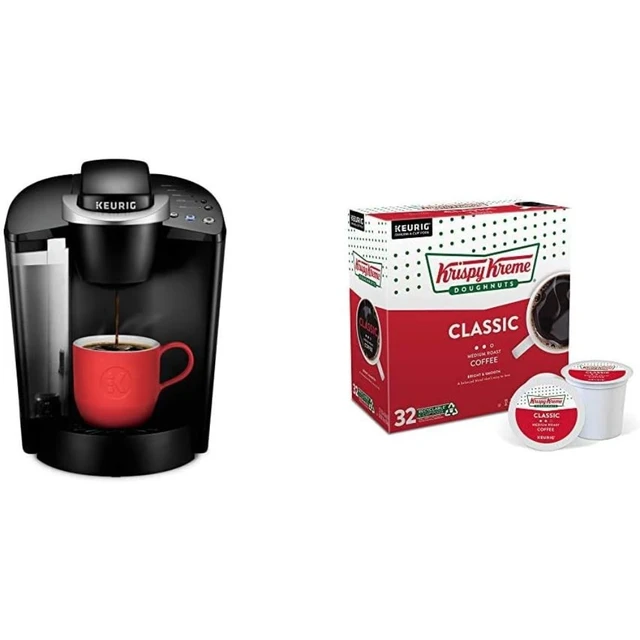
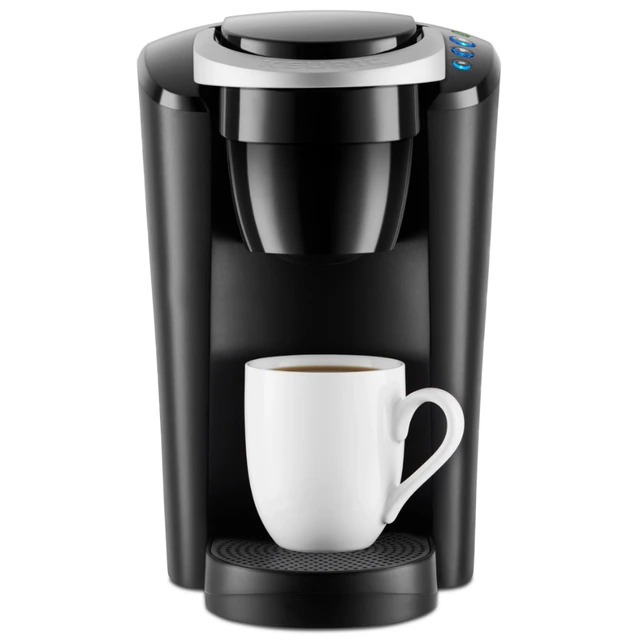
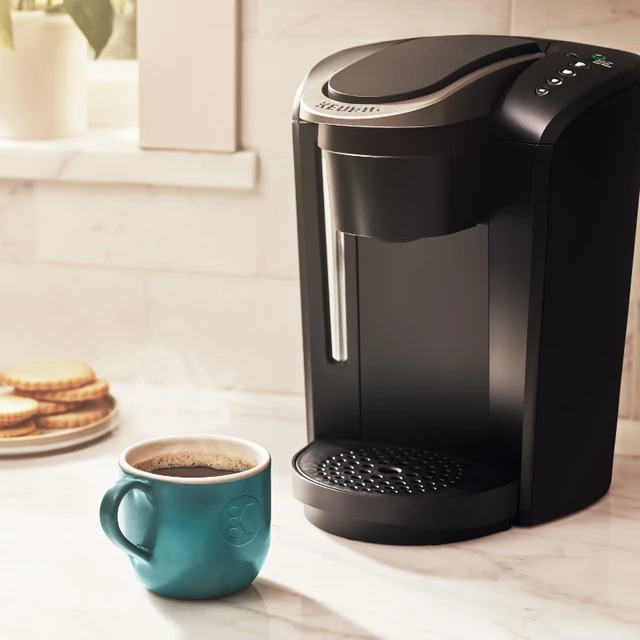
The Keurig Mini is an incredibly convenient appliance for coffee lovers everywhere. Its compact size and ease of use make it a popular choice for individuals who want a quick cup of coffee without the fuss. However, like any appliance, it requires regular cleaning to ensure it continues to function correctly and produce great-tasting coffee. In this detailed guide, we’ll walk you through how to clean Keurig Mini from top to bottom.

Understanding how to clean keurig mini is the first step to maintaining your machine. Over time, coffee residues, oils, and mineral deposits can build up within your Keurig Mini, potentially impacting its performance and the quality of your brew. By following this guide, not only will you extend the life of your coffee maker, but you’ll also ensure every cup of coffee is as delicious as the first.

Disassembling the Keurig Mini

Unplugging and Cooling Down

Before beginning any cleaning process, the first step is to safely disassemble your machine. Start by unplugging the Keurig Mini and allowing it to cool down if it has been recently used. Safety should always be your priority, and giving the machine time to cool will prevent accidental burns or electric shocks.

Removing the Water Reservoir

For those who have a Keurig Mini model with a removable water reservoir, start by emptying any remaining water and setting the reservoir aside. Make sure to wash it with warm, soapy water. After washing, rinse it thoroughly to ensure no soap residue remains, then let it air dry.

Detaching the Drip Tray and Pod Holder

Next, remove the drip tray and pod holder. These components are often hotspots for grime and coffee residue. Detach these parts and wash them similarly with warm, soapy water. Use a brush to get into any small or tight spaces where coffee grounds or debris might accumulate. Once cleaned, rinse thoroughly and set them aside to dry.

Inspecting the Machine

With the exterior components removed, inspect your Keurig Mini for any visible signs of build-up, mold, or coffee stains. Pay particular attention to the area around the pod holder, as coffee grounds often gather there. A quick visual inspection will guide you on which areas need the most attention during the cleaning process.

how to clean keurig mini

Cleaning External Components

Wiping Down the Machine

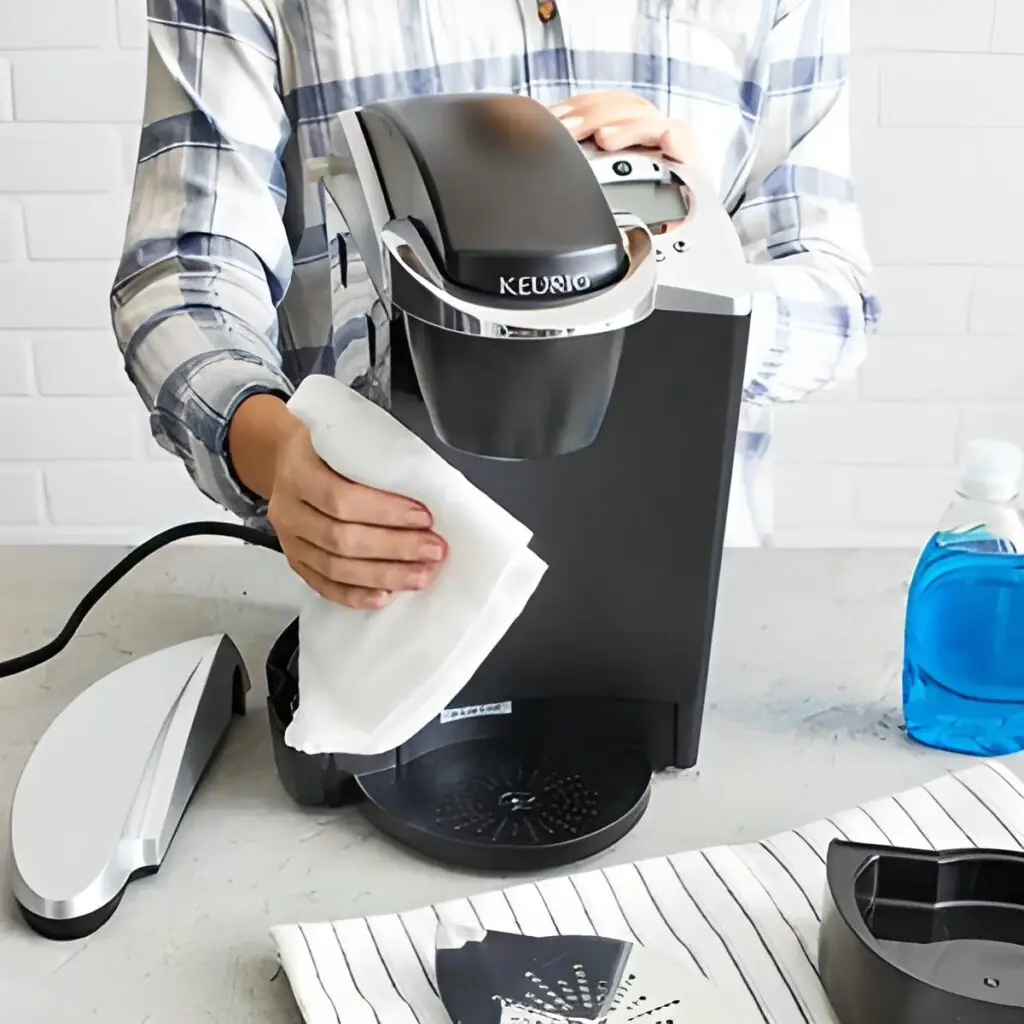
Start by using a soft, damp cloth to wipe down the exterior of the Keurig Mini. Be gentle to avoid scratching the surface. Cleaning the exterior not only improves the appearance of your machine but also removes any coffee splashes or dust that might accumulate over time.

Using Mild Detergents

For tougher stains or grimes, use a mild detergent diluted in warm water. Avoid harsh chemicals or abrasive sponges, as these can damage the machine’s surface. Apply the detergent mix to your cloth and gently scrub the affected areas. Afterward, use a damp cloth to wipe away any soap residue.

Cleaning the Drip Tray and Pod Holder

Given that the drip tray and pod holder come into contact with coffee daily, it’s essential to clean them thoroughly. Use a mild detergent to clean these parts and a brush to ensure all crevices are free from coffee grounds. After cleaning, rinse thoroughly with warm water and let them air dry.

Cleaning Internal Components

Flushing the Machine

One of the most critical parts of cleaning your Keurig Mini is descaling the internal components. Descaling removes mineral deposits that accumulate inside the machine, which can affect its performance and the taste of your coffee.

Using Vinegar Solution

A natural and effective way to descale your Keurig Mini is to use a vinegar solution. Fill the water reservoir with a mixture of half white vinegar and half water. Place a mug on the drip tray and run a brew cycle without a K-cup. Repeat the process until the water reservoir is empty. This action helps remove any internal build-up.

Running Fresh Water Cycles

Following the vinegar solution flush, it’s crucial to run several cycles with only fresh water. This step ensures that any vinegar residue is removed from the machine. Continue running cycles until you can no longer detect the vinegar smell or taste, typically around two to three full reservoirs of fresh water.

Cleaning the Needles

Locating the Needles

The needles in your Keurig Mini are responsible for puncturing K-cups and allowing water to flow through the coffee grounds. Over time, these needles can become clogged with coffee residues. Cleaning them ensures a consistent water flow for optimal brewing.

Using a Needle Cleaning Tool

Most Keurig Mini models come with a needle cleaning tool. If you don’t have this tool, you can use a paper clip. Carefully insert the tool or paper clip into the needle holes to remove any clogs. Be cautious to avoid bending or damaging the needles in the process.

Rinsing the Needles

After dislodging any blockages, run a couple of brew cycles with just water to flush out any remaining debris. This step ensures that the needles are thoroughly cleaned and free of any coffee residues.

how to clean keurig mini

Maintenance Tips for Longevity

Regular Cleaning Schedule

To keep your Keurig Mini in optimal condition, establish a regular cleaning schedule. At a minimum, clean the external parts weekly and descale the internal components every three to six months, depending on your water hardness and usage frequency.

Using Filtered Water

Using filtered water can significantly reduce the build-up of mineral deposits within your Keurig Mini. Filtered water is less likely to contain the minerals that contribute to scale formation, thereby prolonging the intervals between descaling sessions.

Avoiding Overuse

While it may be tempting to use your Keurig Mini continuously, giving it a break between brew cycles can help prevent overheating and wear and tear on the internal components. This practice can extend the life of your coffee maker and ensure consistently good performance.

Troubleshooting Common Issues

Machine Not Brewing

If your Keurig Mini isn’t brewing correctly even after cleaning, it could be due to several reasons, such as clogged needles, insufficient water in the reservoir, or even a malfunctioning part. Double-check these aspects and ensure everything is clean and functioning as it should be.

Odd Tastes or Smells

Should you notice odd tastes or smells in your coffee, it’s a sign that your machine needs cleaning. Besides regular maintenance, make sure to avoid leaving water in the reservoir for extended periods, as standing water can create unpleasant odors.

Slow Brewing

A slow brewing process often indicates that it’s time for descaling. Mineral build-up can restrict water flow, leading to slower brew times. Performing a thorough descaling procedure typically resolves this issue.

Leaking Water

If your Keurig Mini starts leaking water, it could be due to an improperly seated water reservoir or a clogged needle. Ensure that all components are correctly placed and free from blockages. If the issue persists, consult your user manual for further troubleshooting steps.

how to clean keurig miniProlonging the Life of Your Keurig Mini

Consistent Cleaning

Weekly cleaning of removable parts and a monthly vinegar descaling process are essential practices to ensure your machine operates smoothly. Consistent maintenance can prevent the build-up of harmful residues and extend the overall lifespan of your Keurig Mini.

Quality of Water and Pods

The quality of water and coffee pods used in your Keurig Mini can also impact its performance. Opt for high-quality, filtered water and premium coffee pods to reduce the risk of contaminants entering the machine. Using better quality inputs can make a noticeable difference in the longevity and performance of your coffee maker.

Storage and Care

If you plan to store your Keurig Mini for an extended period, ensure it is completely clean and dry. Store it in a cool, dry place to avoid any moisture-related damage. Before using it again, perform a quick rinse cycle to make sure it is ready for brewing.

Conclusion: how to clean keurig mini

Understanding how to clean Keurig Mini comprehensively will ensure that you enjoy consistently good coffee every day. Regularly maintaining and cleaning all the components, from the water reservoir to the needles, will prevent any unforeseen issues and contribute to the longevity of your machine.

By following the steps outlined in this guide, you can keep your Keurig Mini in top condition and enjoy a perfect brew each time. After all, a well-maintained coffee maker not only extends the life of your beloved appliance but also enhances your daily coffee experience.
Posted on

Descaling Your Keurig Slim: A Comprehensive Guide

descaling keurig slim

If you’re a coffee lover, having a reliable coffee maker like the Keurig Slim is essential for brewing that perfect cup of coffee at any time of the day. However, like any appliance, your Keurig Slim needs some care and maintenance, and one of the most important tasks is descaling. Descaling helps to remove mineral deposits that can build up in your coffee maker over time, ensuring that it functions optimally and continues to brew delicious coffee. In this guide, we will explore the importance of descaling, the steps involved, and tips for maintaining your Keurig Slim in excellent condition.

Why Descale Your Keurig Slim?

Understanding Mineral Buildup

The most common reason to descale your Keurig Slim is the mineral buildup caused by hard water. Hard water contains high levels of minerals such as calcium and magnesium. When you boil this water in your coffee maker, these minerals settle and form deposits inside the machine. Over time, these deposits can clog the inner workings of your Keurig, affecting its performance and potentially leading to permanent damage if not addressed.

Benefits of Descaling

  1. Improved Flavor: Regular descaling helps remove mineral deposits that can alter the taste of your coffee. A clean machine ensures that your coffee has its intended flavor profile.
  2. Extended Lifespan: By maintaining your Keurig Slim through regular descaling, you can significantly extend its lifespan and functionality. A well-cared-for coffee maker can serve you for years.
  3. Faster Brewing Times: When mineral buildup occurs, it can slow down your brewing process. Descaling removes these obstructions and restores your machine to its original efficiency.
  4. Preventing Clogging: Regular maintenance will help prevent the internal components of your Keurig from clogging, which can lead to water not flowing correctly and could ultimately break your coffee maker.

descaling keurig slim

How Often Should You Descale?

Most manufacturers recommend descaling your coffee maker every three to six months, depending on the hardness of your water. If you’re using hard water, you might need to descale more frequently. Keep an eye out for signs that indicate it’s time to descale your Keurig Slim, such as slower brewing times or an unusual taste in your coffee.

Preparing for Descaling

Before you start the descaling process, you’ll need a few basic items.

What You Need

  1. Descaling Solution: You can either purchase a Keurig descaling solution or make a DIY mix using equal parts white vinegar and water.
  2. Water: Fresh water is required for rinsing your machine after descaling.
  3. Container: A large container (at least 10 ounces) to catch the water and descaling solution as it flows through the machine.
  4. Coffee Mug: To test your machine after descaling and to have a cup of coffee ready!

Reading the Manual

Before proceeding with the descaling process, it’s vital to consult your Keurig Slim manual. While this guide will give a comprehensive overview, specific models might have unique requirements that you should follow for the best results.

descaling keurig slim

Step-by-Step Process to Descales the Keurig Slim

Prepare the Machine

  • Remove the Water Reservoir: Start by taking off the water reservoir and emptying its contents.
  • Remove the K-Cup Holder: Take out the K-Cup holder if it is present. This will prevent any blocks while descaling.
  • Clean the Drip Tray: Empty and clean the drip tray, so it doesn’t overflow during the process.

Mix the Descaling Solution

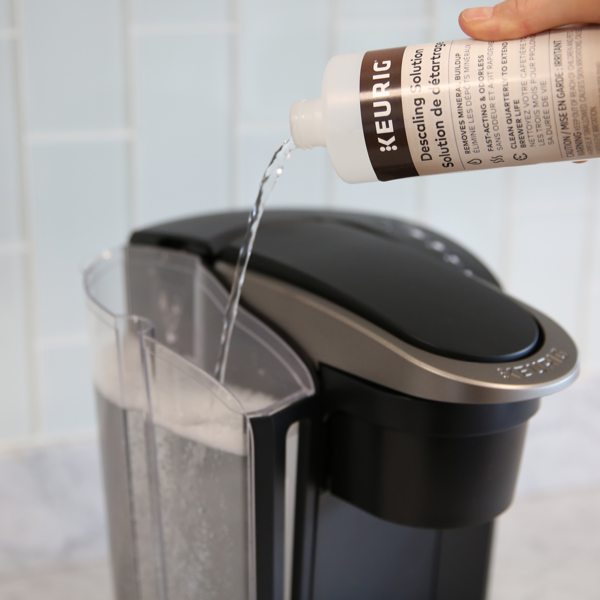
  • Using Keurig Descaling Solution: Follow the instructions on the bottle to mix the solution with water. Typically, it involves filling the reservoir halfway with the descaling solution and then topping it off with water.
  • Using Vinegar: If you’re opting for a DIY solution, fill the reservoir halfway with equal parts of white vinegar and water.

Start the Descaling Process

  1. Power On the Machine: Plug in your Keurig Slim, ensuring that it is turned on.
  2. Run the Descaling Cycle: Place the large container under the coffee outlet. Select the brew button as you normally would. Make sure to use at least the 10-ounce cup setting.
  3. Let it Brew: Allow the descaling solution to run through the machine as if you were brewing coffee. You may need to repeat this process until the reservoir is empty.
  4. Discard the Solution: Discard the solution that has filled the container.

Rinse the Machine

  1. Empty the Reservoir: Rinse out the water reservoir thoroughly.
  2. Fill with Fresh Water: After emptying and rinsing, fill the reservoir with fresh water to the maximum line.
  3. Brew Fresh Water: Run several cycles of pure water through your Keurig Slim without a K-Cup. This will help flush any remaining descaling solution from the machine. You should run at least two to three full reservoirs worth of water through it.

Cleaning Up

  • Dry All Components: After you’ve completed the rinsing process, dry the water reservoir, drip tray, and any other parts you removed.
  • Reassemble the Machine: Put the water reservoir back in place, ensuring it fits snugly, and replace any other components you removed for descaling.

Testing the Machine

Once you have completed all the steps, it’s time to test your Keurig Slim.

  • Brew a Cup of Coffee: Make yourself a cup of coffee using a K-Cup. This will help you determine if the descaling process was successful and that your Keurig is back to brewing delicious coffee.
  • Observe Performance: Pay close attention to the brewing time and the flavor to ensure everything is functioning correctly.

Additional Tips for Maintenance

Maintaining your Keurig Slim doesn’t end with descaling. Here are more tips to ensure it remains in peak condition.

Regularly Clean External Parts

Wipe down the external parts of your Keurig Slim regularly to remove any spills, dust, and accumulated grime. Use a damp cloth and mild soap if necessary.

Change the Water Filter

If your Keurig Slim has a water filter, make sure to change it regularly as per the manufacturer’s recommendations, usually every two months. This will help improve the taste of your coffee and reduce mineral buildup.

Store Properly

If you plan on not using your Keurig Slim for an extended period, empty the water reservoir and store it in a dry, cool place. This prevents stagnant water from building up inside the appliance.

descaling keurig slimTroubleshooting Common Issues

Machine Won’t Brew After Descaling

If you’ve recently descaled your machine and it’s not brewing, it may be due to air pockets in the system. Here’s how to troubleshoot:

  1. Run a Water Only Cycle: Fill the water reservoir with clean water and run a few cycles without a K-Cup to ensure any air bubbles are cleared.
  2. Check for Clogs: Make sure the needle is clear. You can gently clean it using a paper clip.

Weak Coffee After Descaling

Sometimes, the coffee may taste weak following descaling. If that happens:

  1. Run an Extra Rinse Cycle: This may help clear any residual descaling solution or vinegar flavor.
  2. Use Fresh Ingredients: Make sure your coffee beans or grounds are fresh, as old coffee can affect taste.

Conclusion

Descaling your Keurig Slim is an essential process that ensures your coffee maker remains efficient, functional, and capable of brewing the best flavor from every K-Cup. By following the comprehensive steps outlined in this guide, you can maintain your coffee maker in excellent condition and prolong its lifespan. Regular maintenance and timely descaling are key to ensuring that your Keurig Slim serves you the perfect cup of coffee for many years to come. Remember, when it comes to descaling your Keurig Slim, a little effort goes a long way in maintaining a quality brewing experience!

Posted on

Understanding Why Does My Keurig Say Descale

why does my keurig say descale

If you own a Keurig coffee maker, you may have encountered the “Descale” warning on its display. This signal is part of the machine’s maintenance protocol and, if ignored, can eventually lead to performance issues. Descaling is a crucial part of keeping your coffee maker in optimal condition. In this guide, we’ll delve into what the “Descale” feature means, why it’s important, how to descale your machine, and tips for preventing future scale buildup.

What is Descaling?

Descaling is the process of removing mineral buildup from your coffee maker. This buildup, primarily composed of calcium and magnesium, occurs naturally when you use water to brew your coffee. Over time, minerals can accumulate in the machine’s internal components, affecting its performance and the quality of your brewed coffee.

Why Does Scale Build-Up Occur?

Water is the main ingredient in coffee, and its chemical composition can vary significantly depending on the source. Hard water contains high levels of minerals, which can lead to scale buildup. The process of heating water within your coffee maker can accelerate this buildup, especially if you frequently use your machine.

What Happens if You Ignore the Descale Warning?

Ignoring the descale warning can lead to several problems:

  1. Reduced Brewing Efficiency: Scale can block water flow through the machine, resulting in longer brew times and weaker coffee.
  2. Unpleasant Taste: Mineral buildup can affect the flavor of your coffee, resulting in a less enjoyable experience.
  3. Potential Damage: Over time, the scale can cause internal damage to heating elements and other components, leading to costly repairs or replacements.

Recognizing the Descale Warning

Keurig coffee makers come equipped with a built-in feature that alerts users when it’s time to descale. The warning can appear as a message on the display, often accompanied by a light indicator.

When Should You Descale?

The frequency of descaling largely depends on your water quality. If you use hard water, it is advisable to descale every three to six months. Some models will alert you after a certain number of brews or time intervals, so it’s essential to stay attentive to your machine’s signals.

Signs Your Keurig May Need Descaling

  • Slow or inefficient brewing
  • A decrease in coffee temperature
  • A strange or off taste in your coffee
  • Error messages or blinking lights

why does my keurig say descale

Preparing for the Descaling Process

Before you begin the descaling process, you’ll need a few items to ensure a smooth experience.

Items Needed

  1. Descaling Solution: You can buy a commercial descaling solution specifically made for Keurig machines or use a mixture of equal parts white vinegar and water.
  2. Water: Fresh water will be required to rinse the machine after descaling.
  3. Container: A large, empty container that can hold at least 10 ounces of liquid to catch runoff during the descaling process.

Safety Precautions

It’s essential to follow some safety measures to avoid any mishaps while descaling your coffee maker:

  • Ensure the machine is unplugged before starting any maintenance.
  • Avoid using abrasive materials that may scratch the surface.
  • Use protective gear if necessary—gloves can be helpful when using strong chemicals.

why does my keurig say descale

Step-by-Step Guide to Descaling Your Keurig

Now that you’ve gathered your supplies, it’s time to descale your Keurig. Follow these steps carefully for effective results:

Step 1: Empty the Water Reservoir

Start by removing any remaining water from the reservoir. This helps ensure that the descaling solution works efficiently and isn’t diluted.

Step 2: Add the Descaling Solution

If you’re using a commercial descaler, follow the instructions on the packaging. Typically, you will pour the solution into the reservoir and fill it with water to the maximum fill line. If using vinegar, fill the reservoir halfway with vinegar and the remaining half with water.

Step 3: Begin the Descaling Cycle

  • Turn on the Machine: Plug it back in and power it up.
  • Run a Brew Cycle: Place a large container under the brewer and select the largest cup size. Run a brew cycle without inserting a K-Cup. Continue this process until the water reservoir is empty.

Step 4: Let it Sit

Once the reservoir is empty, turn off your Keurig and allow the remaining solution to sit in the machine for about 30 minutes. This waiting period helps the solution break down any mineral deposits effectively.

Step 5: Rinse

After 30 minutes, refill the reservoir with fresh water and run several brew cycles (without K-Cups) until the water runs clear. This step ensures that all the descaling solution is removed from the machine.

Step 6: Cleaning the Exterior

While you wait for the descaling process to complete, take a moment to clean the machine’s exterior. Wipe down surfaces with a damp cloth and mild soap, paying special attention to the area around the brew head.

Post-Descaling Maintenance

After descaling, it’s essential to incorporate some post-maintenance habits to keep your Keurig running smoothly.

Regular Cleaning

To prevent future scale buildup and keep your coffee tasting fresh, clean your coffee maker regularly. Aim to perform a thorough cleaning every month, which includes:

  • Emptying the Water Reservoir: Always pour out any remaining water and clean the reservoir with warm, soapy water.
  • Cleaning the K-Cup Holder: Remove and clean the K-Cup holder to avoid clogs and keep the flavor intact.
  • Wiping Down: Regularly wipe the machine’s exterior to remove dust and spills.

Use Filtered Water

One of the best ways to prevent hard water mineral buildup is to use filtered or bottled water for brewing. If you can’t avoid using tap water, consider investing in a water softener to reduce mineral content.

Monitor Your Machine

Keep an eye on your Keurig for any signs that it may need maintenance. If you notice any odd noises, changes in brew times, or flavors, it may be time to perform both descaling and general cleaning.

why does my keurig say descaleFrequently Asked Questions (FAQs)

What type of descaling solution should I use?

Keurig offers its own descaling solution, but you can also use equal parts white vinegar and water. Just ensure that the solution is safe for use in coffee makers.

Can I descale my Keurig too often?

While it’s essential to follow a regular descaling routine, doing it too often may not cause harm but may be unnecessary unless you have significantly hard water. Generally, a frequency of every 3-6 months is adequate.

What if my machine still has issues after descaling?

If you’ve descaled your Keurig and continue to have issues, consider contacting customer support. It may be possible there are other underlying problems that require professional attention.

Is descaling safe for all Keurig models?

Yes, descaling is safe for all Keurig models. However, always refer to your model’s specific user manual for any model-specific instructions.

Troubleshooting Common Issues

What If the Descale Warning Doesn’t Go Away?

Sometimes, the warning may persist even after you’ve completed the descaling process. Here are a few steps to troubleshoot:

  1. Run Additional Rinses: If you followed the descaling and rinsing instructions and the warning remains, you may need to run several additional cycles of plain water to clear any remaining solution.
  2. Check for Clogs: Inspect the needle and brew basket for blockages.
  3. Factory Reset: For some models, a factory reset may remove persistent warning indicators.
  4. Consult Manual: When in doubt, refer to your Keurig’s user manual for model-specific instructions.

Conclusion

Descaling your Keurig is essential for maintaining the health of your coffee maker and ensuring a high-quality brew. You might wonder, “Why does my Keurig say descale?” This warning indicates that mineral buildup has occurred, and it’s time for maintenance. Addressing this alert promptly can help you avoid performance issues and prolong the life of your machine. Regular upkeep, such as using filtered water and responding to your coffee maker’s signals, contributes to a better coffee experience. So, when that descaling message appears, don’t disregard it—take action to continue enjoying your delicious coffee at the touch of a button.

Posted on

What Does Descale Mean On My Keurig?

what does descale mean on my keurig

If you’re a coffee aficionado or even just someone who needs their daily caffeine fix, you likely appreciate the convenience of a Keurig coffee maker. These machines provide a quick and efficient way to make a single cup of coffee without the mess of traditional brewing methods. However, if you have been using your Keurig for a while, you might have encountered the warning message: “Descale.” This message can be confusing for many users, and it often leads to questions like, “What does descale mean?” and “Why do I need to descale my coffee maker?” This article aims to provide a comprehensive understanding of what it means to descale your Keurig coffee maker, why it’s necessary, and how you can do it efficiently.

What Is Descaling?

The Science Behind Descaling

Descaling is a process that involves removing mineral deposits, also known as limescale, from the internal components of your coffee machine. Over time, as water passes through the Keurig, minerals such as calcium and magnesium begin to accumulate inside the machine. These mineral deposits are harmless to consume but can significantly affect the performance and longevity of your coffee maker.

Why Is Descaling Important?

If not removed, these mineral deposits can:

  • Block Water Pathways: This can prevent the machine from brewing properly.
  • Affect Coffee Taste: Accumulated minerals can alter the taste of your coffee.
  • Reduce Heating Efficiency: Mineral buildup can make it harder for the heating elements to heat water adequately, resulting in lukewarm coffee.
  • Cause Corrosion: Over time, limescale can corrode the internal parts, leading to malfunctions and costly repairs.

what does descale mean on my keurig

Signs That Your Keurig Needs Descaling

Besides the obvious descale message, there are several signs that your Keurig coffee maker might need descaling:

  • Slower Brewing Times: One of the initial indicators can be that your coffee maker takes longer than usual to brew a cup of coffee.
  • Less Coffee Output: If you notice that your machine is producing less coffee than it should, this can be a sign of mineral buildup.
  • Strange Noises: Odd sounds, such as gurgling or sputtering, can indicate that water is having difficulty passing through the machine due to blockages.
  • Poor-tasting Coffee: A noticeable change in the taste of your coffee can be a sign of mineral accumulation inside the machine.

How Often Should You Descale Your Keurig?

Manufacturer’s Recommendations

Keurig recommends descaling your coffee maker every 3 to 6 months, depending on the hardness of your water. Hard water contains more minerals that can accumulate faster in your machine. Some advanced Keurig models come with water filter cartridges that can help reduce mineral buildup, slightly extending the time between descalings.

Personalized Descaling Schedule

While the manufacturer’s guidelines are a good starting point, your usage patterns can also dictate how often you should descale your machine. If you use your Keurig multiple times a day, you might need to descale it more frequently. Similarly, if you use filtered or bottled water, you might be able to extend the intervals between descaling sessions.

Materials Needed for Descaling

Before starting the descaling process, you’ll need to gather some materials:

  • Descaling Solution: You can use a commercially available descaling solution or make your own using white vinegar and distilled water.
  • Large Ceramic Mug: This will be used to catch the descaling solution as it passes through the machine.
  • Clean Water: To rinse the machine after descaling.

what does descale mean on my keurig

Step-by-Step Guide to Descaling Your Keurig

Using a Commercial Descaling Solution

  1. Preparation:
    • Turn off your Keurig and unplug it from the outlet.
    • Empty the water reservoir and remove any coffee pods from the holder.
    • Remove the water filter cartridge if your machine uses one.
  2. Mix the Solution:
    • Follow the instructions on the descaling solution bottle to mix it with water. Typically, you’ll need to pour the entire bottle of descaling solution into the water reservoir and fill the empty bottle with water to add to the reservoir as well.
  3. Start Descaling:
    • Plug the Keurig back in and power it on.
    • Place the large ceramic mug on the drip tray to catch the descaling solution.
    • Run a cleansing brew without a coffee pod, selecting the largest cup size available.
  4. Repeat:
    • Empty the mug and repeat the cleansing brew until the “Add Water” light comes on, indicating that the reservoir is empty.
  5. Let It Sit:
    • Allow the machine to sit for at least 30 minutes with the power on. This gives the descaling solution time to break down any remaining mineral deposits.
  6. Rinse:
    • Empty any remaining descaling solution from the reservoir and rinse it thoroughly. Fill the reservoir with fresh, clean water.
    • Run multiple cleansing brews with clean water to ensure that all traces of the descaling solution are removed.

Using White Vinegar and Distilled Water

  1. Preparation:
    • Turn off and unplug your Keurig, then remove any coffee pods and the water filter cartridge.
  2. Mix the Solution:
    • Fill the water reservoir with a mixture of equal parts white vinegar and distilled water.
  3. Start Descaling:
    • Place a large ceramic mug on the drip tray.
    • Plug in the machine and power it on. Run a cleansing brew using the largest cup size.
  4. Repeat:
    • Empty the mug and repeat the process until the reservoir is empty or the “Add Water” indicator comes on.
  5. Let It Sit:
    • Allow the machine to sit, plugged in and powered on, for at least 4 hours. This extended period helps to ensure that the vinegar effectively dissolves the mineral deposits.
  6. Rinse:
    • Empty the water reservoir and rinse it thoroughly to remove any leftover vinegar.
    • Fill the reservoir with fresh, clean water and run several cleansing brews to ensure that all traces of vinegar are flushed out.

what does descale mean on my keurigPost-Descaling Maintenance Tips

Keeping your Keurig in optimal condition requires more than just periodic descaling. Here are some routine maintenance tips:

Regular Cleaning

  • Water Reservoir: Clean the water reservoir weekly using warm, soapy water, then rinse it thoroughly.
  • Drip Tray: Remove and clean the drip tray regularly to avoid it becoming a breeding ground for bacteria.
  • Needle: The exit needle should be cleaned periodically to prevent blockages that can affect brewing performance.

Water Quality

  • Use Filtered Water: Using filtered water can significantly reduce the rate of mineral buildup in your machine.
  • Change the Water Filter: If your Keurig has a water filter, make sure to change it as recommended, typically every 2 months.

Common Descaling Mistakes and How to Avoid Them

Using the Wrong Solution

Not all descaling solutions are created equal. Always use a descaling solution that is recommended by Keurig or a mixture of white vinegar and distilled water. Avoid using harsh chemicals that can damage the internal components of your machine.

Rushing the Process

Descaling is not a quick fix. The process requires time to effectively break down mineral deposits. Rushing through the steps or skipping the soaking period will likely mean you have to descale again sooner than necessary.

Inadequate Rinsing

Failing to thoroughly rinse your machine after descaling can leave a residue from the descaling solution, which can affect the taste of your coffee and even potentially harm your health. Make sure to run multiple cycles of clean water through your machine to flush out any remaining solution.

Conclusion

Descaling your Keurig coffee maker is an essential maintenance task that ensures the longevity and optimal performance of your machine. By understanding what does descale mean on my keurig, why it’s important, and how to do it correctly, you can keep your coffee maker running smoothly and enjoy delicious coffee with every brew. Regular maintenance, combined with proper descaling, will not only enhance the taste of your coffee but also save you from potential costly repairs or replacements in the long run. With these detailed instructions and maintenance tips, you can confidently tackle the task of descaling your Keurig, keeping your coffee maker in top condition for many cups to come. So the next time you see that “Descale” message, you’ll know exactly what to do to get your Keurig back to brewing the perfect cup of coffee. Happy brewing!

Posted on

How to Get the Descale Light Off Your Keurig?

how to get descale light off keurig

Keurig coffee makers are a beloved staple in many kitchens due to their convenience, speed, and ability to brew a fresh cup of coffee at the touch of a button. However, like all appliances, they require regular maintenance to perform at their best. One common issue Keurig owners face is the persistent “Descale” light on their machine. This light indicates that it’s time to clean out the mineral build-up, which can affect the taste of your coffee and the machine’s performance. This comprehensive guide will provide you with everything you need to know to get the descale light off your Keurig and keep your machine in top condition.

Understanding the Descale Light on Your Keurig

Why Descale Your Keurig?

Descaling is a critical maintenance step for any coffee maker, including Keurig machines. The process involves removing mineral deposits, also known as scale, that accumulate inside the coffee maker over time, particularly if you’re using hard water. These deposits can clog the machine, affect the flavor of your coffee, and ultimately reduce the lifespan of the appliance. Regular descaling enhances the functionality and longevity of your machine, ensuring every cup of coffee is as good as the first.

What Causes the Descale Light to Illuminate?

The descale light on a Keurig operates as a warning system, triggered by an internal sensor that detects the build-up of minerals inside the machine. When the sensor identifies a certain level of scale, it activates the descale light to alert you that it’s time to clean the machine. Ignoring this signal can lead to several problems, such as slower brewing times, less efficient heating, and a decrease in overall coffee quality.

how to get descale light off keurig

Preparing to Descale Your Keurig

Gathering Supplies

Before you begin descaling your machine, you’ll need to gather a few supplies:

  • Descaling solution: You can use Keurig’s official descaling solution or a mixture of white vinegar and water if you prefer a more natural approach.
  • Water: Ensure you have access to clean water to rinse the machine thoroughly after descaling.
  • A large mug: This will collect the descaling solution during the cleaning cycle.
  • A paperclip: For clearing out the exit needle, which can sometimes become clogged with coffee grounds or mineral deposits.

Safety Precautions

Descaling involves running a cleaning solution through your coffee maker, so it’s important to take a few safety precautions. First, ensure that your machine is turned off and unplugged before you start. This reduces the risk of electrical shock. Additionally, handle the descaling solution with care, as it can be irritating to the skin and eyes.

how to get descale light off keurig

The Descaling Process

Step-by-Step Guide

Step 1: Empty the Machine

Start by emptying any water currently in the reservoir. If your machine has a water filter, remove it as well. It’s best to begin the process with an empty and clean machine.

Step 2: Add Descaling Solution

Pour the descaling solution into the water reservoir. If you’re using vinegar, mix one part white vinegar with one part water and fill the reservoir with this mixture.

Step 3: Run the Descaling Cycle

Turn on your Keurig and place a large mug on the drip tray. Open and close the brewer handle without adding a pod, and select the largest cup size. Run this brewing process until the machine indicates that the water reservoir is empty. Depending on your machine model, this may require multiple cycles.

Step 4: Allow the Solution to Sit

Once the descaling solution has cycled through the machine, let it sit for at least 30 minutes. This allows the solution to break down any remaining mineral deposits inside the machine.

Step 5: Rinse Thoroughly

After the waiting period, remove the water reservoir and rinse it thoroughly. Refill it with fresh water and place it back on the machine. Run multiple brewing cycles with just water (no coffee pod) to flush out any remaining descaling solution. Continue this process until the water reservoir is empty, and you no longer detect the scent of vinegar or the descaling solution.

Step 6: Clean the Exit Needle

Using a paperclip, carefully clean the exit needle to ensure it’s free of any debris. You can do this by inserting the paperclip into the needle to dislodge any particles. Be gentle to avoid damaging the machine.

Specifics for Different Keurig Models

While the basic descaling process is relatively consistent across different Keurig models, some models may have specific steps or additional features. For instance:

  • Keurig 2.0 Series: Ensure that you follow the on-screen instructions, and be aware that these models may have a more complex descaling procedure.
  • Keurig K-Classic: This model is straightforward and follows the basic steps outlined above.
  • Keurig K-Supreme: This model features a descaling mode that simplifies the process; refer to your user manual for specific instructions.

Post-Descale Procedures

Resetting the Descale Light

After you’ve completed the descaling process and thoroughly rinsed your machine, you’ll need to reset the descale light. The method to do this varies depending on your Keurig model:

  • For Keurig Classic Models: Typically, unplugging the machine for a few minutes and then plugging it back in will reset the light.
  • For Keurig 2.0 Models: You may need to perform a specific sequence, such as pressing and holding certain buttons; refer to your user manual.
  • For Keurig K-Elite: Press and hold the 8oz and 10oz buttons simultaneously for 3 seconds to reset the descale light.

how to get descale light off keurigRegular Maintenance Tips

Regular maintenance can help prevent the descale light from coming on too frequently:

  • Use Filtered Water: Using filtered or bottled water can reduce mineral build-up compared to tap water.
  • Empty the Water Reservoir: If you won’t be using the coffee maker for a few days, empty the water reservoir to prevent standing water from contributing to scale build-up.
  • Clean the Machine Regularly: Apart from descaling, regularly clean your Keurig’s exterior and removable parts, such as the drip tray and K-cup holder, to maintain overall hygiene.

When to Seek Professional Help

If you’ve followed all the steps and the descale light remains on, or if you notice any malfunctioning of your machine, it might be time to seek professional help. Contact Keurig customer support or consult a certified technician to diagnose and resolve any underlying issues.

Troubleshooting Common Descaling Issues

Sometimes, the descale process doesn’t go as smoothly as planned. Here are solutions to common descaling problems.

Persistent Descale Light

If the descale light remains on after you’ve completed the descaling process, ensure that you’ve followed all steps correctly. Running another descaling cycle might be necessary. If the problem persists, consult your Keurig’s user manual or contact customer support.

Unpleasant Taste or Odor

If you notice a lingering taste or smell of descaling solution or vinegar, it’s crucial to rinse the machine thoroughly. Repeat the rinse cycle with fresh water more than the recommended number of times if needed. Use filtered water for brewing to see if the taste improves.

Slow or Incomplete Brewing

Slow or incomplete brewing after descaling may result from residual deposits or air trapped within the machine. Run several water-only brew cycles to flush out any leftover deposits. Ensure the water reservoir is correctly seated and filled.

Conclusion

By understanding how to properly descale your coffee maker and regularly maintaining it, you can keep your machine in top condition. Regular maintenance, including the use of filtered water and periodic cleaning, can help prolong the life of your coffee maker. Should you encounter persistent issues with the descale light or any other problems, don’t hesitate to seek professional assistance to ensure your beloved Keurig continues to deliver that perfect cup of coffee each morning.

Posted on

Cleaning Keurig Coffee Maker: What’s the Best Way?

keurig coffee maker

For coffee enthusiasts, a Keurig coffee maker is often a kitchen staple, known for its convenience and ability to brew a single perfect cup at a time. However, like any appliance, it requires regular maintenance to function at its best. So, what’s the best way to clean a Keurig coffee maker? Understanding the correct procedures can extend the life of your machine and ensure your coffee tastes as fresh and delicious as possible. In this article, we’ll delve into practical steps and tips for cleaning your Keurig, ensuring it stays in top condition and continues to deliver great-tasting coffee.

Why Cleaning Your Keurig is Essential

Regular cleaning isn’t just about hygiene; it significantly impacts the performance and longevity of your Keurig coffee maker.

Preventing Build-Up

Over time, minerals from water, coffee residues, and oils accumulate in your coffee maker. This build-up can clog your machine, affect the taste of your coffee, and even lead to mechanical failures. Regular cleaning helps prevent these issues, ensuring smooth operation and consistent coffee quality.

Ensuring Optimal Performance

A clean coffee maker functions more efficiently. Regular maintenance, including descaling and cleaning removable parts, helps the machine heat water correctly and brew coffee at the ideal temperature. This not only improves the taste but also reduces the time it takes to brew a cup, making your morning routine more convenient.

Health and Safety

Bacteria and mold can grow in the damp, dark interior of your coffee maker if it’s not cleaned regularly. This can pose health risks over time. Regular cleaning minimizes this risk, ensuring that every cup of coffee is safe to drink.

keurig coffee maker

Daily Cleaning Routine

Incorporate simple daily cleaning habits to keep your Keurig in good shape.

Emptying the Drip Tray

After each use, make it a habit to empty the drip tray. The accumulation of coffee drips and water can create a breeding ground for bacteria. By keeping the drip tray clean and dry, you reduce the risk of bacterial growth.

Running Clean Water Through the Machine

At the end of each day, run a cycle of clean water through the machine without a K-Cup. This simple step flushes out any remaining coffee residue and helps maintain the cleanliness of the internal components. It’s a quick process that can make a big difference in the machine’s performance and longevity.

Wiping Down Exterior Surfaces

Wipe down the exterior of your Keurig, including the coffee outlet and K-Cup holder, with a damp cloth. This helps remove any coffee stains or splashes, keeping your machine looking clean and new. Using a mild detergent can help tackle any stubborn stains or build-up on the exterior surfaces.

Weekly Deep Cleaning

A more thorough cleaning should be done on a weekly basis.

Cleaning the K-Cup Holder

Remove the K-Cup holder and rinse it under warm water. Use a small brush or a paperclip to unclog any coffee grounds stuck in the needle. This helps prevent blockages that can disrupt the brewing process and affect the taste of your coffee. Make sure to dry the holder completely before placing it back into the machine.

Washing the Water Reservoir

Detach the water reservoir and wash it with warm, soapy water. Rinse thoroughly to remove all soap residues. Allow it to air dry before reattaching it to the machine. Keeping the reservoir clean ensures that the water used for brewing is free from contaminants that could affect the flavor and quality of your coffee.

keurig coffee maker

Descaling the Machine

Descaling is vital to remove mineral build-up from the internal components of your Keurig. Fill the reservoir with a descaling solution or a mixture of white vinegar and water. Run the machine through a brewing cycle without a K-Cup until the reservoir is empty. Then, rinse the reservoir and run several cycles with clean water to remove any vinegar taste. This process helps maintain the efficiency and longevity of your Keurig.

Monthly Maintenance

Monthly maintenance helps tackle any deep-seated dirt and ensures the longevity of your coffee maker.

Replacing the Water Filter

If your Keurig model has a water filter, it’s important to replace it every two months or after 60 tank refills. This ensures that the water used for brewing is clean and free from impurities that can affect the taste of your coffee. Follow the manufacturer’s instructions for replacing the filter, and make sure to soak the new filter in water before installing it.

Checking the Needles

Inspect the needles that puncture the K-Cups for any build-up or blockages. Use a small paperclip to dislodge any stuck debris. Keeping the needles clean ensures that the coffee flows smoothly and the K-Cups are properly punctured during brewing.

Inspecting the Seals and Gaskets

Check the seals and gaskets around the water reservoir and K-Cup holder for any signs of wear or damage. Replacing worn gaskets can prevent leaks and ensure that the machine operates correctly. Regular inspection can help identify potential issues before they become major problems.

Troubleshooting Common Issues

Even with regular maintenance, issues can sometimes arise. Knowing how to troubleshoot these can save you time and frustration.

Machine Not Brewing

If your Keurig is not brewing, check for blockages in the needles and ensure that the water reservoir is seated correctly. Running a cycle with clean water can also help to clear any minor issues. If the problem persists, try descaling the machine to remove any internal build-up that might be causing the issue.

Coffee Tastes Off

If the taste of your coffee seems off, it might be time to clean or replace the water filter. Descaling the machine and thoroughly cleaning the K-Cup holder and water reservoir can also help improve the flavor. Sometimes, using filtered water for brewing can make a noticeable difference in the taste of your coffee.

Leaking Water

If you notice water leaking from your Keurig, check the seals and gaskets for any signs of wear. Ensuring that all parts are properly seated and that there are no blockages can often resolve leakage issues. If the problem continues, it might be necessary to replace worn parts or consult the manufacturer for further assistance.

keurig coffee maker Using Natural Cleaners

Natural cleaners can be an effective and eco-friendly way to maintain your Keurig coffee maker.

White Vinegar

White vinegar is excellent for descaling and disinfecting your Keurig. Its acidic properties break down mineral build-up and kill bacteria. Simply mix equal parts vinegar and water and follow the descaling steps outlined earlier. Running several cycles with clean water afterward ensures that any vinegar residue is thoroughly rinsed out.

Baking Soda

Baking soda can be used to clean the exterior surfaces and remove stubborn stains. Make a paste of baking soda and water, apply it to the stains, and gently scrub with a soft cloth. Rinse with clean water and dry thoroughly. Baking soda is a non-abrasive cleaner that’s safe for most surfaces.

Lemon Juice

Lemon juice is another natural descaler. Its acidic nature helps dissolve mineral deposits, and it leaves a pleasant fragrance. Mix lemon juice with water and run it through the machine as you would with vinegar. Ensure you rinse thoroughly with clean water to remove any remaining lemon juice.

Extending the Life of Your Keurig

By following these cleaning routines and tips, you can significantly extend the life of your Keurig coffee maker.

Regular Maintenance

Regular maintenance and periodic descaling ensure that your Keurig runs efficiently and lasts longer. Consistency in following these routines prevents the build-up that can lead to mechanical problems.

Using Filtered Water

Using filtered water can reduce mineral build-up and improve the taste of your coffee. It’s a simple step that can enhance both the longevity and performance of your machine.

Proper Storage

If you won’t be using your Keurig for an extended period, empty the water reservoir and store the machine in a dry place. This prevents the growth of mold and bacteria, ensuring that your Keurig is ready to use when you need it.

Summarizing the Insights: Keurig Coffee Maker Maintenance

So, how to clean a Keurig coffee maker effectively? Regular cleaning, both daily and deep, is essential for maintaining optimal performance and taste. From emptying the drip tray and running clean water cycles daily to weekly deep cleaning of the K-Cup holder and water reservoir, each step plays a crucial role. Monthly maintenance, including descaling and replacing the water filter, ensures that your machine continues to function efficiently. By avoiding common mistakes and using natural cleaners, you can keep your Keurig coffee maker in top condition. Consistent maintenance not only extends the machine’s life but also guarantees that every cup of coffee you brew is fresh, delicious, and safe to drink.

Posted on

How to Descale Keurig Supreme? Ensuring Optimal Performance

keurig coffee maker

Owning a Keurig Supreme coffee maker offers convenience and a quality coffee experience. However, regular maintenance, particularly descaling, is crucial to keep your machine running efficiently. Mineral deposits from water can build up over time, affecting the performance and taste of your coffee. Learning how to descale Keurig Supreme is essential for maintaining its longevity and ensuring you always get the best brew. Let’s delve into the detailed steps to descale your Keurig Supreme effectively and keep it in top condition.
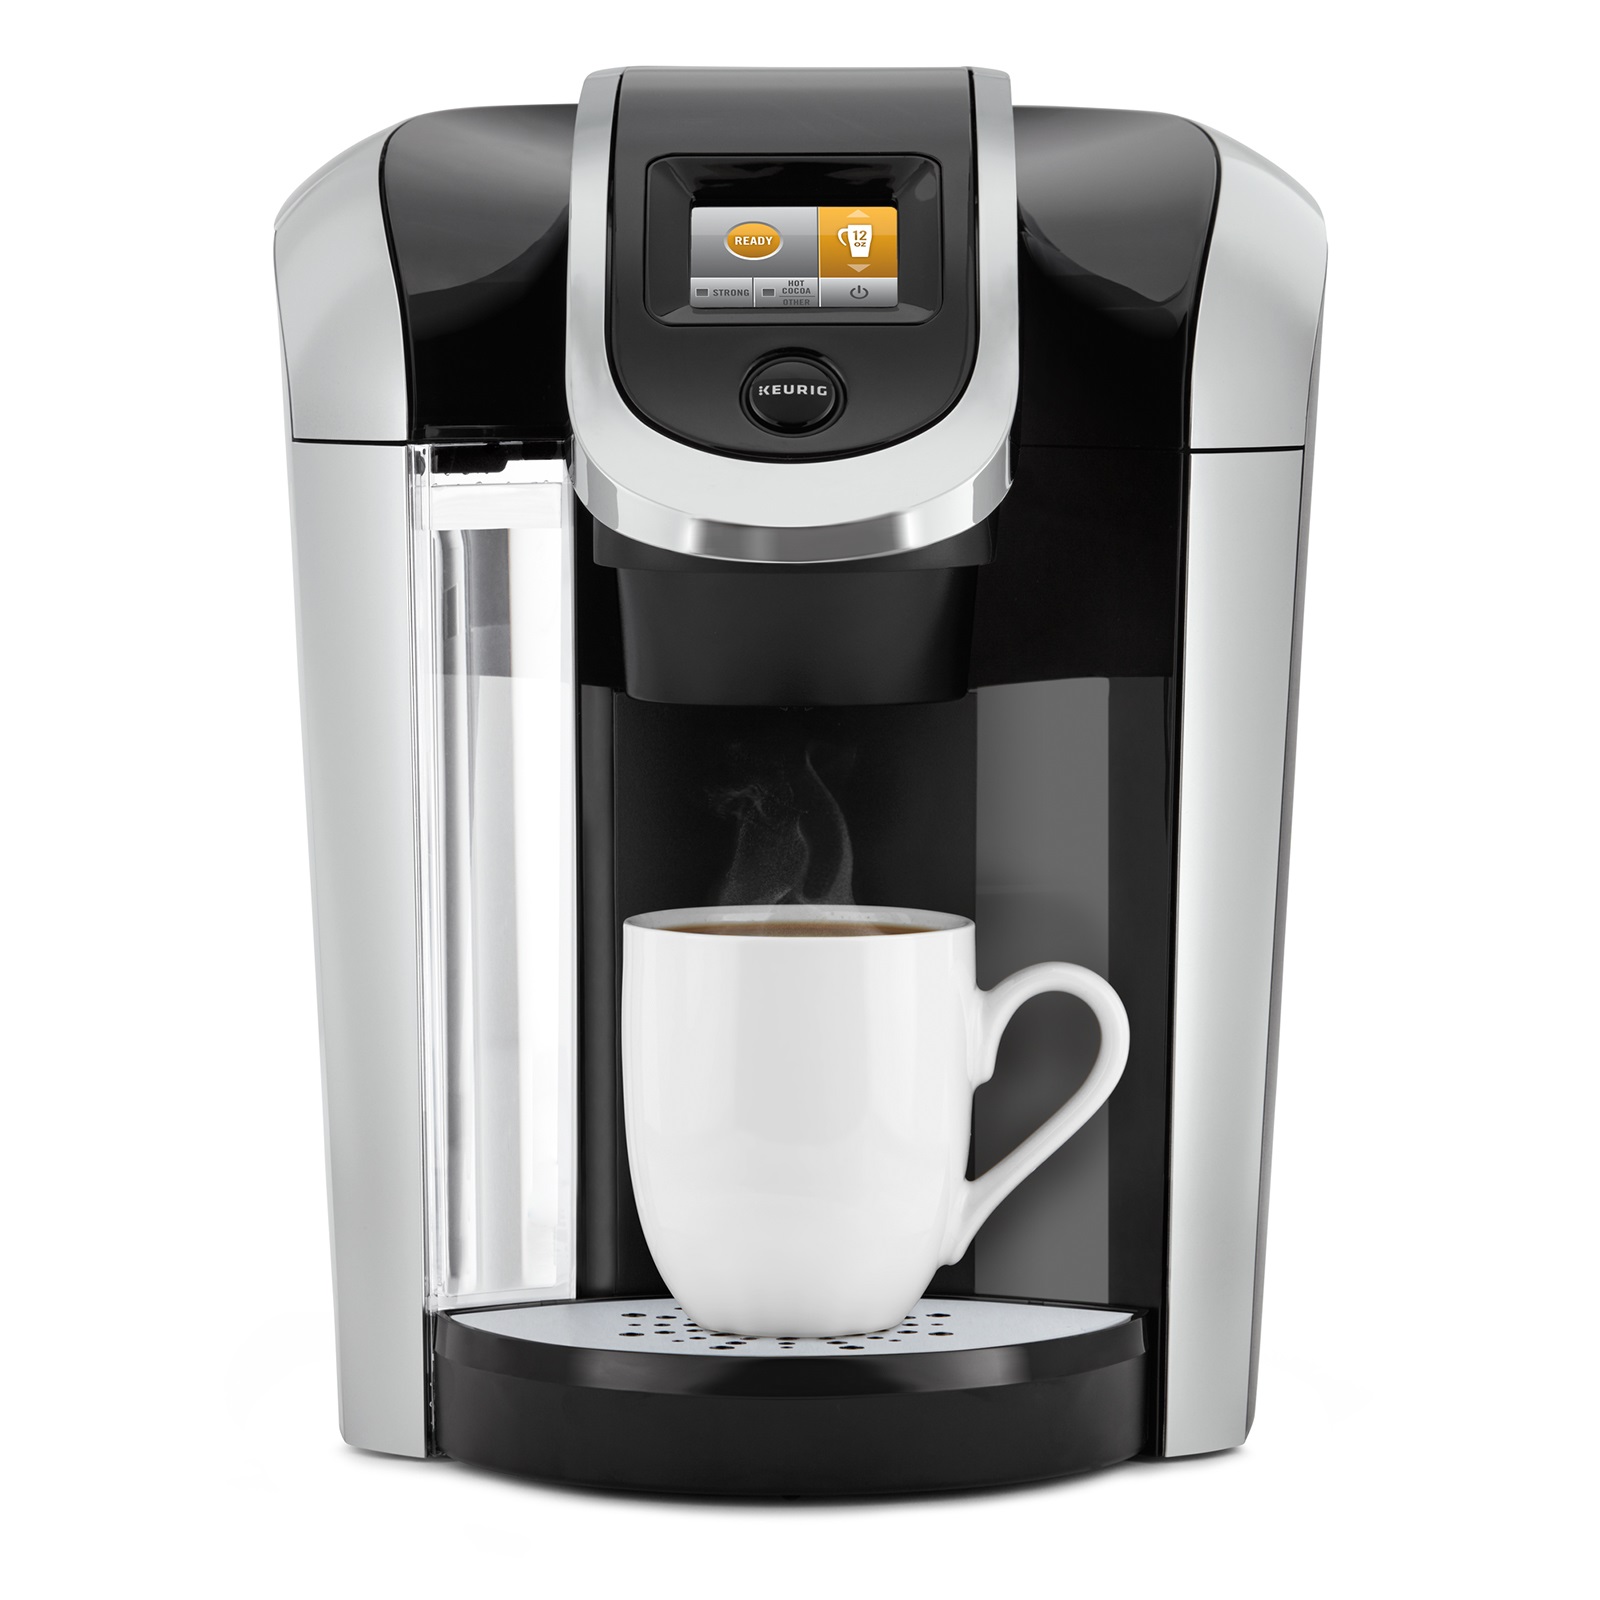
Gathering Your Supplies

Before you begin the descaling process, it’s important to gather all necessary supplies. You’ll need a descaling solution specifically designed for Keurig machines or a DIY mixture of white vinegar and water. Additionally, have a large ceramic mug, access to fresh water, and a clean sink or basin for disposal handy.

Having everything ready before you start simplifies the process and ensures you won’t need to pause midway. Proper preparation helps you perform descaling efficiently and effectively. Collecting all supplies beforehand ensures a smooth and uninterrupted procedure.

Preparing the Machine

Start by turning off your Keurig Supreme and unplugging it from the electrical outlet to ensure safety. Remove any residual water from the water reservoir. Discard any used K-Cup pods, and ensure there are no remnants left in the K-Cup holder.

This preparation step is crucial for a thorough descaling process. Removing leftover water and used pods ensures the descaling solution can flow optimally through the machine. Properly preparing the machine sets the stage for an effective cleaning process.

keurig coffee maker

Adding the Descaling Solution

If you’re using a Keurig-approved descaling solution, follow the manufacturer’s instructions for the appropriate amount. Typically, you’ll need to add the descaling solution to the empty water reservoir and fill it with water to the maximum fill line.

For a DIY approach, mix equal parts of white vinegar and water. Pour this mixture into the water reservoir up to the maximum fill line. The descaling solution works by breaking down mineral deposits and scaling inside the machine. Using the correct amount ensures the solution is effective.

Running the Descaling Cycle

Plug in and turn on your Keurig Supreme. Place the large ceramic mug on the drip tray to catch the descaling solution. Begin by selecting the largest brew size to start the descaling process. Allow the machine to run the full brew cycle with the descaling solution.

Repeat this step, emptying the mug into the sink between cycles, until the water reservoir is empty. This repeated process ensures that the descaling solution thoroughly cleans the internal components. Running a complete descaling cycle guarantees that mineral deposits are effectively removed.

Letting the Solution Sit

After the initial descaling cycles, it’s beneficial to let the machine sit with any remaining descaling solution. Turn off the Keurig and allow it to sit for about 30 minutes. This soaking period allows the descaling solution to break down any stubborn mineral deposits.

This step is particularly important for machines that haven’t been descaled regularly or that have harder water deposits. Giving the solution time to work enhances its effectiveness and ensures a deep clean. Letting the solution sit penetrates and dissolves tough buildup.

Rinsing the Machine

Once the descaling solution has had time to work, it’s crucial to rinse your Keurig Supreme thoroughly to remove any residual descaling solution or vinegar taste. Fill the water reservoir with fresh water and place the ceramic mug back on the drip tray.

Run several brew cycles with just water, emptying the mug into the sink after each cycle, until the reservoir is empty. Typically, 3-4 full reservoirs of water are enough to rinse out the machine completely. Thorough rinsing ensures no descaling solution remains, which could affect the taste of your coffee.

keurig coffee maker

Cleaning External Components

While descaling primarily focuses on the internal components, it’s a good practice to clean the external parts of your Keurig Supreme as well. Wipe down the exterior, drip tray, and water reservoir with a damp cloth and mild detergent if necessary.

Remove and clean the K-Cup holder thoroughly, ensuring no residual coffee grounds or debris remain. Regular external cleaning keeps your machine looking fresh and functional. Maintaining cleanliness of external components complements the descaling process for overall hygiene.

Frequency of Descaling

Descaling frequency depends on the hardness of your water and how frequently you use your Keurig Supreme. Keurig recommends descaling every 3-6 months. In areas with hard water, more frequent descaling—every 2-3 months—might be necessary.

Keeping track of descaling schedules in your calendar or using a reminder can help ensure that you descale the keurig supreme regularly. Consistent maintenance prevents buildup and extends the life of your coffee maker. Regular descaling ensures optimal performance and coffee quality.

Using Filtered Water

Using filtered or bottled water instead of tap water can significantly reduce mineral deposits and the need for frequent descaling. Filtered water contains fewer impurities and minerals that cause scaling.

Consider installing a water filter in your Keurig Supreme if your model supports it or simply use filtered water when brewing. This small change can help maintain your machine’s efficiency and reduce scaling issues. Using filtered water supports the efforts of regular descaling and keeps your machine running smoothly.

Troubleshooting Post-Descale Issues

After descaling, if you notice any issues such as error messages or unusual brewing behavior, it might be due to residual descaling solution or air bubbles in the system. Running additional rinse cycles with fresh water can help clear these residues.

If problems persist, refer to the Keurig manual for specific troubleshooting steps or consider contacting Keurig customer support for further assistance. Addressing post-descale issues promptly ensures your machine returns to normal operation. Effective troubleshooting maintains the reliability of your coffee maker.

keurig coffee maker Storage and Care Tips

Properly storing and caring for your Keurig Supreme when not in use can also help reduce scaling and maintain its performance. Always empty and dry the water reservoir before storing the machine for extended periods.

Cover the machine to prevent dust and debris from entering. Store in a cool, dry place away from direct sunlight. Proper storage keeps your machine in good condition and reduces the need for extensive cleaning when you’re ready to use it again. Thoughtful storage practices contribute to the longevity of your machine.

Benefits of Descaling

Regular descaling not only maintains the performance of your Keurig Supreme but also ensures that your coffee tastes its best. Mineral deposits can affect the machine’s heating elements, water flow, and overall brewing efficiency.

By removing these deposits, you improve the machine’s functionality, reduce wear and tear, and extend its lifespan. Moreover, descaling supports consistent coffee flavor and prevents any off-tastes caused by mineral buildup. The benefits of descaling underscore its importance in your maintenance routine.

Using Keurig’s Descaling Solution

While a DIY descaling mixture of vinegar and water works well, using Keurig’s branded descaling solution can be advantageous. Keurig’s solution is formulated to effectively clean and descale without leaving any residue or aftertaste.

Follow the instructions on the descaling solution package for the best results. Using the branded solution can give you peace of mind, knowing it’s specifically designed for your machine. Investing in Keurig’s solution provides an extra layer of assurance for thorough cleaning.

Conclusion: Ensuring Optimal Performance

In conclusion, knowing how to descale Keurig Supreme involves specific steps that include gathering supplies, preparing the machine, applying the descaling solution, running cycles, and thorough rinsing. Regular descaling is crucial for maintaining the efficiency and longevity of your coffee maker. By following these detailed steps and incorporating preventative measures like using filtered water, you ensure that your Keurig Supreme continues to deliver delicious coffee and operates smoothly. Regular maintenance and proper care make a significant difference, keeping your machine in optimal condition for years to come.