Introduction to Keurig Issues
For many of us, starting the day without a hot cup of coffee is unthinkable. However, when your Keurig coffee maker encounters issues, it can disrupt this comforting routine. One common problem faced by Keurig users is that the machine stops heating water effectively, leading to a lackluster coffee experience. Understanding the potential causes behind this issue is the first step to solving it.

Problems with Keurig machines can be diverse. You could find your machine not turning on, failing to dispense water, or even leaking during the brewing process. These issues may stem from something as simple as alignment of the machine’s components to more complex electrical faults that require professional attention.
A machine that isn’t heating water properly could be experiencing pump issues, scale build-up inside the machine, or a malfunction in the heating system. Identifying these problems early can save you time and frustration and extend your Keurig’s lifespan.
In the following sections, we will go through a step-by-step guide to troubleshoot your Keurig, advise on how to descale it, offer solutions for water leakage, and advise when to seek professional help. With these tips and tricks, we hope to guide you through a smooth resolution process and return you to your beloved coffee ritual in no time.
Identifying the Problem with Your Keurig
Before you can fix your Keurig that’s not heating water, pinpoint the issue. A few common issues could be behind the problem. Here’s how to track them down.
First, ask if your Keurig turns on at all. No power could mean it’s unplugged or there’s an electrical fault.
If it powers on but doesn’t heat, the water pump might be to blame. It might not bring water to the heating element.
A third possibility is scale buildup. Hard water can leave mineral deposits inside your Keurig, affecting its performance.
Finally, check for general clogs. Coffee grounds or debris might block the water path.
To confirm the issue, perform a few simple checks.
- Make sure your Keurig is plugged in and the outlet works.
- Listen for the sound of water moving when it starts. Silence might indicate a pump problem.
- Look for the descaling light. If it’s on, it’s time to descale.
These steps will help narrow down the problem with your Keurig not heating water. Once you know what’s wrong, you can move to the next steps to fix it.
Step-by-Step Keurig Troubleshooting Guide
If your Keurig is not heating water, follow this guide for a fix. First, verify that the machine is plugged in. An unplugged Keurig won’t heat. Check the outlet too – sometimes the issue is with the power source, not your coffee machine.
Next, listen for water movement when you turn on the Keurig. No noise can signal a pump malfunction. This part is crucial for water to reach the heating element.
If the pump seems fine, look for a descaling indicator light. A lit light means mineral buildup is likely. Descaling could solve the heating problem.
Also, inspect for general clogs. Water pathways can get blocked by coffee grounds or debris. A thorough cleaning may be needed.
Try resetting your Keurig if these steps don’t work. Unplug it for at least 30 seconds. Then, hold the power button for 10 seconds after plugging it back in.
Ensure the water reservoir is seated correctly. An improperly placed tank can cause heating issues.
If none of these steps work, your Keurig might need a professional look. Don’t try to fix electrical parts yourself – it’s risky.
Remember to descale regularly and keep your Keurig clean. These steps can prevent future heating problems.
How to Descaling Your Keurig
Descaling your Keurig is crucial for its optimal performance. Over time, mineral deposits from water can build up, impacting heating efficiency and taste. Follow this simple guide to effectively descale your Keurig and ensure it continues to produce the perfect cup of coffee.
Start by turning off your Keurig and unplugging it from the power source. This ensures safety during the descaling process.
Next, fill the water reservoir with a mixture of white vinegar and water. The ideal ratio is half vinegar, half water. Vinegar is excellent for breaking down limescale and mineral buildup.
Run this descaling solution through your Keurig by starting a brewing cycle without a coffee pod. Ensure to place a large mug to catch the solution. Repeat this process until the reservoir is empty.
After running the vinegar solution, refill the reservoir with fresh water. Run several brew cycles with just water to rinse any remaining vinegar taste.
Your Keurig should now be scaled properly. Descaling every 3 to 6 months can prevent issues related to mineral buildup.
Regular descaling not only improves performance but also extends the lifespan of your Keurig. Make descaling a part of your regular maintenance routine and enjoy consistent, delicious coffee every day.
 Resolving Keurig Water Leakage Issues
Water leakage in your Keurig can be a frustrating issue. It often results in messy clean-ups and can affect the machine’s performance. To tackle this, let’s explore some common causes and solutions for water leakage in Keurig machines.
First, ensure that the water reservoir is correctly aligned. Misalignment can cause water to escape from unintended areas. Check if the reservoir is seated properly in its designated spot.
Next, inspect the Keurig for any visible cracks or damages, particularly in the reservoir and its connection points. Any damage can allow water to leak out. Consider replacing any cracked parts immediately.
Additionally, check the seals around the water reservoir. Over time, these can wear out and become less effective. Replacing old seals can often fix leakage issues.
Another common cause is a clogged valve or water line. Coffee grounds or mineral build-up can block the flow of water, forcing it to find an alternative escape route. Regular cleaning and descaling your Keurig can prevent this issue.
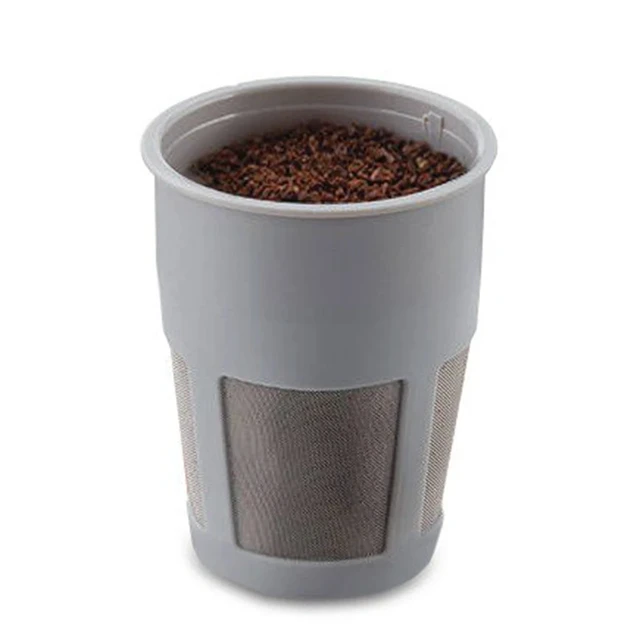
Sometimes, the machine may leak while it is preheating. This could be due to a clog in the brewing needle or K-cup holder. Cleaning these components can resolve the problem.
If none of these steps fix the leakage, the issue might be more complex, such as a malfunctioning internal component. In such cases, it’s advisable to contact Keurig customer support for further assistance or to seek professional repair services.
Regular maintenance and prompt attention to any signs of leakage can help ensure your Keurig operates efficiently, providing you with the perfect cup of coffee without any hassle.
What to Do If Your Keurig Won’t Brew
Facing a Keurig that won’t brew can be frustrating. Don’t worry though, there are some steps you can take to solve this. Here’s what to do when your Keurig is not heating water or brewing.
First, check if the power source is working. Ensure your Keurig is plugged in and the outlet is not faulty. Sometimes the simplest check can solve the issue.
Next, make sure the water reservoir is properly seated. If it’s not aligned right, your Keurig won’t brew. Push it firmly into place to avoid any brewing issues.
Another quick fix is to check for clogs. A blocked water line or needle can stop your Keurig from brewing. Use a paperclip to clean out any coffee grounds or debris that might be stuck.
Try performing a power cycle. Unplug your Keurig for a few minutes, then plug it back in. Press the power button to reset the machine. This can often get things running again.
If these steps don’t work, your Keurig might need descaling. Over time, calcium deposits can build up, and block water flow. See the earlier section on descaling your Keurig for detailed steps.
Lastly, for persistent problems, refer to the Keurig manual. It may have specific instructions for troubleshooting. If issues remain, contact Keurig customer support for assistance. Regular maintenance can also prevent these issues from happening.
When to Seek Professional Keurig Repair Services
Sometimes, despite your best troubleshooting efforts, your Keurig might still not heat water properly. In such instances, it’s best to consider professional repair services. Knowing when to turn to the experts can save you time and prevent further damage to your coffee maker. Here are signs that professional help is required:
- Persistent Issues: If problems persist after you have tried all the troubleshooting steps, a professional should look at your Keurig.
- Electrical Faults: Don’t attempt to fix any electrical components yourself. If you suspect an electrical issue, contact a professional.
- Water Leakage: If water leakage continues despite all fixes, the internal component might be damaged. This requires a professional’s attention.
- Descale Ineffectiveness: If descaling your Keurig does not resolve the heating issue, the problem might be more complex.
- No Power: When your Keurig won’t turn on at all, even when plugged in, it could be a serious electrical fault.
Contacting Keurig’s customer support is often the first step. They can provide guidance and determine if your coffee maker needs professional servicing. If your Keurig is still under warranty, you may be eligible for repairs or a replacement at no additional cost. Do not hesitate to seek out expert assistance to ensure your coffee maker is functioning at its best again.
Maintaining Your Keurig for Optimal Performance
To avoid Keurig issues, regular upkeep is key. In this guide, we’ll explore how to maintain your Keurig to prevent common problems like not heating water. Follow these maintenance routines to keep your Keurig in top shape.
Clean Regularly
A clean Keurig is a happy Keurig. Every week, remove and wash the water reservoir, drip tray, and K-cup holder. Use soapy water and a soft cloth. Ensure they dry fully before putting them back.
Descale Every 3-6 Months
As suggested in earlier sections, descale regularly. This clears any mineral build-up. Use a descaling solution or white vinegar mix. Run this solution through your Keurig, then flush with fresh water.
Replace Water Filter Cartridge
If your Keurig has a water filter, replace it every two months. This ensures fresh tasting coffee. It also reduces the chance of clogs and mineral buildup.
Check for Wear and Tear
Inspect your Keurig for worn-out parts. Look closely at the seals and needles. Replace any parts that show damage or excessive wear. This can prevent leaks and other brewing problems.
Keep It Dry
After each use, let your Keurig air out. Leave the lid off the water reservoir. This prevents mold and mildew growth.
Use Bottled or Filtered Water
Hard water can cause scale faster. If possible, use bottled or filtered water. This can reduce the need for frequent descaling and improve your coffee’s taste.
By following these steps, you can reduce the chances of facing a Keurig not heating water or other issues. Consistent upkeep leads to consistent coffee quality. Enjoy your Keurig’s performance day after day with these maintenance tips.

 How to Properly Clean Your Keurig
 DIY Repairs for Keurig Water Sensors
 Contacting Keurig Customer Service

 Dealing with Specific Keurig Issues