Posted on

How to Clean Keurig Mini: A Comprehensive Guide

how to clean keurig mini

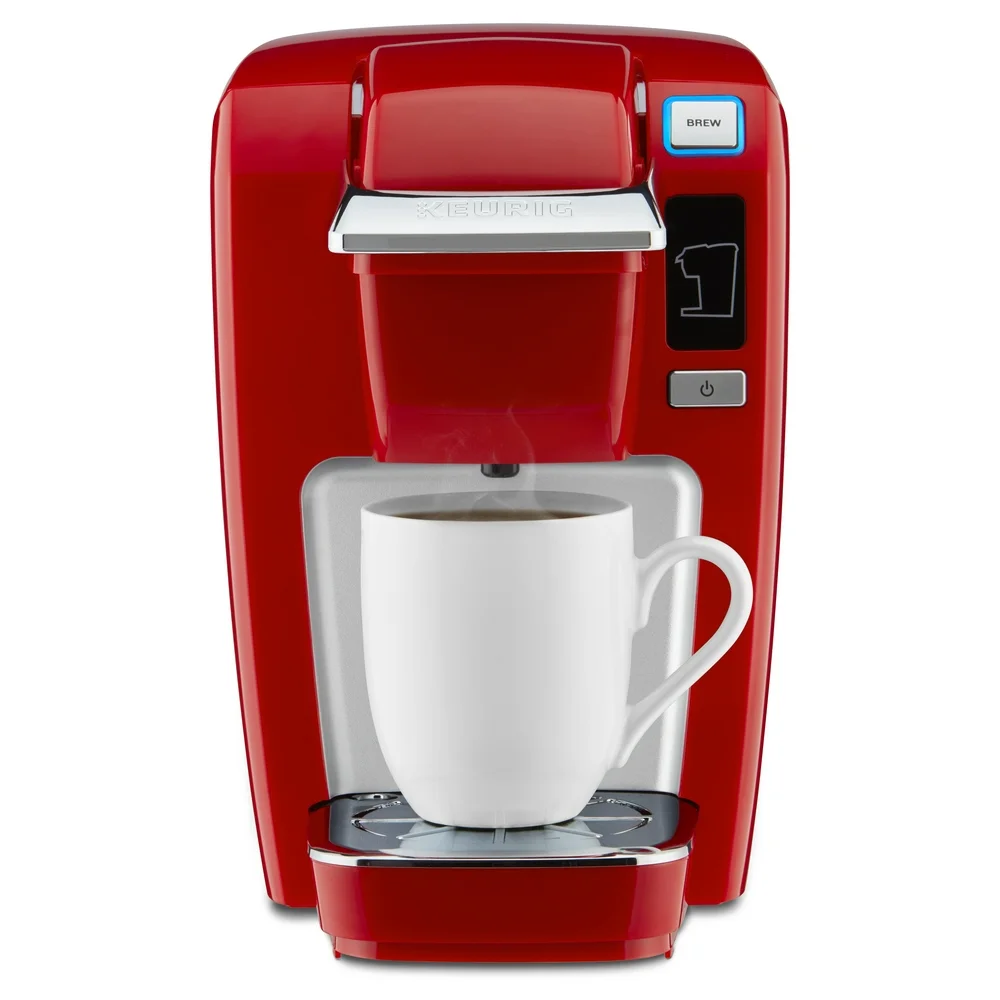
The Keurig Mini is an incredibly convenient appliance for coffee lovers everywhere. Its compact size and ease of use make it a popular choice for individuals who want a quick cup of coffee without the fuss. However, like any appliance, it requires regular cleaning to ensure it continues to function correctly and produce great-tasting coffee. In this detailed guide, we’ll walk you through how to clean Keurig Mini from top to bottom.

Understanding how to clean keurig mini is the first step to maintaining your machine. Over time, coffee residues, oils, and mineral deposits can build up within your Keurig Mini, potentially impacting its performance and the quality of your brew. By following this guide, not only will you extend the life of your coffee maker, but you’ll also ensure every cup of coffee is as delicious as the first.

Disassembling the Keurig Mini

Unplugging and Cooling Down

Before beginning any cleaning process, the first step is to safely disassemble your machine. Start by unplugging the Keurig Mini and allowing it to cool down if it has been recently used. Safety should always be your priority, and giving the machine time to cool will prevent accidental burns or electric shocks.

Removing the Water Reservoir

For those who have a Keurig Mini model with a removable water reservoir, start by emptying any remaining water and setting the reservoir aside. Make sure to wash it with warm, soapy water. After washing, rinse it thoroughly to ensure no soap residue remains, then let it air dry.

Detaching the Drip Tray and Pod Holder

Next, remove the drip tray and pod holder. These components are often hotspots for grime and coffee residue. Detach these parts and wash them similarly with warm, soapy water. Use a brush to get into any small or tight spaces where coffee grounds or debris might accumulate. Once cleaned, rinse thoroughly and set them aside to dry.

Inspecting the Machine

With the exterior components removed, inspect your Keurig Mini for any visible signs of build-up, mold, or coffee stains. Pay particular attention to the area around the pod holder, as coffee grounds often gather there. A quick visual inspection will guide you on which areas need the most attention during the cleaning process.

how to clean keurig mini

Cleaning External Components

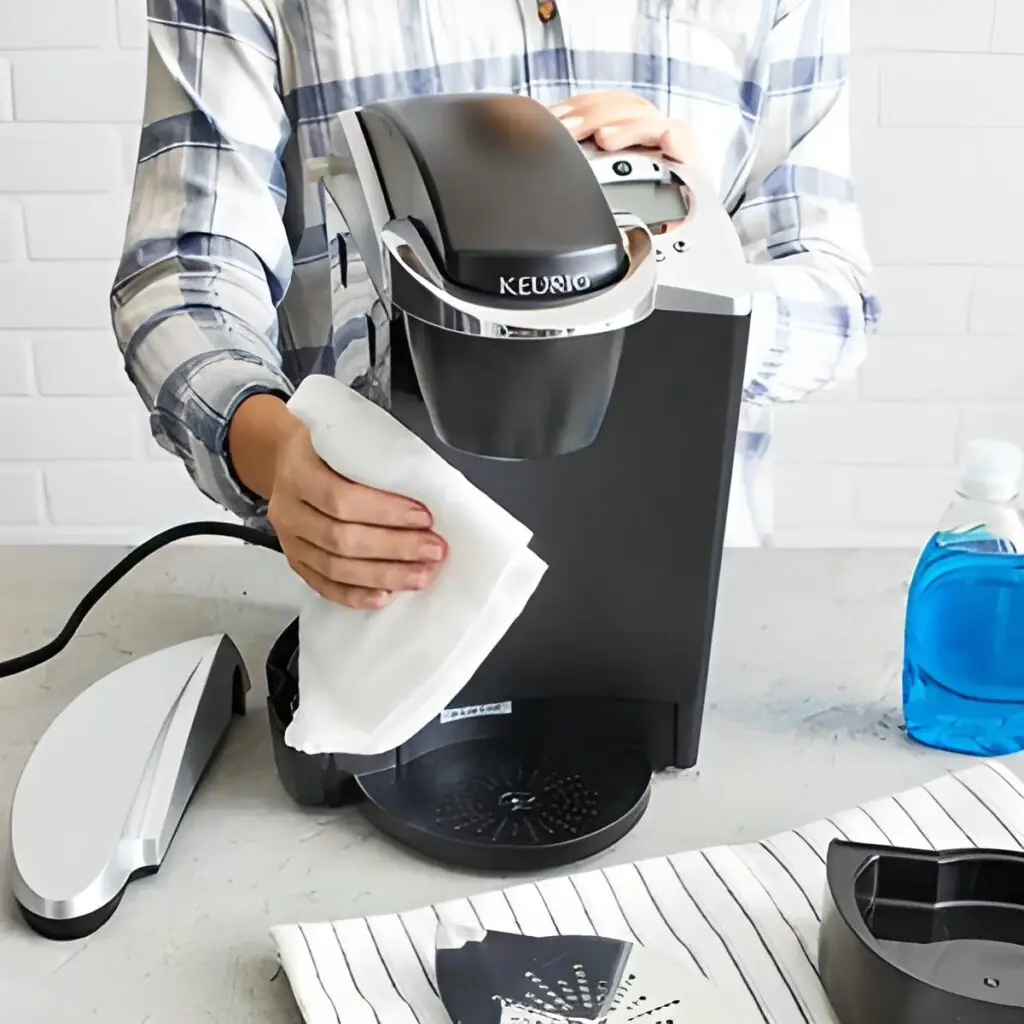
Wiping Down the Machine

Start by using a soft, damp cloth to wipe down the exterior of the Keurig Mini. Be gentle to avoid scratching the surface. Cleaning the exterior not only improves the appearance of your machine but also removes any coffee splashes or dust that might accumulate over time.

Using Mild Detergents

For tougher stains or grimes, use a mild detergent diluted in warm water. Avoid harsh chemicals or abrasive sponges, as these can damage the machine’s surface. Apply the detergent mix to your cloth and gently scrub the affected areas. Afterward, use a damp cloth to wipe away any soap residue.

Cleaning the Drip Tray and Pod Holder

Given that the drip tray and pod holder come into contact with coffee daily, it’s essential to clean them thoroughly. Use a mild detergent to clean these parts and a brush to ensure all crevices are free from coffee grounds. After cleaning, rinse thoroughly with warm water and let them air dry.

Cleaning Internal Components

Flushing the Machine

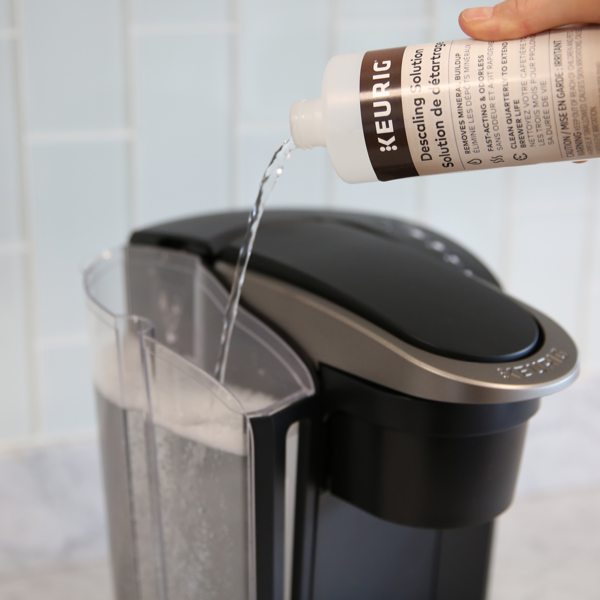
One of the most critical parts of cleaning your Keurig Mini is descaling the internal components. Descaling removes mineral deposits that accumulate inside the machine, which can affect its performance and the taste of your coffee.

Using Vinegar Solution

A natural and effective way to descale your Keurig Mini is to use a vinegar solution. Fill the water reservoir with a mixture of half white vinegar and half water. Place a mug on the drip tray and run a brew cycle without a K-cup. Repeat the process until the water reservoir is empty. This action helps remove any internal build-up.

Running Fresh Water Cycles

Following the vinegar solution flush, it’s crucial to run several cycles with only fresh water. This step ensures that any vinegar residue is removed from the machine. Continue running cycles until you can no longer detect the vinegar smell or taste, typically around two to three full reservoirs of fresh water.

Cleaning the Needles

Locating the Needles

The needles in your Keurig Mini are responsible for puncturing K-cups and allowing water to flow through the coffee grounds. Over time, these needles can become clogged with coffee residues. Cleaning them ensures a consistent water flow for optimal brewing.

Using a Needle Cleaning Tool

Most Keurig Mini models come with a needle cleaning tool. If you don’t have this tool, you can use a paper clip. Carefully insert the tool or paper clip into the needle holes to remove any clogs. Be cautious to avoid bending or damaging the needles in the process.

Rinsing the Needles

After dislodging any blockages, run a couple of brew cycles with just water to flush out any remaining debris. This step ensures that the needles are thoroughly cleaned and free of any coffee residues.

how to clean keurig mini

Maintenance Tips for Longevity

Regular Cleaning Schedule

To keep your Keurig Mini in optimal condition, establish a regular cleaning schedule. At a minimum, clean the external parts weekly and descale the internal components every three to six months, depending on your water hardness and usage frequency.

Using Filtered Water

Using filtered water can significantly reduce the build-up of mineral deposits within your Keurig Mini. Filtered water is less likely to contain the minerals that contribute to scale formation, thereby prolonging the intervals between descaling sessions.

Avoiding Overuse

While it may be tempting to use your Keurig Mini continuously, giving it a break between brew cycles can help prevent overheating and wear and tear on the internal components. This practice can extend the life of your coffee maker and ensure consistently good performance.

Troubleshooting Common Issues

Machine Not Brewing

If your Keurig Mini isn’t brewing correctly even after cleaning, it could be due to several reasons, such as clogged needles, insufficient water in the reservoir, or even a malfunctioning part. Double-check these aspects and ensure everything is clean and functioning as it should be.

Odd Tastes or Smells

Should you notice odd tastes or smells in your coffee, it’s a sign that your machine needs cleaning. Besides regular maintenance, make sure to avoid leaving water in the reservoir for extended periods, as standing water can create unpleasant odors.

Slow Brewing

A slow brewing process often indicates that it’s time for descaling. Mineral build-up can restrict water flow, leading to slower brew times. Performing a thorough descaling procedure typically resolves this issue.

Leaking Water

If your Keurig Mini starts leaking water, it could be due to an improperly seated water reservoir or a clogged needle. Ensure that all components are correctly placed and free from blockages. If the issue persists, consult your user manual for further troubleshooting steps.

how to clean keurig miniProlonging the Life of Your Keurig Mini

Consistent Cleaning

Weekly cleaning of removable parts and a monthly vinegar descaling process are essential practices to ensure your machine operates smoothly. Consistent maintenance can prevent the build-up of harmful residues and extend the overall lifespan of your Keurig Mini.

Quality of Water and Pods

The quality of water and coffee pods used in your Keurig Mini can also impact its performance. Opt for high-quality, filtered water and premium coffee pods to reduce the risk of contaminants entering the machine. Using better quality inputs can make a noticeable difference in the longevity and performance of your coffee maker.

Storage and Care

If you plan to store your Keurig Mini for an extended period, ensure it is completely clean and dry. Store it in a cool, dry place to avoid any moisture-related damage. Before using it again, perform a quick rinse cycle to make sure it is ready for brewing.

Conclusion: how to clean keurig mini

Understanding how to clean Keurig Mini comprehensively will ensure that you enjoy consistently good coffee every day. Regularly maintaining and cleaning all the components, from the water reservoir to the needles, will prevent any unforeseen issues and contribute to the longevity of your machine.

By following the steps outlined in this guide, you can keep your Keurig Mini in top condition and enjoy a perfect brew each time. After all, a well-maintained coffee maker not only extends the life of your beloved appliance but also enhances your daily coffee experience.

Posted on

Cleaning Keurig Coffee Maker: What’s the Best Way?

keurig coffee maker

For coffee enthusiasts, a Keurig coffee maker is often a kitchen staple, known for its convenience and ability to brew a single perfect cup at a time. However, like any appliance, it requires regular maintenance to function at its best. So, what’s the best way to clean a Keurig coffee maker? Understanding the correct procedures can extend the life of your machine and ensure your coffee tastes as fresh and delicious as possible. In this article, we’ll delve into practical steps and tips for cleaning your Keurig, ensuring it stays in top condition and continues to deliver great-tasting coffee.

Why Cleaning Your Keurig is Essential

Regular cleaning isn’t just about hygiene; it significantly impacts the performance and longevity of your Keurig coffee maker.

Preventing Build-Up

Over time, minerals from water, coffee residues, and oils accumulate in your coffee maker. This build-up can clog your machine, affect the taste of your coffee, and even lead to mechanical failures. Regular cleaning helps prevent these issues, ensuring smooth operation and consistent coffee quality.

Ensuring Optimal Performance

A clean coffee maker functions more efficiently. Regular maintenance, including descaling and cleaning removable parts, helps the machine heat water correctly and brew coffee at the ideal temperature. This not only improves the taste but also reduces the time it takes to brew a cup, making your morning routine more convenient.

Health and Safety

Bacteria and mold can grow in the damp, dark interior of your coffee maker if it’s not cleaned regularly. This can pose health risks over time. Regular cleaning minimizes this risk, ensuring that every cup of coffee is safe to drink.

keurig coffee maker

Daily Cleaning Routine

Incorporate simple daily cleaning habits to keep your Keurig in good shape.

Emptying the Drip Tray

After each use, make it a habit to empty the drip tray. The accumulation of coffee drips and water can create a breeding ground for bacteria. By keeping the drip tray clean and dry, you reduce the risk of bacterial growth.

Running Clean Water Through the Machine

At the end of each day, run a cycle of clean water through the machine without a K-Cup. This simple step flushes out any remaining coffee residue and helps maintain the cleanliness of the internal components. It’s a quick process that can make a big difference in the machine’s performance and longevity.

Wiping Down Exterior Surfaces

Wipe down the exterior of your Keurig, including the coffee outlet and K-Cup holder, with a damp cloth. This helps remove any coffee stains or splashes, keeping your machine looking clean and new. Using a mild detergent can help tackle any stubborn stains or build-up on the exterior surfaces.

Weekly Deep Cleaning

A more thorough cleaning should be done on a weekly basis.

Cleaning the K-Cup Holder

Remove the K-Cup holder and rinse it under warm water. Use a small brush or a paperclip to unclog any coffee grounds stuck in the needle. This helps prevent blockages that can disrupt the brewing process and affect the taste of your coffee. Make sure to dry the holder completely before placing it back into the machine.

Washing the Water Reservoir

Detach the water reservoir and wash it with warm, soapy water. Rinse thoroughly to remove all soap residues. Allow it to air dry before reattaching it to the machine. Keeping the reservoir clean ensures that the water used for brewing is free from contaminants that could affect the flavor and quality of your coffee.

keurig coffee maker

Descaling the Machine

Descaling is vital to remove mineral build-up from the internal components of your Keurig. Fill the reservoir with a descaling solution or a mixture of white vinegar and water. Run the machine through a brewing cycle without a K-Cup until the reservoir is empty. Then, rinse the reservoir and run several cycles with clean water to remove any vinegar taste. This process helps maintain the efficiency and longevity of your Keurig.

Monthly Maintenance

Monthly maintenance helps tackle any deep-seated dirt and ensures the longevity of your coffee maker.

Replacing the Water Filter

If your Keurig model has a water filter, it’s important to replace it every two months or after 60 tank refills. This ensures that the water used for brewing is clean and free from impurities that can affect the taste of your coffee. Follow the manufacturer’s instructions for replacing the filter, and make sure to soak the new filter in water before installing it.

Checking the Needles

Inspect the needles that puncture the K-Cups for any build-up or blockages. Use a small paperclip to dislodge any stuck debris. Keeping the needles clean ensures that the coffee flows smoothly and the K-Cups are properly punctured during brewing.

Inspecting the Seals and Gaskets

Check the seals and gaskets around the water reservoir and K-Cup holder for any signs of wear or damage. Replacing worn gaskets can prevent leaks and ensure that the machine operates correctly. Regular inspection can help identify potential issues before they become major problems.

Troubleshooting Common Issues

Even with regular maintenance, issues can sometimes arise. Knowing how to troubleshoot these can save you time and frustration.

Machine Not Brewing

If your Keurig is not brewing, check for blockages in the needles and ensure that the water reservoir is seated correctly. Running a cycle with clean water can also help to clear any minor issues. If the problem persists, try descaling the machine to remove any internal build-up that might be causing the issue.

Coffee Tastes Off

If the taste of your coffee seems off, it might be time to clean or replace the water filter. Descaling the machine and thoroughly cleaning the K-Cup holder and water reservoir can also help improve the flavor. Sometimes, using filtered water for brewing can make a noticeable difference in the taste of your coffee.

Leaking Water

If you notice water leaking from your Keurig, check the seals and gaskets for any signs of wear. Ensuring that all parts are properly seated and that there are no blockages can often resolve leakage issues. If the problem continues, it might be necessary to replace worn parts or consult the manufacturer for further assistance.

keurig coffee maker Using Natural Cleaners

Natural cleaners can be an effective and eco-friendly way to maintain your Keurig coffee maker.

White Vinegar

White vinegar is excellent for descaling and disinfecting your Keurig. Its acidic properties break down mineral build-up and kill bacteria. Simply mix equal parts vinegar and water and follow the descaling steps outlined earlier. Running several cycles with clean water afterward ensures that any vinegar residue is thoroughly rinsed out.

Baking Soda

Baking soda can be used to clean the exterior surfaces and remove stubborn stains. Make a paste of baking soda and water, apply it to the stains, and gently scrub with a soft cloth. Rinse with clean water and dry thoroughly. Baking soda is a non-abrasive cleaner that’s safe for most surfaces.

Lemon Juice

Lemon juice is another natural descaler. Its acidic nature helps dissolve mineral deposits, and it leaves a pleasant fragrance. Mix lemon juice with water and run it through the machine as you would with vinegar. Ensure you rinse thoroughly with clean water to remove any remaining lemon juice.

Extending the Life of Your Keurig

By following these cleaning routines and tips, you can significantly extend the life of your Keurig coffee maker.

Regular Maintenance

Regular maintenance and periodic descaling ensure that your Keurig runs efficiently and lasts longer. Consistency in following these routines prevents the build-up that can lead to mechanical problems.

Using Filtered Water

Using filtered water can reduce mineral build-up and improve the taste of your coffee. It’s a simple step that can enhance both the longevity and performance of your machine.

Proper Storage

If you won’t be using your Keurig for an extended period, empty the water reservoir and store the machine in a dry place. This prevents the growth of mold and bacteria, ensuring that your Keurig is ready to use when you need it.

Summarizing the Insights: Keurig Coffee Maker Maintenance

So, how to clean a Keurig coffee maker effectively? Regular cleaning, both daily and deep, is essential for maintaining optimal performance and taste. From emptying the drip tray and running clean water cycles daily to weekly deep cleaning of the K-Cup holder and water reservoir, each step plays a crucial role. Monthly maintenance, including descaling and replacing the water filter, ensures that your machine continues to function efficiently. By avoiding common mistakes and using natural cleaners, you can keep your Keurig coffee maker in top condition. Consistent maintenance not only extends the machine’s life but also guarantees that every cup of coffee you brew is fresh, delicious, and safe to drink.