There’s no denying the convenience that a Keurig coffee maker brings to your morning routine. With just a press of a button, you can have a freshly brewed cup of coffee in minutes. However, it can be incredibly frustrating when your Keurig stops brewing a full cup. This issue can disrupt your day, especially if coffee is your go-to beverage to start your morning. Why does this happen, and how can you fix it? Let’s delve into the potential reasons behind this problem and explore solutions so you can get back to enjoying your full cup of coffee.
Regular Maintenance and Its Importance
Why Maintenance Matters
Regular maintenance of your Keurig coffee maker is crucial for its longevity and performance. Over time, mineral deposits from water and coffee residues can build up inside the machine, affecting its efficiency and brewing capacity. These buildups can clog the water lines and needles, resulting in an incomplete brew cycle. Understanding the importance of maintenance emphasizes why addressing brewing issues is essential for the long-term functionality of your machine.
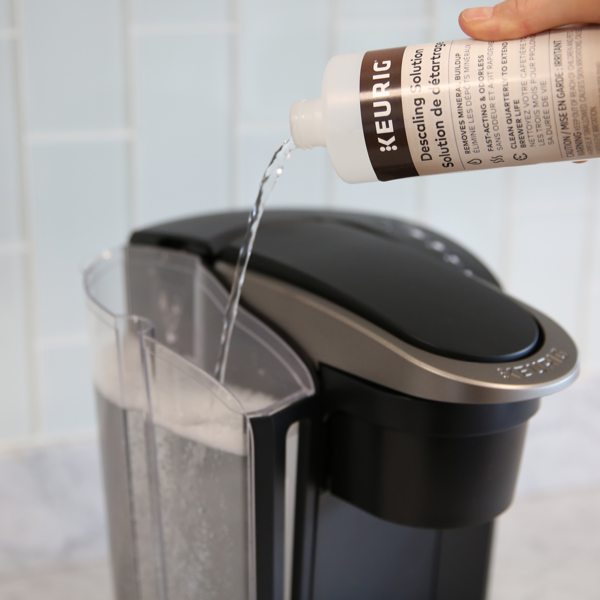
Descaling the Machine
Descaling your Keurig is one of the most important maintenance tasks. It involves removing mineral deposits that accumulate from hard water. Ensure that you use a descaling solution specifically made for coffee makers or a mixture of vinegar and water. Run the machine through a descaling cycle every three to six months, depending on the hardness of your water. Keeping your Keurig descaled ensures smooth water flow and optimal brewing performance.
Common Causes of Under-Brewing
Blocked Needles
One of the most common reasons your Keurig might not brew a full cup is due to blocked needles. Keurig machines have needles that puncture the K-Cup to deliver water and extract coffee. Coffee grounds and residues can clog these needles, disrupting the water flow. Regularly cleaning the needles ensures they remain unobstructed and functional.
Clogged Water Lines
Clogged water lines can also be a significant factor. Mineral deposits and impurities in the water can accumulate in the water lines, blocking the flow and reducing the amount of water that reaches the K-Cup. Descaling the machine can help clear these clogs and restore normal water flow. Addressing clogged water lines ensures a consistent and full brew cycle.
Step-by-Step Troubleshooting
Cleaning the Needles
To clean the needles, first, unplug your Keurig for safety. Open the compartment where you place the K-Cup, and carefully remove the holder. Use a paper clip or a specialized Keurig needle cleaning tool to gently dislodge any debris from the needles. Rinsing the holder and ensuring it’s free from coffee grounds and residues helps maintain proper needle function.
Descaling the Machine
Prepare a descaling solution or a vinegar-water mixture. Fill the water reservoir with the solution and run the machine through a brewing cycle without inserting a K-Cup. Repeat this process until the reservoir is empty, followed by several cycles of plain water to rinse out any residual descaling solution. Descaling effectively removes mineral deposits that can hinder brewing performance.
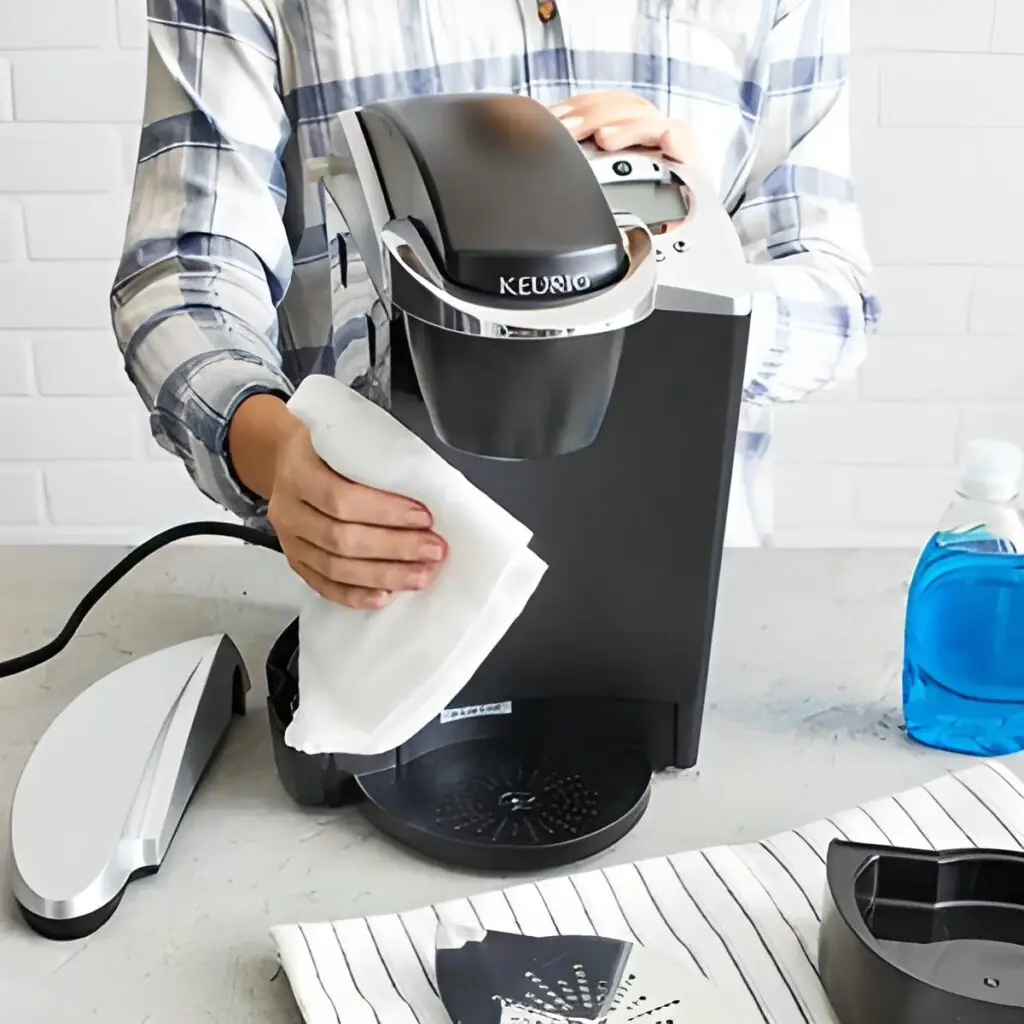
Checking the Water Reservoir
Ensure the water reservoir is seated properly and is free from any debris that could obstruct water flow. Sometimes, the problem can be as simple as a misaligned reservoir or a blocked filter. Checking and cleaning the reservoir ensures uninterrupted water flow during the brewing process.
Advanced Troubleshooting
Inspecting the Water Pump
If your machine is still not brewing a full cup after basic troubleshooting, the issue might lie with the water pump. The pump is responsible for drawing water from the reservoir and pushing it through the machine. Listen for any unusual noises or a lack of sound from the pump. If the pump is malfunctioning, it may need professional repair or replacement.
Circuit Board Examination
Sometimes, issues with the circuit board can affect the brewing cycle. Electrical components can wear out or malfunction over time. If you’re comfortable with electronics, you can inspect the circuit board for any obvious signs of damage or burnt components. Otherwise, consulting a professional technician for a thorough examination and repair ensures safe and effective resolution of electrical issues.
Preventive Measures
Regular Cleaning Schedule
Establishing a regular cleaning schedule can prevent many common issues. Clean the needles, descaling the machine, and rinsing out the water reservoir should be part of your routine maintenance. Adopting a proactive approach to cleaning ensures your Keurig operates smoothly and efficiently.
Using Filtered Water
Using filtered water can significantly reduce mineral buildup and extend the time between necessary descaling. Filtered water contains fewer impurities and minerals that can clog your machine. Implementing this simple step can enhance your Keurig’s performance and longevity.
When to Seek Professional Help
Persistent Issues
If you’ve followed all troubleshooting steps and your Keurig still doesn’t brew a full cup, it might be time to seek professional help. Persistent issues could indicate deeper problems that require expert diagnosis and repair. Recognizing when to seek professional assistance ensures effective resolution of complex problems.
Warranty and Support
Check if your Keurig is still under warranty. If so, contacting Keurig’s customer support can provide solutions or potentially a replacement if the machine is faulty. Utilizing warranty and support services ensures you receive expert help and potential cost savings on repairs or replacements.
Exploring Alternative Brewing Methods
Manual Brewing Options
While addressing the issues with your Keurig, consider exploring manual brewing methods like French press, pour-over, or AeroPress. These methods can provide delicious coffee and give you more control over the brewing process. Discovering and experimenting with manual brewing can offer new coffee experiences and temporary solutions.
Backup Coffee Makers
Having a backup coffee maker can be a practical solution for when your Keurig encounters issues. Drip coffee makers or other single-serve machines can serve as reliable alternatives. Investing in a backup coffee maker ensures your coffee routine remains uninterrupted.
Community Help and Online Resources
Online Forums
Joining online forums and communities dedicated to Keurig users can provide additional insights and troubleshooting tips. Other users often share their experiences and practical solutions for common issues. Engaging with online communities can offer valuable support and diverse solutions.
Instructional Videos
YouTube and other video platforms have numerous instructional videos on Keurig troubleshooting and maintenance. Visual guides can make it easier to follow steps and implement solutions. Utilizing instructional videos ensures you can effectively address and resolve issues with clear guidance.
Deciding on Replacement
Evaluating Longevity
Consider the age and condition of your Keurig. If it’s an older model or has had recurring issues, it might be worth considering a replacement. Newer models often come with improved features and better efficiency. Evaluating the longevity of your machine helps inform your decision on repair or replacement.
Cost Analysis
Compare the cost of repairs to the price of a new Keurig. Sometimes, investing in a new machine can be more economical, especially if the existing one has frequent or costly problems. Conducting a cost analysis ensures you make an informed financial decision.
Enhancing Your Coffee Experience
Exploring Coffee Varieties
Take this opportunity to explore different coffee varieties and brewing methods. Trying new coffee blends or single-origin beans can enhance your coffee experience. Exploring new coffee options ensures a richer and more enjoyable coffee journey.
Customizing Brew Strength
If your Keurig brews find it again, use the machine’s settings to customize your brew strength and size. Understanding your machine’s capabilities can help you optimize your coffee-making process. Customizing your brew ensures you get the perfect cup every time.
Conclusion
Experiencing issues with your Keurig not brewing a full cup can be frustrating, but understanding the potential causes and knowing how to troubleshoot can help restore its functionality. Regular maintenance, such as cleaning the needles and descaling the machine, is crucial for preventing common problems. Advanced troubleshooting, including inspecting the water pump and circuit board, can address more persistent issues. When basic steps don’t resolve the problem, seeking professional help or considering a replacement might be necessary. Meanwhile, exploring alternative brewing methods and engaging with online communities can provide additional support and solutions. By taking a comprehensive approach to maintenance and troubleshooting, you can ensure your Keurig continues to deliver that perfect cup of coffee. So, why is your Keurig not brewing a full cup anymore? With the right steps and solutions, you can restore its performance and enjoy your coffee routine once again.


 Storage and Care Tips
 Software Updates