Posted on

Understanding Keurig Descale Light Won’t Turn Off

keurig descale light won't turn off

If you own a Keurig coffee maker, you might have encountered the frustrating situation where the descale light won’t turn off. This little indicator can create confusion, and around that confusion, a flurry of questions usually arises. In this comprehensive guide, we will explore the reasons behind your Keurig descale light remaining illuminated, step-by-step descaling procedures, preventive measures, and some tips for ongoing maintenance. By the end of this article, you will not only have a clear understanding of why the descale light won’t turn off, but you’ll also be equipped with the necessary skills to manage it effectively.

What Does the Descale Light Indicate?

The Purpose of the Descale Light

The descale light is fundamentally a warning signal designed to alert you when mineral build-up has occurred in your Keurig coffee machine. Over time, especially in areas with hard water, minerals like calcium and lime accumulate in the internal components of the machine. This buildup can significantly hinder the performance of the coffee maker, leading to subpar brewing, slower water flow, and potentially even machine breakdown.

When to Pay Attention to the Descale Light

The descale light generally illuminates after a certain number of brews or when the machine detects the presence of high mineral content. Ignoring this warning can lead to decreased efficiency and taste quality.

The Descaling Process

If your Keurig descale light won’t turn off, the first step is to go through the descaling process. While this may seem like a daunting task, it’s relatively straightforward if followed correctly. Here’s how to do it:

Materials Needed

  • White vinegar or descaling solution
  • Fresh water
  • A container capable of holding at least 10 ounces of liquid

Step-by-Step Descaling Instructions

  1. Prepare Your Machines: Make sure your coffee maker is unplugged, and remove any coffee pods. If you regularly use a filter in the water reservoir, it’s advisable to remove that as well during the descaling process.
  2. Mix the Descaling Solution: If you’re using white vinegar, fill the water reservoir halfway with vinegar and the other half with water. If you’re using a commercial descaling solution, follow the instructions on the package for mixing.
  3. Initiate the Descaling Cycle: Plug the machine back in, place your container beneath the brew head, and start the brewing cycle. Choose a larger brew size (typically the largest setting), and dispense the solution into your container. Repeat this until the water reservoir is empty.
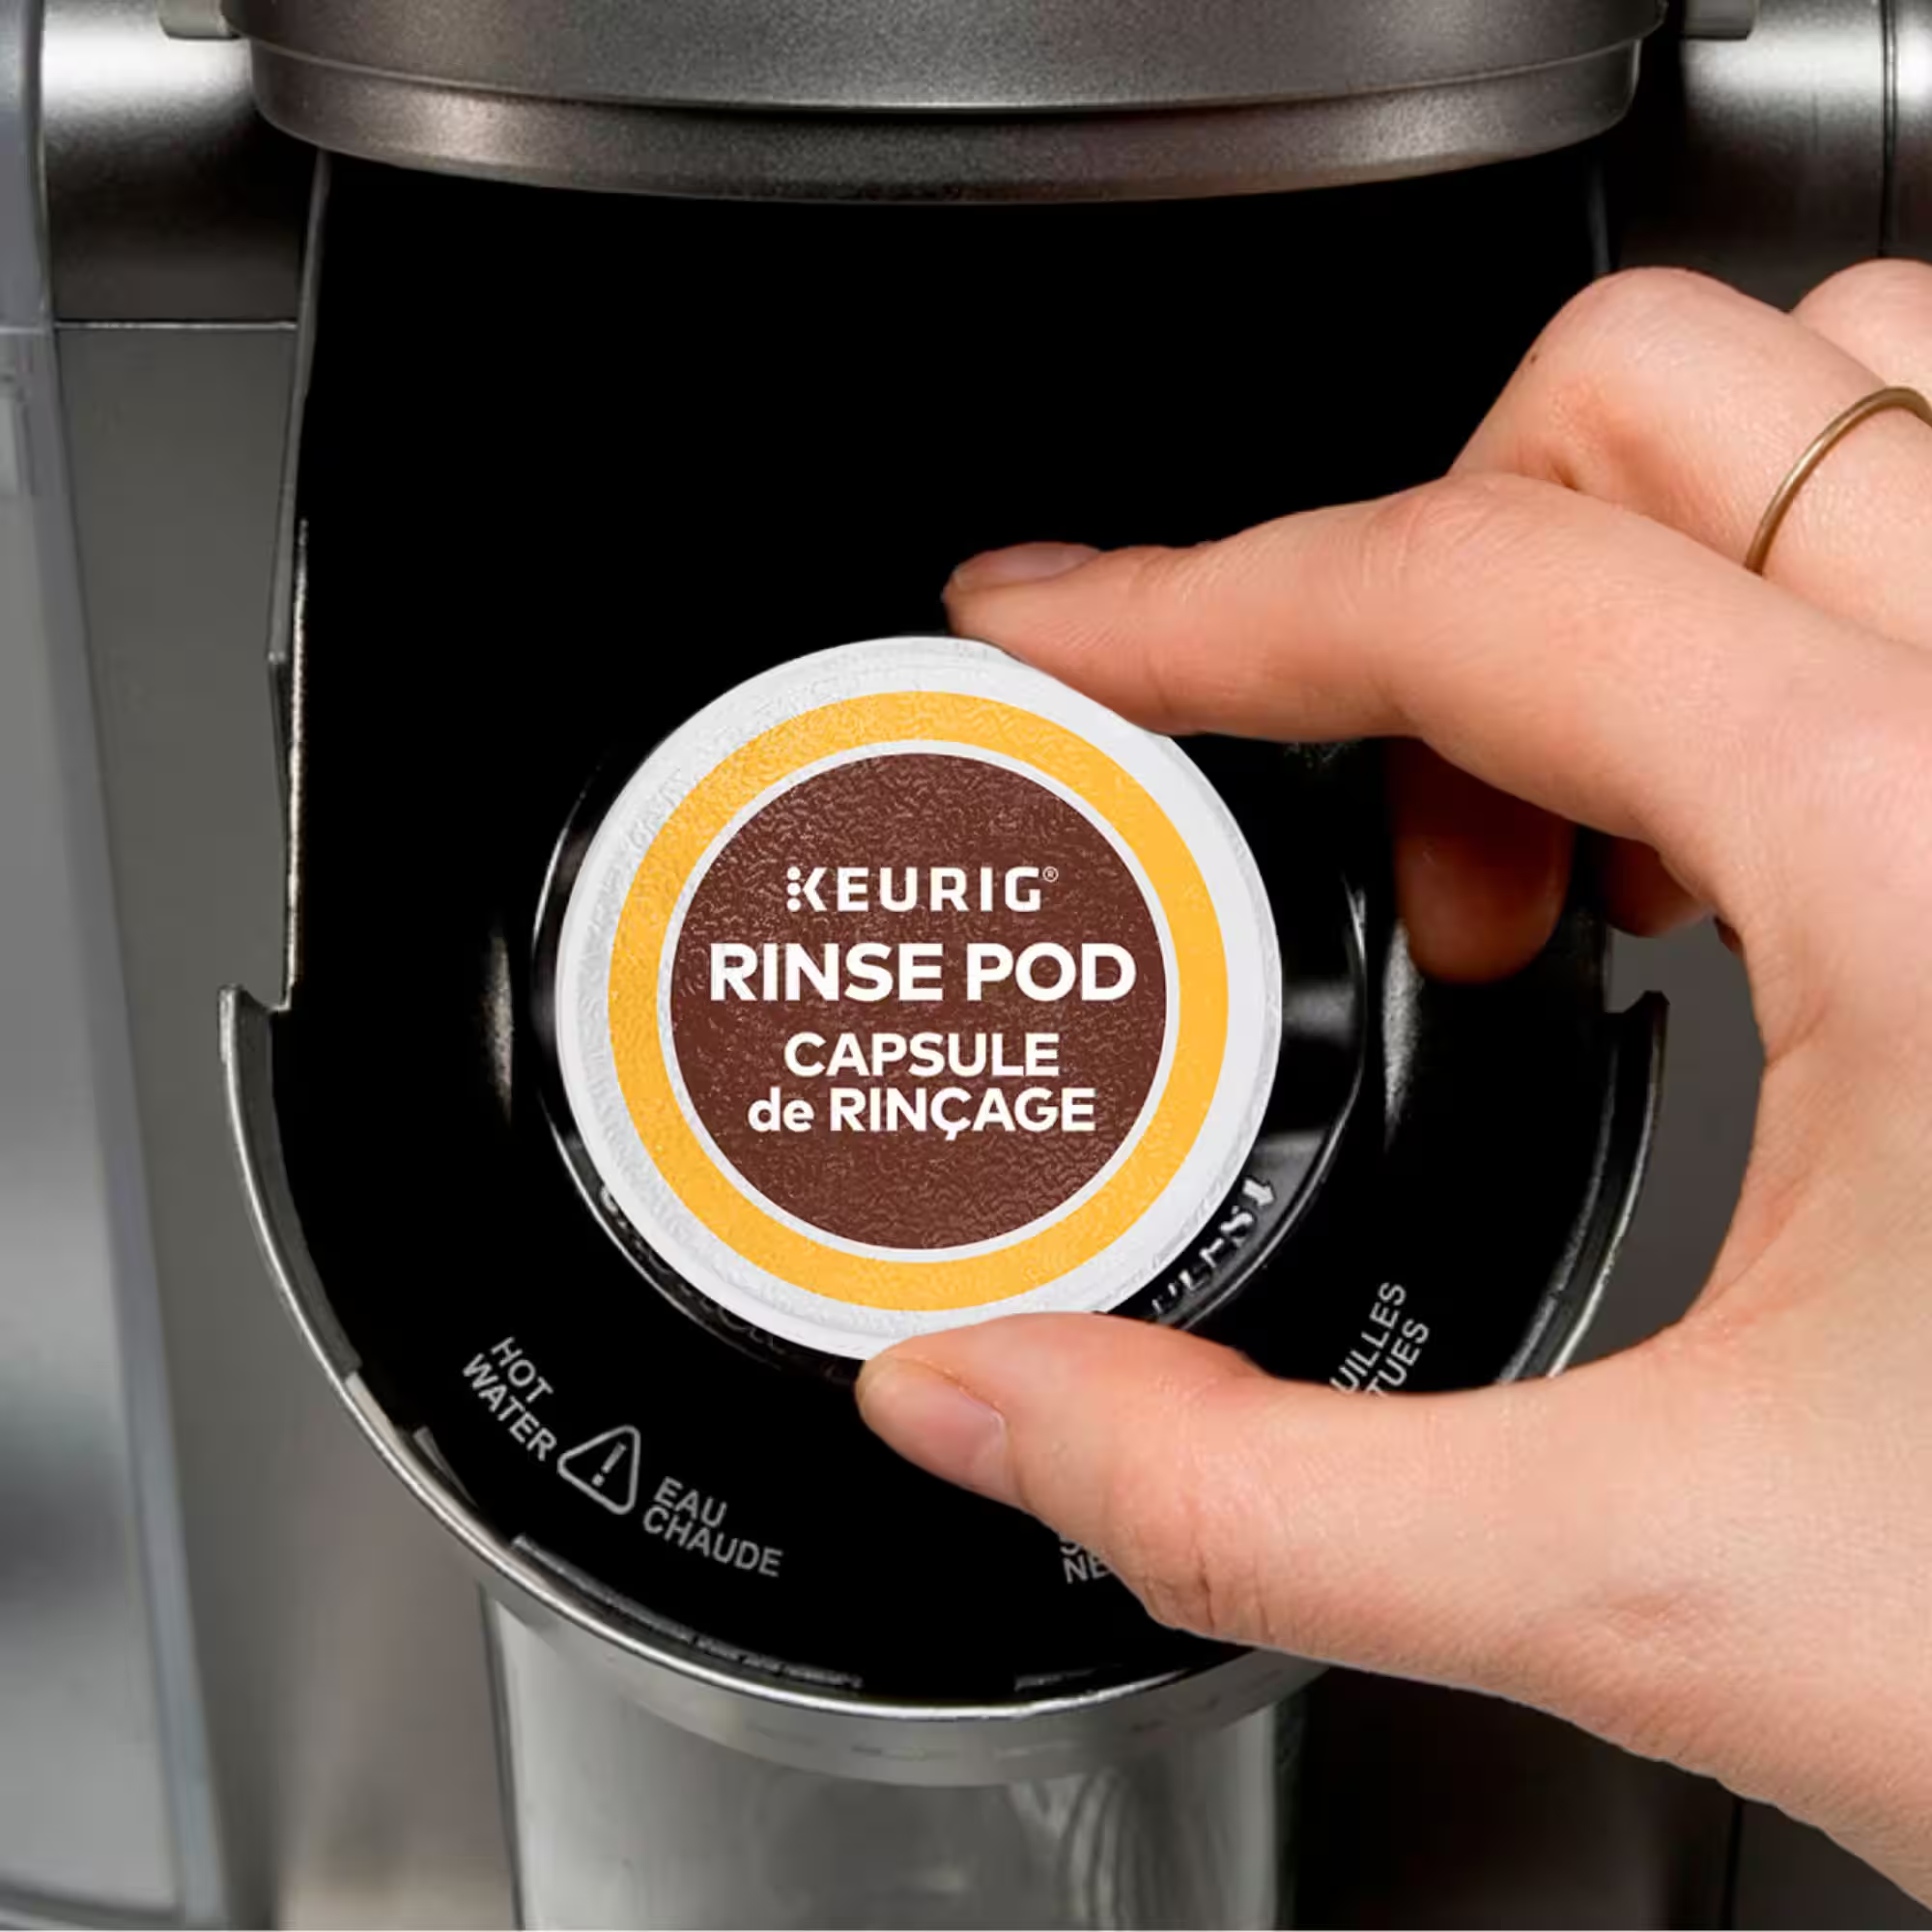
  4. Rinse: After you’ve completed dispelling all the descaling solution, thoroughly clean the water reservoir. Fill it with fresh water and run several brew cycles without a coffee pod until the descale light turns off, ensuring any remaining vinegar or descaler is flushed out of the machine.
  5. Final Steps: Once you’ve rinsed out the vinegar or descaling solution, allow the machine to sit for about 30 minutes. This will help reset the descale light.

keurig descale light won't turn off

What to Do If the Descale Light Remains On

Common Reasons for Persistent Descale Light

If you find that your Keurig descale light won’t turn off even after proper descaling, you may need to consider several possible reasons:

  • Incomplete Descaling: Ensure you’ve followed the descaling steps thoroughly. Sometimes, residue from the descaling solution may still linger, prompting the light to stay illuminated.
  • Water Quality: Using hard water can lead to frequent buildups. Even post-descaling, ongoing usage of hard water might trigger the descale light to illuminate sooner than expected.
  • Faulty Sensor: The issue could also be technological. If the internal sensor is malfunctioning, it may not accurately represent the machine’s condition.
  • Remnants of the Cleaning Solution: Ensure that you have thoroughly rinsed your machine post-descaling. Any lingering taste or residue could also cause issues.

Troubleshooting Tips

  1. Repeat Descaling: If the light remains illuminated, go through the descaling process again but this time focus carefully on each step to ensure nothing is skipped.
  2. Check Water Quality: If you consistently use tap water, consider using filtered or bottled water. This will help reduce mineral deposits and may prevent future occurrences.
  3. Clean Other Components: Apart from descaling, it’s essential to check other parts of the machine, like the needle and K-cup holder, to ensure they are clean and functioning correctly.
  4. Reset the Machine: While not common to work with, unplugging the machine for a few minutes and plugging it back in may sometimes reset electronic components.
  5. Reach Out for Support: If after doing everything we’ve talked about your Keurig descale light won’t turn off, consider contacting Keurig customer support. They may offer more specific troubleshooting guidance or may inform you of potential needs for repairs.

keurig descale light won't turn off

Preventing Future Descaling Issues

Benefits of Regular Maintenance

The best way to handle a descale light that won’t turn off is to prevent it from happening in the first place. Here are some practical ways to maintain your coffee maker and reduce the risk of mineral buildup:

  1. Use Filtered Water: As noted, the quality of the water you use can significantly affect mineral accumulation. Switching to filtered water can significantly reduce the likelihood of requiring frequent descaling.
  2. Regular Cleaning: Get into the habit of cleaning your coffee maker regularly. Wipe down the exterior, clean the drip tray, and check for any coffee grounds that might be stuck in the system.
  3. Descale Regularly: Depending on usage, it’s good practice to descale your Keurig at least every three to six months. Keeping on top of this will minimize the chances of the descale light illuminating unexpectedly.
  4. Use Appropriate Solutions: If you opt for descaling solutions, make sure they are compatible with your Keurig model, as using inappropriate products can lead to further complications.
  5. Monitor Usage: If you notice that the descale light illuminates sooner than expected, consider decreasing the frequency of brews until you can determine the cause.

keurig descale light won't turn offSpecial Considerations for Different Models

Keurig has developed a range of coffee-maker models, and while the basic descaling process tends to be similar, it’s always a good viewing routine to consult your specific model’s manual. Some advanced models may have other specific indicators or settings revolving around descaling. Ensure you review your manual for model-specific maintenance routines and troubleshooting tips.

Perform a Manual Descale

If previous attempts have failed, consider performing a manual descale process again. Sometimes repeating descaling can remedy issues with stubborn mineral deposits.

  1. Use Alternate Solutions: If you initially used a specific brand of descaling solution, trying a vinegar-based approach may yield better results, or vice versa.
  2. Follow Proper Rinse Procedures: After repeating the descaling, ensure you run several clean water cycles.

Preventive Measures

The best way to combat the Keurig descale light won’t turn off problem is to take preventive measures. Regular maintenance can substantially minimize issues with mineral buildup.

Regular Cleaning Schedule

You may want to adopt a regular cleaning schedule that includes descaling every three to six months, depending on your water’s hardness.

  1. Use Filtered Water: If you frequently brew coffee, consider using filtered water to lessen mineral deposits.
  2. Routine Maintenance Checks: Regularly check and clean the machine’s parts, including the water reservoir and the K-Cup holder.

Invest in a Water Softener

If you live in an area with hard water, investing in a water softener can protect your Keurig from mineral buildup. This can lessen the frequency of descaling and prolong the machine’s life.

Conclusion

The experience of seeing your Keurig descale light won’t turn off can undoubtedly be annoying, but it’s an important reminder of how essential it is to maintain your coffee maker. Through understanding the descaling process and keeping up with regular maintenance, you can enjoy perfectly brewed coffee without unnecessary interruptions.

The important takeaway is to stay proactive. By adhering to the guidelines outlined in this guide, you can minimize the risk of encountering issues with your coffee maker again in the future. Remember, keeping your machine clean and functioning optimally not only enhances your coffee experience but also prolongs the lifespan of your Keurig. With time and care, you’ll be able to enjoy the perfect cup of coffee, free from the nagging reminder of a descale light that won’t turn off.

Posted on

Understanding Why Does My Keurig Say Descale

why does my keurig say descale

If you own a Keurig coffee maker, you may have encountered the “Descale” warning on its display. This signal is part of the machine’s maintenance protocol and, if ignored, can eventually lead to performance issues. Descaling is a crucial part of keeping your coffee maker in optimal condition. In this guide, we’ll delve into what the “Descale” feature means, why it’s important, how to descale your machine, and tips for preventing future scale buildup.

What is Descaling?

Descaling is the process of removing mineral buildup from your coffee maker. This buildup, primarily composed of calcium and magnesium, occurs naturally when you use water to brew your coffee. Over time, minerals can accumulate in the machine’s internal components, affecting its performance and the quality of your brewed coffee.

Why Does Scale Build-Up Occur?

Water is the main ingredient in coffee, and its chemical composition can vary significantly depending on the source. Hard water contains high levels of minerals, which can lead to scale buildup. The process of heating water within your coffee maker can accelerate this buildup, especially if you frequently use your machine.

What Happens if You Ignore the Descale Warning?

Ignoring the descale warning can lead to several problems:

  1. Reduced Brewing Efficiency: Scale can block water flow through the machine, resulting in longer brew times and weaker coffee.
  2. Unpleasant Taste: Mineral buildup can affect the flavor of your coffee, resulting in a less enjoyable experience.
  3. Potential Damage: Over time, the scale can cause internal damage to heating elements and other components, leading to costly repairs or replacements.

Recognizing the Descale Warning

Keurig coffee makers come equipped with a built-in feature that alerts users when it’s time to descale. The warning can appear as a message on the display, often accompanied by a light indicator.

When Should You Descale?

The frequency of descaling largely depends on your water quality. If you use hard water, it is advisable to descale every three to six months. Some models will alert you after a certain number of brews or time intervals, so it’s essential to stay attentive to your machine’s signals.

Signs Your Keurig May Need Descaling

  • Slow or inefficient brewing
  • A decrease in coffee temperature
  • A strange or off taste in your coffee
  • Error messages or blinking lights

why does my keurig say descale

Preparing for the Descaling Process

Before you begin the descaling process, you’ll need a few items to ensure a smooth experience.

Items Needed

  1. Descaling Solution: You can buy a commercial descaling solution specifically made for Keurig machines or use a mixture of equal parts white vinegar and water.
  2. Water: Fresh water will be required to rinse the machine after descaling.
  3. Container: A large, empty container that can hold at least 10 ounces of liquid to catch runoff during the descaling process.

Safety Precautions

It’s essential to follow some safety measures to avoid any mishaps while descaling your coffee maker:

  • Ensure the machine is unplugged before starting any maintenance.
  • Avoid using abrasive materials that may scratch the surface.
  • Use protective gear if necessary—gloves can be helpful when using strong chemicals.

why does my keurig say descale

Step-by-Step Guide to Descaling Your Keurig

Now that you’ve gathered your supplies, it’s time to descale your Keurig. Follow these steps carefully for effective results:

Step 1: Empty the Water Reservoir

Start by removing any remaining water from the reservoir. This helps ensure that the descaling solution works efficiently and isn’t diluted.

Step 2: Add the Descaling Solution

If you’re using a commercial descaler, follow the instructions on the packaging. Typically, you will pour the solution into the reservoir and fill it with water to the maximum fill line. If using vinegar, fill the reservoir halfway with vinegar and the remaining half with water.

Step 3: Begin the Descaling Cycle

  • Turn on the Machine: Plug it back in and power it up.
  • Run a Brew Cycle: Place a large container under the brewer and select the largest cup size. Run a brew cycle without inserting a K-Cup. Continue this process until the water reservoir is empty.

Step 4: Let it Sit

Once the reservoir is empty, turn off your Keurig and allow the remaining solution to sit in the machine for about 30 minutes. This waiting period helps the solution break down any mineral deposits effectively.

Step 5: Rinse

After 30 minutes, refill the reservoir with fresh water and run several brew cycles (without K-Cups) until the water runs clear. This step ensures that all the descaling solution is removed from the machine.

Step 6: Cleaning the Exterior

While you wait for the descaling process to complete, take a moment to clean the machine’s exterior. Wipe down surfaces with a damp cloth and mild soap, paying special attention to the area around the brew head.

Post-Descaling Maintenance

After descaling, it’s essential to incorporate some post-maintenance habits to keep your Keurig running smoothly.

Regular Cleaning

To prevent future scale buildup and keep your coffee tasting fresh, clean your coffee maker regularly. Aim to perform a thorough cleaning every month, which includes:

  • Emptying the Water Reservoir: Always pour out any remaining water and clean the reservoir with warm, soapy water.
  • Cleaning the K-Cup Holder: Remove and clean the K-Cup holder to avoid clogs and keep the flavor intact.
  • Wiping Down: Regularly wipe the machine’s exterior to remove dust and spills.

Use Filtered Water

One of the best ways to prevent hard water mineral buildup is to use filtered or bottled water for brewing. If you can’t avoid using tap water, consider investing in a water softener to reduce mineral content.

Monitor Your Machine

Keep an eye on your Keurig for any signs that it may need maintenance. If you notice any odd noises, changes in brew times, or flavors, it may be time to perform both descaling and general cleaning.

why does my keurig say descaleFrequently Asked Questions (FAQs)

What type of descaling solution should I use?

Keurig offers its own descaling solution, but you can also use equal parts white vinegar and water. Just ensure that the solution is safe for use in coffee makers.

Can I descale my Keurig too often?

While it’s essential to follow a regular descaling routine, doing it too often may not cause harm but may be unnecessary unless you have significantly hard water. Generally, a frequency of every 3-6 months is adequate.

What if my machine still has issues after descaling?

If you’ve descaled your Keurig and continue to have issues, consider contacting customer support. It may be possible there are other underlying problems that require professional attention.

Is descaling safe for all Keurig models?

Yes, descaling is safe for all Keurig models. However, always refer to your model’s specific user manual for any model-specific instructions.

Troubleshooting Common Issues

What If the Descale Warning Doesn’t Go Away?

Sometimes, the warning may persist even after you’ve completed the descaling process. Here are a few steps to troubleshoot:

  1. Run Additional Rinses: If you followed the descaling and rinsing instructions and the warning remains, you may need to run several additional cycles of plain water to clear any remaining solution.
  2. Check for Clogs: Inspect the needle and brew basket for blockages.
  3. Factory Reset: For some models, a factory reset may remove persistent warning indicators.
  4. Consult Manual: When in doubt, refer to your Keurig’s user manual for model-specific instructions.

Conclusion

Descaling your Keurig is essential for maintaining the health of your coffee maker and ensuring a high-quality brew. You might wonder, “Why does my Keurig say descale?” This warning indicates that mineral buildup has occurred, and it’s time for maintenance. Addressing this alert promptly can help you avoid performance issues and prolong the life of your machine. Regular upkeep, such as using filtered water and responding to your coffee maker’s signals, contributes to a better coffee experience. So, when that descaling message appears, don’t disregard it—take action to continue enjoying your delicious coffee at the touch of a button.

Posted on

Fix Non-Responsive Coffee Maker: Keurig wont turn on

keurig wont turn on

Introduction

Keurig coffee makers have transformed the way we brew our coffee, providing convenience and speed. However, like any electronic device, they can encounter issues over time, one of which is keurig wont turn on. If you’re experiencing this frustrating problem, you’re not alone. Many users have faced similar challenges, and in this comprehensive guide, we will explore the potential reasons behind your Keurig not powering on and how to troubleshoot the issue effectively.

Understanding Your Keurig Machine

Before delving into potential solutions, it’s essential to understand the basic components of your Keurig machine. These coffee makers typically comprise several critical parts, including the water reservoir, heating element, and brewing chamber. When any part of the machine malfunctions, it can prevent the entire system from working correctly.

Common Reasons Your Keurig Won’t Turn On

There can be various reasons for your Keurig not turning on, ranging from minor malfunctions to significant electrical issues. Below, we’ll explore some common causes.

1. Power Supply Issues

Sometimes, the reason your Keurig won’t turn on is as simple as an issue with the power supply. This could include the following:

  • Unplugged or Loose Power Cord: Ensure that the power cord is securely connected to both the outlet and the coffee maker.
  • Faulty Electrical Outlet: Test the outlet by plugging in another device. If it doesn’t work, the outlet may need to be replaced.
  • Power Surges: Power surges can damage or disrupt the internal circuits of your coffee maker.

2. Internal Component Failures

Like all machines, Keurig coffee makers have internal components that can fail over time. A few components that may cause your machine not to function include:

  • Heating Element Failure: The heating element is crucial in boiling water for your coffee. If it malfunctions, the machine may not turn on.
  • Motherboard Issues: The motherboard controls various functions. If it becomes damaged, the machine may fail to power on.
  • Sensors: Certain sensors detect the presence of water or coffee pods. If they malfunction, your Keurig may not start.

3. Clogged Water Lines

If water cannot flow through the machine, it won’t be able to operate effectively. A clogged water line could lead to a machine that won’t turn on. Issues can often arise from:

  • Mineral Buildup: Over time, minerals from water can accumulate and create blockages.
  • Coffee Grounds: Coffee grounds can sometimes find their way into water lines, causing clogs.

4. External Factors

While less common, external factors such as environmental conditions and maintenance can also affect your Keurig’s ability to turn on:

  • Humidity and Temperature: Extreme changes in humidity or temperature can impact electronic devices.
  • Maintenance Neglect: Lack of regular maintenance may lead to internal issues that accumulate over time, ultimately affecting performance.

keurig wont turn on

Troubleshooting Steps

If your Keurig won’t turn on, following these troubleshooting steps may help you identify and resolve the issue.

Check the Power Source

The first step in troubleshooting your Keurig is to ensure that it has a reliable power source. Double-check the power cord connections and plug the machine into a different electrical outlet.

  1. Unplug and Re-plug: Unplug the machine, wait for a minute, and then re-plug it. This might reset any temporary issues.
  2. Test the Outlet: If keurig wont turn on after that, test the electrical outlet using another device. If that devices works, the outlet is fine. If not, consider having an electrician assess the outlet.
  3. Use a Different Surge Protector: If you are using a surge protector, try plugging your Keurig directly into the wall to rule out any issues with the protector.

Inspect the Power Cord

Next, examine the power cord for any visible damage:

  • Frayed or Damaged Wire: If you find any exposed or damaged wires, the cord may need to be replaced.
  • Connection Points: Ensure the connectors at both ends are stable and secure.

Examine Internal Components

If the power source checking doesn’t yield results, the next step is to assess the internal components:

  1. Check for Water Damage: Look for any signs of water leakage, as this could cause internal damage.
  2. Look for Loose Connections: If you are comfortable doing so, open up the machine to check for any loose wires or connections.
  3. Seek Professional Help: If you’re uncertain about opening the machine, it may be best to consult a technician or contact Keurig’s customer service.

Descale the Machine

If you suspect that a clog could be the cause of the issue, descaling your machine might do the trick. This involves removing mineral deposits that can build up over time.

  1. Prepare a Descaling Solution: You can either buy a dedicated descaling solution or use a mixture of equal parts water and white vinegar.
  2. Run the Descaling Cycle: Follow the instructions in your user manual on how to properly descale your machine, ensuring that all components are effectively cleaned.

keurig wont turn on

Factory Reset

If your Keurig model supports it, consider performing a factory reset. This will restore all settings and may resolve any software-related issues causing the machine to malfunction.

  1. Refer to the Manual: Refer to your user manual for specific instructions on how to perform a factory reset.
  2. Follow All Steps: Ensure you follow all steps carefully to reset the machine completely.

Customer Support

If none of the above troubleshooting steps work, it may be time to reach out to Keurig customer service for further assistance. They may have additional insight or pertain to any recalls or issues specific to your model.

Preventative Maintenance Tips

After troubleshooting your Keurig, it’s essential to adopt consistent preventive measures to avoid future problems.

Regular Cleaning

Keeping your machine clean not only ensures better performance but also extends its lifespan. Consider the following:

  • Weekly Maintenance: Clean external parts and spray areas with a non-abrasive cleaner.
  • Monthly Descaling: Depending on your water quality, perform monthly descaling to handle mineral buildup.

Proper Usage

Always follow the manufacturer’s instructions for use:

  • Use the Correct Water Type: Use filtered water whenever possible to minimize mineral deposits.
  • Store Properly: If you don’t plan to use the machine for an extended period, store it in a cool, dry place.

Avoid Overusing

Overusing your machine can lead to increased wear and tear. Take breaks between brews to allow the components to cool down, reducing the risk of overheating.

keurig wont turn onWhen to Seek Professional Help

After performing your troubleshooting and maintenance efforts, if your Keurig still does not turn on, it may be time to consider seeking professional assistance. Sometimes, electrical issues can be severe and require specialty tools or parts that aren’t easily accessible to the average consumer.

Local Repair Shops

Look for local appliance repair shops that specialize in coffee machines. These technicians often have the experience and knowledge to diagnose and fix the problem efficiently.

Manufacturer Support

If your unit is under warranty, consider reaching out to Keurig’s customer support. They can assist in diagnosing the issue and provide repair or replacement options as needed. Always check your warranty status before seeking independent repairs, as self-service may void your warranty.

Conclusion: keurig wont turn on

Keurig wont turn on can be frustrating, but with systematic troubleshooting, you can identify and potentially resolve the issue on your own. By understanding common problems, following a structured approach to troubleshooting, and implementing proper maintenance practices, you can enjoy many more cups of delicious coffee without further interruptions.

No one wants a broken coffee maker, especially when you depend on it for your daily routine. Remember that sometimes, seeking professional help is your best option when dealing with complicated electronic malfunctions. Engaging with customer support can provide more specialized assistance tailored to your specific model, ensuring you get your Keurig back in action as smoothly as possible.

Posted on

What Does Descale Mean On My Keurig?

what does descale mean on my keurig

If you’re a coffee aficionado or even just someone who needs their daily caffeine fix, you likely appreciate the convenience of a Keurig coffee maker. These machines provide a quick and efficient way to make a single cup of coffee without the mess of traditional brewing methods. However, if you have been using your Keurig for a while, you might have encountered the warning message: “Descale.” This message can be confusing for many users, and it often leads to questions like, “What does descale mean?” and “Why do I need to descale my coffee maker?” This article aims to provide a comprehensive understanding of what it means to descale your Keurig coffee maker, why it’s necessary, and how you can do it efficiently.

What Is Descaling?

The Science Behind Descaling

Descaling is a process that involves removing mineral deposits, also known as limescale, from the internal components of your coffee machine. Over time, as water passes through the Keurig, minerals such as calcium and magnesium begin to accumulate inside the machine. These mineral deposits are harmless to consume but can significantly affect the performance and longevity of your coffee maker.

Why Is Descaling Important?

If not removed, these mineral deposits can:

  • Block Water Pathways: This can prevent the machine from brewing properly.
  • Affect Coffee Taste: Accumulated minerals can alter the taste of your coffee.
  • Reduce Heating Efficiency: Mineral buildup can make it harder for the heating elements to heat water adequately, resulting in lukewarm coffee.
  • Cause Corrosion: Over time, limescale can corrode the internal parts, leading to malfunctions and costly repairs.

what does descale mean on my keurig

Signs That Your Keurig Needs Descaling

Besides the obvious descale message, there are several signs that your Keurig coffee maker might need descaling:

  • Slower Brewing Times: One of the initial indicators can be that your coffee maker takes longer than usual to brew a cup of coffee.
  • Less Coffee Output: If you notice that your machine is producing less coffee than it should, this can be a sign of mineral buildup.
  • Strange Noises: Odd sounds, such as gurgling or sputtering, can indicate that water is having difficulty passing through the machine due to blockages.
  • Poor-tasting Coffee: A noticeable change in the taste of your coffee can be a sign of mineral accumulation inside the machine.

How Often Should You Descale Your Keurig?

Manufacturer’s Recommendations

Keurig recommends descaling your coffee maker every 3 to 6 months, depending on the hardness of your water. Hard water contains more minerals that can accumulate faster in your machine. Some advanced Keurig models come with water filter cartridges that can help reduce mineral buildup, slightly extending the time between descalings.

Personalized Descaling Schedule

While the manufacturer’s guidelines are a good starting point, your usage patterns can also dictate how often you should descale your machine. If you use your Keurig multiple times a day, you might need to descale it more frequently. Similarly, if you use filtered or bottled water, you might be able to extend the intervals between descaling sessions.

Materials Needed for Descaling

Before starting the descaling process, you’ll need to gather some materials:

  • Descaling Solution: You can use a commercially available descaling solution or make your own using white vinegar and distilled water.
  • Large Ceramic Mug: This will be used to catch the descaling solution as it passes through the machine.
  • Clean Water: To rinse the machine after descaling.

what does descale mean on my keurig

Step-by-Step Guide to Descaling Your Keurig

Using a Commercial Descaling Solution

  1. Preparation:
    • Turn off your Keurig and unplug it from the outlet.
    • Empty the water reservoir and remove any coffee pods from the holder.
    • Remove the water filter cartridge if your machine uses one.
  2. Mix the Solution:
    • Follow the instructions on the descaling solution bottle to mix it with water. Typically, you’ll need to pour the entire bottle of descaling solution into the water reservoir and fill the empty bottle with water to add to the reservoir as well.
  3. Start Descaling:
    • Plug the Keurig back in and power it on.
    • Place the large ceramic mug on the drip tray to catch the descaling solution.
    • Run a cleansing brew without a coffee pod, selecting the largest cup size available.
  4. Repeat:
    • Empty the mug and repeat the cleansing brew until the “Add Water” light comes on, indicating that the reservoir is empty.
  5. Let It Sit:
    • Allow the machine to sit for at least 30 minutes with the power on. This gives the descaling solution time to break down any remaining mineral deposits.
  6. Rinse:
    • Empty any remaining descaling solution from the reservoir and rinse it thoroughly. Fill the reservoir with fresh, clean water.
    • Run multiple cleansing brews with clean water to ensure that all traces of the descaling solution are removed.

Using White Vinegar and Distilled Water

  1. Preparation:
    • Turn off and unplug your Keurig, then remove any coffee pods and the water filter cartridge.
  2. Mix the Solution:
    • Fill the water reservoir with a mixture of equal parts white vinegar and distilled water.
  3. Start Descaling:
    • Place a large ceramic mug on the drip tray.
    • Plug in the machine and power it on. Run a cleansing brew using the largest cup size.
  4. Repeat:
    • Empty the mug and repeat the process until the reservoir is empty or the “Add Water” indicator comes on.
  5. Let It Sit:
    • Allow the machine to sit, plugged in and powered on, for at least 4 hours. This extended period helps to ensure that the vinegar effectively dissolves the mineral deposits.
  6. Rinse:
    • Empty the water reservoir and rinse it thoroughly to remove any leftover vinegar.
    • Fill the reservoir with fresh, clean water and run several cleansing brews to ensure that all traces of vinegar are flushed out.

what does descale mean on my keurigPost-Descaling Maintenance Tips

Keeping your Keurig in optimal condition requires more than just periodic descaling. Here are some routine maintenance tips:

Regular Cleaning

  • Water Reservoir: Clean the water reservoir weekly using warm, soapy water, then rinse it thoroughly.
  • Drip Tray: Remove and clean the drip tray regularly to avoid it becoming a breeding ground for bacteria.
  • Needle: The exit needle should be cleaned periodically to prevent blockages that can affect brewing performance.

Water Quality

  • Use Filtered Water: Using filtered water can significantly reduce the rate of mineral buildup in your machine.
  • Change the Water Filter: If your Keurig has a water filter, make sure to change it as recommended, typically every 2 months.

Common Descaling Mistakes and How to Avoid Them

Using the Wrong Solution

Not all descaling solutions are created equal. Always use a descaling solution that is recommended by Keurig or a mixture of white vinegar and distilled water. Avoid using harsh chemicals that can damage the internal components of your machine.

Rushing the Process

Descaling is not a quick fix. The process requires time to effectively break down mineral deposits. Rushing through the steps or skipping the soaking period will likely mean you have to descale again sooner than necessary.

Inadequate Rinsing

Failing to thoroughly rinse your machine after descaling can leave a residue from the descaling solution, which can affect the taste of your coffee and even potentially harm your health. Make sure to run multiple cycles of clean water through your machine to flush out any remaining solution.

Conclusion

Descaling your Keurig coffee maker is an essential maintenance task that ensures the longevity and optimal performance of your machine. By understanding what does descale mean on my keurig, why it’s important, and how to do it correctly, you can keep your coffee maker running smoothly and enjoy delicious coffee with every brew. Regular maintenance, combined with proper descaling, will not only enhance the taste of your coffee but also save you from potential costly repairs or replacements in the long run. With these detailed instructions and maintenance tips, you can confidently tackle the task of descaling your Keurig, keeping your coffee maker in top condition for many cups to come. So the next time you see that “Descale” message, you’ll know exactly what to do to get your Keurig back to brewing the perfect cup of coffee. Happy brewing!

Posted on

Guide to Keurig Serial Number Lookup

keurig serial number lookup

When it comes to modern coffee brewers, the name “Keurig” is practically synonymous with convenience and quality. Whether you’re a home coffee enthusiast or you’re responsible for keeping a bustling office stocked with caffeine options, chances are you’ve encountered a Keurig machine. But like all appliances, Keurig coffee makers sometimes require maintenance, support, or even replacement parts, and when that time comes, you may need to know your machine’s serial number.

This guide will walk you through why you might need to look up your Keurig’s serial number, how to find it, and what you can do with this information to get the most out of your coffee brewing experience. With a thorough overview spanning, we aim to cover everything you need to know about Keurig serial numbers.

Why Keurig Serial Numbers Matter

Provides Specific Information on the Model

Every Keurig brewer comes with a unique serial number that serves as its fingerprint. This serial number can provide specific information about the model and production date, which can be invaluable when troubleshooting or making warranty claims. For instance, knowing the exact model number and production version can help you or customer service representatives quickly pinpoint issues and identify suitable solutions.

Facilitates Warranties and Repairs

Keurig’s warranty policies usually require the serial number for validation purposes. When making warranty claims, the serial number will confirm details such as the date of purchase and the specific model that’s under warranty. This verification process can significantly accelerate the repair or replacement of your Keurig machine.

keurig serial number lookup

Helps in Ordering Replacement Parts

If you ever need to order replacement parts or accessories, having your Keurig’s serial number can make the process smoother. Parts are often model-specific, and referencing the serial number ensures that you receive the correct components, thereby minimizing downtime.

Enhances Customer Support Experience

When contacting customer support, providing your Keurig’s serial number helps streamline the diagnostic process. Support teams can quickly pull up the history and specifications of your machine to provide targeted advice or effective solutions.

Where to Find Your Keurig Serial Number

Common Locations

Finding the serial number on your Keurig isn’t usually difficult, but the exact location can vary depending on the model. Most Keurig machines feature a sticker or label containing the serial number. Generally, you can find this sticker in one of the following places:

  1. Underneath the Drip Tray: Many Keurig models have their serial numbers on a sticker underneath the removable drip tray. Simply pull out the drip tray, and you should see the serial number printed there.
  2. Behind the Water Reservoir: Some models place the sticker behind the water reservoir. To find it, remove the water reservoir and look for the sticker on the machine’s body.
  3. Back or Bottom of the Machine: For other models, the serial number may be located on the back or the underside of the machine itself.
  4. Inside the Brewer’s Lid: Occasionally, the serial number may be found inside the lid of the brewer, particularly in some older models.

Important Tips for Locating the Serial Number

While finding the serial number is generally straightforward, consider the following tips to make the process even more efficient:

  • Consult the User Manual: The user manual often specifies where the serial number is located, tailored to your specific model.
  • Use a Flashlight: Poor lighting can make it harder to read small print. Use a flashlight to illuminate darker areas, like beneath the machine.
  • Keep the Machine Off: For safety reasons, always turn off and unplug your Keurig before moving parts or flipping the machine to locate the serial number.

keurig serial number lookup

Decoding the Keurig Serial Number

Format and Structure

The structure of a Keurig serial number typically consists of a combination of letters and numbers. This alphanumeric code conveys various pieces of information about the machine:

  • Model Information: The first few characters often indicate the model and version.
  • Production Date: Some segments of the serial number may represent the production date or manufacturing batch.
  • Unique Identifier: The concluding part of the serial number is usually a unique identifier that distinguishes your device from others produced in the same batch.

Verification and Authenticity

Decoding your Keurig serial number can help you verify the machine’s authenticity. Especially if you purchased your Keurig from a third-party seller, checking the serial number against known formats can give you peace of mind regarding the machine’s legitimacy.

Using the Serial Number for Support and Service

Online Support Portals

Many Keurig owners find online support to be convenient and efficient. By entering your serial number into Keurig’s online support portal, you can:

  • Access Model-Specific FAQs and Troubleshooting Guides: Information tailored to your specific machine makes it easier to address common issues.
  • Check Warranty Status: The portal can instantly tell you if your machine is still under warranty and what types of service you are eligible for.
  • Order Replacement Parts and Accessories: The platform can recommend compatible parts and accessories based on your serial number.

Customer Support Calls

When contacting customer support via phone, having the serial number ready can expedite the process. The support agent can use this information to:

  • Pull Up Service History: This helps the agent understand any previous issues and resolutions related to your machine.
  • Guide You Through Troubleshooting: Knowing the exact model, they can give detailed, model-specific instructions for resolving issues.
  • Arrange Repairs or Replacements: For warranty claims or service appointments, the serial number is crucial for scheduling and verification.

keurig serial number lookupEnsuring Proper Maintenance

Registering Your Keurig

Registering your Keurig with the manufacturer is a wise step that maximizes the benefits of your purchase. Using the serial number, you can register your machine for:

  • Extended Warranty Options: Some registrations come with the option to purchase extended warranties.
  • Promotional Offers: Registered users often receive special offers and discounts from Keurig.
  • Automatic Service Reminders: Some registration services offer automatic reminders for routine maintenance like descaling.

Regular Cleaning and Descaling

Keeping track of your serial number also serves a secondary benefit—ease in maintaining a proper cleaning schedule. Regular cleaning and descaling based on model-specific advice can prolong the life of your machine.

Software Updates

Certain Keurig models, particularly those with more advanced features like touchscreens and programmable settings, may receive occasional software updates. Using the serial number, you can check if there are pending updates that could improve performance or add new features.

Additional Uses for the Serial Number

Community Support and Forums

Online forums and community groups dedicated to Keurig owners are excellent resources for support and advice. Sharing your serial number (minus the unique identifier) can help other community members offer more precise recommendations and solutions tailored to your specific model.

Returns and Exchanges

If you need to return or exchange your Keurig, many retailers will require the serial number. Keeping this information handy can simplify the process and ensure that you receive a replacement that meets your needs.

Conclusion

Understanding and utilizing your Keurig serial number is an essential aspect of machine ownership that can save you time, money, and hassle. From verifying authenticity to expediting customer service, this unique identifier offers a multitude of benefits. By knowing where to locate your serial number, conducting a Keurig serial number lookup, understanding its format, and using it effectively for support, warranties, and maintenance, you can ensure that your Keurig coffee maker functions optimally for years to come. So the next time you enjoy that perfect cup of coffee, remember that a little serial number lookup is behind much of that convenience and reliability.

Posted on

How to Get the Descale Light Off Your Keurig?

how to get descale light off keurig

Keurig coffee makers are a beloved staple in many kitchens due to their convenience, speed, and ability to brew a fresh cup of coffee at the touch of a button. However, like all appliances, they require regular maintenance to perform at their best. One common issue Keurig owners face is the persistent “Descale” light on their machine. This light indicates that it’s time to clean out the mineral build-up, which can affect the taste of your coffee and the machine’s performance. This comprehensive guide will provide you with everything you need to know to get the descale light off your Keurig and keep your machine in top condition.

Understanding the Descale Light on Your Keurig

Why Descale Your Keurig?

Descaling is a critical maintenance step for any coffee maker, including Keurig machines. The process involves removing mineral deposits, also known as scale, that accumulate inside the coffee maker over time, particularly if you’re using hard water. These deposits can clog the machine, affect the flavor of your coffee, and ultimately reduce the lifespan of the appliance. Regular descaling enhances the functionality and longevity of your machine, ensuring every cup of coffee is as good as the first.

What Causes the Descale Light to Illuminate?

The descale light on a Keurig operates as a warning system, triggered by an internal sensor that detects the build-up of minerals inside the machine. When the sensor identifies a certain level of scale, it activates the descale light to alert you that it’s time to clean the machine. Ignoring this signal can lead to several problems, such as slower brewing times, less efficient heating, and a decrease in overall coffee quality.

how to get descale light off keurig

Preparing to Descale Your Keurig

Gathering Supplies

Before you begin descaling your machine, you’ll need to gather a few supplies:

  • Descaling solution: You can use Keurig’s official descaling solution or a mixture of white vinegar and water if you prefer a more natural approach.
  • Water: Ensure you have access to clean water to rinse the machine thoroughly after descaling.
  • A large mug: This will collect the descaling solution during the cleaning cycle.
  • A paperclip: For clearing out the exit needle, which can sometimes become clogged with coffee grounds or mineral deposits.

Safety Precautions

Descaling involves running a cleaning solution through your coffee maker, so it’s important to take a few safety precautions. First, ensure that your machine is turned off and unplugged before you start. This reduces the risk of electrical shock. Additionally, handle the descaling solution with care, as it can be irritating to the skin and eyes.

how to get descale light off keurig

The Descaling Process

Step-by-Step Guide

Step 1: Empty the Machine

Start by emptying any water currently in the reservoir. If your machine has a water filter, remove it as well. It’s best to begin the process with an empty and clean machine.

Step 2: Add Descaling Solution

Pour the descaling solution into the water reservoir. If you’re using vinegar, mix one part white vinegar with one part water and fill the reservoir with this mixture.

Step 3: Run the Descaling Cycle

Turn on your Keurig and place a large mug on the drip tray. Open and close the brewer handle without adding a pod, and select the largest cup size. Run this brewing process until the machine indicates that the water reservoir is empty. Depending on your machine model, this may require multiple cycles.

Step 4: Allow the Solution to Sit

Once the descaling solution has cycled through the machine, let it sit for at least 30 minutes. This allows the solution to break down any remaining mineral deposits inside the machine.

Step 5: Rinse Thoroughly

After the waiting period, remove the water reservoir and rinse it thoroughly. Refill it with fresh water and place it back on the machine. Run multiple brewing cycles with just water (no coffee pod) to flush out any remaining descaling solution. Continue this process until the water reservoir is empty, and you no longer detect the scent of vinegar or the descaling solution.

Step 6: Clean the Exit Needle

Using a paperclip, carefully clean the exit needle to ensure it’s free of any debris. You can do this by inserting the paperclip into the needle to dislodge any particles. Be gentle to avoid damaging the machine.

Specifics for Different Keurig Models

While the basic descaling process is relatively consistent across different Keurig models, some models may have specific steps or additional features. For instance:

  • Keurig 2.0 Series: Ensure that you follow the on-screen instructions, and be aware that these models may have a more complex descaling procedure.
  • Keurig K-Classic: This model is straightforward and follows the basic steps outlined above.
  • Keurig K-Supreme: This model features a descaling mode that simplifies the process; refer to your user manual for specific instructions.

Post-Descale Procedures

Resetting the Descale Light

After you’ve completed the descaling process and thoroughly rinsed your machine, you’ll need to reset the descale light. The method to do this varies depending on your Keurig model:

  • For Keurig Classic Models: Typically, unplugging the machine for a few minutes and then plugging it back in will reset the light.
  • For Keurig 2.0 Models: You may need to perform a specific sequence, such as pressing and holding certain buttons; refer to your user manual.
  • For Keurig K-Elite: Press and hold the 8oz and 10oz buttons simultaneously for 3 seconds to reset the descale light.

how to get descale light off keurigRegular Maintenance Tips

Regular maintenance can help prevent the descale light from coming on too frequently:

  • Use Filtered Water: Using filtered or bottled water can reduce mineral build-up compared to tap water.
  • Empty the Water Reservoir: If you won’t be using the coffee maker for a few days, empty the water reservoir to prevent standing water from contributing to scale build-up.
  • Clean the Machine Regularly: Apart from descaling, regularly clean your Keurig’s exterior and removable parts, such as the drip tray and K-cup holder, to maintain overall hygiene.

When to Seek Professional Help

If you’ve followed all the steps and the descale light remains on, or if you notice any malfunctioning of your machine, it might be time to seek professional help. Contact Keurig customer support or consult a certified technician to diagnose and resolve any underlying issues.

Troubleshooting Common Descaling Issues

Sometimes, the descale process doesn’t go as smoothly as planned. Here are solutions to common descaling problems.

Persistent Descale Light

If the descale light remains on after you’ve completed the descaling process, ensure that you’ve followed all steps correctly. Running another descaling cycle might be necessary. If the problem persists, consult your Keurig’s user manual or contact customer support.

Unpleasant Taste or Odor

If you notice a lingering taste or smell of descaling solution or vinegar, it’s crucial to rinse the machine thoroughly. Repeat the rinse cycle with fresh water more than the recommended number of times if needed. Use filtered water for brewing to see if the taste improves.

Slow or Incomplete Brewing

Slow or incomplete brewing after descaling may result from residual deposits or air trapped within the machine. Run several water-only brew cycles to flush out any leftover deposits. Ensure the water reservoir is correctly seated and filled.

Conclusion

By understanding how to properly descale your coffee maker and regularly maintaining it, you can keep your machine in top condition. Regular maintenance, including the use of filtered water and periodic cleaning, can help prolong the life of your coffee maker. Should you encounter persistent issues with the descale light or any other problems, don’t hesitate to seek professional assistance to ensure your beloved Keurig continues to deliver that perfect cup of coffee each morning.

Posted on

Why Is My Keurig Not Brewing a Full Cup Anymore?

keurig not brewing full cup

There’s no denying the convenience that a Keurig coffee maker brings to your morning routine. With just a press of a button, you can have a freshly brewed cup of coffee in minutes. However, it can be incredibly frustrating when your Keurig stops brewing a full cup. This issue can disrupt your day, especially if coffee is your go-to beverage to start your morning. Why does this happen, and how can you fix it? Let’s delve into the potential reasons behind this problem and explore solutions so you can get back to enjoying your full cup of coffee.

Regular Maintenance and Its Importance

Why Maintenance Matters

Regular maintenance of your Keurig coffee maker is crucial for its longevity and performance. Over time, mineral deposits from water and coffee residues can build up inside the machine, affecting its efficiency and brewing capacity. These buildups can clog the water lines and needles, resulting in an incomplete brew cycle. Understanding the importance of maintenance emphasizes why addressing brewing issues is essential for the long-term functionality of your machine.

Descaling the Machine

Descaling your Keurig is one of the most important maintenance tasks. It involves removing mineral deposits that accumulate from hard water. Ensure that you use a descaling solution specifically made for coffee makers or a mixture of vinegar and water. Run the machine through a descaling cycle every three to six months, depending on the hardness of your water. Keeping your Keurig descaled ensures smooth water flow and optimal brewing performance.

keurig not brewing full cup

Common Causes of Under-Brewing

Blocked Needles

One of the most common reasons your Keurig might not brew a full cup is due to blocked needles. Keurig machines have needles that puncture the K-Cup to deliver water and extract coffee. Coffee grounds and residues can clog these needles, disrupting the water flow. Regularly cleaning the needles ensures they remain unobstructed and functional.

Clogged Water Lines

Clogged water lines can also be a significant factor. Mineral deposits and impurities in the water can accumulate in the water lines, blocking the flow and reducing the amount of water that reaches the K-Cup. Descaling the machine can help clear these clogs and restore normal water flow. Addressing clogged water lines ensures a consistent and full brew cycle.

Step-by-Step Troubleshooting

Cleaning the Needles

To clean the needles, first, unplug your Keurig for safety. Open the compartment where you place the K-Cup, and carefully remove the holder. Use a paper clip or a specialized Keurig needle cleaning tool to gently dislodge any debris from the needles. Rinsing the holder and ensuring it’s free from coffee grounds and residues helps maintain proper needle function.

Descaling the Machine

Prepare a descaling solution or a vinegar-water mixture. Fill the water reservoir with the solution and run the machine through a brewing cycle without inserting a K-Cup. Repeat this process until the reservoir is empty, followed by several cycles of plain water to rinse out any residual descaling solution. Descaling effectively removes mineral deposits that can hinder brewing performance.

Checking the Water Reservoir

Ensure the water reservoir is seated properly and is free from any debris that could obstruct water flow. Sometimes, the problem can be as simple as a misaligned reservoir or a blocked filter. Checking and cleaning the reservoir ensures uninterrupted water flow during the brewing process.

Advanced Troubleshooting

Inspecting the Water Pump

If your machine is still not brewing a full cup after basic troubleshooting, the issue might lie with the water pump. The pump is responsible for drawing water from the reservoir and pushing it through the machine. Listen for any unusual noises or a lack of sound from the pump. If the pump is malfunctioning, it may need professional repair or replacement.

Circuit Board Examination

Sometimes, issues with the circuit board can affect the brewing cycle. Electrical components can wear out or malfunction over time. If you’re comfortable with electronics, you can inspect the circuit board for any obvious signs of damage or burnt components. Otherwise, consulting a professional technician for a thorough examination and repair ensures safe and effective resolution of electrical issues.

keurig not brewing full cup

Preventive Measures

Regular Cleaning Schedule

Establishing a regular cleaning schedule can prevent many common issues. Clean the needles, descaling the machine, and rinsing out the water reservoir should be part of your routine maintenance. Adopting a proactive approach to cleaning ensures your Keurig operates smoothly and efficiently.

Using Filtered Water

Using filtered water can significantly reduce mineral buildup and extend the time between necessary descaling. Filtered water contains fewer impurities and minerals that can clog your machine. Implementing this simple step can enhance your Keurig’s performance and longevity.

When to Seek Professional Help

Persistent Issues

If you’ve followed all troubleshooting steps and your Keurig still doesn’t brew a full cup, it might be time to seek professional help. Persistent issues could indicate deeper problems that require expert diagnosis and repair. Recognizing when to seek professional assistance ensures effective resolution of complex problems.

Warranty and Support

Check if your Keurig is still under warranty. If so, contacting Keurig’s customer support can provide solutions or potentially a replacement if the machine is faulty. Utilizing warranty and support services ensures you receive expert help and potential cost savings on repairs or replacements.

Exploring Alternative Brewing Methods

Manual Brewing Options

While addressing the issues with your Keurig, consider exploring manual brewing methods like French press, pour-over, or AeroPress. These methods can provide delicious coffee and give you more control over the brewing process. Discovering and experimenting with manual brewing can offer new coffee experiences and temporary solutions.

Backup Coffee Makers

Having a backup coffee maker can be a practical solution for when your Keurig encounters issues. Drip coffee makers or other single-serve machines can serve as reliable alternatives. Investing in a backup coffee maker ensures your coffee routine remains uninterrupted.

keurig not brewing full cupCommunity Help and Online Resources

Online Forums

Joining online forums and communities dedicated to Keurig users can provide additional insights and troubleshooting tips. Other users often share their experiences and practical solutions for common issues. Engaging with online communities can offer valuable support and diverse solutions.

Instructional Videos

YouTube and other video platforms have numerous instructional videos on Keurig troubleshooting and maintenance. Visual guides can make it easier to follow steps and implement solutions. Utilizing instructional videos ensures you can effectively address and resolve issues with clear guidance.

Deciding on Replacement

Evaluating Longevity

Consider the age and condition of your Keurig. If it’s an older model or has had recurring issues, it might be worth considering a replacement. Newer models often come with improved features and better efficiency. Evaluating the longevity of your machine helps inform your decision on repair or replacement.

Cost Analysis

Compare the cost of repairs to the price of a new Keurig. Sometimes, investing in a new machine can be more economical, especially if the existing one has frequent or costly problems. Conducting a cost analysis ensures you make an informed financial decision.

Enhancing Your Coffee Experience

Exploring Coffee Varieties

Take this opportunity to explore different coffee varieties and brewing methods. Trying new coffee blends or single-origin beans can enhance your coffee experience. Exploring new coffee options ensures a richer and more enjoyable coffee journey.

Customizing Brew Strength

If your Keurig brews find it again, use the machine’s settings to customize your brew strength and size. Understanding your machine’s capabilities can help you optimize your coffee-making process. Customizing your brew ensures you get the perfect cup every time.

Conclusion

Experiencing issues with your Keurig not brewing a full cup can be frustrating, but understanding the potential causes and knowing how to troubleshoot can help restore its functionality. Regular maintenance, such as cleaning the needles and descaling the machine, is crucial for preventing common problems. Advanced troubleshooting, including inspecting the water pump and circuit board, can address more persistent issues. When basic steps don’t resolve the problem, seeking professional help or considering a replacement might be necessary. Meanwhile, exploring alternative brewing methods and engaging with online communities can provide additional support and solutions. By taking a comprehensive approach to maintenance and troubleshooting, you can ensure your Keurig continues to deliver that perfect cup of coffee. So, why is your Keurig not brewing a full cup anymore? With the right steps and solutions, you can restore its performance and enjoy your coffee routine once again.

Posted on

Why Won’t My Keurig Turn On After Descaling?

keurig won't turn on after descaling

Descaling your Keurig is essential for maintaining its performance and longevity, but what happens when your Keurig won’t turn on after descaling? This issue can be frustrating, especially when you’re craving that first cup of coffee. Understanding why your Keurig isn’t powering up and knowing how to troubleshoot can save you from unnecessary inconvenience. In this article, we’ll delve into the possible reasons behind this problem and provide step-by-step solutions to get your Keurig back in working order.

Understanding the Descaling Process

Why Descaling Matters

Descaling is crucial for keeping your Keurig in optimal condition. Over time, minerals from water can build up inside the machine, affecting its performance and the taste of your coffee. Descaling removes these mineral deposits, ensuring that your Keurig functions smoothly and produces high-quality brews. Understanding the importance of descaling underscores the necessity of this maintenance task.

The Descaling Procedure

The typical descaling process involves using a descaling solution or vinegar, followed by multiple rinses with clean water. This process might seem straightforward, but issues can arise if not done correctly. Missteps during descaling can potentially lead to problems like your Keurig not turning on. Knowing the proper procedure can help minimize the risks associated with descaling.

Common Reasons for Power Issues

Electrical Problems

One of the most common reasons your Keurig won’t turn on after descaling is an electrical issue. This could be related to the power cord, outlet, or internal electrical components. Checking and addressing these electrical aspects can often resolve the problem. Ensuring safe and functional electrical connections is foundational to troubleshooting power issues.

Residual Moisture

Moisture from the descaling process can sometimes affect the internal components of the Keurig. If the machine was not thoroughly dried before attempting to use it again, it might not turn on. Allowing adequate drying time can help avoid this issue. Understanding how moisture impacts the machine’s electronics emphasizes the need for proper drying.

keurig won't turn on after descaling

Steps to Troubleshoot Your Keurig

Check the Power Source

First, ensure that your Keurig is properly plugged into a functioning outlet. Test the outlet with another device to confirm whether it’s working. If the outlet is faulty, try plugging the Keurig into a different one. Simplifying your troubleshooting process by eliminating basic power issues can quickly identify the root cause.

Inspect the Power Cord

Examine the power cord for any signs of damage such as fraying or cuts. A damaged power cord can prevent your Keurig from turning on. Replace the cord if necessary and check if the machine powers up. Ensuring the integrity of the power cord is critical for safe and effective operation.

Internal Component Checks

Resetting the Machine

Sometimes, a simple reset can solve the problem. Unplug your Keurig and leave it unplugged for a few minutes before plugging it back in. This can reset the internal electronics and potentially resolve any glitches. Performing a reset is a straightforward step that can often yield quick results.

Water Reservoir and Sensors

Ensure the water reservoir is seated correctly. Some Keurig models have sensors that prevent the machine from turning on if the reservoir isn’t properly placed. A misaligned reservoir can interfere with the sensor, causing power issues. Confirming the correct placement of the water reservoir ensures that all safety mechanisms are engaged.

Advanced Troubleshooting

Internal Fuse Check

If simple troubleshooting steps don’t work, the issue might be with an internal fuse. Some Keurig models have internal fuses that can blow if there’s an electrical short. Consulting your Keurig’s user manual or a professional technician can help with locating and checking the fuse. Understanding the internal components can guide more advanced troubleshooting efforts.

Inspecting the Circuit Board

In some cases, the problem might lie with the circuit board. Descaling fluid or water might have damaged the circuit board, leading to power issues. Inspecting the circuit board for signs of damage and consulting a professional for potential repairs can be necessary if other troubleshooting steps fail.

keurig won't turn on after descaling

Preventive Measures for Future Use

Proper Drying Techniques

To prevent moisture-related issues, ensure that you allow your Keurig to dry thoroughly after descaling. You can do this by leaving the water reservoir open and letting the machine air out for several hours. Proper drying techniques can minimize the risks of power issues in the future.

Regular Maintenance

Regular maintenance, including frequent descaling and cleaning, can keep your Keurig in good working condition. Following the manufacturer’s guidelines for maintenance ensures that your machine remains functional and efficient. A proactive approach to maintenance can prevent many common issues from arising.

When to Seek Professional Help

Identifying Complex Issues

If basic and advanced troubleshooting steps don’t resolve the issue, it might be time to seek professional help. Complex issues like extensive electrical damage require professional expertise. Recognizing when to seek expert assistance ensures that your machine is repaired correctly and safely.

Cost-Benefit Analysis

Consider the cost of professional repairs versus the price of a new Keurig. If the machine is older or the repair costs are high, purchasing a new one might be more economical. Conducting a cost-benefit analysis helps you make an informed decision regarding repairs.

Warranty and Customer Support

Checking Warranty Status

Before seeking professional repair services, check if your Keurig is still under warranty. If it is, contact Keurig customer support for assistance. Warranty coverage might save you from out-of-pocket repair costs. Understanding your warranty status can inform your next steps in troubleshooting.

Utilizing Customer Support

Keurig’s customer support team can provide valuable assistance, including troubleshooting tips and repair options. Contacting customer support can offer solutions tailored to your specific model and issue. Leveraging customer support ensures that you have access to expert guidance.

keurig won't turn on after descalingAlternative Brewing Methods

Temporary Coffee Solutions

While resolving your Keurig issue, consider alternative brewing methods like drip coffee makers, French presses, or pour-over systems. These methods can provide quality coffee without relying on your Keurig. Having backup options ensures that your coffee routine continues uninterrupted.

Long-Term Choices

If repeated issues occur with your Keurig, you might consider exploring other coffee maker brands or models that better suit your needs. Researching alternatives can lead to a more reliable and satisfying coffee experience. Diversifying your brewing options can enhance your overall coffee enjoyment.

Community Insights and Forums

Online Communities

Joining online forums and communities dedicated to Keurig users can provide additional insights and solutions. Users often share their experiences and troubleshooting tips, offering practical advice. Engaging with online communities can offer support and innovative solutions for your Keurig problems.

Sharing Experiences

Sharing your own experiences and solutions can help others facing similar issues. Contributing to community knowledge bases fosters a collaborative environment for problem-solving. Participating actively in user communities enhances collective understanding and troubleshooting capabilities.

Environmental Considerations

Sustainable Practices

When considering repair or replacement options, think about the environmental impact. Proper disposal of old machines and selecting energy-efficient models can contribute to sustainability. Practicing environmentally responsible choices ensures that your coffee habits align with broader environmental values.

Recycling Programs

Some companies offer recycling programs for old coffee machines. Participating in these programs ensures that the materials are disposed of or repurposed responsibly. Engaging in recycling efforts supports sustainable practices and minimizes waste.

Conclusion

When your Keurig won’t turn on after descaling, it can be both frustrating and perplexing. By understanding the potential causes, such as electrical issues or residual moisture, and following a structured troubleshooting process, you can often resolve the problem. Simple steps like checking the power source, resetting the machine, and ensuring proper placement of components can make a significant difference. For more complex issues, seeking professional help or contacting customer support might be necessary. Meanwhile, exploring alternative brewing methods ensures that your coffee cravings are met. Ultimately, a proactive approach to maintenance and troubleshooting can keep your Keurig in optimal condition, providing you with delicious coffee for years to come. So, why won’t your Keurig turn on after descaling? With careful analysis and methodical troubleshooting, you can find the answer and enjoy your Keurig once again.

Posted on

Why Won’t My Keurig Turn On? Troubleshooting Tips

why won't my keurig turn on

Why Won’t My Keurig Turn On?

A Keurig coffee maker is a convenient addition to any kitchen, providing quick and easy access to your daily caffeine fix. However, there are times when you go to make your morning coffee, and your Keurig refuses to turn on. This issue can be particularly frustrating, especially when you’re in dire need of that first cup of the day. Understanding the potential reasons why a Keurig won’t turn on and knowing how to troubleshoot them can save you time and stress. This comprehensive guide will delve into common causes and provide detailed solutions to get your Keurig back in working order.

why won't my keurig turn on

Checking Electrical Connections

Power Outlet Issues

Firstly, ensure that the power outlet is functioning correctly. To verify this, plug another appliance into the same outlet to see if it receives power. Sometimes, circuit breakers can trip, causing the outlet to lose power. If your Keurig won’t turn on, and the outlet isn’t working, reset the circuit breaker or try using a different outlet. This simple step often resolves the issue and is an excellent starting point for troubleshooting.

Power Cord Inspection

Examine the power cord for any visible signs of damage, such as fraying or cuts. A damaged power cord can prevent your Keurig from turning on. If you notice any damage to the cord, do not use the machine and contact Keurig’s customer service for a replacement. Also, ensure the power cord is securely plugged into both the machine and the outlet. A loose connection can also be the cause of the problem.

Power Button Functionality

Check the power button to ensure that it’s functioning properly. Press it firmly and listen for any clicks or sounds that indicate it’s responding. If the power button feels stuck or unresponsive, this could be causing the issue. In some cases, using a small amount of electronic contact cleaner can help restore its functionality. Replacing the button might also be necessary if it’s completely defective.

Internal Component Inspection

Water Reservoir Placement

The water reservoir must be correctly seated for the Keurig to function. Remove the reservoir and place it back securely, ensuring it fits snugly into its slot. An improperly seated reservoir can prevent the machine from turning on, as some models have safety switches that detect this alignment.

Internal Moisture or Residue

During regular use or descaling, moisture or residue can accumulate inside your Keurig. Carefully check the areas around the water tank and internal components for any signs of moisture. Use a dry cloth to wipe down those areas. Allow the machine to air dry for an extended period before attempting to power it on again.

Circuit Board and Fuse Inspection

For those comfortable with more advanced troubleshooting, inspect the circuit board and internal fuses. To do this, you’ll need to carefully remove the machine’s casing. Look for any signs of burns, frayed wires, or damaged components. If you find anything unusual, it’s best to consult a professional technician or contact Keurig support for a detailed inspection and repair.

Checking for Loose Connections

Loose or disconnected internal wires might also be a reason why your Keurig won’t turn on. Carefully inspect the internal wiring to ensure all connections are secure and properly attached. A loose wire can easily be reconnected, solving the problem quickly.

why won't my keurig turn on

Resetting the Keurig

Simple Reset

A simple reset can often fix minor glitches. Unplug your Keurig from the power outlet and leave it unplugged for about five minutes. After this period, plug it back in and try turning it on. This step resets the internal electronics and can resolve many issues.

Advanced Reset

If a simple reset doesn’t work, try a more advanced reset by holding down the power button for about 10 seconds while the machine is unplugged. This can help clear any lingering errors in the system. After doing this, plug the machine back in and attempt to power it on again.

Refer to the User Manual

Different Keurig models may have specific reset procedures. Refer to your user manual for detailed instructions on how to perform a reset for your particular model. Following the manufacturer’s guidelines ensures that you’re taking the correct steps.

Common Operational Issues

Blocked Needles

The needles that puncture the K-cup can become clogged with coffee grounds or mineral deposits. This can cause the machine to fail to start. Use a needle cleaning tool or a paperclip to gently clear any blockages from the needles. Regularly performing this task helps maintain smooth operation.

Safety Interlocks

Keurig machines have several safety interlocks to ensure safe operation. If any of these are not properly engaged, the machine won’t turn on. Make sure the lid is securely closed, the K-cup holder is properly seated, and the water reservoir is correctly placed. These checks ensure that all safety mechanisms are satisfied.

Descaling and Cleaning Cycle

Mineral buildup can obstruct water flow and interfere with the machine’s operation. Regularly descale your Keurig according to the manufacturer’s instructions. Run a full cleaning cycle with a descaling solution to remove mineral deposits. Proper maintenance avoids operational issues and extends the life of your Keurig.

Professional Assistance and Warranty

Contacting Customer Support

If your Keurig is still under warranty, contacting Keurig customer support is a wise decision. They can provide specific troubleshooting steps or arrange for a repair or replacement if necessary. Have your serial number and purchase details ready for a smoother process.

Professional Repair Services

If the machine is out of warranty, consider professional repair services. Local appliance repair shops often have experience with Keurig machines and can diagnose and fix electrical or mechanical issues. Make sure to choose a technician familiar with Keurigs to ensure a reliable repair.

Evaluating the Cost of Repairs

Assess whether the cost of repairs is worth it compared to the price of purchasing a new machine. Sometimes, ongoing repair costs can exceed the value of the machine, making a replacement a more pragmatic and economical choice.

Replacement Options

If your Keurig continues to experience issues despite troubleshooting and repairs, it might be time to consider a replacement. Evaluate the cost of ongoing repairs versus the cost of a new machine. Sometimes, upgrading to a newer model with improved features provides a better long-term solution.

why won't my keurig turn onPreventive Measures and Maintenance

Regular Descaling

To prevent many common issues, regularly descale your Keurig every three to six months, depending on usage and water hardness. Regular cleaning removes mineral buildup and keeps your machine running efficiently.

Using Filtered Water

Using filtered or bottled water reduces mineral buildup and the frequency of descaling. This practice not only improves the taste of your coffee but also prolongs the machine’s life by maintaining clean internal components.

Cleaning and Maintenance

Regularly clean the water reservoir, needles, and exterior parts of your Keurig. Follow the manufacturer’s maintenance schedule to keep the machine in optimal condition. Regular maintenance prevents many issues that can cause your Keurig not to turn on.

Checking for Updates

Occasionally, manufacturers release software updates or recall notices that include fixes for reported issues. Register your Keurig with the manufacturer to receive these updates and stay informed about any potential problems and their solutions.

Alternatives to Keurig

Exploring Other Coffee Makers

If you’re consistently facing issues with your Keurig, you might want to explore other coffee makers. Traditional drip coffee makers, French presses, and single-cup brewers from other brands can offer reliable performance with different features and benefits.

Considering Pod-Free Options

Pod-free coffee makers like French presses and pour-over brewers avoid the complexity of electrical components and offer a more hands-on brewing experience. These options can be less prone to the types of failures that affect more technologically complex machines.

Budget and Premium Models

Evaluate your budget and coffee consumption habits to find a machine that suits your needs. Premium models often offer advanced features and greater durability, while budget options provide simplicity and affordability.

Conclusion

When your Keurig won’t turn on, it can disrupt your daily routine and leave you without your much-needed coffee. However, understanding the potential causes and knowing how to troubleshoot them can alleviate the frustration. From checking power outlets and inspecting internal components to resetting and maintaining the machine, these steps can often restore your Keurig’s functionality. If these methods don’t work, seeking professional help or considering a replacement ensures you can continue enjoying your favorite coffee drinks without prolonged interruptions. By following this guide, you’ll be well-equipped to diagnose and fix the issues preventing your Keurig from turning on, ensuring a smooth and enjoyable coffee experience each day.

Posted on

Why Won’t My Keurig Power On After Descaling?

keurig won't power

Descaling is a necessary maintenance step to keep your Keurig running smoothly by removing mineral buildup. However, it can be frustrating when your Keurig won’t power on after descaling. This issue can leave you craving your morning coffee and wondering what went wrong. Understanding the potential causes and solutions to this problem is crucial. This guide will delve into the reasons behind this malfunction and provide detailed steps to troubleshoot and fix it. We’ll explore various aspects such as electrical issues, internal component malfunctioning, and proper descaling procedures.

Electrical Connections and Power Supply

Check the Power Outlet

First, ensure that the power outlet is functioning correctly. To verify this, plug another appliance into the same outlet to see if it receives power. Sometimes, circuit breakers can trip, causing the outlet to lose power. If the outlet isn’t working and your Keurig won’t power on after descaling, reset the circuit breaker or try using a different outlet. This simple step can often resolve the issue.

Inspect the Power Cord

Examine the power cord for any visible damage or fraying. A damaged cord can prevent the Keurig from powering on. If you find any damage, refrain from using the machine and contact Keurig’s customer service for a replacement. Using a damaged power cord poses a fire hazard and should be addressed immediately.

Proper Plugging

Ensure the power cord is properly plugged into both the Keurig and the power outlet. Sometimes, the cord may become slightly dislodged during the descaling process. A secure connection is vital for the machine to function.

keurig won't power

Resetting the Keurig

Simple Reset

To reset your Keurig, unplug it from the power outlet and wait for about five minutes. After this period, plug the machine back in and try turning it on. This action can reset the internal electronics and often resolves minor glitches.

Advanced Reset

If a simple reset doesn’t work, try an advanced reset by holding down the power button for 10 seconds while the machine is unplugged. This procedure can help clear any internal errors that may have occurred during descaling. Reconnecting the machine afterward might restore its functionality.

User Manual Instructions

Refer to the user manual for specific reset instructions for your Keurig model. Different models may have unique reset procedures, so following the manufacturer’s guidelines is essential for resolving power-related issues.

Internal Component Checks

Inspect the Water Reservoir

The water reservoir might not be seated correctly after descaling. Ensure it’s snugly in place, as an improper connection can prevent the machine from powering on. Removing and reseating the reservoir can often restore the power connection.

Check for Moisture and Residue

Descaling solutions can sometimes leave moisture or residue inside the machine. Carefully open the Keurig and check the internal components for any dampness or buildup. Cleaning and drying these areas thoroughly can help restore functionality. Use a dry cloth to wipe away any residue.

Fuse and Circuit Board Inspection

For more advanced troubleshooting, inspect the fuse and circuit board inside the Keurig. These components can sometimes malfunction or become damaged during descaling. If you’re comfortable doing so, open the machine’s casing to check these parts, but be cautious as this can void the warranty. If you observe visible damage, contact Keurig support for further assistance.

keurig won't power

Descaling Process Issues

Incorrect Descaling Procedure

Following the correct descaling procedure is crucial for maintaining your Keurig. Double-check that you followed all the steps in the manual. An incomplete or incorrect descaling cycle can sometimes cause the machine to malfunction. Adhering to the manufacturer’s instructions ensures proper maintenance.

Use of Proper Descaling Solution

Using a proper descaling solution recommended by Keurig is essential. Generic or homemade solutions might not be compatible and can cause issues. Stick to the recommended products to avoid complications. Using improper solutions can lead to residue buildup or damage internal components.

Post-Descaling Rinse

After descaling, it’s important to run several clean water cycles through the machine to rinse out any remaining solution. Residual descaling solution can interfere with the machine’s operation. Ensuring a thorough rinse helps maintain the machine’s functionality and taste of the coffee.

External Factors and Malfunctions

Environmental Factors

Ensure the surrounding environment of your Keurig is conducive to its operation. Extreme temperatures, both hot and cold, can affect the internal components. Place the machine in a dry, moderate temperature area to prevent malfunctions related to environmental factors.

Blocked Needles

The needles that puncture the K-cup can become clogged during descaling, especially if debris is dislodged during the process. Use a needle cleaning tool or a paperclip to gently clear any blockages. Ensuring the needles are clean helps the machine operate correctly.

Safety Interlocks

Keurig machines have multiple safety interlocks to ensure proper operation. If any of these are not correctly engaged, the machine won’t power on. Check to ensure the lid is securely closed and the K-cup holder is properly seated. These interlocks protect the user and ensure safe operation.

When to Seek Professional Help

Warranty and Customer Support

If your Keurig is still under warranty, contact Keurig customer support. They can provide specific troubleshooting steps or arrange for a repair or replacement. Providing the serial number and purchase details can expedite the process. Utilizing the warranty helps avoid additional costs.

Professional Repair Services

For issues beyond simple troubleshooting, consider professional repair services. Local appliance repair shops can often fix electrical or mechanical issues. Ensure the technician is experienced with Keurig machines to ensure proper repairs. Professional services provide expertise and can extend the machine’s lifespan.

Replacement Options

If the machine is older and continually experiencing issues, it might be more cost-effective to replace it. Consider upgrading to a newer model with improved features. Researching the latest models can help you find a suitable replacement that fits your needs.

keurig won't powerPreventive Measures

Regular Maintenance

Regular maintenance can prevent many common issues. Descale your Keurig every three to six months, depending on usage and water hardness. Regular cleaning of the water reservoir, needles, and external parts can also extend the machine’s life. A maintenance schedule ensures consistent performance.

Using Filtered Water

Using filtered or bottled water can reduce mineral buildup and extend the time between descaling. This practice can help maintain the machine’s efficiency and improve the taste of your coffee. Reducing mineral buildup also prevents future descaling-related issues.

Avoiding Overuse

Avoid running the machine continuously without breaks. Overuse can lead to overheating and wear out internal components faster. Allow the Keurig to cool down between uses to prevent overheating-related issues.

Exploring Alternative Coffee Machines

Pros and Cons of Pod Machines

Consider the pros and cons of different coffee machines. Pod machines offer convenience but can be prone to specific issues like power failures. Weigh these factors while deciding if a pod machine is the best option for your coffee needs.

Traditional Drip Coffee Makers

Traditional drip coffee makers are reliable alternatives to pod machines. They have fewer electronic components that can malfunction and often provide better control over the brewing process. Although less convenient, they offer consistency and durability.

French Press and Pour-Over Methods

French press and pour-over methods are manual coffee-making alternatives that don’t rely on electrical components. These methods offer precise control over brewing and can produce rich, flavorful coffee. Exploring different brewing methods can add variety and reliability to your coffee routine.

Conclusion: keurig won’t power on after descaling

When your Keurig won’t power on after descaling, it can disrupt your daily routine and leave you without your much-needed coffee. However, understanding and addressing the potential causes can help restore your machine’s functionality. From checking electrical connections and conducting resets to inspecting internal components and following proper descaling procedures, comprehensive troubleshooting can resolve many issues. If these steps don’t work, seeking professional help or considering replacement options ensures you can continue enjoying your coffee without prolonged interruptions. Regular maintenance and preventive measures will also help keep your Keurig in good working order, preventing future issues and prolonging the machine’s life. By following this guide, you can effectively troubleshoot and fix your Keurig, ensuring a smooth and enjoyable coffee experience every day.