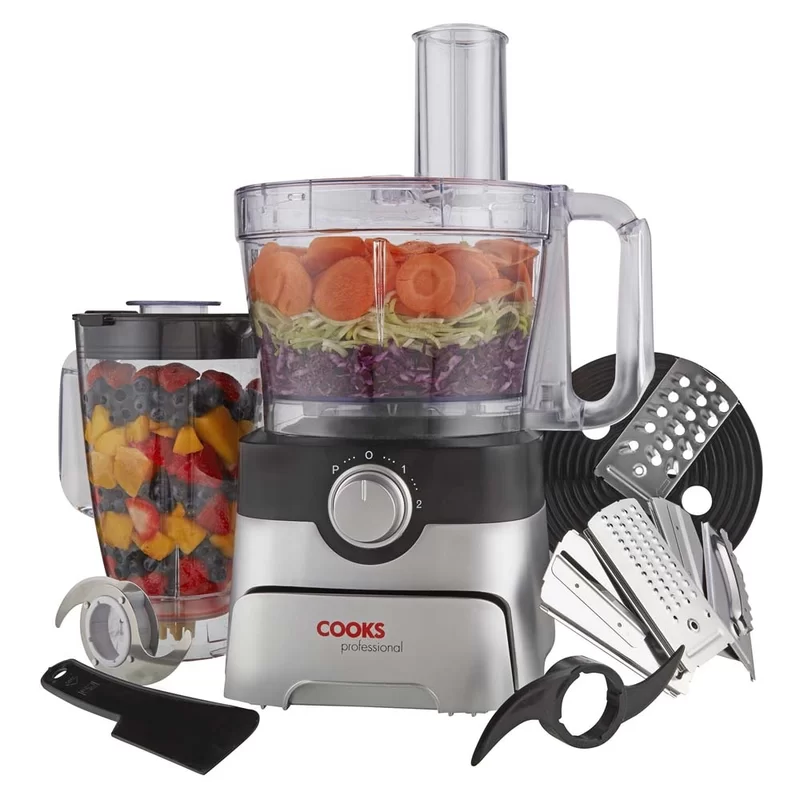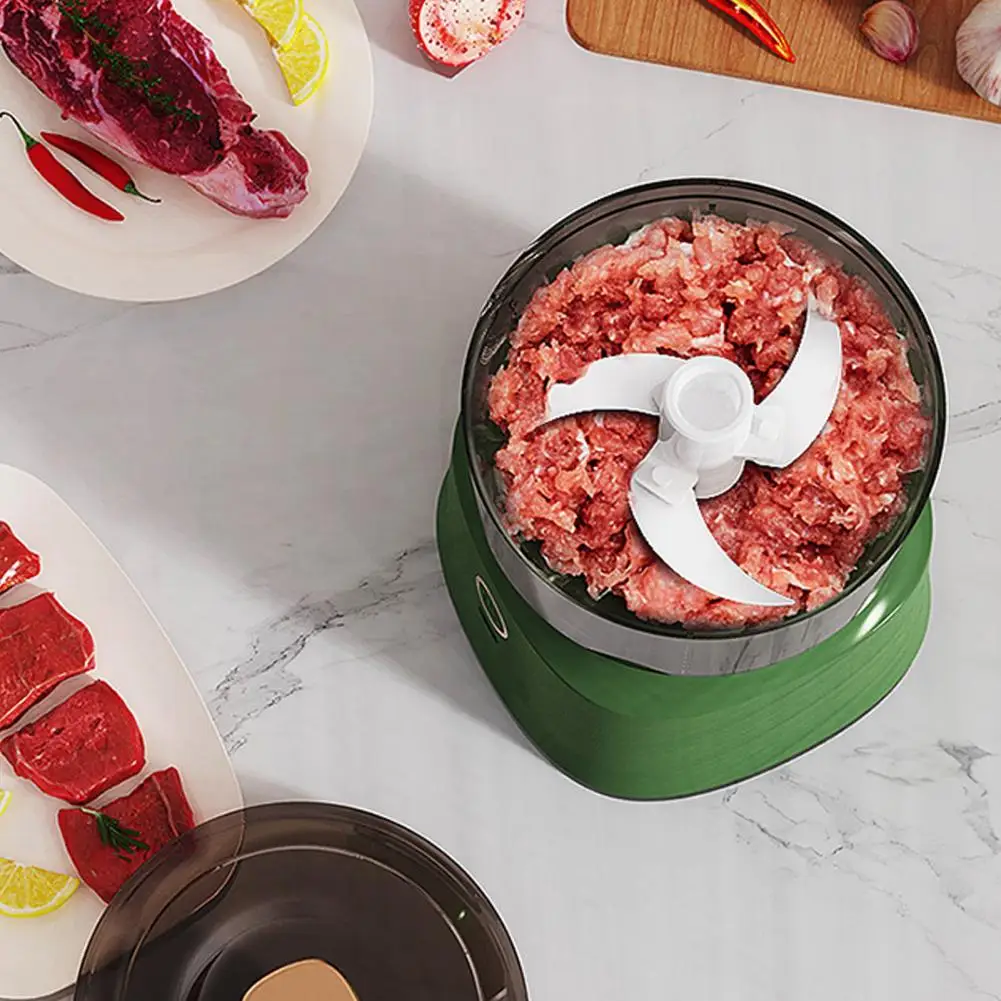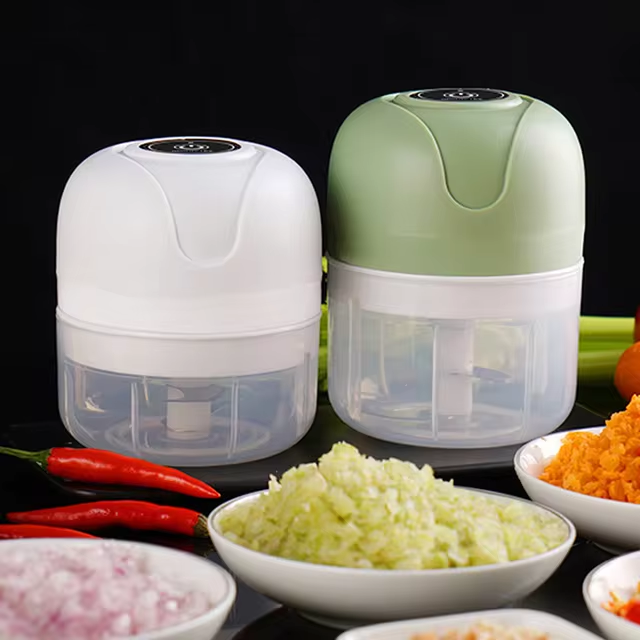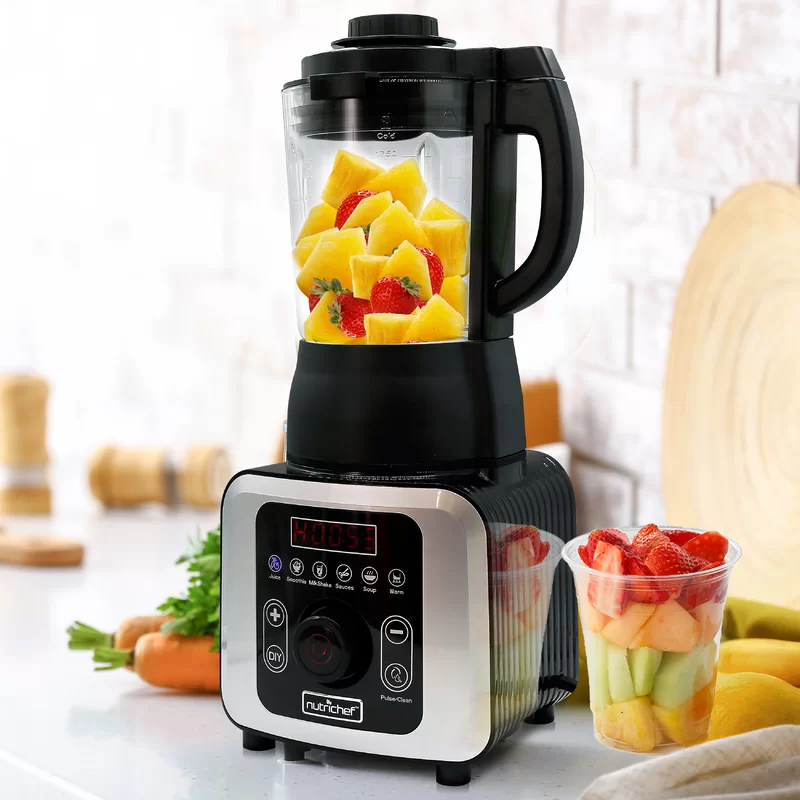
Posted on

Which Is Better: Electric or Mechanical Coffee Grinder?

electric coffee grinder

Introduction:

Understanding the differences between electric and mechanical (manual) coffee grinders can significantly impact your coffee brewing experience. Each type of grinder has its advantages and drawbacks, impacting factors like grind consistency, convenience, and user control. This detailed guide explores the benefits and disadvantages of both electric and mechanical coffee grinders to help you make an informed decision based on your coffee preferences and lifestyle.

electric coffee grinder

Which Is Better: Electric or Mechanical Coffee Grinder?

Electric Coffee Grinders: Features and Benefits

Electric coffee grinder(moulin à café électrique) offers convenience and efficiency, making them a popular choice for many coffee enthusiasts. They come with a range of features that enhance the coffee grinding process.

Speed and Efficiency: Electric grinders are known for their speed. They quickly and efficiently grind coffee beans, saving time, especially when preparing coffee for multiple people. The motorized operation ensures consistent performance with minimal effort.

Consistency in Grind: Electric grinders, particularly burr types, are renowned for their ability to produce a uniform grind. Consistency in particle size is crucial for even extraction and optimal flavor. High-end electric grinders offer precise adjustments for different grind sizes, from fine espresso to coarse French press.

Ease of Use: Most electric coffee grinders are user-friendly, with simple controls and settings. Push-button operation and programmable settings make it easy to achieve the desired grind without manual effort. This convenience is ideal for busy mornings or people who prefer a hassle-free coffee-making process.

Capacity and Size: Electric grinders usually have larger bean hoppers and ground coffee containers, making them suitable for grinding large quantities at once. This feature is beneficial for households with multiple coffee drinkers or for entertaining guests.

Additional Features: Advanced electric grinders come with extra features like built-in timers, digital displays, and smart technology integration (e.g., app connectivity). These features enhance the user experience and allow for more precise control over the grinding process.

electric coffee grinder

Mechanical Coffee Grinders: Features and Benefits

Mechanical or manual coffee grinders offer a different set of advantages that appeal to specific coffee lovers. They emphasize control, portability, and durability.

Control Over Grinding Process: Manual grinders give users full control over the grinding process. This hands-on approach allows for a more tactile and customizable experience. Adjusting the grind size is straightforward and often more precise, particularly with high-quality manual grinders.

Portability: One of the standout benefits of mechanical grinders is their portability. Compact and lightweight, they are perfect for travel, camping, or locations without electrical outlets. Their small size also makes them easy to store.

Quiet Operation: Manual grinders operate quietly, a significant advantage for those who prefer not to disturb their household or enjoy grinding coffee early in the morning. The absence of a motor means no loud noises during the grinding process.

Durability: Mechanical grinders are often built with fewer moving parts and simpler mechanisms, making them more durable and long-lasting. High-quality manual grinders are crafted from robust materials like stainless steel or ceramic, ensuring a long lifespan and consistent performance.

Cost-Effective: Manual grinders are generally more affordable than electric models. They offer a cost-effective way to enjoy freshly ground coffee without a significant initial investment. This affordability makes them an attractive option for beginners or those on a budget.

electric coffee grinder

Comparing Grind Quality and Consistency

When it comes to grind quality and consistency, both electric and manual grinders have their strengths and weaknesses.

Electric Grinders: Electric grinders, especially high-end burr models, excel in grind consistency and quality. They produce uniform particle sizes essential for different brewing methods. Adjustable settings allow for precise control over the coarseness or fineness of the grind.

Consistency Advantages:

  • Uniform grind size ensures even extraction.
  • Burr grinders provide better consistency compared to blade grinders.
  • Ideal for fine adjustments, particularly important for espresso.

Mechanical Grinders: Manual grinders also offer excellent grind quality, particularly those with conical burrs. While they require more effort, they can produce consistent grounds suitable for various brewing methods.

Consistency Advantages:

  • High-quality manual grinders deliver uniform particle sizes.
  • More control over grind size adjustments.
  • Suitable for all grind sizes, from fine to coarse.

Convenience and Usability

Convenience and ease of use are significant factors to consider when choosing between an electric and a manual grinder.

Electric Grinders: Electric grinders are known for their convenience. They offer quick and effortless grinding at the push of a button, making them ideal for those who value time and simplicity.

Convenience Advantages:

  • Quick and easy operation.
  • Suitable for large quantities of coffee.
  • Additional features like timers and programmable settings enhance usability.

Mechanical Grinders: Manual grinders require more time and effort but offer a more involved, hands-on experience. They are perfect for those who enjoy the ritualistic aspect of coffee preparation.

Convenience Advantages:

  • No need for electricity; can be used anywhere.
  • Quiet operation ideal for early morning or shared living spaces.
  • Compact and easy to store.

electric coffee grinder

Maintenance and Durability

Both electric and manual grinders require maintenance to ensure longevity and performance. However, they differ in terms of durability and ease of care.

Electric Grinders: Electric grinders have more components and require regular maintenance, including cleaning burrs or blades and inspecting electrical parts. Higher-end models may offer easy-to-clean designs.

Durability and Maintenance:

  • Regular cleaning to prevent residue buildup and maintain performance.
  • Electrical components may require repair or replacement over time.
  • High-quality models offer robust durability but at a higher cost.

Mechanical Grinders: Manual grinders have simpler mechanisms, making them easier to clean and maintain. Their durability is often superior due to fewer moving parts.

Durability and Maintenance:

  • Minimal maintenance; easy to disassemble and clean.
  • Fewer components mean fewer potential repairs.
  • High-quality materials ensure long-lasting performance.

Price and Value

The initial cost and overall value are essential considerations when choosing between an electric and a manual coffee grinder.

Electric Grinders: Electric grinders range from affordable models to high-end devices with advanced features. The cost can vary significantly based on the grinder’s build quality, features, and brand.

Price and Value:

  • Higher initial cost for high-quality models.
  • Additional features can justify the expense for avid coffee drinkers.
  • Long-term value includes ease of use and consistent performance.

Mechanical Grinders: Manual grinders are generally more affordable, with high-quality models available at a lower price point compared to electric grinders. They offer excellent value for those on a budget or seeking a cost-effective solution.

Price and Value:

  • More affordable initial investment.
  • High-quality manual grinders offer excellent performance and durability.
  • Long-term value includes portability and low maintenance costs.

electric coffee grinder

Environmental Impact and Sustainability

Sustainability and environmental impact are increasingly important considerations when choosing a coffee grinder.

Electric Grinders: Electric grinders require electricity, contributing to energy consumption. However, high-quality models built to last can reduce waste and the need for replacements.

Environmental Considerations:

  • Energy consumption varies by model; look for energy-efficient options.
  • Durable models reduce long-term waste.
  • Consider models with recyclable or environmentally friendly materials.

Mechanical Grinders: Manual grinders do not require electricity, making them a more eco-friendly choice. Their durability and simple design also contribute to lower environmental impact.

Environmental Considerations:

  • No electricity required; ideal for reducing energy consumption.
  • Long-lasting materials and fewer parts contribute to sustainability.
  • Compact design reduces material usage and waste.

Conclusion

Choosing between an electric or mechanical coffee grinder depends on your priorities, whether they are convenience, control, portability, or sustainability. Electric grinders offer speed, consistency, and ease of use, making them suitable for busy coffee enthusiasts. Mechanical grinders provide control, quiet operation, and durability, ideal for those who value a hands-on, eco-friendly approach. By understanding the features, benefits, and considerations of each type, you can select the best coffee grinder to enhance your brewing experience and enjoy the perfect cup of coffee.

Posted on

How to Make Cranberry Juice in a Blender?

blender

Introduction:

Making cranberry juice in a blender at home is a quick and convenient way to enjoy the many health benefits of this tart and refreshing beverage. This comprehensive guide explores each step, from selecting the right cranberries to creative variations, ensuring a delicious homemade cranberry juice. By understanding the correct methods, safety precautions, and enhancements, you can create a high-quality juice efficiently.

blender

How to Make Cranberry Juice in a Blender?

Selecting the Best Cranberries

Choosing high-quality cranberries is essential for making delicious and nutritious juice. Here’s how to select the best cranberries for your juice.

Fresh Cranberries: Fresh cranberries are great for juicing and usually available during the fall and winter months. Look for firm, plump, and bright red berries. Avoid cranberries that are soft, wrinkled, or have dark spots.

Frozen Cranberries: Frozen cranberries are a convenient option available year-round and retain most of their nutrients. Choose brands without added sugars or preservatives, and ensure the berries are whole and not stuck together in clumps.

Organic Cranberries: Opting for organic cranberries reduces your exposure to pesticides and other chemicals. Organic cranberries can be found fresh or frozen at health food stores or online.

Checking Harvest Date: If buying fresh cranberries, check for the harvest date. Freshly harvested cranberries will have optimal flavor and nutritional content.

blender

Preparing Cranberries for Blending

Proper preparation of cranberries ensures an efficient blending process and enhances the juice’s flavor and texture. Follow these steps for preparation.

Rinse Thoroughly: Rinse the cranberries under cold running water to remove any dirt or debris. Use a colander to make rinsing easier. This step is especially important for fresh berries.

Inspect and Sort: Inspect the cranberries and remove any that are bruised, darkened, or damaged. Sorting ensures only high-quality berries go into your juice.

Thaw Frozen Cranberries: If using frozen cranberries, thaw them before blending. Place them in a bowl at room temperature for about 30 minutes, or use the microwave’s defrost setting for a quicker option.

Measure the Cranberries: Measure the desired amount of cranberries for your juice. Typically, 2 to 3 cups of cranberries yield enough juice for multiple servings.

Basic Blending Method for Cranberry Juice

A step-by-step guide to the basic blending method ensures you make cranberry juice effectively and efficiently. Here’s how to create the perfect juice.

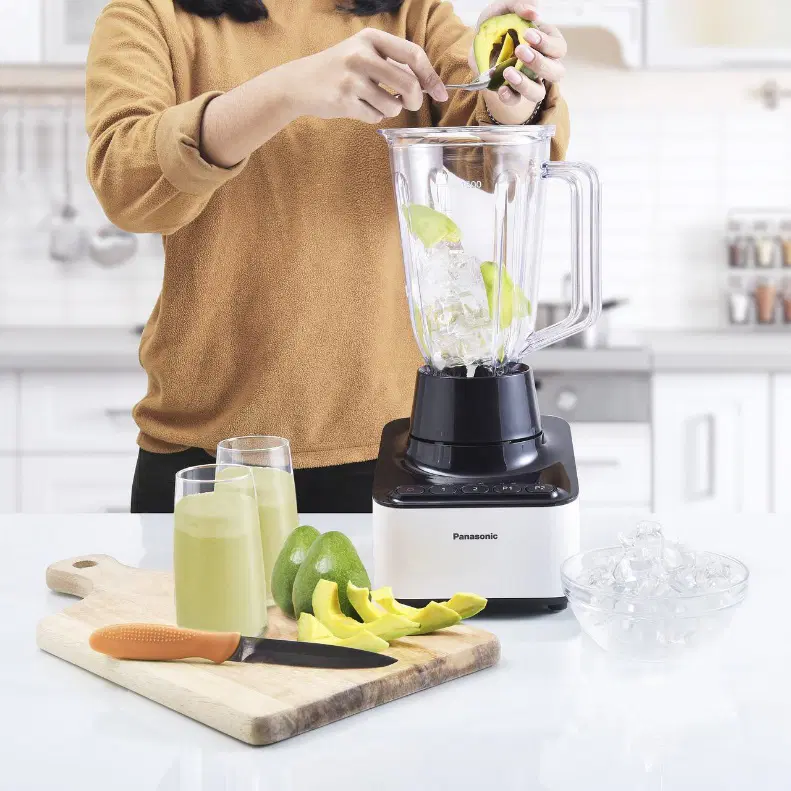
Blender Preparation: Ensure your blender is clean and ready to use. A high-speed blender works best for breaking down the cranberries and extracting juice. Make sure the blades and pitcher are intact and properly assembled.

Adding Cranberries: Place the prepared cranberries into the blender. For a standard serving, use about 2 cups of cranberries. Adjust the amount based on your needs and blender capacity.

Adding Water: Add water to the blender. The amount of water depends on the desired consistency and taste. Generally, 2 to 3 cups of water per 2 cups of cranberries provide a balanced juice. More water yields a lighter juice, while less water results in a more concentrated flavor.

Blending Process: Blend the cranberries and water at high speed until you achieve a smooth consistency. This process usually takes about 1 to 2 minutes, depending on your blender’s power. Pause to scrape down the sides if necessary to ensure all berries are blended.

Straining the Juice: Use a fine mesh strainer or cheesecloth to strain the blended mixture into a large bowl or pitcher. This step removes the pulp and seeds, resulting in a smooth juice. For a pulp-free juice, you may need to strain multiple times.

Final Adjustments: Taste the juice and adjust if needed. Add more water if it’s too strong, or a sweetener like honey, agave, or sugar if it’s too tart. Stir well to combine and ensure the juice is homogeneous.

blender

Safety Tips for Making Cranberry Juice

Making cranberry juice in a blender requires certain safety precautions to ensure a smooth and accident-free process. Keep these tips in mind.

Proper Handling of Blades: The blender blades are sharp and can cause injuries if not handled properly. Assemble and disassemble the blender carefully, and always unplug it before cleaning or handling the blades.

Avoid Overfilling: Do not overfill the blender pitcher. Leave some space to allow for expansion and prevent spills. Overfilling can also strain the motor and reduce blending efficiency.

Securing the Lid: Ensure the blender lid is securely in place before turning on the blender. An improperly secured lid can cause the contents to spill during blending, causing a mess and potential burns if the mixture is hot.

Cleaning and Hygiene: Maintain cleanliness throughout the process. Wash your hands, clean the blender, and use sanitized utensils and containers. Proper hygiene prevents contamination and ensures a safe, fresh juice.

Monitoring Blending: Keep an eye on the blending process. If the blender struggles or makes unusual noises, stop and check for any issues. Continuous monitoring helps prevent motor burnout and ensures even blending.

Enhancing and Flavoring Cranberry Juice

Adding extra flavors and enhancements can elevate your homemade cranberry juice, creating a more enjoyable drink. Here are some ideas for flavoring.

Natural Sweeteners: Sweeten your cranberry juice naturally with honey, agave syrup, or maple syrup. These alternatives to refined sugar provide a richer taste and additional health benefits.

Fruits and Berries: Combine cranberries with other fruits for a unique flavor profile. Options like apples, oranges, strawberries, or blueberries blend well with cranberries and add natural sweetness.

Herbs and Spices: Infuse your juice with herbs and spices like mint, basil, or ginger. These additions not only enhance the flavor but also provide additional health benefits and complexity to the drink.

Citrus Zest: Adding the zest of lemons, limes, or oranges can brighten up the cranberry juice with a fresh, tangy note. A small amount goes a long way, so use it sparingly.

Vanilla Extract: A drop or two of vanilla extract adds warmth and depth to the cranberry juice. It pairs well with the tartness of cranberries and balances the overall flavor.

blender

Creative Cranberry Juice Variations

Experimenting with different variations of cranberry juice keeps the drink exciting and tailored to your preferences. Here are a few creative ideas.

Cranberry Apple Juice: Blend cranberries with fresh apples. The sweetness of apples complements the tartness of cranberries, resulting in a balanced and refreshing juice.

Cranberry Citrus Punch: Combine cranberries with orange and lemon juice for a zesty citrus punch. This variation is perfect for a revitalizing drink during warm weather.

Cranberry and Pomegranate Mix: Mix cranberries with pomegranate seeds or juice for a richly flavored and antioxidant-packed beverage.

Cranberry Ginger Juice: Blend fresh ginger with cranberries for a spicy kick. Ginger adds warmth and a health boost to the juice.

Cranberry Mint Cooler: Add fresh mint leaves to the blender for a refreshing minty twist. This variation is invigorating and perfect for a summer day.

Ensuring Consistent Results

Achieving consistent results with your homemade cranberry juice involves a few key practices. Here’s how to ensure every batch turns out just right.

Uniform Cranberry Quality: Use cranberries of similar freshness, size, and quality for each batch. Consistency in the raw ingredients ensures uniform flavor and texture.

Measure Ingredients: Measure the cranberries and water accurately for each batch. Following a standard ratio achieves consistent flavor and strength.

Blending Time: Blend for a consistent duration each time. This helps achieve the same smooth texture for every batch.

Straining Technique: Use the same straining method and tools (strainer, cheesecloth) to ensure uniform juice clarity and pulp content.

Regular Tasting: Taste the juice and adjust flavors consistently. Sweeteners, citrus, or other flavor enhancers should be added in measured amounts for similar results.

blender

Health Benefits of Cranberry Juice

Incorporating cranberry juice into your diet offers numerous health benefits. Here are some reasons to enjoy your homemade cranberry juice.

Rich in Antioxidants: Cranberries are high in antioxidants, which protect your cells from damage caused by free radicals. Antioxidants support overall health and may reduce the risk of chronic diseases.

Supports Urinary Health: Cranberry juice is known for its role in preventing urinary tract infections (UTIs). Compounds in cranberries, such as proanthocyanidins, inhibit bacteria from adhering to the urinary tract walls.

Boosts Immunity: Cranberries are rich in vitamins C and E, which boost your immune system. Regular consumption of cranberry juice can help your body fight off infections and illnesses.

Promotes Heart Health: Drinking cranberry juice may support heart health by improving cholesterol levels, reducing blood pressure, and promoting healthy blood vessels. Cranberries contain polyphenols, which are beneficial for cardiovascular health.

Improves Digestion: Cranberries’ fiber content aids digestion and promotes a healthy gut. Consuming cranberry juice can help prevent constipation and support a balanced digestive system.

Storing and Serving Cranberry Juice

Proper storage and serving techniques ensure that your homemade cranberry juice remains fresh and enjoyable. Follow these guidelines for optimal results.

Refrigeration: Store the cranberry juice in an airtight container and refrigerate it. Freshly made juice typically lasts about 5-7 days when properly refrigerated.

Stir Before Serving: Cranberry juice may separate upon standing. Stir well before serving to mix any settled pulp or particles and achieve an even consistency.

Ice Cubes: Serve the cranberry juice over ice for a refreshing chilled beverage. Ice cubes also help dilute the juice slightly, balancing its tartness.

Presentation: Use glasses with a rim garnished with sugar or salt for a festive touch. Add a slice of lime or a sprig of mint for an attractive presentation.

Freezing: For longer storage, freeze the juice in ice cube trays and transfer the frozen cubes to freezer-safe bags. Cranberry juice cubes can be added to other drinks or thawed as needed.


Conclusion

Making cranberry juice in a blender is a simple and rewarding process that allows you to enjoy a fresh, nutritious, and customizable beverage. By selecting high-quality cranberries, following the preparation and blending methods, experimenting with flavors, and adhering to safety guidelines, you can create delicious cranberry juice that suits your taste and nutritional preferences. This comprehensive guide equips you with the knowledge and confidence to produce high-quality homemade cranberry juice, enhancing your diet and overall well-being. Enjoy the vibrant taste and numerous health benefits of your freshly made cranberry juice!

Posted on

Can You Make Hummus in a Blender?

blender

Introduction:

Hummus, a creamy and flavorful dip made primarily from chickpeas, tahini, olive oil, lemon juice, and garlic, is a popular dish in many cultures. While traditional hummus is often made using a food processor, many people wonder if a blender can achieve similar results. In this detailed guide, we will explore the process of making hummus in a blender, evaluate the pros and cons, offer tips for achieving the perfect texture, and provide delicious variations to enhance your culinary repertoire.

blender

Can You Make Hummus in a Blender?

Adequate Blender for Hummus

Using a blender for hummus is entirely feasible, but the type of blender you use matters.

High-Powered Blenders: High-powered blenders, such as Vitamix or Blendtec, are ideal for making hummus. Their strong motors and sharp blades make it easy to achieve a smooth, creamy texture without much effort.

Standard Blenders: Standard blenders can also be used, albeit with a few adjustments. You may need to add extra liquid or pulse the ingredients more frequently to achieve the desired consistency.

Food Processor vs. Blender: Compared to food processors, blenders create a smoother hummus since they blend at higher speeds. However, food processors may offer more control over texture and make it easier to incorporate ingredients gradually.

Ingredients for Classic Hummus

Before diving into the blending process, gather the primary ingredients for traditional hummus.

Chickpeas: The main ingredient in hummus, chickpeas (also known as garbanzo beans), can be used either canned or cooked from dry. Canned chickpeas are convenient, while homemade cooked chickpeas can offer a fresher taste. If using canned chickpeas, rinse and drain them thoroughly.

Tahini: Tahini, a paste made from sesame seeds, adds a nutty flavor and creamy texture to hummus. Ensure your tahini is well-stirred before using, as it can separate over time.

Olive Oil: Extra virgin olive oil contributes to the richness and smoothness of hummus. A high-quality oil enhances both flavor and consistency.

Lemon Juice: Freshly squeezed lemon juice adds a bright, tangy element to hummus, balancing the richness of the other ingredients.

Garlic: Garlic provides a pungent, savory depth to hummus. Adjust the amount based on your preference for garlic intensity.

Cumin: Cumin is a common spice in hummus, lending a warm, earthy flavor. It’s optional but highly recommended for traditional recipes.

Salt and Pepper: Season with salt and pepper to taste. These basic seasonings amplify the flavors of the other ingredients.

Water or Aquafaba: Adding a bit of water or aquafaba (the liquid from canned chickpeas) can help achieve the desired consistency and smoothness in your hummus.

blender

Blending Process for Hummus

Now that you have all the necessary ingredients, let’s delve into the step-by-step process of making hummus in a blender.

Prepare the Chickpeas: If using dried chickpeas, soak them overnight and cook them until tender. For canned chickpeas, rinse and drain them thoroughly. Reserve some of the aquafaba if you plan to use it as a liquid in your hummus.

Combine Ingredients: Add the chickpeas, tahini, olive oil, lemon juice, minced garlic, cumin, salt, and pepper to the blender. Begin with a small amount of water or aquafaba.

Start Blending: Start the blender on a low setting and gradually increase the speed. If the mixture seems too thick or isn’t blending smoothly, add more water or aquafaba a little at a time until you achieve the desired consistency.

Pause and Scrape: Occasionally stop the blender to scrape down the sides with a spatula. This ensures all ingredients are evenly incorporated and promotes a smoother texture.

Blend Until Smooth: Continue blending until the hummus reaches a creamy, smooth consistency. High-powered blenders may only take a minute or two, while standard blenders might require a bit more time.

Adjust Seasoning: Taste the hummus and adjust the seasoning as needed. Add more salt, lemon juice, or garlic based on your preference.

Final Blend: Give the hummus one final blend to ensure all adjustments are well incorporated.

Achieving the Perfect Texture

The desired texture of hummus can vary, but generally, a smooth, creamy consistency is preferred. Here are some tips to achieve this using a blender.

Use Warm Ingredients: Using warm chickpeas or adding warm water/aquafaba can help the blender process the ingredients more smoothly, resulting in a creamier texture.

Peel the Chickpeas: To achieve an ultra-smooth texture, consider peeling the chickpeas before blending. While this can be time-consuming, it removes the skins that can cause graininess. Rub the chickpeas between your fingers or in a clean kitchen towel to loosen the skins, then discard them.

Start Slow, Then Speed Up: Begin blending at a slow speed and gradually increase to high. This ensures thorough initial mixing and prevents splattering.

Add Liquid Slowly: Adding water or aquafaba slowly, a tablespoon at a time, prevents the hummus from becoming too runny. This control helps you reach the ideal consistency.

Blend Longer: Don’t rush the blending process. Allow the blender to run long enough to break down all ingredients completely, achieving the smoothest result possible.

blender

Flavor Variations

Hummus is a versatile base that can be customized with various flavors. Here are some popular variations to elevate your homemade hummus:

Roasted Red Pepper Hummus: Add roasted red peppers to the blender along with the traditional ingredients. Adjust the seasonings to taste, and blend until smooth. The peppers add a sweet, smoky flavor and vibrant color.

Garlic and Herb Hummus: Enhance your hummus with fresh herbs such as parsley, cilantro, or basil. Add extra garlic for a more robust flavor. Blend until the herbs are finely incorporated.

Spicy Hummus: Introduce heat by adding ingredients like roasted jalapeños, cayenne pepper, or hot sauce. Adjust the spice level according to your preference.

Avocado Hummus: For a creamy, rich twist, add ripe avocado to your hummus. This variation not only adds smoothness but also a hint of fresh, buttery flavor.

Sun-Dried Tomato Hummus: Incorporate sun-dried tomatoes into your hummus mixture. These tomatoes add a tangy, slightly sweet flavor that’s both unique and delicious.

Beet Hummus: Add cooked or roasted beets to your hummus for a vibrant color and earthy taste. Beets not only enhance the flavor but also boost the nutritional profile of your hummus.

Health Benefits of Hummus

Hummus is not only delicious but also packed with nutritional benefits that make it a healthy addition to your diet.

Rich in Protein: Chickpeas are an excellent source of plant-based protein, making hummus a great option for vegetarians and vegans looking to boost their protein intake.

High in Fiber: Hummus is high in dietary fiber, which aids digestion, helps maintain healthy cholesterol levels, and keeps you feeling full longer.

Healthy Fats: The olive oil and tahini in hummus provide healthy monounsaturated and polyunsaturated fats, which are beneficial for heart health.

Vitamins and Minerals: Hummus contains essential vitamins and minerals, including folate, iron, magnesium, phosphorus, and B vitamins, which support overall well-being.

Low Glycemic Index: Hummus has a low glycemic index, meaning it helps regulate blood sugar levels and provides sustained energy without causing spikes.

blender

Serving Suggestions

Hummus is incredibly versatile and can be enjoyed in numerous ways. Here are some popular serving suggestions:

As a Dip: Serve hummus with fresh vegetable sticks, pita bread, tortilla chips, or crackers for a delicious and healthy snack or appetizer.

In Sandwiches and Wraps: Spread hummus on bread or tortillas as a base for sandwiches and wraps. Pair it with fresh vegetables, avocado, and lean proteins for a satisfying meal.

As a Sauce: Use hummus as a sauce for grilled meats, roasted vegetables, or salads. Its creamy texture and rich flavor enhance a wide range of dishes.

With Meals: Add hummus to grain bowls, falafel, or kebabs to elevate the flavor and nutritional content. It pairs well with Mediterranean and Middle Eastern dishes.

Storing Homemade Hummus

Proper storage of homemade hummus ensures its freshness and safety for later consumption.

Refrigeration: Store homemade hummus in an airtight container and refrigerate it. It typically lasts up to a week in the refrigerator. If the hummus separates, simply stir it to reincorporate the ingredients.

Preventing Oxidation: To prevent the top layer from drying out or oxidizing, drizzle a thin layer of olive oil over the surface before sealing the container. Pressing plastic wrap directly onto the surface of the hummus can also help.

Freezing: For longer storage, hummus can be frozen. Portion it into airtight containers or freezer bags, leaving some space for expansion. Hummus can be frozen for up to three months. Thaw it in the refrigerator before use and stir well to restore its texture.

blender

Troubleshooting Common Issues

Even with the best efforts, you may encounter some issues while making hummus in a blender. Here are solutions to common problems:

Too Runny: If your hummus is too runny, add more chickpeas or reduce the liquid. Blend until you achieve the right consistency.

Too Thick: If the hummus is too thick and difficult to blend, add small amounts of water, olive oil, or lemon juice until it reaches the desired smoothness.

Grainy Texture: A grainy texture may result from under-blending or unpeeled chickpeas. Blend longer and, if necessary, peel the chickpeas to achieve a smoother consistency.

Bitter Taste: A bitter taste can result from using too much tahini or old, rancid sesame seeds. Ensure your tahini is fresh and use it sparingly.

Lacks Flavor: If the hummus lacks flavor, adjust the seasoning. Add more lemon juice, garlic, salt, or spices like cumin to enhance the taste.

Conclusion

Making hummus in a blender is not only possible but also convenient and effective. By following the detailed blending process, utilizing tips for achieving the perfect texture, exploring various flavor variations, and understanding the health benefits, you can create delicious homemade hummus that suits your taste and dietary preferences. With the right approach and a little creativity, blender-made hummus can be a staple in your kitchen, offering a versatile, nutritious, and flavorful addition to meals and snacks.

Posted on

How to Puree Without a Blender?

blender

Introduction:

Pureeing is a common culinary technique used to create smooth, creamy textures in dishes ranging from soups and sauces to baby food and desserts. While a blender is a convenient tool for pureeing, it is possible to achieve similar results using other kitchen equipment and techniques. Whether you find yourself without a blender or simply prefer alternative methods, this guide provides detailed instructions and tips on how to puree without a blender effectively and effortlessly.

blender

How to Puree Without a Blender?

Using a Food Processor

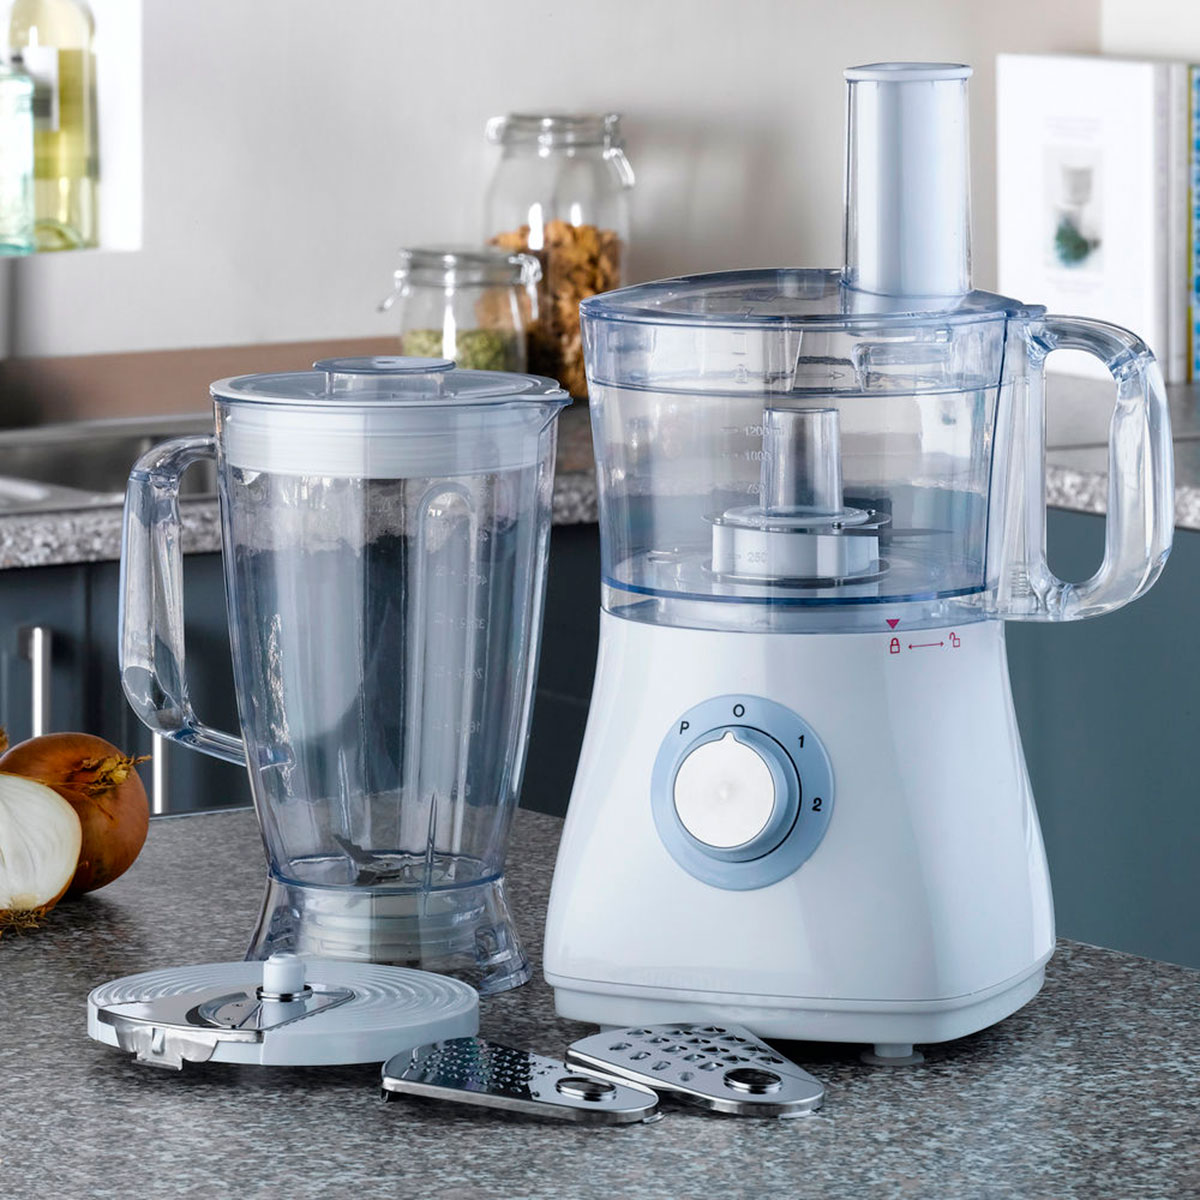
A food processor is a versatile kitchen appliance that can easily handle pureeing tasks. It might not be a blender, but it certainly comes close in terms of effectiveness.

Steps for Pureeing with a Food Processor:

  1. Prepare Ingredients: Cut your ingredients into small, evenly-sized pieces to ensure they process evenly.
  2. Load the Processor: Place the ingredients into the food processor bowl, but avoid overloading it to ensure smooth, consistent processing.
  3. Pulse and Process: Use the “pulse” button to start breaking down the ingredients. After a few pulses, switch to a continuous process mode. Scrape down the sides of the bowl as needed to ensure thorough blending.
  4. Check Consistency: Check the texture regularly. If the mixture is too thick, add a small amount of liquid (water, broth, or milk) and continue processing until you achieve the desired smoothness.

Avoiding Overprocessing: Be mindful not to overprocess your mixture, especially if you are pureeing fibrous or starchy ingredients. Overprocessing can result in a gluey texture.

Using a Potato Masher or Fork

A potato masher or a sturdy fork can be an effective tool for pureeing soft fruits and cooked vegetables. This method requires a bit of manual effort but can yield excellent results.

Steps for Pureeing with a Potato Masher or Fork:

  1. Cook Ingredients Thoroughly: Ensure that your fruits or vegetables are cooked until very soft, as this makes them easier to mash.
  2. Place in a Large Bowl: Transfer the cooked ingredients to a large mixing bowl to provide ample space for mashing.
  3. Mash Gradually: Use a potato masher or fork to mash the ingredients, applying steady pressure. Rotate the bowl and scrape the sides to ensure an even mash.
  4. Add Liquid if Necessary: If the mixture is too thick or dry, add a small amount of cooking liquid or another suitable liquid to help achieve a smoother texture.

Achieving Smooth Texture: While this method may not produce a perfectly smooth puree, it works well for dishes where a slightly textured consistency is acceptable, such as rustic soups or chunky sauces.

blender

Using a Sieve or Food Mill

A sieve or food mill can create a smooth puree by pressing the ingredients through a fine mesh. This technique is particularly useful for removing seeds, skins, and fibrous material.

Steps for Pureeing with a Sieve or Food Mill:

  1. Cook Ingredients: Ensure that your fruits or vegetables are fully cooked and soft.
  2. Choose the Right Tool: Select a fine-mesh sieve or a food mill with the appropriate disc size for your desired consistency.
  3. Press the Ingredients: Place the cooked ingredients into the sieve or food mill. Use a spoon, spatula, or the food mill’s handle to press the contents through the mesh or disc.
  4. Collect the Puree: Collect the puree in a bowl placed below the sieve or food mill, scraping the underside as needed to gather all the smooth mixture.

Advantages of a Food Mill: Food mills are particularly effective for making baby food, sauces, and soups, as they can easily remove skins and seeds while producing a smooth texture.

Using a Knife and Cutting Board

For certain dishes, a finely chopped or minced texture may be an acceptable alternative to a completely smooth puree. This method relies on precise knife skills.

Steps for Pureeing with a Knife:

  1. Prepare Ingredients: Clean, peel, and chop your ingredients into small, uniform pieces.
  2. Cook Until Soft: Cook the ingredients until they are very tender, making them easier to mince.
  3. Chop Finely: Using a sharp chef’s knife, finely chop the cooked ingredients. Continue chopping until you achieve the desired texture.
  4. Combine Ingredients: If necessary, combine the minced ingredients with a small amount of liquid or other components to enhance the consistency.

Applications: This method is suitable for making spreads, relishes, or textured sauces where a fully smooth consistency is not required.

blender

Using an Immersion Blender

An immersion blender, or stick blender, is another handy tool for pureeing. It offers more control compared to traditional blenders and can be used directly in the cooking pot.

Steps for Pureeing with an Immersion Blender:

  1. Cook Ingredients: Ensure your ingredients are fully cooked and soft.
  2. Prepare for Blending: Transfer the ingredients to a deep pot or bowl if they are not already in one suitable for blending.
  3. Submerge and Blend: Submerge the immersion blender into the ingredients, starting on low speed. Move the blender around to ensure even blending.
  4. Check and Adjust: Stop blending periodically to check the consistency. Add liquid as needed and continue blending until you achieve a smooth puree.

Versatility: Immersion blenders are versatile and can also be used for making smoothies, soups, and emulsifying sauces.

Using a Mortar and Pestle

The traditional mortar and pestle method is excellent for pureeing smaller quantities and creating a smooth paste. This method is particularly effective for herbs, spices, and certain types of cooked vegetables.

Steps for Pureeing with a Mortar and Pestle:

  1. Prepare Ingredients: Ensure ingredients are chopped into smaller pieces for easier grinding.
  2. Add Ingredients: Place a small amount of the chopped or cooked ingredients into the mortar.
  3. Grind and Crush: Use the pestle to grind and crush the ingredients against the sides and bottom of the mortar in a circular motion.
  4. Continue Until Smooth: Continue grinding until you achieve the desired consistency, adding small quantities of liquid if necessary.

Best Uses: This method is ideal for making pesto, garlic paste, guacamole, and spice blends. It can also be used for small-batch baby food.

blender

Steaming and Pureeing

Steaming works well for softening fruits and vegetables, making them easier to puree using manual methods.

Steps for Steaming and Pureeing:

  1. Prepare and Steam: Clean, peel, and chop the ingredients. Steam them until they are very tender using a steaming basket or microwave.
  2. Transfer to Bowl: Remove the steamed ingredients and transfer them to a mixing bowl.
  3. Mash or Blend: Use a potato masher, fork, or manual grinder to mash the steamed ingredients until smooth. Alternatively, an immersion blender can also be used.

Retaining Nutrients: Steaming helps retain most of the nutrients in the vegetables and fruits, making this a healthy option for preparing purees, especially for baby food.

Using a Ricer

A potato ricer can be an effective tool for pureeing soft vegetables and fruits, providing a smooth, consistent texture.

Steps for Pureeing with a Ricer:

  1. Cook Ingredients: Cook the ingredients until they are very tender.
  2. Load the Ricer: Place the cooked ingredients into the ricer’s chamber.
  3. Press Through: Press the handles together to force the ingredients through the small holes, creating a smooth puree.
  4. Collect the Puree: Gather the puree from the ricer and mix it to ensure even consistency.

Applications: This method is excellent for potatoes, apples, and other soft fruits and vegetables, providing a smooth texture without lumps.

Combining Techniques

Sometimes, using a combination of these methods can yield the best results for achieving the desired puree consistency.

Steps for Combining Techniques:

  1. Start with Steaming: Begin by steaming the ingredients to soften them.
  2. Initial Mashing: Use a potato masher or fork to break down the steamed ingredients.
  3. Refining Texture: Pass the mashed ingredients through a sieve, food mill, or use an immersion blender for a finer texture.

Advantages: Combining techniques allows you to control the texture more precisely and ensures a smooth, lump-free puree.

blender

Storing Purees

Proper storage of purees ensures they remain fresh and safe for later use.

Steps for Storing Purees:

  1. Cool Properly: Allow purees to cool to room temperature before storing.
  2. Use Airtight Containers: Store purees in airtight containers or freezer-safe bags to prevent contamination and freezer burn.
  3. Label and Date: Label the containers with the contents and the date of preparation for easy identification.

Preserving Freshness: Purees can be refrigerated for up to three days or frozen for up to three months. Thaw frozen purees in the refrigerator or use a gentle heat source for reheating.

Final Tips and Tricks

Achieving the perfect puree without a blender can be perfected with a few additional tips and tricks.

Smooth Texture: Add a small amount of liquid, such as broth, milk, or water, to help achieve a smoother consistency.

Preventing Air Bubbles: Avoid incorporating air into the puree during manual mashing or blending to prevent foam and bubbles.

Season Judiciously: Taste and adjust seasoning after pureeing, as flavors can intensify or need balancing after the texture is adjusted.

Adaptive Techniques: Adjust your techniques based on the ingredients. For example, fibrous vegetables may require more thorough mashing or passing through a sieve.

Conclusion

Pureeing without a blender is entirely achievable using various kitchen tools and techniques. Whether using a food processor, potato masher, sieve, or a combination of methods, you can create smooth, delicious purees for a variety of dishes. Proper preparation, technique, and storage practices ensure your purees are flavorful and consistent. By understanding and utilizing these methods, you can confidently tackle pureeing tasks without relying on a blender, bringing versatility and creativity to your culinary adventures.

Posted on

The Vegetable Slicer: Simplifying Your Culinary Creations

vegetable slicer

Introduction:

Unleashing the Power of the Vegetable Slicer

In the fast-paced world of modern cooking, efficiency and precision are key elements to creating delicious meals. The vegetable slicer is a versatile tool that revolutionizes the way we prepare vegetables, saving time and effort while ensuring consistent and professional results. In this comprehensive guide, we will explore the incredible benefits and functionalities of the vegetable slicer. From its various cutting options to its ease of use and maintenance, discover how this indispensable kitchen tool simplifies your culinary creations and elevates your cooking experience.

vegetable slicer

The Vegetable Slicer: Simplifying Your Culinary Creations

  1. The Power of Precision: Consistent and Perfectly Cut Vegetables

a. Versatile cutting options: The vegetable slicer offers a range of cutting options to suit any recipe or preference. From thin slices for delicate salads to julienne or ribbon cuts for stir-fries and garnishes, this device provides consistent and precise results every time.

b. Adjustable thickness settings: Many vegetable slicers feature adjustable thickness settings, allowing you to customize the thickness of your slices. Whether you desire paper-thin cuts or thicker pieces for heartier dishes, the slicer accommodates your desired thickness preferences.

c. Uniformity in presentation: With a vegetable slicer, your vegetable slices will be uniform in shape and size, giving your dishes a visually appealing presentation. This consistency enhances the overall presentation of your culinary creations and ensures even cooking or marinating.
vegetable slicer

  1. Enhancing Efficiency: Saving Time and Effort in the Kitchen

a. Quick and effortless operation: Vegetable slicers are designed for efficiency, allowing you to slice vegetables with ease and speed. With just a few simple motions, you can transform a whole vegetable into perfectly sliced pieces, minimizing the time and effort spent on vegetable preparation.

b. Time-saving meal prep: By utilizing a vegetable slicer, you can significantly reduce the time spent on meal preparation. Whether you’re slicing cucumbers for a salad or preparing zucchini for a pasta dish, this tool streamlines the process and lets you focus on other aspects of your meal.

c. Consistency in slicing: Traditional hand cutting can result in inconsistent vegetable slices, leading to uneven cooking times or textures. With a vegetable slicer, you can achieve uniform slices every time, ensuring even cooking, consistent flavors, and a professional touch to your dishes.

  1. Safe and User-Friendly: Convenient Features for All

a. Built-in safety features: Vegetable slicers are equipped with built-in safety features to protect your hands during use. Many models come with finger guards or food holders to prevent accidental cuts and promote safe slicing.

b. Non-slip bases: Vegetable slicers often feature non-slip bases or suction feet to provide stability during use. This reduces the risk of the device slipping or moving around on the countertop, promoting safe and efficient slicing.

c. Easy assembly and disassembly: Most vegetable slicers are designed for easy assembly and disassembly, making them convenient to use and clean. The various slicer components can be easily separated, allowing for thorough washing and hassle-free storage.

vegetable slicer

  1. Maintenance and Care: Keeping Your Vegetable Slicer in Prime Condition

a. Cleaning simplicity: Vegetable slicers are typically made with materials that are easy to clean. Many models are dishwasher safe, but hand washing with warm soapy water and a brush is often sufficient for regular maintenance.

b. Blade maintenance: Proper blade maintenance is essential for the longevity and performance of your vegetable slicer. Some models have removable blades that can be sharpened or replaced when necessary. Follow the manufacturer’s instructions to ensure proper blade care and maintenance.

c. Drying and storage: After cleaning your vegetable slicer, ensure that all components are thoroughly dried before storing. To prolong its lifespan, store the slicer in a dry and safe place, eliminating the risk of damage or deterioration.

vegetable slicer

  1. Culinary Versatility: Expanding Your Recipe Repertoire

a. Creative and versatile slicing techniques: With a vegetable slicer, you can experiment with various slicing techniques, opening doors to a world of culinary creativity. From waffle cuts for unique textures to crinkle cuts for added visual appeal, the slicer allows you to explore new possibilities in your recipes.

b. Slicing multiple vegetables: The vegetable slicer enables you to slice multiple vegetables efficiently, making it an excellent tool for creating salads, gratins, layered dishes, or even vegetable chips. Enjoy the convenience of effortlessly slicing a variety of vegetables to harmoniously merge flavors and textures in your favorite dishes.

c. Fruit slicing capabilities: Some vegetable slicers also have the capability to slice fruits, expanding their versatility in the kitchen. Whether you want thin apple slices for a pie or elegant citrus garnishes for cocktails, the slicer provides consistent results for your fruit slicing needs.

  1. Economical and Environmentally Friendly: Reducing Food Waste

a. Utilizing the entire vegetable: With a vegetable slicer, you can make the most out of your vegetables, minimizing waste. By slicing vegetables in their entirety, you maximize their use in various dishes, reducing unnecessary discarding of edible parts.

b. Less food preparation waste: The precision and efficiency of a vegetable slicer help reduce food preparation waste. Compared to traditional hand cutting methods, the slicer ensures minimal trimming or uneven slicing, saving both time and money spent on unnecessary food waste.

c. Replacing store-bought pre-sliced produce: Investing in a vegetable slicer allows you to avoid purchasing overpriced pre-sliced vegetables from the grocery store. By slicing your vegetables at home, you not only save money but also contribute to reducing plastic packaging waste.

  1. Portable and On-the-Go Convenience: Slicing Anywhere, Anytime

a. Compact and portable design: Many vegetable slicers are compact and lightweight, making them ideal for on-the-go use. Whether you’re preparing a dish at a friend’s house or enjoying a picnic outdoors, the convenience of a portable vegetable slicer ensures that you can slice vegetables wherever your culinary adventures take you.

b. Camping and outdoor cooking: If you enjoy camping or cooking outdoors, a vegetable slicer can be a game-changer. Slice fresh vegetables effortlessly, enhancing your outdoor meals with a touch of freshness and homemade goodness.

c. Travel-friendly companion: For travelers who prefer to prepare their meals, a portable vegetable slicer allows you to maintain a healthy diet while exploring new destinations. Slice fruits and vegetables in your hotel room or Airbnb, ensuring you have access to nutritious meals throughout your journey.

vegetable slicer

Conclusion: Elevating Your Culinary Experience with the Vegetable Slicer

Experience the transformative power of the vegetable slicer as it simplifies your culinary creations and enhances your efficiency in the kitchen. From its precision cutting options to its time-saving benefits, this versatile tool takes your vegetable preparation to a whole new level. With its user-friendly features, safety precautions, and easy maintenance, the vegetable slicer becomes an essential companion for any cooking enthusiast. Embrace the convenience, consistency, and culinary efficiency that the vegetable slicer offers, and elevate your cooking experience to new heights. Discover the joy of effortlessly sliced vegetables, stunning presentations, and, most importantly, more time to savor and enjoy your delicious creations.

Posted on

Benefits of a Costco Immersion Blender: A Review

immersion blender

Introduction:

Exploring the Advantages of a Costco Immersion Blender

An immersion blender is a versatile kitchen tool that is essential for blending, pureeing, and emulsifying ingredients with ease. Costco, a popular warehouse retailer, offers a range of immersion blenders that provide excellent performance at affordable prices. In this comprehensive review, we will delve into the benefits of a Costco immersion blender. By exploring its features, functionality, and value for money, you can make an informed decision and enhance your culinary endeavors.

immersion blender

Benefits of a Costco Immersion Blender: A Comprehensive Review

  1. High-Quality Construction and Durability

Costco immersion blenders boast impressive build quality, ensuring their longevity and durability. These blenders are constructed using sturdy materials, such as stainless steel shafts and BPA-free plastic components. The robust construction ensures that the blender can withstand the demands of frequent use and extended kitchen sessions.

  1. Versatility in Blending Tasks

a. Blending soups and sauces: A Costco immersion blender is perfect for blending soups and sauces directly in the pot. Its portable and lightweight design makes it easy to maneuver within the confines of a hot pan or dish without the need for transferring ingredients to a separate blender.

b. Pureeing fruits and vegetables: Whether you’re making baby food or creating smoothies, an immersion blender from Costco is an excellent tool for pureeing fruits and vegetables to a smooth consistency. Its powerful motor and sharp blades ensure efficient blending and optimal results.

c. Emulsifying dressings and sauces: With its ability to handle light emulsification tasks, such as mayonnaise and salad dressings, a Costco immersion blender allows for easy preparation of homemade sauces and condiments.

immersion blender

  1. Convenient and Efficient Design

a. Cordless options: Costco offers a selection of cordless immersion blenders, providing users with freedom of movement and ease of use without being restricted by a power cord. These cordless models are powered by rechargeable batteries, eliminating the need for constant connection to an electrical outlet.

b. Ergonomic handles: Immersion blenders from Costco are equipped with ergonomic handles that ensure a comfortable grip during use. The well-designed handles reduce fatigue and provide better control over the blending process.

c. Interchangeable attachments: Many Costco immersion blenders come with a range of interchangeable attachments, including different blade types, whisk attachments, and blending beakers. These attachments allow users to perform various tasks using a single tool, saving both storage space and money.

  1. Speed and Power Options

a. Variable speed settings: Costco immersion blenders typically offer multiple speed settings, allowing you to adjust the blending speed according to the desired consistency of the ingredients. This versatility ensures that you have control over the blending process for optimal results.

b. Powerful motors: Costco immersion blenders are equipped with powerful motors that offer high torque and efficient blending capabilities. These motors can handle tough ingredients, such as frozen fruits and dense vegetables, with ease.

immersion blender

  1. Easy to Clean and Maintain

a. Detachable shafts: The shaft of a Costco immersion blender can be detached from the motor unit, making it easy to clean and maintain. The detachable design ensures that you can clean each component thoroughly, preventing the accumulation of food particles and ensuring hygiene.

b. Dishwasher-safe components: Many Costco immersion blenders feature dishwasher-safe components, such as blending beakers and attachments. This simplifies the cleaning process, allowing for effortless maintenance and quick reusability.

  1. Cost-Effective Option

Costco immersion blenders provide excellent value for money. With their combination of quality construction, versatility, and competitive pricing, these blenders offer a cost-effective solution for various blending tasks. The affordability of Costco immersion blenders makes them an attractive option for both home cooks and professional chefs on a budget.

  1. Customer Satisfaction and Warranty

Costco is known for its commitment to customer satisfaction. Additionally, many immersion blenders at Costco come with manufacturer warranties, providing added peace of mind.

immersion blender

  1. Comparing Costco Immersion Blenders

a. Variety of options: Costco offers a range of immersion blenders from different brands, providing customers with options to suit their specific needs and preferences. Compare features, specifications, and customer reviews to find the immersion blender that best aligns with your requirements.

b. Consider power and speed: Depending on your blending needs, evaluate the power and speed options of different immersion blenders available at Costco. Look for models with adjustable speed settings and motors that can handle the tasks you have in mind.

c. Attachments and accessories: Take into account the attachments and accessories offered with each immersion blender. Consider whether you need accessories such as whisk attachments, chopping bowls, or blending beakers to enhance the versatility of your blender.

  1. Additional Tips for Using a Costco Immersion Blender

a. Ensure safety: Read the instruction manual provided with your Costco immersion blender to understand how to operate it safely. Familiarize yourself with the safety features and follow recommended guidelines for correct usage.

b. Monitor blending time: While immersion blenders are designed to be efficient, be mindful not to exceed the recommended blending time for your specific model. Prolonged blending can strain the motor and affect the performance and durability of the blender.

c. Use in short bursts: If you’re blending denser ingredients or large quantities, it’s advisable to use short bursts of blending rather than continuous blending. This helps prevent the motor from overheating and prolongs the life of the immersion blender.

  1. Customer Reviews and Recommendations

a. Learn from others: Read customer reviews and recommendations for Costco immersion blenders to gain insights into their experiences and satisfaction levels. Check online forums or Costco’s own website to access a wealth of valuable information.

b. Seek advice from professionals: If you have specific blending needs or requirements, consider reaching out to professionals, such as chefs or culinary experts, who have experience using immersion blenders. Their insights can help guide you in making an informed decision.

immersion blender

Conclusion:

Enhancing Your Culinary Experience with a Costco Immersion Blender

A Costco immersion blender is a valuable addition to any kitchen, offering versatility, convenience, and durability. With its high-quality construction, powerful performance, and ease of use, a Costco immersion blender allows you to tackle a wide range of blending tasks and achieve professional-quality results. The affordability and customer satisfaction associated with Costco make it an ideal choice when considering an immersion blender. By investing in a Costco immersion blender, you can elevate your culinary experience, whether you’re blending soups, pureeing fruits, or whipping up delicious homemade sauces. Enjoy the benefits that a Costco immersion blender brings and explore the endless possibilities in your kitchen.

Posted on

Making Butter in a Blender: The Ultimate Guide

butter in a blender

Introduction:

Exploring the Possibility of Making Butter in a Blender

Butter is a versatile ingredient that adds richness and flavor to various dishes. While traditionally made using cream and a churn, you may wonder if it’s possible to make butter in a blender. In this comprehensive guide, we will delve into the process of making butter in a blender. By following these steps, you can enjoy the satisfaction of homemade butter without the need for specialized equipment.

butter in a blender

Making Butter in a Blender: The Ultimate Guide

  1. Understanding the Science behind Butter Making

a. The science of cream: Butter is made by separating the fat globules from the liquid in cream. When the cream is agitated, the fat globules stick together, forming butter, while the remaining liquid is known as buttermilk.

b. The role of cold temperature: Cold cream is more conducive to butter formation. The low temperature helps solidify the fat, facilitating the agglomeration of the fat globules.

  1. Choosing the Right Blender

a. Blender capacity: Opt for a blender with a capacity that allows ample space for the cream to be agitated. This prevents overflow and ensures efficient butter formation.

b. Motor power: Ensure that the blender you choose has a motor powerful enough to handle the task of blending cream into butter. A high-powered blender with sturdy blades provides better results.

c. Speed settings: Look for a blender with variable speed settings, including a low speed option. This allows for better control and prevents overmixing the cream.

butter in a blender

  1. Gathering the Ingredients

a. Fresh heavy cream: Start with fresh, high-quality heavy cream. Cream with a higher fat content generally yields better butter results.

b. Salt (optional): Gather salt if you prefer salted butter. It can be added during the blending process or incorporated later when shaping the butter.

  1. Preparing the Blender and Cream

a. Blender preparation: Ensure that the blender and all its components are clean and dry before use. This prevents any unwanted flavors or contamination.

b. Chilling the cream: Refrigerate the cream for several hours or overnight to achieve the necessary cold temperature. The colder the cream, the easier it is to form butter.

butter in a blender

  1. Blending the Cream

a. Pour the cream into the blender: Pour the chilled cream into the blender, ensuring not to overfill it. Leaving some space allows movement and proper aeration.

b. Start on low speed: Begin blending on the lowest speed setting to prevent splattering and ensure even blending. Gradually increase the speed as the cream starts to thicken.

c. Monitor the blending progress: Watch the cream closely as it thickens. You will notice the formation of whipped cream followed by lumps beginning to separate from the liquid.

d. Scraping down the sides: Pause blending occasionally to scrape down the sides of the blender with a spatula. This ensures that all the cream is incorporated into the butter.

e. Adjusting the speed: If necessary, adjust the speed of the blender to maintain the ideal consistency and prevent overmixing. Be cautious not to overwork the cream, as this can result in a grainy texture.

  1. Forming and Shaping the Butter

a. Separating the buttermilk: Once the butter has formed and separated from the liquid, known as buttermilk, stop blending. Pour off the buttermilk, which can be saved for other culinary uses.

b. Washing the butter: Place the butter in a bowl of ice water and gently knead it with your hands or a spatula. This helps remove any remaining buttermilk and ensures a longer shelf life for the butter.

c. Adding salt (optional): If desired, incorporate salt into the butter during the kneading process. Start with a small amount and gradually increase to taste.

d. Shaping the butter: Shape the butter into a desired form, such as a log, pats, or a mold. Wrap it tightly in plastic wrap or parchment paper to maintain freshness and shape.

  1. Storing and Enjoying Homemade Butter

a. Refrigerating the butter: Store the homemade butter in an airtight container in the refrigerator. This ensures freshness and extends the shelf life for several weeks.

b. Exploring flavor variations: Homemade butter offers the opportunity to experiment with flavor variations. Consider adding herbs, spices, or other ingredients to infuse your butter with unique tastes.

c. Incorporating homemade butter into recipes: Use your homemade butter in your favorite recipes that call for butter. Enjoy the rich flavor and satisfaction of using your own creation.

butter in a blender

  1. Troubleshooting and Tips for Successful Blender Butter Making

a. Cream not thickening: If the cream doesn’t seem to be thickening properly, double-check that it’s chilled enough. You can also try increasing the blending speed slightly or using a blender with more power. Additionally, be cautious not to blend for too long, as that can lead to a grainy texture.

b. Grainy texture: If your butter ends up with a grainy texture, it might be due to overmixing or not adequately draining the buttermilk. Ensure that you knead the butter in ice water to remove any remaining buttermilk, which can cause graininess.

c. Flavor variations: Besides adding salt, you can experiment with other flavor variations to enhance your butter. Some options include incorporating minced garlic or herbs like rosemary or thyme. Mix in these additional ingredients during the kneading process to infuse your butter with delightful flavors.

d. Softening homemade butter: If you need softened butter, remove your homemade butter from the refrigerator and let it sit at room temperature for a few minutes. Adjust this time based on ambient temperatures and desired softness.

e. Using unsalted cream: If you prefer unsalted butter, start with unsalted heavy cream. This allows you to control the amount of salt added, or you can choose to omit it altogether.

butter in a blender

Conclusion: Homemade Butter Made Easy

While making butter traditionally may involve specialized equipment, crafting your own butter in a blender is an achievable and enjoyable process. By following the steps outlined in this comprehensive guide, you can create delicious homemade butter without the need for a churn. Take pride in your homemade creation and savor the superior flavor and quality of homemade butter, customized to your preferences. Whether spread on toast, used in baking, or incorporated into savory dishes, your blender-made butter will elevate your culinary creations and add a touch of satisfaction to your meals.

Posted on

Is it safe to put a blender in the dishwasher?

blender

Introduction: Understanding the dishwasher compatibility of blenders

Blenders have become an indispensable tool in the kitchen, making tasks like blending, pureeing, and crushing ingredients a breeze. After using a blender, cleaning can sometimes be a tedious task. Many wonder whether it is safe and convenient to clean their blender by putting it in the dishwasher. In this comprehensive guide, we will explore the dishwasher compatibility of blenders, providing insight into the factors to consider, potential risks, and alternative cleaning methods. By understanding the compatibility of your blender with the dishwasher, you can ensure a safe and efficient cleaning process while prolonging the lifespan of your blender.

blender

Is it safe to put a blender in the dishwasher?

  1. Reviewing the blender’s dishwasher compatibility

a. Consult the manufacturer’s instructions: The first step is to refer to the blender’s manual or instructions. There, you will find specific guidance on whether the blender is dishwasher-safe or not. Manufacturers usually provide clear instructions regarding dishwasher compatibility.

b. Check for dishwasher-safe components: Even if the blender is labeled as dishwasher-safe, it is important to verify which parts can safely be placed in the dishwasher. Some blenders may have removable blades, lids, or containers that are dishwasher-safe, while other components may need to be hand-washed.

  1. Disassembling the blender

a. Separating removable components: Before cleaning your blender, disassemble it by removing the blades, lid, and any other detachable parts. This allows for a more thorough cleaning and prevents any potential damage during the dishwasher cycle.

b. Examining non-removable components: Take note of any components that cannot be removed, such as the base or electrical elements. These parts should not be submerged in water or placed in the dishwasher due to the risk of damage.

blender

  1. Hand-washing for optimal care

a. Cleaning non-dishwasher-safe components: If your blender has non-dishwasher-safe components, it is necessary to hand-wash them. Fill a sink or basin with warm, soapy water and use a sponge or brush to gently clean these parts, ensuring they are thoroughly rinsed and dried afterward.

b. Being cautious with electronic elements: Components like the base, control panel, and electrical cords should never be submerged in water or exposed to excessive moisture. Dampen a cloth with a mild cleaning solution and carefully wipe these parts clean.

  1. Dishwasher cleaning precautions

a. Assessing dishwasher capacity: Verify whether your dishwasher has the capacity to accommodate the size and shape of your blender components. Ensuring there is ample space prevents overcrowding, which can hinder the effectiveness of the cleaning process.

b. Choosing a dishwasher cycle: Opt for a gentle or delicate cycle when cleaning blender components in the dishwasher. This reduces the risk of damage to delicate parts like blades or seals.

c. Placement of dishwasher-safe components: Arrange the dishwasher-safe blender components securely in the dishwasher’s utensil basket or on the top rack. Avoid placing the components near heating elements, such as the dishwasher’s heating coil.

blender

  1. Potential risks and considerations

a. Heat and plastic components: Dishwasher cycles can expose plastic blender components to high temperatures, potentially causing warping, melting, or degradation. Assess the material composition of your blender parts and exercise caution accordingly.

b. Blade exposure: Improperly placed blender blades in the dishwasher can pose a safety risk to the user. Ensure blades are securely attached to their respective components or wrap them separately in a protective container or mesh bag to prevent any potential accidents.

  1. Alternative cleaning methods

a. Immediate hand-washing: Clean your blender immediately after use by filling it with warm, soapy water and blending for a few seconds. This helps remove debris and makes subsequent hand-washing easier.

b. Soaking and scrubbing: For tougher residues or stains, soak blender components in warm, soapy water to loosen the debris before hand-washing. Use a brush or sponge to gently scrub away any remaining residue.

c. Vinegar solution for odors: To combat lingering odors in blender components, soak them in a solution of equal parts water and white vinegar. Rinse thoroughly afterward to eliminate any vinegar smell.

blender

  1. Maintaining your blender’s longevity

a. Preserving blade sharpness: Hand-washing the blender blades allows for greater control and minimizes the risk of dulling or chipping them. Gently clean the blades by running a sponge or brush along their edges, taking care to avoid direct contact with sharp blades.

b. Drying thoroughly: After hand-washing or dishwasher cleaning, ensure that all blender components are thoroughly dried before reassembling them. Moisture trapped in crevices can lead to the growth of mold or mildew, affecting both the blender’s performance and hygiene.

c. Regular cleaning routine: Establish a regular cleaning routine to prevent residue buildup and maintain optimal blender functionality. Regular cleaning also extends the lifespan of your blender and ensures that each use results in a fresh and hygienic blend.

  1. Additional tips for blender maintenance

a. Avoiding abrasive cleaning tools: When hand-washing blender components, use gentle sponges, brushes, or cloths to prevent scratches or damage to the surfaces. Avoid metal scouring pads or abrasive cleaners that can mar the finish.

b. Wiping the base: Regularly wipe the base of the blender with a damp cloth to remove any spills, splatters, or food residues that may have accumulated during use. This keeps the exterior clean and prevents the development of odors.

c. Storing with care: After cleaning and drying, store the blender in a dry, well-ventilated area. Make sure all components are properly assembled or stored together to prevent misplacement or damage.

blender

Conclusion: Understanding the dishwasher compatibility of blenders

Determining whether your blender is dishwasher-safe requires careful examination of the manufacturer’s instructions and individual components. While some blenders can safely handle the dishwasher environment, others may have specific limitations that require hand-washing for optimal care. Take into account the dishwasher’s capacity, the materials of the blender’s components, and any potential risks associated with heat or blade exposure. When in doubt, err on the side of caution and opt for alternate cleaning methods like immediate hand-washing, soaking, or vinegar solutions. By understanding the compatibility between your blender and the dishwasher, you can maintain the cleanliness and performance of your blender while ensuring a safe and efficient cleaning process.

Posted on

Refreshing and Nutritious: Celery Juice Recipe Using a Blender

blender

Introduction: The Power of Celery Juice

Celery juice has gained popularity for its potential health benefits, including improved digestion, hydration, and detoxification. Making celery juice at home using a blender allows you to harness the nutritional properties of fresh celery stalks and customize the taste to your liking. In this comprehensive guide, we will provide a step-by-step recipe for making celery juice using a blender, along with variations and tips to enhance its flavor and maximize its nutritional value.

blender

Refreshing and Nutritious: Homemade Celery Juice Recipe Using a Blender

Preparing the Celery:

Selecting and Cleaning

a. Choosing fresh celery: Look for celery bunches with firm, crisp stalks and vibrant green leaves. Opt for organic celery if available, as it reduces the risk of pesticide exposure.

b. Cleaning the celery: Rinse the celery thoroughly under cool running water to remove any dirt or debris. Gently pat dry using a clean towel or paper towel.

c. Removing the leaves: While the leaves carry flavor, they can sometimes give a bitter taste to the juice. Decide whether to include or discard the leaves based on your preference.

Cutting and Trimming:

Preparing for Blending

a. Trim the ends: Using a sharp knife, trim both ends of the celery stalks. Remove about ½ inch from the root end and discard any discolored or wilted parts.

b. Slicing the stalks: Cut the celery stalks into smaller pieces, approximately 1 to 2 inches in length. This ensures easier blending and prevents strain on the blender’s motor.

blender

Blending the Celery:

Extracting the Juice

a. Placing the celery in the blender: Add the prepared celery stalks to the blender container. It is recommended to start with a smaller batch initially to ensure an even blend.

b. Adding liquid (optional): Depending on the blender’s power and the desired consistency of the juice, you can add a small amount of water to facilitate blending. Start with ¼ to ½ cup of water, adjusting as needed.

c. Blending to desired consistency: Secure the blender lid and start on a low speed setting, gradually working up to high speed. Blend until the celery is completely pulverized and a smooth, liquid consistency is achieved.

d. Straining the juice (optional): If desired, strain the blended juice through a fine-mesh sieve, nut milk bag, or cheesecloth to remove any remaining pulp. This step is optional, as some prefer to consume the juice with its natural fiber intact.

Serving and Enhancing the Juice:

Flavorful Variations

a. Enjoying pure celery juice: Consume the freshly blended celery juice as is, without any additional ingredients. This allows you to experience the pure taste and obtain all the natural benefits of celery.

b. Adding lemon or lime: Squeeze a fresh lemon or lime into the celery juice to enhance the flavor and provide a subtle citrus tang. Start with a small amount and adjust to your taste preference.

c. Infusing with herbs or ginger: For an added flavor boost, blend the celery stalks with a small piece of fresh ginger or a handful of herbs like mint or cilantro. This imparts a refreshing twist to the juice.

d. Combining other fruits or vegetables: Incorporate other fruits or vegetables into the celery juice to create unique flavor combinations. Experiment with ingredients such as cucumber, apple, pineapple, or spinach, adjusting the amounts to suit your taste.

blender

Storing and Consuming Celery Juice:

Tips for Freshness

a. Drinking immediately: For maximum nutritional benefits, consume the celery juice right after blending. Freshly made celery juice retains its potency and flavor.

b. Storing in the refrigerator: If unable to consume the juice immediately, transfer it to an airtight container and refrigerate. It is best to consume within 24 hours to maintain freshness and prevent nutrient degradation.

c. Stirring before drinking: If the juice has been refrigerated, give it a gentle stir before consuming. Natural separation may occur, but a quick stir ensures an even distribution of flavors.

d. Freezing for future use: To prolong the shelf life and availability of celery juice, freeze the juice in ice cube trays or freezer-safe containers. Thaw and stir before drinking when ready to consume.

blender

Cleaning Your Blender:

Maintaining Hygiene

a. Safety first: Before cleaning the blender, unplug it from the power source to avoid any accidents.

b. Disassembling and separating parts: Carefully remove the blender jar or container from the base. Depending on your blender model, detach the blade assembly carefully by unscrewing or releasing the locking mechanism. Separate all removable parts for thorough cleaning.

c. Handwashing or dishwasher: Check the manufacturer’s instructions to determine if the blender parts are dishwasher safe. If they are, place them in the dishwasher and run a cycle. If not, wash the parts by hand using warm soapy water. Use a bottle brush or sponge to clean the blender jar and blade assembly thoroughly.

d. Drying and reassembling: After washing, rinse all the parts with clean water and allow them to air dry completely. Once dry, reassemble the blender, ensuring that all parts are securely fitted in their respective positions.

Tips and Considerations:

Maximizing Celery Juice Enjoyment

a. Celery selection: Opt for celery bunches that have a mild and fresh aroma, crisp texture, and vibrant green color. Avoid celery that feels limp or has brown or yellowish discoloration.

b. Organic and pesticide-free: Whenever possible, choose organic celery to minimize exposure to pesticides and chemicals. Organic celery is cultivated without synthetic fertilizers or harmful pesticides, making it a healthier choice.

c. Drink on an empty stomach: To maximize the potential health benefits of celery juice, consume it on an empty stomach in the morning. This allows the body to absorb the nutrients more effectively.

blender

Conclusion:

Savoring the Benefits of Homemade Celery Juice

Making celery juice at home using a blender allows you to enjoy a refreshing and nutritious beverage that can positively impact your well-being. By following the step-by-step recipe, preparing the celery, blending to the desired consistency, and experimenting with flavor variations, you can savor the benefits of homemade celery juice.

Remember to choose fresh, organic celery for superior taste and potential health benefits. With regular consumption of homemade celery juice, you can enjoy increased hydration, improved digestion, and a boost in essential nutrients. Embrace the power of celery and integrate this simple and delicious juice into your daily routine for a refreshing wellness experience.

Posted on

Fresh and Flavorful: Homemade Salsa Recipe Using a Blender

blender

Introduction: The Delights of Homemade Salsa

Nothing beats the fresh and vibrant flavors of homemade salsa. Creating your own salsa using a blender allows you to customize the ingredients to your taste preferences and ensures a quick and convenient preparation process. In this comprehensive guide, we will provide a step-by-step recipe for making fresh salsa using a blender, along with variations and tips to enhance the flavors.

blender

Fresh and Flavorful: Homemade Salsa Recipe Using a Blender

Gathering the Ingredients:

Preparing for Salsa Making

a. Tomatoes: Start with ripe and juicy tomatoes, preferably plum or Roma tomatoes. These varieties have a denser flesh and fewer seeds, making them ideal for salsa.

b. Onion: Choose a medium-sized onion, either white or red, depending on your preference. The onion adds a zesty and slightly pungent flavor to the salsa.

c. Jalapeño or chili peppers: Determine your desired level of spiciness and choose either jalapeño or chili peppers accordingly. Adjust the quantity of peppers based on your heat tolerance for a salsa that suits your taste buds.

d. Garlic cloves: Fresh garlic cloves provide a robust and savory flavor to the salsa. Adjust the quantity based on your preference for a hint or a more pronounced garlic taste.

e. Cilantro: This herb adds a refreshing and citrus-like aroma to the salsa. Use a handful of fresh cilantro leaves and discard the stems.

f. Lime or lemon juice: Adding citrus juice enhances the salsa’s tanginess and freshness. Choose between lime or lemon juice based on your preference or what is readily available.

g. Salt and black pepper: These essential seasonings bring out the flavors of the other ingredients. Add salt and black pepper to taste, starting with small amounts and adjusting as needed.

blender

Preparing the Ingredients:

Quick and Simple Steps

a. Tomato preparation: Wash the tomatoes and remove the cores. Cut each tomato into quarters, ensuring the seeds and excess liquid are removed.

b. Onion and pepper preparation: Peel and roughly chop the onion. If using jalapeño or chili peppers, remove the stems and seeds before chopping. Adjust the amount of seeds based on your desired spice level.

c. Garlic preparation: Peel the garlic cloves and roughly chop them. Adjust the quantity according to your preference for garlic flavor.

d. Cilantro preparation: Rinse the cilantro leaves thoroughly and pat them dry with a clean kitchen towel.

Blending the Salsa:

Combining the Flavors

a. Adding ingredients to the blender: Place the prepared tomatoes, onion, peppers, garlic, and cilantro leaves into the blender. Add a small pinch of salt and pepper to start.

b. Squeezing in citrus juice: Cut a lime or lemon in half and squeeze the juice directly into the blender. Start with a small amount and taste the salsa after blending, adjusting the acidity as desired.

c. Blending to desired consistency: Secure the blender lid and pulse the ingredients, gradually increasing the speed to achieve the desired salsa consistency. Blend for a shorter time for a chunkier texture or longer for a smoother consistency.

d. Adjusting taste and seasoning: Taste the blended salsa and adjust the flavors according to your preference. Add more salt, pepper, citrus juice, or any other seasonings to balance the flavors. Blend briefly after each adjustment to incorporate the flavors.

blender

Serving and Storing:

Maximizing Freshness

a. Texture and temperature: If you prefer a chilled salsa, transfer the blended mixture to a refrigerator-friendly container and allow it to cool for at least 30 minutes before serving. Alternatively, you can serve the salsa immediately at room temperature. Adjust the texture by blending further or chopping additional ingredients if desired.

b. Salsa variations and additions: Customize your salsa by adding additional ingredients based on your taste preferences. Consider adding diced fresh pineapple, mango, corn, black beans, or even a touch of honey for a twist of sweetness.

c. Pairing and garnishing: Serve your homemade salsa with tortilla chips, toasted pita bread, or as a topping for quesadillas, tacos, grilled meats, or fish. Garnish the salsa with a sprig of fresh cilantro, a squeeze of lime juice, or a sprinkle of diced onion for additional freshness and visual appeal.

d. Storage and shelf life: Store any leftover salsa in an airtight container in the refrigerator for up to five days. The flavors will continue to develop and meld together over time, intensifying the salsa’s taste.


blender

Tips for Perfect Salsa:

Enhancing Flavor and Texture

a. Tomato selection: Opt for ripe tomatoes that are firm but still slightly yielding to the touch. The sweetness and juiciness of perfectly ripened tomatoes contribute to a vibrant and delicious salsa.

b. Roasting or grilling vegetables: For a smoky and charred flavor, consider roasting or grilling the tomatoes, onions, peppers, and garlic before blending them. This extra step adds depth and complexity to the salsa.

c. Adjusting spice levels: If you prefer a milder salsa, remove the seeds and membranes from the jalapeño or chili peppers before blending. For a spicier kick, leave them intact or even add additional peppers to intensify the heat.

d. Balancing acidity: If the salsa tastes too tangy or acidic, add a pinch of sugar or a splash of agave syrup to balance out the flavors. This helps to mellow the acidity without compromising the overall taste.

e. Allowing flavors to meld: For optimal flavor development, refrigerate the salsa for a few hours or overnight. This allows the ingredients to mingle, deepen in flavor, and create a more harmonious taste.

f. Batch sizes and scaling: Adjust the recipe according to your needs by increasing or decreasing the quantities of ingredients. Keep in mind the capacity and power of your blender when scaling up the recipe.

blender

Conclusion:

Homemade Salsa Delights

Making fresh salsa at home using a blender allows you to create a flavorful and customizable condiment that elevates your meals and snacks. By following the step-by-step recipe and incorporating variations and adjustments based on your taste preferences, you can enjoy a salsa that perfectly suits your palate.

Remember to experiment with different quantities of ingredients and seasoning, allowing your personal preferences to guide you. With your homemade salsa, relish the vibrant flavors, embrace the versatility, and savor the satisfaction of a delicious homemade condiment that adds a burst of freshness to any dish.