Posted on Leave a comment

How to make smoothie at home without blender?

blender

Introduction


Smoothies are a popular and nutritious way to enjoy a refreshing and healthy drink. However, not everyone has access to a blender to create these delicious beverages. Fortunately, there are alternative methods that allow you to make smoothies at home without a blender. In this guide, we will explore various techniques and tools that can be used to create smoothies using simple ingredients and readily available kitchen equipment. Whether you don’t have a blender or prefer to try something different, these methods will enable you to enjoy homemade smoothies with ease.

blender

How to make smoothie at home without blender?

Mashing and Whisking Method

1.1. Selecting Soft Ingredients

When making smoothies without a blender, it is best to choose soft and easily malleable ingredients. This may include ripe bananas, soft berries, or other fruits that can be easily mashed or pureed.


1.2. Mashing the Ingredients

Place the soft ingredients in a mixing bowl and use a fork or a potato masher to mash them thoroughly. Mash until the ingredients are smooth and well combined, achieving a consistency similar to that of a puree.


1.3. Whisking to Combine

Once the soft ingredients are mashed, add any liquid components, such as milk, yogurt, or juice, to the bowl. Use a whisk or a fork to vigorously stir and combine the ingredients until they are well blended. Continue whisking until the mixture reaches a smooth and homogeneous consistency.


1.4. Optional Straining

If desired, strain the mixture through a fine-mesh sieve to remove any remaining lumps or fibers. This step is particularly helpful when working with fruits that contain seeds or fibrous components.


Mason Jar Shake Method

2.1. Selecting Ingredients and Tools

For this method, choose ingredients that are easily malleable or can be broken down into smaller pieces. You will also need a mason jar with a tight-fitting lid to create the shaking action.


2.2. Cutting Ingredients into Small Pieces

Cut the ingredients into small, manageable pieces. This ensures that they will break down effectively during the shaking process.


2.3. Combining Ingredients in the Mason Jar

Place the chopped ingredients into the mason jar, leaving some space at the top for shaking. Add any liquid components, such as milk, yogurt, or juice, to the jar.

blender

2.4. Tightening the Lid and Shaking

Secure the lid tightly on the mason jar, ensuring it is properly sealed. Shake the jar vigorously for several minutes, allowing the ingredients to mix and break down. The shaking action emulates the blending process, resulting in a smooth and well-incorporated mixture.


2.5. Straining (Optional)

If desired, strain the mixture through a fine-mesh sieve to remove any remaining solid particles. This step helps achieve a smoother texture, especially when working with ingredients that have more fibrous or seedy components.


Food Processor Method

3.1. Selecting the Right Food Processor

While not a blender, a food processor can effectively blend smoothie ingredients into a desirable consistency. Ensure that your food processor has a strong motor and sharp blades suitable for processing the ingredients.


3.2. Preparing the Ingredients

Cut the ingredients into small, manageable pieces that can be easily processed by the food processor. This includes fruits, vegetables, and any other ingredients you wish to include in your smoothie.


3.3. Layering the Ingredients

Place the ingredients in layers inside the food processor, starting with the softest and most liquid ingredients at the bottom. This ensures efficient processing and prevents any large chunks from remaining.


3.4. Processing the Ingredients

Secure the lid of the food processor and process the ingredients on a low to medium speed setting. Pulse the food processor in short bursts to break down the ingredients, gradually increasing the processing time until a smooth consistency is achieved.


3.5. Adjusting the Texture

After processing, assess the texture of the mixture. If the smoothie is too thick, add a small amount of liquid (such as milk or juice) and continue processing until the desired consistency is reached. If the mixture is too thin, add small amounts of ingredients like frozen fruit or ice to thicken it.

blender

Hand Immersion Blender Method

4.1. Acquiring a Hand Immersion Blender

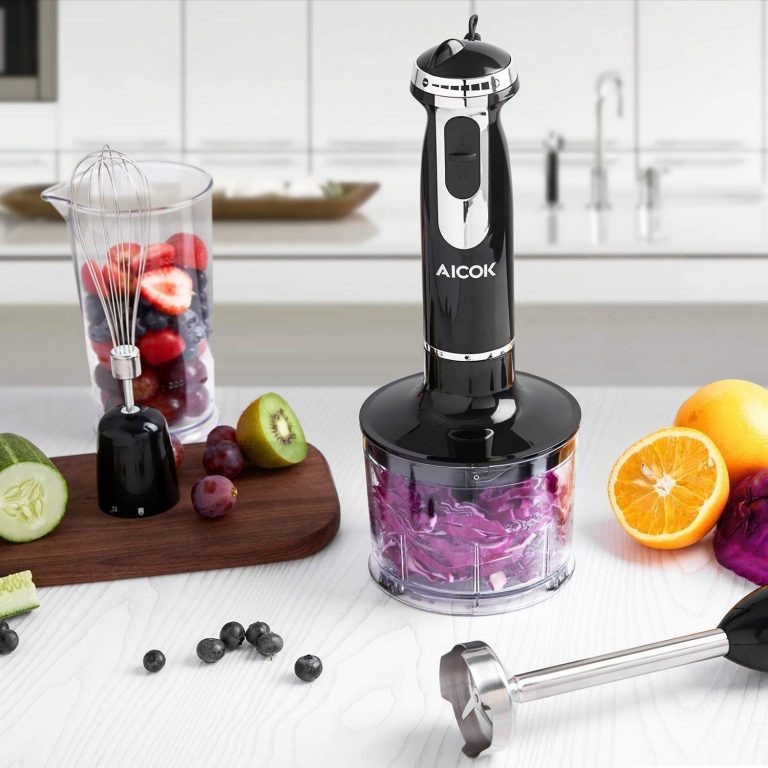
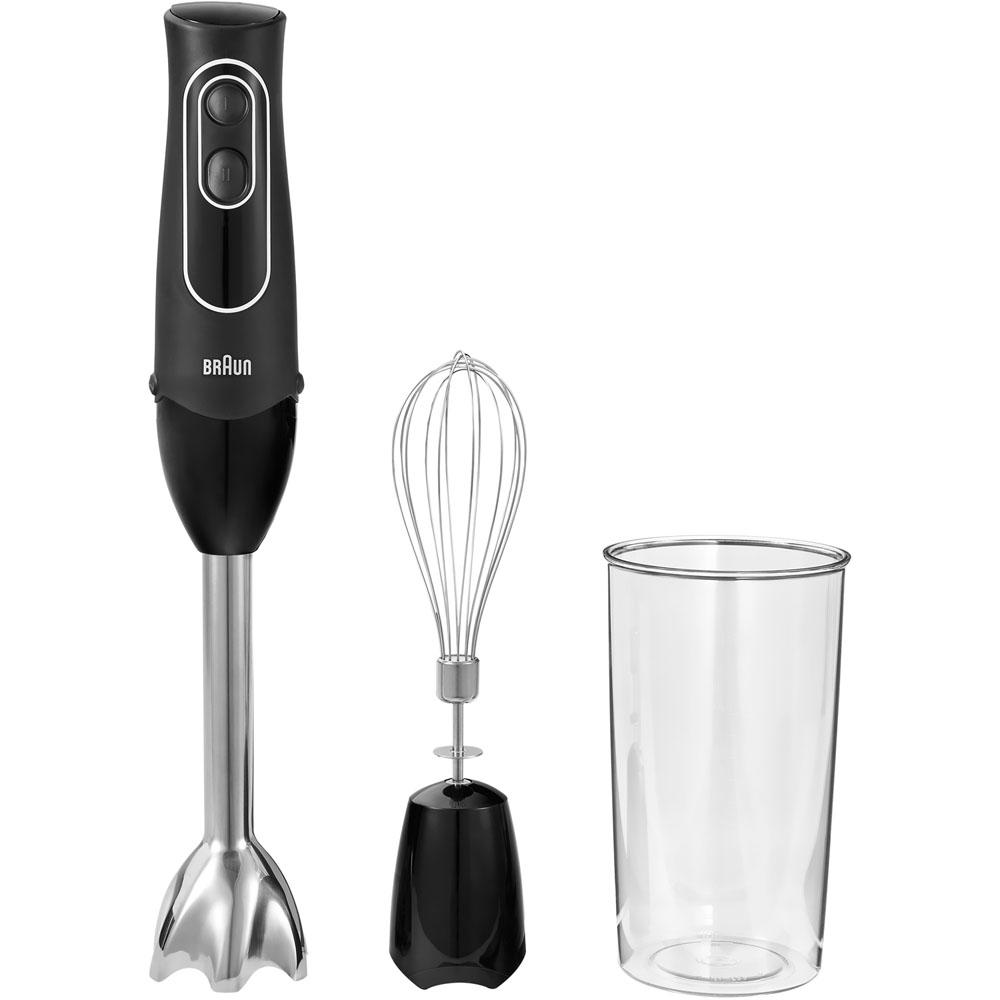
If you do not have a traditional blender but have access to a hand immersion blender, this method can be a convenient alternative. A hand immersion blender is a handheld device with blades that can blend ingredients directly in the container.


4.2. Preparing the Ingredients

Cut the ingredients into smaller pieces that can be easily blended by the immersion blender. This ensures efficient blending and reduces the strain on the device.


4.3. Combining the Ingredients in a Container

Place the ingredients into a large, deep container. A tall and narrow container, such as a mixing bowl or a large cup, is ideal for containing the ingredients and preventing splattering during the blending process.


4.4. Blending with the Hand Immersion Blender

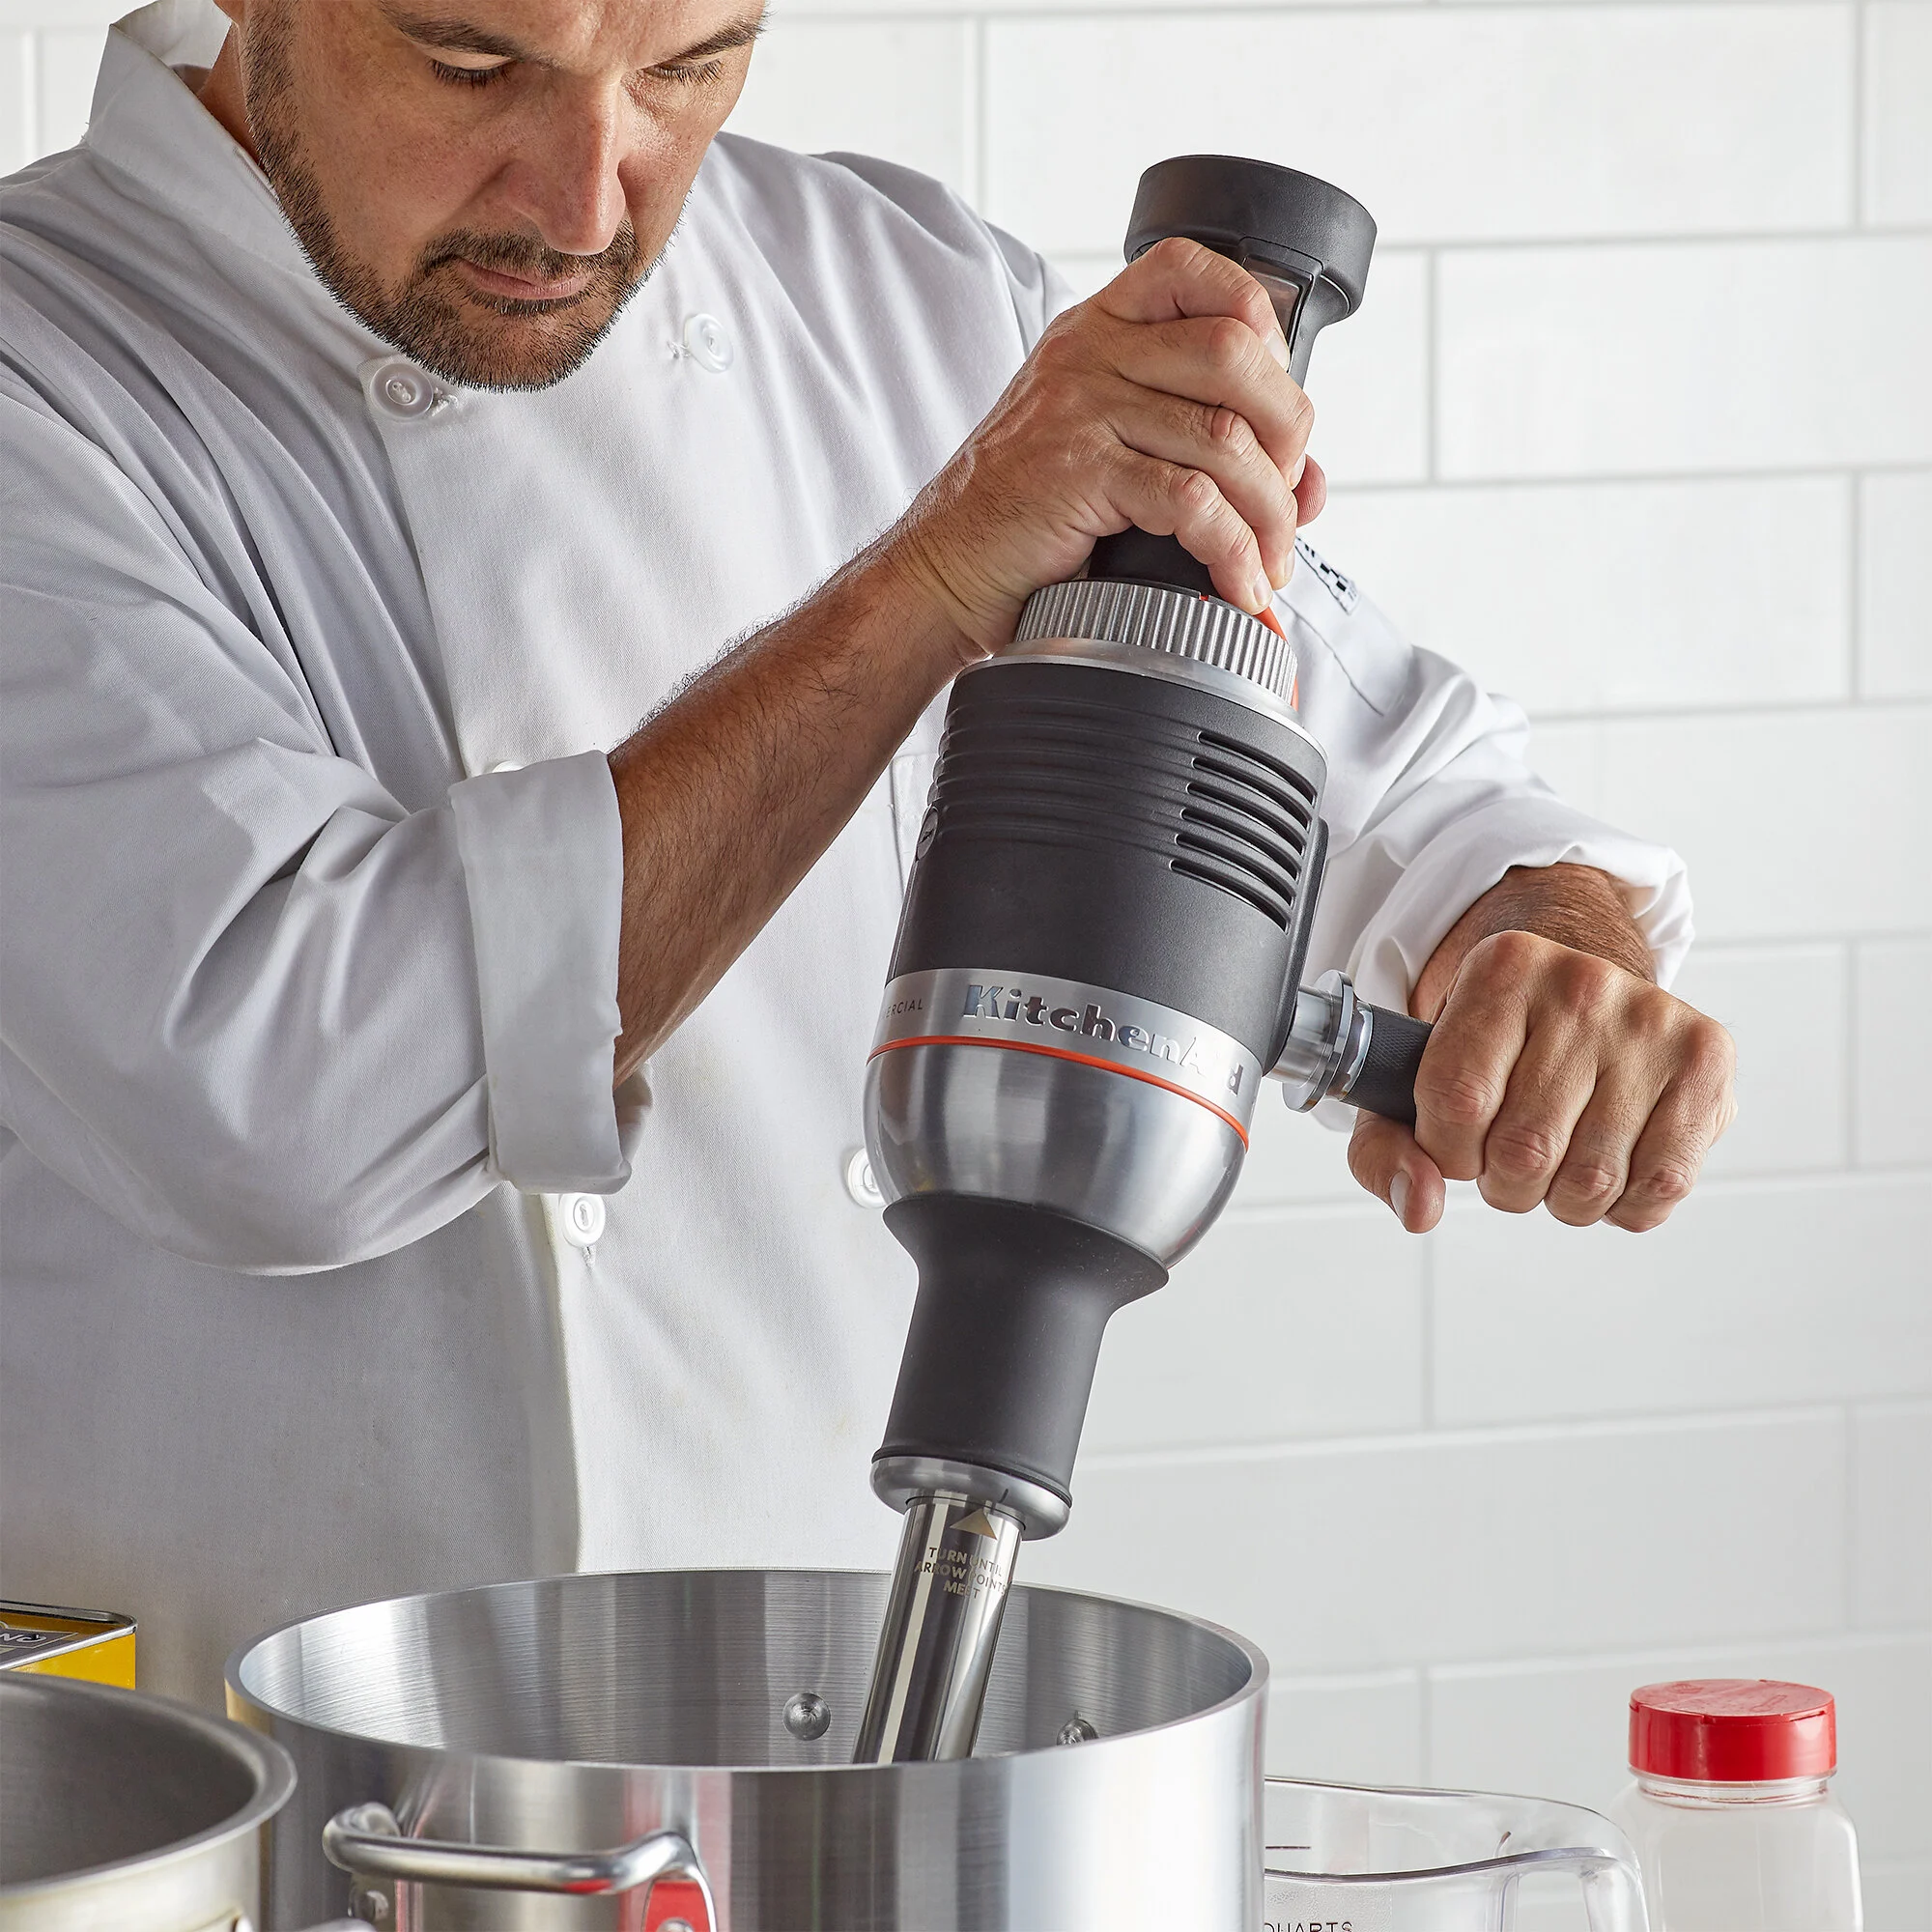
Immerse the blender head of the hand immersion blender into the container, making sure the blades are fully submerged. Hold the container with one hand and the immersion blender with the other. Turn on the blender and blend the ingredients, moving the blender head around to ensure even blending and a smooth consistency.


4.5. Adjusting the Texture

Evaluate the texture of the smoothie and adjust as necessary. If the smoothie is too thick, add a small amount of liquid and continue blending. If the mixture is too thin, add small amounts of ingredients like frozen fruit or ice to thicken it.

blender

Tips and Considerations

6.1. Ingredient Choices

When making smoothies without a blender, it is important to consider the texture and consistency of the ingredients you select. Opt for soft fruits, such as bananas, berries, or avocados, as they are easier to mash or break down using alternative methods. Additionally, consider using pre-frozen fruit or ice cubes to help achieve a colder and thicker smoothie texture.


6.2. Liquid Adjustments

The amount of liquid you add to your smoothie will affect its consistency. Start with a smaller amount, such as a few tablespoons, and gradually add more as you mix or shake the ingredients. This allows you to control the thickness of the smoothie to suit your personal preference.


6.3. Experiment with Flavors

While you may not have the blending power to fully incorporate certain ingredients, you can still experiment with flavors by adding them as toppings or mix-ins after you have created the base of your smoothie. Consider adding nuts, seeds, granola, or even small fruit chunks to enhance the texture and flavor of your smoothie.


6.4. Preparing Frozen Ingredients

If you’re using frozen fruit or ice cubes, allow them to thaw slightly before mashing or blending. This will make them easier to work with and prevent excessive strain on your mixing tools.


6.5. Cleaning and Maintenance

After using alternative methods to make your smoothie, be sure to promptly clean and sanitize the utensils, containers, and tools you used. This ensures proper hygiene and prevents any residue from affecting future food preparations.


Additional Equipment for Enhanced Results

7.1. Handheld Potato Masher or Fork

To achieve a smoother consistency when mashing ingredients, consider using a handheld potato masher or a fork with sturdy tines. These tools allow you to effectively break down the ingredients and ensure a more homogenous mixture.


7.2. Manual Whisk or Egg Beater

For the whisking method, using a manual whisk or an egg beater can provide better blending results compared to using a fork. These tools allow for more efficient mixing, ensuring a smoother and well-incorporated smoothie.


7.3. Mason Jar with a Tight-Fitting Lid

When using the mason jar shake method, make sure you have a jar with a secure lid that can withstand the vigorous shaking. This will prevent any leakage or spills during the mixing process.

blender

Conclusion

Making smoothies at home without a blender is possible using alternative methods that utilize basic kitchen tools and techniques. Whether you choose to mash and whisk ingredients, use a mason jar for shaking, employ a food processor, or utilize a hand immersion blender, these methods allow you to create delicious and nutritious smoothies. Remember to choose soft ingredients, cut them into manageable pieces, and incorporate liquid components to achieve a desirable consistency. With these alternative methods, you can create homemade smoothies without the need for a traditional blender, enabling you to enjoy refreshing and healthy drinks at your convenience.

Posted on Leave a comment

What desserts can I make in a blender?

blender

Introduction


Blenders are versatile kitchen appliances that can be used for much more than just making smoothies. From quick and easy treats to indulgent desserts, blenders can help you create a wide range of delicious sweet treats. In this guide, we will explore various dessert ideas that can be made using a blender, showcasing the versatility and convenience of this beloved kitchen tool.

blender

What desserts can I make in a blender?

Creamy Fruit Smoothies

1.1. Classic Fruit Smoothies

Blenders are perfect for creating refreshing and healthy fruit smoothies. Combine your favorite fruits, such as berries, bananas, or tropical fruits, with a liquid base such as milk, yogurt, or juice. Blend until smooth and enjoy a creamy and nutritious treat.


1.2. Green Smoothies

For a nutritious and energizing dessert option, try making green smoothies in your blender. Blend leafy greens like spinach or kale with fruits, such as pineapple or mango, and add a liquid base like coconut water or almond milk. The result is a vibrant and nutrient-packed dessert option.


Velvety Milkshakes

2.1. Classic Milkshakes

Blenders are perfect for creating rich and velvety milkshakes. Combine your favorite ice cream flavor with milk and any additional ingredients, such as chocolate syrup, caramel, or fresh fruit, then blend until smooth. Pour into a glass, add whipped cream if desired, and enjoy a creamy and indulgent treat.

blender

2.2. Coffee or Mocha Milkshakes

For coffee lovers, whip up a delicious coffee or mocha milkshake. Blend coffee or espresso, chocolate ice cream, milk, and a touch of sweetener together until smooth. This delightful blend of flavors creates a creamy and caffeinated dessert option.


Simple Frozen Yogurt

3.1. Fruit Frozen Yogurt

Enjoy the goodness of frozen yogurt by blending together your favorite fruits, yogurt, and a sweetener of your choice. Freeze the mixture until it reaches a firm consistency and serve as a refreshing and healthier alternative to traditional ice cream.


3.2. Cookie Dough Frozen Yogurt

For a fun twist on frozen yogurt, blend together cookie dough pieces, yogurt, and a touch of sweetener. Freeze until firm and enjoy a delightful dessert that combines the smoothness of frozen yogurt with the indulgence of cookie dough.


Decadent Puddings and Mousses

4.1. Chocolate Avocado Mousse

Create a rich and velvety chocolate mousse by blending ripe avocados, cocoa powder, sweetener, and a splash of milk or cream. The result is a creamy and indulgent dessert that is surprisingly healthy and packed with nutrients.


4.2. Fruit Puddings

Blenders are great for creating smooth and creamy fruit puddings. Blend together ripe fruits like bananas, mangoes, or berries with a thickening agent like yogurt or chia seeds. Refrigerate until set, and enjoy a refreshing and fruity dessert.

blender

Quick Pancakes and Crepes

5.1. Blender Pancakes

Blend together pancake batter ingredients, including flour, eggs, milk, and a touch of sweetener, for quick and fluffy pancakes. Pour the batter directly from the blender onto a hot griddle or pan, cook until golden brown, and enjoy delicious homemade pancakes in no time.


5.2. Blender Crepes

For a thinner and delicate treat, blend together flour, eggs, milk, and a pinch of salt to create crepe batter. Pour the batter onto a hot skillet, cook until lightly browned, and fill your crepes with your favorite sweet fillings like Nutella, fruits, or whipped cream.


Silky Homemade Ice Cream

6.1. Classic Homemade Ice Cream

With the help of a blender, you can easily make homemade ice cream. Blend together heavy cream, sweetened condensed milk, vanilla extract, and any desired mix-ins like chocolate chips or crushed cookies. Pour the mixture into a container, freeze until firm, and enjoy a creamy and flavorful ice cream.


6.2. Dairy-Free Ice Cream

For those with dietary restrictions, blenders are perfect for making dairy-free ice cream. Blend together frozen fruits, such as bananas or berries, with coconut milk or nut milk until smooth and creamy. Freeze the mixture until firm, and you’ll have a delicious and guilt-free frozen dessert.

blender

Whipped Cream and Sauces

7.1. Homemade Whipped Cream

Blenders are perfect for making homemade whipped cream. Simply pour heavy cream into the blender and add a sweetener like powdered sugar or vanilla extract. Blend until the cream thickens and forms soft peaks. Use the whipped cream to top off desserts like pies, cakes, or hot cocoa for an extra touch of indulgence.


7.2. Fruit Sauces

Blend together fresh or frozen fruits with a sweetener of your choice to create flavorful fruit sauces. The blender will break down the fruits and create a smooth and luscious sauce that can be drizzled over ice cream, pancakes, waffles, or yogurt.


Nut Butters and Spreads

8.1. Homemade Nut Butter

Blenders are capable of making delicious homemade nut butters. Blend roasted nuts of your choice, such as peanuts, almonds, or cashews, until they reach a smooth and creamy consistency. You can customize the flavor by adding a touch of salt, honey, or chocolate. Use the nut butter as a spread on toast, in sandwiches, or as a dip for fruits and vegetables.


8.2. Hummus and Bean Spreads

Blenders are also great for making creamy and flavorful spreads like hummus or bean spreads. Blend cooked chickpeas or other beans with tahini, garlic, lemon juice, and spices until smooth and creamy. Use the spread as a dip, sandwich filling, or a topping for crackers or vegetables.


Quick Batters and Doughs

9.1. Blender Batters

Blenders can help you create quick and easy batters for pancakes, waffles, or muffins. Blend together the dry ingredients, such as flour, baking powder, and sugar, with the wet ingredients like eggs, milk, and oil until well combined. This method ensures a smooth and consistent batter without any lumps.


9.2. Blender Doughs

Blenders can also be used to make doughs for bread, pizza, or pastry. Simply blend the dry ingredients with the fats, such as butter or shortening, until crumbly. Then add the wet ingredients and blend until the dough comes together. This method saves time and effort compared to traditional hand-kneading.


Refreshing Sorbets and Slushies

10.1. Fruit Sorbets

Blenders are excellent for making refreshing fruit sorbets. Blend together frozen fruit chunks, a touch of sweetener, and a splash of juice or water until smooth and creamy. Freeze the mixture until firm, and you’ll have a delightful and icy treat to enjoy on hot summer days.


10.2. Slushies and Frozen Drinks

Use your blender to create slushies and frozen drinks by blending ice cubes with your favorite fruit juices, soda, or alcoholic beverages. Add a splash of flavoring syrup or fresh fruit for an extra burst of taste. Blend until the ice is crushed and the mixture is slushy, then pour into glasses for a refreshing and cooling drink.

blender

Conclusion


Blenders are fantastic tools for creating a wide variety of delicious desserts. From creamy smoothies and indulgent milkshakes to velvety puddings and homemade ice cream, the possibilities are endless. Experiment with different flavors, ingredients, and textures to create unique and personalized desserts. With a blender in your kitchen, you can easily whip up quick and tasty treats that will satisfy your sweet tooth and impress your family and friends.

Posted on Leave a comment

How do the size of a food processor compare to a blender?

blender

Introduction


Food processors and blenders are both essential kitchen appliances that simplify food preparation and save time. While they share similar functionalities, there are notable differences in their design, size, and capabilities. In this guide, we will compare the size of food processors and blenders, exploring their respective features and applications. By understanding these distinctions, you can determine which appliance best suits your culinary needs and kitchen space.

blender

How do the size of a food processor compare to a blender?

Size Considerations for Food Processors

1.1. Overall Dimensions

Food processors generally have a larger footprint compared to mixers. They are designed with a wider and more robust base to accommodate their various accessories and attachments. The dimensions of food processors can vary, but they commonly measure around 10 to 15 inches in height and 9 to 12 inches in width.


1.2. Bowl Capacity

Food processors typically feature larger and deeper bowls to handle substantial quantities of ingredients. The bowl capacity of a food processor can range from 7 to 16 cups, allowing for the preparation of large batches of food. The bowl size is an essential factor to consider, especially when processing ingredients in bulk or for larger families.


1.3. Attachments and Accessories

One of the defining characteristics of food processors is their assortment of attachments and accessories. These appliances often come with interchangeable blades and discs for various functions such as slicing, shredding, grating, and dough kneading. The availability of these additional components contributes to the overall size and versatility of a food processor.

blender

Size Considerations for Blenders

2.1. Compact Design

Blenders are generally more compact in size compared to food processors, making them easier to store in smaller kitchen spaces. Their slender and streamlined design allows for greater maneuverability and efficient use of countertop space. Blenders commonly measure around 12 to 16 inches in height and 7 to 8 inches in width.


2.2. Jar or Pitcher Capacity

The size of a blender can be determined by its jar or pitcher capacity. Blenders generally have smaller containers compared to food processors. The jar capacity can range from 32 to 64 ounces, depending on the model. This size is suitable for blending individual servings or small to medium batches of ingredients.


2.3. Lid Design and Opening

Blenders are equipped with specially designed lids that allow for easy pouring and adding ingredients while in use. The lids typically have removable plugs or openings to accommodate the addition of liquids or solids during blending. This convenient feature contributes to the compact size and functionality of blenders.

blender

Functionality and Usage

3.1. Food Processor Functions

Food processors are highly versatile appliances that excel in tasks such as chopping, pureeing, slicing, shredding, and dough kneading. They are designed to handle a wide range of ingredients, including vegetables, fruits, meat, nuts, and grains. The powerful motor and various attachments enable precise and efficient processing, making food processors ideal for meal preparation and advanced culinary techniques.


3.2. Blender Functions

Blenders, on the other hand, specialize in blending, pureeing, and liquefying ingredients. They are primarily used for making smoothies, shakes, soups, sauces, and dips. Blenders are especially adept at crushing ice and breaking down fibrous ingredients, ensuring a smooth and uniform texture. While blenders have limited slicing and shredding capabilities, they don’t offer the same range of functions as food processors.


Versatility and Multi-functionality

4.1. Food Processor Versatility

Food processors are known for their versatility due to the range of attachments and accessories they offer. With the appropriate blades or discs, a food processor can perform tasks such as slicing vegetables, grating cheese, kneading dough, and even emulsifying dressings. This versatility makes food processors an excellent investment for those who enjoy experimenting in the kitchen.


4.2. Blender Multi-functionality

While stick blenders may not offer the same breadth of functions as food processors, they can still be versatile appliances. Many blenders come with additional attachments like personal-sized cups, grinding blades, or food processing bowls, which allow for a wider range of applications. These attachments expand the blender’s capabilities to accommodate tasks such as grinding coffee beans, making nut butter, or chopping small amounts of ingredients.

blender

Choosing the Right Appliance for Your Needs

5.1. Consider Cooking Habits

To determine whether a food processor or blender suits your needs, consider your cooking habits and the types of recipes you commonly prepare. If you regularly cook meals that require slicing, shredding, or kneading dough, a food processor would be a valuable addition to your kitchen. If your primary focus is on blending smoothies, soups, or sauces, a blender may be more suitable.


5.2. Assess Kitchen Space

Evaluate the available space in your kitchen before selecting an appliance. If you have ample countertop space or a dedicated storage area, a food processor can be a practical choice. However, if your kitchen is limited in space or you prefer a more compact appliance, a blender may be the better option.


5.3. Consider Budget Constraints

Budgetary considerations can also influence your decision. Food processors, with their larger capacities and additional attachments, tend to be more expensive than blenders. Assess your budget and weigh the features and functions of each appliance to find the best fit for your financial constraints.


Additional Considerations

7.1. Noise Level

It’s worth noting that both food processors and blenders can generate significant noise during operation. However, blenders tend to be slightly louder due to their high-speed blending capabilities. If noise is a concern, look for models that offer noise reduction features or operate at lower decibel levels.


7.2. Cleaning and Maintenance

When comparing the size of food processors and blenders, it’s important to consider the cleaning and maintenance requirements of each appliance. Food processors typically have more components, including blades, discs, and bowls, which may require thorough cleaning after each use. Blenders, with their simpler design and fewer parts, are generally easier to clean and maintain.


7.3. Safety Features

Both food processors and blenders come with safety features to prevent accidents during operation. These can include locking mechanisms, safety interlocks, and non-slip bases to ensure stability. When choosing an appliance, consider the safety features that are important to you and select a model that meets your requirements.

blender

Conclusion

Food processors and blenders serve distinct purposes in the kitchen, each offering unique features and benefits. Food processors are larger in size, equipped with various attachments, and excel in tasks such as slicing, shredding, and dough kneading. Blenders, with their compact design, specialize in blending, pureeing, and liquefying ingredients. When deciding between the two, consider your specific cooking needs, kitchen space, and budget. By understanding the size and capabilities of food processors and blenders, you can make an informed decision and choose the appliance that best suits your culinary adventures and kitchen requirements.

Posted on Leave a comment

Can a blender be used to make frozen yogurt or sorbet?

blender

Introduction


Blenders are versatile kitchen appliances that can do much more than just blend smoothies or soups. They can also be used to create refreshing and delicious frozen yogurt or sorbet right in the comfort of your home. If you’re looking to satisfy your sweet tooth with a healthier alternative or experiment with fruity and tangy flavors, this guide will walk you through the step-by-step process of making frozen yogurt and sorbet using a blender. Get ready to indulge in delightful frozen treats!

blender

Can a blender be used to make frozen yogurt or sorbet?

Frozen Yogurt: Creamy and Tangy Goodness

1.1. Ingredients

To make frozen yogurt, gather your desired ingredients, including plain yogurt, sweetener (such as honey or maple syrup), and flavorings like vanilla extract or fruit puree. You can also add mix-ins such as fresh fruit chunks, chocolate chips, or crushed cookies for added texture and flavor.


1.2. Blender Preparation

Ensure that your blender is clean and ready for use. If necessary, disassemble the blender jar and wash all components thoroughly. Once clean, reassemble the blender, ensuring that all parts are securely in place.


Preparing the Frozen Yogurt Base

2.1. Yogurt Selection

Choose a plain yogurt that suits your taste preferences. You can opt for regular, Greek, or dairy-free yogurt, depending on your dietary needs or preferences. Full-fat yogurt tends to yield a creamier texture, while low-fat or non-fat options may result in a slightly lighter texture.


2.2. Sweetening the Yogurt

Measure the desired amount of sweetener, such as honey or maple syrup, and add it to the blender. The amount of sweetener can be adjusted to suit your taste. Keep in mind that freezing dulls the sweetness slightly, so it’s okay to have a slightly sweeter base.

blender

2.3. Flavor Enhancements

To infuse your frozen yogurt with delightful flavor, add your chosen flavorings, such as vanilla extract or fruit puree, to the blender. The quantity and type of flavorings will depend on your preferences and the recipe you’re following.


Blending the Frozen Yogurt Mixture

3.1. Blending Process

Place the lid securely on the blender and begin blending the yogurt mixture on a low speed. Gradually increase the speed to achieve a smooth and well-combined mixture. Blend for a few minutes until the ingredients are fully incorporated and the mixture is creamy and smooth.


3.2. Mix-in Additions

If you’re adding mix-ins to your frozen yogurt, stop blending briefly to incorporate them into the mixture. This can include fresh fruit chunks, chocolate chips, or crushed cookies. Blend for a few additional seconds to distribute the mix-ins evenly throughout the yogurt.


Freezing the Frozen Yogurt

4.1. Freezing Containers

Prepare freezer-safe containers to store your frozen yogurt. You can use one large container or individual portions, depending on your preference. Ensure that the containers are clean and dry before use.


4.2. Filling the Containers

Pour the blended frozen yogurt mixture from the blender into the prepared containers. Fill the containers to about 3/4 full, as the yogurt will expand as it freezes. Leave some space at the top to allow for proper expansion and to accommodate any additional toppings or swirls.


4.3. Optional Toppings and Swirls

Get creative by adding toppings or swirls to your frozen yogurt. This can include drizzling chocolate sauce, caramel, or fruit puree on top. Use a spoon or skewer to swirl the toppings or create patterns for an aesthetically pleasing presentation.


4.4. Freezing Time

Place the containers in the freezer and let the frozen yogurt set for at least 4-6 hours, or until it reaches the desired firmness. Remember to cover the containers with lids or plastic wrap to prevent ice crystals from forming.

blender

Sorbet: Refreshingly Fruity Delight

5.1. Fruit Selection

For sorbet, the primary ingredient is fresh or frozen fruit. Choose your favorite fruits, such as berries, mangoes, peaches, or citrus fruits, depending on what is in season or readily available. Ensure that the fruits are ripe and flavorful for the best results.


5.2. Fruit Preparation

Wash and clean the fruits thoroughly, removing any stems, seeds, or skin. Cut larger fruits into smaller chunks for easier blending. If using frozen fruit, allow it to thaw slightly before blending.


5.3. Sweetening the Sorbet

Some fruits may require additional sweetening to balance their natural tartness. Add a sweetener of your choice, such as sugar, honey, or agave syrup, to the blender along with the fruit. Adjust the amount of sweetener based on the fruit’s natural sweetness and your personal preference.


5.4. Optional Citrus Juice

For an added burst of freshness and tanginess, consider adding a splash of citrus juice, such as lemon or lime juice, to the fruit mixture. Citrus juices help brighten the flavors of the sorbet and add a zesty kick.


Blending the Sorbet Mixture

6.1. Blending Process

Place the lid securely on the blender and start blending the fruit mixture on a low speed. Gradually increase the speed to ensure thorough blending. Blend for a few minutes until the mixture becomes smooth and homogeneous, with no visible fruit chunks.


6.2. Optional Sieving

To achieve a smoother texture, you can pass the blended mixture through a fine-mesh sieve or strainer to remove any remaining fruit fibers or seeds. This step is optional, and some prefer to keep the sorbet texture slightly rustic and full of fruit bits.

blender

Freezing the Sorbet

7.1. Freezing Containers

Similar to frozen yogurt, prepare freezer-safe containers for storing your sorbet. Choose containers that are the appropriate size for your desired amount of sorbet, ensuring they have lids or can be covered with plastic wrap.


7.2. Filling the Containers

Pour the blended sorbet mixture from the mixer into the prepared containers, leaving some space at the top for expansion. Smooth the surface with a spoon or spatula, ensuring an even distribution.


7.3. Optional Fruit Swirls and Toppings

For an eye-catching presentation, consider adding fruit swirls or chunks to the sorbet mixture. Gently fold in fresh fruit chunks or create swirls with fruit puree using a spoon or skewer. This adds visual appeal and bursts of fruit flavors.


7.4. Freezing Time

Place the containers in the freezer and allow the sorbet to freeze for at least 4-6 hours, or until it reaches the desired firmness. Remember to cover the containers to prevent ice crystals from forming.


Serving and Enjoying your Frozen Delights

8.1. Softening the Frozen Yogurt or Sorbet

Before serving, remove the containers from the freezer and let the frozen yogurt or sorbet sit at room temperature for a few minutes to soften. This step ensures easier scooping and a smoother texture.


8.2. Scooping and Serving

Using an ice cream scoop or spoon, portion out the desired amount of frozen yogurt or sorbet into bowls or cones. Garnish with fresh fruit, mint leaves, or a dusting of powdered sugar to enhance the presentation and flavor.


8.3. Storing the Remaining Frozen Yogurt or Sorbet

If there are leftovers, ensure that the remaining frozen yogurt or sorbet is stored in an airtight container in the freezer. This helps maintain its texture and prevents freezer burn. Remember to label the container with the flavor and date of preparation for future reference.

blender

Conclusion

Blenders can be fantastic tools for creating luscious and refreshing frozen desserts like yogurt and sorbet. With the right ingredients, a little creativity, and a trusty stick blender, you can whip up frozen treats that are both delicious and healthier alternatives to store-bought options. So, grab your blender, gather your favorite ingredients, and embark on a delightful frozen adventure right in your kitchen. Indulge in the creamy and tangy goodness of frozen yogurt or savor the fruity and refreshing delight of homemade sorbet. Enjoy every spoonful and share the frozen joy with friends and family!

Posted on Leave a comment

How to make ice cream in a blender?

blender

Introduction


Making homemade ice cream is a delightful culinary adventure that brings joy to both children and adults alike. While traditional methods often involve specialized equipment and lengthy processes, making ice cream in a blender offers a quick and easy alternative. In this guide, we will explore the step-by-step process of creating delicious homemade ice cream using a blender, allowing you to enjoy creamy, frozen treats in no time.

blender

How to make ice cream in a blender?

Choosing the Right Blender

1.1. Blender Capacity

Ensure that your blender has a sufficient capacity to accommodate the desired amount of ice cream mixture. Consider the quantity of ice cream you want to make, as well as the space required for expansion during freezing.


1.2. Motor Power

A blender with a powerful motor ensures smooth blending and efficient ice cream making. Look for blenders with motors specifically designed to handle frozen ingredients.


1.3. Blade Design

Opt for blenders with sturdy, sharp blades that can effectively blend and crush ice and other solid ingredients. Stainless steel blades tend to be more durable and efficient in blending frozen mixtures.

blender

Preparing the Ice Cream Base

2.1. Ingredients

Gather the necessary ingredients for your ice cream base. This typically includes cream, milk, sugar, and flavorings of your choice, such as vanilla extract, cocoa powder, or fruit puree. Be creative and experiment with different flavors and add-ins to personalize your ice cream.


2.2. Chilling the Ingredients

For optimal results, chill the cream and milk in the refrigerator before using them in the ice cream base. Cold ingredients help achieve a smoother texture and faster freezing.


Blending the Ice Cream Mixture

3.1. Adding the Ingredients

Begin by adding the chilled cream and milk to the blender. Add sugar and any desired flavorings or mix-ins as well. The exact measurements will depend on your recipe, so refer to the specific quantities provided.


3.2. Blending Process

Place the lid securely on the blender and start blending on a low speed to combine the ingredients. Gradually increase the speed to achieve a smooth and creamy consistency. Blend for a few minutes until the mixture is well combined and all the ingredients are evenly distributed.


3.3. Scraping Down the Sides

Periodically stop blending and use a spatula or spoon to scrape down the sides of the blender jar. This ensures that any unmixed ingredients are incorporated into the mixture, resulting in a well-blended ice cream base.

blender

Freezing the Ice Cream

4.1. Freezing Containers

Prepare a freezer-safe container or containers to store your ice cream. It can be one large container or several smaller ones, depending on your preference. Place the container(s) in the freezer to chill while you continue the process.


4.2. Chilling the Mixture

Transfer the blended ice cream base from the blender into a separate container. Cover the container with plastic wrap or a lid and refrigerate it for at least 1 hour, or until thoroughly chilled. Chilling the mixture before freezing helps improve the ice cream’s texture and consistency.


4.3. Freezing Process

Once the ice cream base is chilled, remove the containers from the freezer and pour the mixture into them. Fill the containers to about 3/4 full, as the ice cream will expand as it freezes. Leave some space at the top to allow for proper expansion.


4.4. Optional Stir-ins or Swirls

At this stage, you can add any additional ingredients, such as chocolate chips, cookie dough chunks, or fruit swirls. Gently fold them into the ice cream mixture, ensuring even distribution.


4.5. Freezing Time

Place the containers in the freezer and allow the ice cream to freeze for at least 4-6 hours, or until it reaches the desired consistency. It is recommended to check and stir the ice cream mixture every hour during the first few hours of freezing to prevent ice crystals from forming.

blender

Serving and Enjoying Homemade Ice Cream

5.1. Softening the Ice Cream

When ready to serve, remove the ice cream from the freezer and let it sit at room temperature for a few minutes to soften. This step ensures easier scooping and a smooth, creamy texture.


5.2. Scooping and Garnishing

Using an ice cream scoop or spoon, portion out the desired amount of homemade ice cream into bowls or cones. Feel free to add toppings such as sprinkles, chocolate sauce, or fresh fruit to enhance the presentation and flavor.


5.3. Storing the Remaining Ice Cream

If there are leftovers, ensure that the remaining ice cream is stored in an airtight container in the freezer. This helps maintain its texture and prevents freezer burn. Remember to label the container with the flavor and date of preparation for future reference.

blender

Cleaning the Blender

6.1. Safety Precautions

Before cleaning the blender, ensure that it is unplugged to prevent any accidents. Handle the blades carefully to avoid any injuries during the cleaning process.


6.2. Dismantling and Soaking

Carefully remove the blender jar, lid, and blades from the base. Fill the sink or a large container with warm soapy water and let the parts soak for a few minutes. This will help loosen any stubborn residue and make cleaning easier.


6.3. Cleaning the Components

Using a sponge or non-abrasive brush, scrub the blender parts thoroughly, paying special attention to the blades and the interior of the jar. Rinse each component with warm water to remove any soap residue.


6.4. Drying and Reassembling

After cleaning, allow the mixer parts to air dry completely. Once dry, reassemble the blender, ensuring that all components are securely in place. Store the blender in a safe and easily accessible location for future use.


Tips and Variations for Blender Ice Cream

8.1. Creamy Texture Tips

To achieve an even creamier texture, consider using a higher-fat content cream, such as heavy cream or whipping cream. You can also experiment with adding a small amount of cornstarch or a tablespoon of cream cheese to the base mixture before blending.


8.2. Sweetness and Flavor Adjustments

Tailor the sweetness and flavor of your ice cream by adjusting the amount of sugar or using alternative sweeteners such as honey, maple syrup, or stevia. Additionally, experiment with different flavor extracts, spices, or mix-ins to create unique and personalized ice cream flavors.


8.3. Vegan and Dairy-Free Options

If you prefer a vegan or dairy-free ice cream, substitute the dairy cream and milk with alternatives like coconut milk, almond milk, or cashew milk. Ensure that the consistency of the alternative milk is suitable for freezing, as some varieties may yield different results.


Conclusion

Making homemade ice cream in a blender is a fun and simple process that yields delicious frozen treats. By choosing the right blender, preparing the ice cream base, blending the mixture thoroughly, and following the freezing steps, you can easily create creamy and flavorful ice cream. Enjoy your homemade creation by serving it with your favorite toppings or storing it for later enjoyment. With experimentation and creativity, the possibilities for delightful homemade ice cream are endless.

Posted on Leave a comment

Can you use a blender as a food processor?

blender

Introduction


Blenders and food processors are both versatile kitchen appliances that aid in food preparation and culinary endeavors. By understanding the capabilities and limitations of blenders, you can harness their versatility in the kitchen and make the most of this multi-functional appliance.

blender

Can you use a blender as a food processor?

Blenders and Food Processors: Understanding the Differences

1.1. Blenders: Primary Functions

Blenders are designed to blend, puree, and liquefy ingredients, typically with the aid of high-speed blades. They excel in creating smoothies, shakes, soups, sauces, and other liquid or semi-liquid preparations. Blenders are known for their ability to incorporate all ingredients, including fiber-rich peels, seeds, and pulp, into a homogeneous mixture.


1.2. Food Processors: Primary Functions

Food processors, on the other hand, are designed specifically for food preparation tasks such as chopping, slicing, shredding, and kneading. They feature various attachments and blades that allow for different processing techniques. Food processors are known for their ability to handle larger quantities of ingredients and perform precise and controlled cutting techniques.

blender

Tasks You Can Accomplish with a Blender

2.1. Pureeing and Blending

Blenders excel in pureeing and blending tasks, producing smooth and consistent textures. They can be used to puree fruits and vegetables for baby food, create silky smooth soups or sauces, and blend ingredients for smoothies or creamy dips.


2.2. Crushing and Grinding

Blenders with robust blades can handle tasks such as crushing ice, grinding coffee beans, or blending nuts into nut butter. The high-speed blades create enough force to break down these harder ingredients into fine textures.


2.3. Mixing and Emulsifying

Blenders are effective in mixing and emulsifying ingredients, making them suitable for creating salad dressings, marinades, or even whipped toppings. The rapid spinning of the blades combines the ingredients thoroughly and creates smooth and creamy mixtures.


Tasks that Require Adaptation or Limitations

3.1. Chopping and Shredding

While blenders can handle small chopping tasks, such as mincing garlic or chopping herbs, they are not as effective as food processors when it comes to larger-scale chopping or shredding. The blade design and container shape of blenders are optimized for blending and may not produce consistently uniform results for chopping or shredding tasks.


3.2. Slicing and Julienne Cuts

Blenders are not designed for slicing or creating julienne cuts. Food processors have specific attachments and blades that allow for precise slicing and julienne cuts, making them better suited for tasks such as preparing vegetables for stir-fries or salads.

blender

Tips for Using a Blender as a Food Processor

4.1. Manage Batch Sizes

Blenders are typically smaller in capacity compared to food processors. When using a blender as a food processor, it is important to manage batch sizes to ensure proper processing. Working in smaller batches allows for better control and ensures that the ingredients are processed evenly.


4.2. Pulse Function

Utilize the pulse function of the blender to control the processing of ingredients. Pulsing helps achieve more controlled and consistent results for tasks such as chopping or blending ingredients.


4.3. Scraping Down the Sides

During processing, periodically stop the blender and use a spatula to scrape down the sides of the container.


4.4. Adjusting Speed and Time

Experiment with adjusting the speed and processing time to achieve the desired consistency. For blending or emulsifying, a lower speed and shorter processing time may be sufficient.


Cleaning and Maintenance

5.1. Detachable Components

Most blenders come with detachable blades and containers, making them easier to clean and maintain. After each use, dismantle the blender and wash the components with warm, soapy water.


5.2. Blade Sharpness

Regularly check the sharpness of the blades in your blender. Over time, blades can become dull, affecting their performance. Keep the blades sharp by periodically sharpening them or replacing them if necessary.

blender

Choosing the Right Blender for Food Processing Tasks

6.1. Capacity and Power

When selecting a blender for food processing tasks, consider the capacity and power of the appliance. Opt for a blender with a larger capacity if you plan to process larger quantities of ingredients. Look for a blender with a powerful motor to handle more challenging tasks such as crushing ice or grinding nuts.


6.2. Blade Design

Blender blades come in various designs, each suited for different functions. Look for a blender with sturdy and sharp blades that can handle both blending and some food processing tasks effectively.


6.3. Attachments and Accessories

Some blenders may come with additional attachments or accessories that enhance their food processing capabilities. These attachments can include chopping blades, slicing discs, or grating blades. Consider your specific food processing needs and look for a blender that offers the appropriate attachments.


Considerations for Specific Food Processing Tasks

7.1. Dough and Baked Goods

Blenders are not well-suited for kneading dough or creating delicate baked goods that require precise control. If you frequently engage in baking activities, investing in a food processor may be a more suitable option.


7.2. Slicing and Shredding Large Quantities

When it comes to slicing or shredding large quantities of ingredients, a food processor with dedicated slicing or shredding discs will offer more efficient and consistent results. Food processors can handle a higher volume of ingredients at once, making them ideal for tasks like preparing slaw, slicing vegetables for stir-fries, or shredding cheese.


7.3. Nut Butters and Grinding

While blenders can be used to make nut butters and grind ingredients, they may require more effort and time compared to food processors. Food processors often come with precision blades and powerful motors that can efficiently process nuts, seeds, or spices into smooth pastes or powders. If you frequently make nut butters or grind ingredients, a food processor may provide more consistent and efficient results.


Benefits of Using a Blender as a Food Processor

8.1. Cost and Space Savings

Using a blender as a food processor eliminates the need to purchase and store an additional appliance, saving both money and kitchen space. Blenders are generally more affordable than food processors, making them a cost-effective option for those looking to expand their food processing capabilities without investing in a separate appliance.


8.2. Versatile and Multi-Functional

Blenders offer the advantage of being multi-functional appliances that can handle various tasks beyond simple blending. Utilizing a blender as a food processor allows for greater versatility in the kitchen, accommodating a wider range of food preparation needs.


8.3. Ease of Use and Cleanup

Blenders are typically easier to use and clean compared to food processors. The ease of use and cleanup associated with blenders make them a convenient choice for those seeking efficient and hassle-free food processing.

blender

Conclusion


While blenders and food processors have distinct purposes, blenders can be versatile kitchen appliances that can double as food processors for certain tasks. Blenders excel in pureeing, blending, crushing, and mixing tasks, making them suitable for a range of food preparation needs. However, it is important to keep in mind the limitations and adaptability required when using a blender as a food processor. Consider the tasks you frequently perform in the kitchen, the capacity and power of the blender, and the specific attachments or accessories available to ensure optimal results. By harnessing the versatility of blenders, you can expand the capabilities of this appliance and streamline your food preparation process.

Posted on Leave a comment

What is the difference between a blender and a juicer?

blender

Introduction


Blenders and juicers are two common kitchen appliances used to process fruits and vegetables, but they differ significantly in their functions and the final product they produce. While both tools offer ways to incorporate nutritious ingredients into our diets, understanding the differences between blenders and juicers can help you choose the right appliance for your specific needs. In this guide, we will explore the distinctions between blenders and juicers, comparing their features, functions, and the benefits they provide.

blender

What is the difference between a blender and a juicer?

Blenders: Versatility and Fiber Retention

1.1. Blending Process

Blenders are appliances that combine ingredients into a homogenous mixture. They work by using high-speed blades to break down the ingredients and combine them into a smooth consistency.


1.2. Retention of Fiber

One key advantage of blenders is that they retain the fiber content of fruits and vegetables. The blending process involves pulverizing the whole ingredients, including their fiber-rich peels, seeds, and pulp, into a smooth mixture. This ensures that the fiber remains intact and is consumed along with the other nutrients.


1.3. Versatility in Ingredient Preparation

Blenders are versatile and can handle a wide range of ingredients, including fruits, vegetables, nuts, and seeds. They can easily process these ingredients into smoothies, sauces, soups, and other blended concoctions.

blender

Juicers: Extraction of Liquid Nutrients

2.1. Extracting Juice

Juicers are designed to extract the liquid content from fruits and vegetables while separating the fibrous pulp. They use various methods, such as centrifugal force or cold-pressing, to separate the juice from the solid components.


2.2. Removal of Fiber

One key distinction of juicers is that they remove the fiber from the final product. The extraction process separates the juice, which contains the liquid nutrients, from the fibrous pulp, resulting in a smooth liquid with minimal fiber content.


2.3. Concentrated Nutrients

Juicers excel in extracting concentrated amounts of vitamins, minerals, and antioxidants from fruits and vegetables. Removing the fiber allows for easier digestion and quicker absorption of these nutrients by the body.

blender

Nutrient Content: Blenders vs. Juicers

3.1. Blenders and Nutrient Availability

Blenders retain the natural fiber of fruits and vegetables, ensuring that all the edible components are consumed together. This includes the vitamins, minerals, antioxidants, and other beneficial compounds present in the whole ingredient. The fiber slows down the release of nutrients into the bloodstream, allowing for sustained energy and balanced blood sugar levels.


3.2. Juicers and Nutrient Concentration

Juicers extract the liquid nutrients from the fruits and vegetables, resulting in a more concentrated source of vitamins and minerals. Without the fiber, the body can rapidly absorb and utilize these nutrients. Juices offer a quick and easily digestible way to access a concentrated source of vitamins and minerals.


Fiber: Blenders vs. Juicers

4.1. Fiber in Blended Beverages

Blended beverages, created using a blender, retain the fiber content of the ingredients. Fiber plays a crucial role in digestion, promoting satiety, regulating blood sugar levels, and maintaining healthy bowel movements. Blending ensures that the fiber content of the whole ingredients is consumed, providing essential nutrients and promoting digestive health.


4.2. Fiber Absence in Juices

Juices, produced using a juicer, have a reduced or absent fiber content. The extraction process separates the liquid nutrients from the fibrous pulp, removing the majority of the fiber. While the juice still contains vitamins and minerals, the absence of fiber can impact digestion, blood sugar regulation, and feelings of satiety.

blender

Texture and Consistency: Blenders vs. Juicers

5.1. Blended Beverages and Texture

Blenders create beverages with a thick, smooth consistency due to the inclusion of all the edible components, including the fiber. Blended beverages retain the natural texture of the ingredients, resulting in a satisfying and substantial drinking experience.


5.2. Juices and Smooth Liquid

Juicers produce smooth liquids by separating the juice from the fibrous pulp. The resulting juice has a thinner consistency compared to blended beverages. Juices offer a refreshing and hydrating drinking experience.


Practicality and Cleanup: Blenders vs. Juicers

6.1. Blenders: Convenience and Cleanup

Blenders are generally easier to use and clean. They require minimal preparation time and often involve simple rinsing and washing of the pitcher, blades, and lid. Blenders are suitable for individuals with busy lifestyles or limited time for kitchen cleanup.


6.2. Juicers: Extraction Process and Cleanup

Juicers typically require more preparation time and involve the extraction process, which can be more involved than blender usage. Depending on the type of juicer, components may need to be disassembled and cleaned thoroughly after each use. Juicers may require more time and effort for cleanup compared to blenders.


Cost and Space Considerations

7.1. Blenders: Cost-Effective Option

Blenders tend to be more cost-effective compared to juicers. They come in a variety of price ranges, allowing for options that fit different budgets. Additionally, purchasing a blender eliminates the need for a separate appliance for processing fruits and vegetables, making it a more economical choice.


7.2. Juicers: Investment and Kitchen Space

Juicers often come with a higher price tag compared to blenders due to their specialized extraction capabilities. Investing in a juicer may require a larger upfront cost. Additionally, juicers take up additional space in the kitchen, which may be a consideration for those with limited counter or storage space.


Culinary Versatility: Blenders

8.1. Blenders for Recipe Variety

Blenders offer greater versatility in the kitchen. They are not limited to creating beverages but can also be used for a variety of culinary tasks, such as making soups, sauces, dips, nut butters, and even grinding coffee or spices. Blenders provide a range of possibilities beyond just fruit and vegetable processing.


Specificity and Goal-Oriented Usage: Juicers

9.1. Juicers for Specific Health Goals

Juicers are often associated with specific health goals, such as detoxification or juice fasting. They allow for precise extraction of nutrients and are popular among individuals aiming to increase their intake of vitamins and minerals in a concentrated form. Juicers can be a valuable tool for those focused on particular health objectives.


Personal Preference and Taste

10.1. Texture and Flavor Preferences

Personal preference plays a significant role in choosing between a blender and a juicer. Some individuals may prefer the thicker texture and more substantial feel of blended beverages, while others may enjoy the refreshing and lighter consistency of juices. Taste preferences can also influence the choice, as certain ingredients may taste better when blended or juiced.

blender

Conclusion


Blenders and juicers serve distinct purposes in the kitchen, and understanding their differences is essential for choosing the right appliance for your needs. Blenders retain the fiber content, offer versatility in ingredient preparation, and provide a more substantial and satisfying drinking experience. Juicers, on the other hand, extract the liquid nutrients, offer concentrated vitamin and mineral content, and provide a refreshing and hydrating drinking experience. Consider your preferences, dietary goals, and lifestyle when deciding between a blender and a juicer, as both appliances offer unique benefits and considerations for incorporating fruits and vegetables into your diet.

Posted on Leave a comment

Is blending better than juicing?

blender

Introduction


Blending and juicing are two popular methods of incorporating fruits and vegetables into our diets, providing a convenient way to consume essential nutrients. While both methods offer benefits, they differ in terms of extraction process, fiber content, nutrient retention, and overall health impact. In this guide, we will compare blending and juicing, exploring their respective advantages and drawbacks, to help you make an informed choice on which method best suits your dietary preferences and health goals.

blender

Is blending better than juicing?

Extracting Nutrients: Blending

1.1. The Blending Process

Blending involves pulverizing whole fruits and vegetables, including their fiber-rich peels, seeds, and pulp, into a smooth consistency while retaining all the edible components. Blenders break down the ingredients into a finely blended mixture without separating the liquid from the fiber.


1.2. Retention of Fiber

One of the main benefits of blending is the retention of dietary fiber. Fiber plays a crucial role in digestion, promoting satiety, regulating blood sugar levels, and maintaining healthy bowel movements. Blending ensures that the fiber content of the ingredients remains intact, providing essential nutrients and promoting digestive health.


1.3. Slow Release of Nutrients

The fiber in blended concoctions slows down the release of nutrients into the bloodstream, preventing rapid spikes in blood sugar levels. This slow release helps maintain energy levels and avoids sudden crashes, making blended beverages suitable for sustained energy throughout the day.

blender

Extracting Nutrients: Juicing

2.1. The Juicing Process

Juicing involves extracting the liquid content from fruits and vegetables, leaving behind the fibrous pulp. This is typically done using a juicer or a cold-press method, which separates the juice from the solid components.


2.2. Concentrated Nutrients

Juicing extracts concentrated amounts of vitamins, minerals, and antioxidants from fruits and vegetables into a liquid form. Without the fiber, the body can quickly absorb and utilize these nutrients, providing a boost of essential vitamins and minerals.


2.3. Reduced Fiber Content

The main drawback of juicing is the reduction or removal of dietary fiber. While fiber is essential for digestion, its absence in juices allows for easier digestion and quicker absorption of nutrients. However, this can lead to a faster release of sugars into the bloodstream, potentially impacting blood sugar levels for some individuals.


Satiety and Digestive Health: Blending

3.1. Enhanced Satiety

Due to the presence of fiber, blended beverages tend to be more filling and can help control appetite. The fiber content promotes a feeling of fullness, reducing the likelihood of overeating and aiding in weight management.


3.2. Improved Digestion

Fiber plays a crucial role in maintaining a healthy digestive system. The fiber-rich content of blended beverages promotes regular bowel movements, prevents constipation, and supports overall gut health.

blender

Satiety and Digestive Health: Juicing

4.1. Hydration and Nutrient Absorption

Juices are hydrating and can provide a quick source of essential nutrients. The absence of fiber allows the body to rapidly absorb these nutrients, making them readily available for use.


4.2. Potential Digestive Challenges

The reduced fiber content in juices may lead to a less satisfying feeling of fullness compared to blended beverages. Additionally, some individuals may experience digestive challenges, such as bloating or discomfort, due to the concentrated sugar content or quicker absorption of nutrients.


Weight Management: Blending

5.1. Fiber for Weight Management

The fiber content in blended beverages can aid in weight management. It promotes satiety, reduces feelings of hunger, and helps control portion sizes, making it easier to maintain a balanced diet and manage caloric intake.


5.2. Lower Caloric Density

Blended beverages tend to have a lower caloric density compared to juices. The inclusion of fiber-rich ingredients and the absence of added sugars or syrups in homemade blends contribute to a healthier option for weight-conscious individuals.

blender

Weight Management: Juicing

6.1. Caloric Intake Awareness

While juicing can provide a concentrated source of nutrients, it is important to be aware of the overall caloric intake, especially if weight management is a goal. Juices can be calorie-dense, particularly when sweetened or when larger quantities are consumed.


6.2. Portion Control

Maintaining portion control while juicing is essential. Consuming excessive amounts of juice can lead to an increased caloric intake without the feeling of fullness, potentially hindering weight management efforts.


Antioxidant Content: Blending

7.1. Fiber and Antioxidants

Blending retains the fiber-rich components of fruits and vegetables, which also contain a significant amount of antioxidants. Antioxidants play a crucial role in neutralizing harmful free radicals in the body, protecting against cellular damage, and reducing the risk of chronic diseases.


7.2. Enhanced Nutrient Synergy

Blending allows for a combination of different fruits and vegetables, maximizing the intake of a wide range of antioxidants. This promotes nutrient synergy, where the presence of one nutrient enhances the absorption or effectiveness of another, leading to greater overall health benefits.


Antioxidant Content: Juicing

8.1. Concentrated Antioxidants

Juices can provide a concentrated source of antioxidants, as the extraction process separates the liquid containing these compounds from the fiber. This allows for a more potent intake of antioxidants, potentially providing a boost to the body’s defense against oxidative stress.


8.2. Variety of Antioxidant-Rich Ingredients

By using a variety of antioxidant-rich fruits and vegetables in juicing, individuals can benefit from a diverse range of antioxidants. Including ingredients such as berries, dark leafy greens, and citrus fruits can provide a wide array of these beneficial compounds.


Practicality and Convenience: Blending

9.1. Quick and Easy Preparation

Blending is relatively quick and easy, requiring minimal preparation time. Simply add the desired ingredients to the blender, blend until smooth, and enjoy. The inclusion of fiber-rich ingredients also reduces the need for additional components.


9.2. Cleaning and Maintenance

Blenders are generally easier to clean compared to juicers. With blended beverages, a simple rinse and wash of the blender pitcher, blades, and lid are usually sufficient. This makes blending a more convenient option for those with busy lifestyles or limited time for kitchen cleanup.


Practicality and Convenience: Juicing

10.1. Convenient On-the-Go Option

Juices can be prepared in advance and stored in portable containers, making them a convenient option for individuals on the go. They can be enjoyed as a refreshing and hydrating beverage throughout the day, providing a quick source of nutrients.


10.2. Reduced Preparation and Cleanup

While juicing requires the extraction process, it often involves less preparation time compared to blending. The absence of fibrous components also makes cleaning juicer components relatively quick and straightforward.

blender

Conclusion


Both blending and juicing offer benefits and drawbacks, depending on individual dietary preferences and health goals. Blending retains the fiber content and provides a more filling, satiating option that supports digestive health and weight management. Juicing, on the other hand, allows for quick absorption of concentrated nutrients and hydration but may lack the fiber and potential satiety benefits of blended beverages. Ultimately, the choice between blending and juicing depends on personal preferences, health considerations, and individual goals. Incorporating a variety of fruits and vegetables into your diet in whichever form you prefer can help ensure a well-rounded nutrient intake and support a healthy lifestyle.

Posted on Leave a comment

Which Ninja Portable blender is best?

blender

Introduction


Ninja is a renowned brand known for its high-quality blenders, including a range of portable options that offer convenience and versatility for users on the go. With several models to choose from, finding the best Ninja portable blender can be a daunting task. In this guide, we will compare some of the top Ninja portable blenders available in terms of features, performance, durability, and customer satisfaction. By considering factors such as power, capacity, portability, and additional features, you can make an informed decision on which Ninja portable blender suits your needs best.

blender

Which Ninja Portable blender is best?

Ninja Personal Blender BL642

1.1. Power and Performance

The Ninja Personal Blender BL642 is a powerful portable blender with a 1200-watt motor, ensuring smooth blending of even tough ingredients. It comes with various blending options, including two different-sized cups and a pitcher, making it suitable for different serving sizes and purposes.


1.2. Capacity and Portability

The BL642 includes a 72-ounce pitcher and two 16-ounce Nutri Ninja cups with to-go lids. This provides flexibility for blending larger quantities or preparing individual servings. The compact design and lightweight components make it highly portable for use at home, work, or when traveling.


1.3. Additional Features

The BL642 offers additional features such as Auto-iQ technology, which provides pre-set blending programs for convenience and consistent results. It also comes with Total Crushing blades, enabling the blender to crush ice and frozen ingredients with ease. The dishwasher-safe components make cleaning effortless.

blender

Ninja Nutri Pro Compact Personal Blender BL456

2.1. Power and Performance

The Ninja Nutri Pro Compact Personal Blender BL456 is a compact yet powerful portable blender. It features a 900-watt motor, allowing for efficient blending and pulverization of various ingredients, including tough greens and frozen fruits.


2.2. Capacity and Portability

The BL456 comes with a 24-ounce Tritan cup and a convenient to-go lid, making it ideal for creating single servings of smoothies or other beverages. Its compact size and lightweight design make it highly portable for use at home, the office, or on the go.


2.3. Additional Features

The BL456 includes specially designed Pro Extractor Blades, which help extract nutrients from whole fruits and vegetables. The blender is also equipped with a powerful pulse function, allowing you to control the blending process and achieve your desired consistency.


Ninja Blender Duo with Auto-iQ BL642Z

3.1. Power and Performance

The Ninja Blender Duo with Auto-iQ BL642Z is a versatile portable blender that combines power and performance. It features a 1200-watt motor and offers multiple blending options, including a 72-ounce pitcher, two 24-ounce Nutri Ninja cups, and a 64-ounce food processor bowl.


3.2. Capacity and Portability

With its various blending containers, the BL642Z is suitable for both single servings and larger batches. The compact design and lightweight components make it portable and convenient for use in different settings.


3.3. Additional Features

The BL642Z includes Auto-iQ technology, which provides pre-set blending programs for consistent results. It also comes with Total Crushing blades for effortless ice crushing and a food processor attachment for added versatility in the kitchen.

blender

Ninja Fit Personal Blender QB3001SS

4.1. Power and Performance

The Ninja Fit Personal Blender QB3001SS is a compact and affordable portable blender. It features a 700-watt motor, allowing for efficient blending of various ingredients, including fruits, vegetables, and ice.


4.2. Capacity and Portability

The QB3001SS comes with two 16-ounce Nutri Ninja cups and two sip-and-seal lids, making it perfect for creating individual servings of smoothies or other beverages. Its compact size and lightweight design make it highly portable for use at home, work, or when traveling.


4.3. Additional Features

The QB3001SS includes stainless steel blades for effective blending and easy cleaning. The blender is also equipped with a pulse function, giving you control over the blending process and allowing you to achieve your desired consistency.


Ninja Professional Plus Blender with Auto-iQ BN701

5.1. Power and Performance

The Ninja Professional Plus Blender with Auto-iQ BN701 is a high-performance portable blender. It features a powerful 1400-watt motor, allowing for efficient blending of various ingredients, including tough fruits, vegetables, and ice.

blender

5.2. Capacity and Portability

The BN701 includes a 72-ounce pitcher, making it suitable for blending larger quantities of smoothies or other beverages. While it is not as compact as some other portable blenders, it is still relatively portable and can be used in various settings.


5.3. Additional Features

The BN701 comes with Auto-iQ technology, which provides pre-programmed settings for consistent results. It also features Total Crushing blades for effortless ice crushing and blending. The display panel provides easy access to the different blending options and settings.


Ninja BL480 Nutri Ninja Personal Blender with Auto-iQ

6.1. Power and Performance

The Ninja BL480 Nutri Ninja Personal Blender with Auto-iQ is a compact and powerful portable blender. It features a 1000-watt motor, allowing for efficient blending of a wide range of ingredients, including fruits, vegetables, and ice.


6.2. Capacity and Portability

The BL480 comes with two 24-ounce Nutri Ninja cups, making it ideal for creating individual servings of smoothies or other beverages. Its compact and lightweight design makes it highly portable, perfect for use at home, work, or when traveling.


6.3. Additional Features

The BL480 includes Auto-iQ technology, providing pre-programmed settings for consistent blending results. It also features Pro Extractor Blades, designed to extract nutrients from whole fruits and vegetables. The cups come with sip-and-seal lids, allowing you to enjoy your blended creations on the go.

blender

Conclusion


Choosing the best Ninja portable blender depends on your specific needs and preferences. The Ninja Personal Blender BL642 offers a powerful motor, multiple blending options, and additional features such as Auto-iQ technology and Total Crushing blades. Ninja Nutri Pro Compact Personal Blender BL456 provides compactness, portability, and efficient blending for single servings. The Ninja Blender Duo with Auto-iQ BL642Z offers versatility with its range of containers and accessories. Lastly, the Ninja Fit Personal Blender QB3001SS provides affordability, compactness, and convenience for individual servings.


Consider factors such as power, capacity, portability, and additional features when selecting the best Ninja portable blender for you. Evaluate your blending requirements, desired serving sizes, and intended usage scenarios to make an informed decision. With any of these Ninja portable blenders, you can enjoy the convenience and versatility of blending your favorite beverages, smoothies, and more, wherever you go.

Posted on Leave a comment

How do you use the Ninja Ultimate blender?

blender

Introduction


The Ninja Ultimate Blender is a powerful and versatile appliance that allows you to blend, puree, and process a wide variety of ingredients. Whether you want to make smoothies, sauces, soups, or other culinary creations, the Ninja Ultimate Blender provides the functionality and convenience you need. In this guide, we will provide a step-by-step tutorial on how to use the Ninja Ultimate Blender, ensuring that you can make the most of this powerful kitchen tool.

blender

How do you use the Ninja Ultimate blender?

Assembling the Ninja Ultimate Blender

1.1. Unpack the Components

Carefully unpack the Ninja Ultimate Blender and familiarize yourself with the different components. The package usually includes the base, pitcher or cups, lids, blades, and any additional attachments or accessories.


1.2. Place the Base on a Stable Surface

Find a stable and level surface in your kitchen to place the base of the Ninja Ultimate Blender. Ensure that there is enough space for the blender to operate safely and that the power cord can reach a nearby electrical outlet.


1.3. Attach the Pitcher or Cup

Depending on the recipe or desired serving size, attach the appropriate pitcher or cup to the base. The pitcher is typically used for larger quantities, while the cups are ideal for single servings or personal use. Align the pitcher or cup with the base, ensuring that it locks securely into place.


1.4. Attach the Blades

Insert the blades into the pitcher or cup, aligning the notches on the blades with the corresponding slots. Push the blades down firmly until they are securely in place.

blender

Preparing Ingredients

2.1. Wash and Prepare Ingredients

Before using the Ninja Ultimate Blender, ensure that all ingredients are properly washed, peeled, and prepared according to the recipe. Remove any pits, stems, or tough parts as necessary.


2.2. Cutting Ingredients

For larger ingredients or those with tough textures, such as fruits or vegetables, it may be necessary to cut them into smaller pieces to ensure smooth blending. Cut the ingredients into manageable sizes that can easily fit into the pitcher or cups.


Using the Ninja Ultimate Blender

3.1. Adding Ingredients

Place the desired ingredients into the pitcher or cups of the Ninja Ultimate Blender. Be mindful not to exceed the maximum fill line indicated on the pitcher or cups to prevent overfilling or spillage during blending.


3.2. Selecting the Appropriate Speed or Program

The Ninja Ultimate Blender typically offers multiple speed settings or pre-set programs for different types of blending tasks. Choose the appropriate speed or program based on the recipe or desired consistency. For example, use a higher speed for smoothies or sauces and a lower speed for chopping or pulsing.


3.3. Blending Techniques

To blend ingredients using the Ninja Ultimate Blender, securely place the pitcher or cup with the ingredients onto the base. Ensure that the lid is securely in place before starting the blender. Depending on your model, the blender may have different controls and buttons. Follow the manufacturer’s instructions for your specific model to operate the blender correctly.


3.4. Pulse and Blend

To start the blending process, press the appropriate button or turn the dial to the desired speed. For certain recipes, such as sauces or salsas, pulsing the ingredients by quickly turning the blender on and off can help achieve the desired texture. For other recipes, blend continuously until the ingredients are smooth and well combined.

blender

Adjusting Consistency and Texture

4.1. Checking Consistency

During the blending process, periodically check the consistency of the mixture by removing the lid and using a spatula or spoon to assess the texture. If necessary, scrape down the sides of the pitcher or cup with a spatula to ensure even blending.


4.2. Adding Liquid

If the mixture appears too thick or dry, you can add liquid gradually to achieve the desired consistency. Add small amounts of liquid, such as water, juice, or milk, and blend again until the mixture reaches the desired smoothness.


4.3. Adjusting Speed or Time

If the ingredients are not blending evenly or to the desired consistency, you can adjust the speed or time settings accordingly. Increase the speed or blend for a longer duration to further process the ingredients.


Serving and Cleaning

5.1. Serving the Prepared Mixture

Once the ingredients are blended to your satisfaction, carefully remove the pitcher or cup from the base. Remove the blades from the pitcher or cup by unscrewing them and transfer the mixture to serving containers, bowls, or glasses as desired.


5.2. Cleaning the Blender

After using the Ninja Ultimate Blender, disassemble the pitcher or cup, blades, and any other removable parts. Rinse them thoroughly with warm water and a mild detergent, or place them in the dishwasher if they are dishwasher safe. Wipe down the base of the blender with a damp cloth. Ensure that all components are completely dry before reassembling or storing the blender.

blender

Additional Tips and Considerations

6.1. Ice and Frozen Ingredients

To blend ice or frozen ingredients, ensure that your Ninja Ultimate Blender model is designed to handle such ingredients. Some models come with specific settings or blades for crushing ice or processing frozen fruits. Check the user manual or manufacturer’s guidelines for recommendations on blending frozen ingredients.


6.2. Hot Ingredients

Exercise caution when blending hot liquids or ingredients. Some blenders, including the Ninja Ultimate Blender, are designed to handle hot ingredients. However, it is important to follow the manufacturer’s guidelines and allow hot ingredients to cool slightly before blending to prevent accidents or damage to the blender components.


6.3. Blending Small Quantities

When blending small quantities, such as spices, herbs, or nuts, it may be more effective to use the smaller cups or containers that come with the Ninja Ultimate Blender. This ensures that the ingredients are properly processed and blended.


6.4. Noise and Vibration

Blending can generate noise and vibration, especially when blending at high speeds. To reduce noise and prevent unnecessary movement, ensure that the pitcher or cups are securely placed on the base and that the lid is tightly sealed.


6.5. Safety Features

The Ninja Ultimate Blender is equipped with various safety features, such as a locking mechanism that prevents the blender from operating unless all components are correctly assembled. Familiarize yourself with these safety features and ensure that they are functioning properly before each use.


Exploring Recipes and Techniques

7.1. Recipe Inspiration

To fully utilize the capabilities of your Ninja Ultimate Blender, explore recipe books, online resources, or the manufacturer’s website for recipe inspiration. There are numerous recipes available for smoothies, soups, sauces, dips, and more. Trying out different recipes will help you discover the full potential of your blender.


7.2. Texture and Consistency

Experiment with blending techniques to achieve different textures and consistencies. For example, blending for a longer duration will result in a smoother texture, while pulsing can create a chunkier consistency. Adjusting the speed and duration will allow you to customize the final product according to your preferences.


7.3. Layered Blending

For recipes that require multiple ingredients or flavors, consider layering the ingredients in the pitcher or cups before blending. This technique allows you to achieve distinct layers and flavors in the final product.

blender

Conclusion


Using the Ninja Ultimate Blender is a simple and efficient process that allows you to create a wide range of culinary creations. By following the steps provided in this guide, you can assemble the blender, prepare the ingredients, and operate the blender to produce smooth and well-blended mixtures. Adjusting the speed, adding liquid as necessary, and periodically checking the consistency will help you achieve the desired texture and taste. Afterward, serving the mixture and cleaning the blender components will ensure a satisfying and convenient experience. With the Ninja Ultimate Blender, you can unleash your creativity in the kitchen and enjoy the versatility and power it offers.