Posted on

Whipping Up Deliciousness: Making Whipped Cream in a Blender

blender

Introduction

Whipped cream is a versatile and delightful topping that adds a touch of indulgence to desserts, beverages, and even morning pancakes. While many rely on electric mixers for the task, a blender can also be a handy tool for whipping cream to perfection. In this comprehensive guide, we will explore the steps to make whipped cream using a blender. From preparing the ingredients to achieving the perfect consistency, we will provide specific instructions and tips to help you create velvety, homemade whipped cream in no time.

blender

Whipping Up Deliciousness: Making Whipped Cream in a Blender

I. Gather Your Ingredients and Tools

  1. Heavy Whipping Cream:

  • Start by ensuring you have fresh, high-fat heavy whipping cream. Its higher fat content (usually around 35-40%) is what enables the cream to whip properly. Use it straight from the refrigerator to maintain a cool temperature during the whipping process.
  1. Sweetener:

  • You will also need a sweetener to enhance the flavor of the whipped cream. Granulated sugar is a common choice, but you can also use powdered sugar or alternative sweeteners to suit your preference.
  1. Blender:

  • Prepare a blender with a sturdy motor and a secure, tight-fitting lid. The blender’s power is crucial for efficient whipping, while the lid prevents any splattering during the process.

II. Preparing the Blender and Ingredients

  1. Chilling the Blender Jar and Blades:

  • Before starting, place the blender jar and its blades in the refrigerator for about 15 minutes. Chilled equipment helps maintain the appropriate temperature needed for successful whipping.
  1. Cooling the Ingredients:

  • Refrigerate the heavy whipping cream for at least 30 minutes before use to ensure its cold temperature, which aids in achieving the desired consistency.

blender

III. Whipping Process

  1. Adding the Ingredients:

  • Begin by pouring the cold heavy whipping cream into the chilled blender jar. Add the desired amount of sweetener according to your taste preferences. As a general guideline, use around 2 tablespoons of sugar per cup of cream. Adjust the amount of sweetener based on personal preference.
  1. Blending at Low Speed:

  • Secure the blender lid tightly and start blending at a low speed. This initial low speed breaks down the cream and incorporates the sweetener evenly.
  1. Increasing Speed:

  • Gradually increase the blender speed to a medium-high setting. The increased speed helps incorporate air into the cream, resulting in the desired light and fluffy texture of whipped cream. Monitor the texture and consistency as you increase the speed.
  1. Checking the Texture:

  • Periodically stop the blender and lift the lid to check the consistency. If the cream appears too thin and runny, continue blending until soft peaks form. Soft peaks are gentle and slightly curl over when the blender is lifted from the cream.
  1. Avoid Over-Whipping:

  • Be cautious to avoid over-whipping the cream, as it can quickly turn into butter with continued blending. If you accidentally over-whip the cream, you can rescue it by adding a bit more fresh cream and gently whisking it by hand to soften the texture.

IV. Storing and Serving

  1. Storage:

  • Transfer the freshly whipped cream to an airtight container and store it in the refrigerator until ready to use. It can be kept for up to 24 hours, but note that it may lose some of its volume and texture over time.
  1. Flavored Variations:

  • Spice up your whipped cream by incorporating additional flavors. Add a splash of vanilla extract, almond extract, or any other desired flavorings during the blending process. Adjust the amount according to personal taste preferences.
  1. Serving Suggestions:

  • Serve the homemade whipped cream alongside desserts like pies, cakes, or fresh fruits. It also beautifully complements hot beverages, such as hot chocolate or coffee. Use your creativity to explore versatile serving options.

blender

V. Tips and Considerations

  1. Be Mindful of Blender Capacity:

  • Ensure your blender has enough capacity to accommodate the volume of cream you plan to whip. Overfilling the blender can lead to ineffective whipping due to restricted movement of the cream.
  1. Watch the Texture:

  • Pay close attention to the texture of the cream throughout the blending process. Stop blending as soon as soft peaks form to avoid over-whipping.
  1. Use Full-Fat Cream:

  • Opt for heavy whipping cream with a higher fat content as it froths and stabilizes better, resulting in a smoother and more stable whipped cream.
  1. Avoid Starting at High Speed:

  • Starting the blender on a high speed from the beginning may cause the cream to splatter or become lumpy. Begin at a lower speed and gradually increase it to achieve the desired texture.

blender

VII. Troubleshooting Common Issues

  1. Cream Not Whipping:

  • If you find that your cream is not whipping properly even after following the steps, there could be a few potential issues. Ensure that your cream is fresh and has a high enough fat content. Avoid using ultra-pasteurized cream, as it may not whip as well. Additionally, make sure your blender is in good working condition and has enough power to handle the task.
  1. Over-Whipping:

  • Over-whipping can happen if you let the blender run for too long. If you accidentally over-whip the cream and it becomes too thick and butter-like, you can try adding a little bit of fresh cream to soften the texture. Gently whisk it by hand until the desired consistency is achieved.

VIII. Alternative Methods

  1. Hand Whisk:

  • If you don’t have a blender or prefer a more traditional approach, you can whip cream by hand using a whisk. Chill the cream and a mixing bowl beforehand, and gradually whisk in a circular motion until soft peaks form.
  1. Stand Mixer:

  • A stand mixer with a whisk attachment can also be used to whip cream. Follow the manufacturer’s instructions for the appropriate speed and duration. Keep a close eye on the texture to ensure it doesn’t become over-whipped.

blender

VI. Conclusion: Whipping Cream with Ease

By following these specific steps and tips, you can successfully make whipped cream using a blender. From preparing the ingredients to achieving the perfect consistency, using a blender provides a convenient and efficient way to create homemade whipped cream.

Remember to ensure the cream, blender jar, and blades are properly chilled, and gradually increase the blender speed to achieve soft peaks. Enjoy the velvety texture and delightful sweetness of your homemade whipped cream as you enhance your favorite desserts and beverages.

Embrace the simplicity and versatility of making whipped cream in a blender, and elevate your culinary creations with this light and airy topping.

Posted on Leave a comment

Unlocking Espresso: Brewing Espresso in Your Keurig

keurig coffee maker

Introduction

If you’re a fan of strong, flavorful espresso, you may wonder if it’s possible to brew it using your beloved Keurig machine. While Keurigs are primarily designed for single-serve coffee, it is indeed possible to make espresso-like drinks with a few adjustments and considerations. In this comprehensive guide, we will explore the step-by-step process of brewing espresso in your Keurig, discuss the importance of equipment and coffee selection, and offer tips for achieving a rich and satisfying espresso-like experience. Get ready to elevate your Keurig brewing to create your own espresso-inspired delights.

keurig coffee maker

Unlocking Espresso: Brewing Espresso in Your Keurig

I. Understanding Espresso

Discover the characteristics of espresso and how it differs from regular coffee:

  1. Concentrated and Strong Flavor:

  • Espresso is a highly concentrated coffee beverage known for its robust flavor profile. It is made by forcing hot water through finely ground coffee under high pressure, resulting in a bold and intense brew.
  1. Thick and Crema-topped:

  • A hallmark of espresso is its signature crema – a golden, foamy layer that tops the shot of espresso. Crema adds visual appeal and contributes to the overall taste and mouthfeel of the drink.
  1. Served in Small Portions:

  • Traditionally, espresso is served in small shot-sized portions. This allows the drinker to savor its strong taste and experience the full impact of the concentrated flavors.

II. Equipment and Coffee Considerations

Understand the equipment and coffee requirements for brewing espresso-like drinks in your Keurig:

  1. Compatible Keurig Machine:

  • While Keurigs are not designed specifically for espresso, certain Keurig models can produce beverages that closely resemble espresso. Look for Keurig machines with the option to brew smaller cup sizes, as this will enhance the concentration and strength of the resulting coffee.
  1. Espresso K-Cup Pods:

  • Choose espresso-specific K-Cup pods that are specially designed to produce a more concentrated coffee. These pods typically contain finely ground coffee and are labeled as espresso or suitable for espresso-like brews.
  1. High Pressure and Pre-infusion:

  • Keurig machines lack the high pressure and pre-infusion capabilities of traditional espresso machines. However, selecting a Keurig model with stronger brewing options can help you achieve a closer approximation to the characteristics of espresso.

keurig coffee maker

III. Steps to Brew Espresso-like Drinks

Follow these steps to brew espresso-like drinks with your Keurig:

  1. Select an Espresso-compatible K-Cup:

  • Choose an espresso-specific or espresso-like K-Cup pod from a reputable coffee brand. These pods are specifically designed to produce a more concentrated and flavorful result.
  1. Pre-warm Your Cup:

  • Before brewing, heat your cup by filling it with hot water and allowing it to sit for a moment. This step helps maintain the optimal drinking temperature of your espresso-like drink.
  1. Brew on Smaller Cup Sizes:

  • If your Keurig allows, select the smallest cup size available to enhance the concentration and strength of your coffee. This will help achieve a closer approximation to espresso’s qualities.
  1. Adjust Brew Strength:

  • If your Keurig allows for brew strength adjustments, opt for the strongest setting to intensify the flavor of your espresso-like drink.
  1. Manual Control and Timing:

  • To better simulate the process of pulling an espresso shot, consider manually stopping the brewing process before it completes to create a shorter and more concentrated extraction. Experiment with timing to find your preferred strength and taste.
  1. Tamp or Stir the Coffee:

  • After brewing, use a tamper or stir stick to gently press down or stir the brewed coffee in the cup. This can encourage further extraction and create a richer, creamier texture.

keurig coffee maker

IV. Enhancing Your Espresso-like Drink

Experiment with these techniques to enhance the experience of your Keurig-brewed espresso-like drinks:

  1. Froth Milk:

  • Use a milk frother to create microfoam, mimicking the texture of steamed milk found in traditional espresso drinks like lattes and cappuccinos. Pour the frothed milk over your Keurig-brewed espresso-like coffee for added richness and creaminess.
  1. Add Syrups or Flavors:

  • Customize your espresso-like drink by adding flavored syrups, such as vanilla, caramel, or hazelnut. These additions can add depth and complexity to your brewed beverage.
  1. Top with Whipped Cream:

  • For an indulgent touch, garnish your espresso-like drink with a dollop of freshly whipped cream. This adds a luxurious, velvety texture and a delightful contrast to the strong flavors.

keurig coffee maker

V. Cleaning and Maintenance

Ensure proper cleaning and maintenance of your Keurig for optimal espresso-like brewing:

  1. Regular Cleaning:

  • Clean and descale your Keurig machine according to the manufacturer’s instructions. This helps prevent coffee residue buildup and ensures consistent performance and taste.
  1. Maintain Water Quality:

  • Use filtered water to enhance the flavor of your espresso-like brew and prevent mineral buildup in your Keurig machine. Regularly change the water filter if your Keurig has one.

VI. Exploring Alternatives

If your desire for true espresso taste persists, consider investing in a dedicated espresso machine that can provide a higher level of customization and control over the brewing process. These machines often offer the necessary pressure and features to produce authentic espresso at home.、


VIII. Tips for an Authentic Experience

To enhance your espresso-like experience with a Keurig machine, consider the following tips:

  1. Experiment with Coffee Brands:

  • Try different espresso-compatible K-Cup pods from various coffee brands to find the flavor profiles that suit your preferences. Some brands may offer unique blends or roast levels that closely resemble traditional espresso.
  1. Pre-warm the Portafilter:

  • If you have a reusable My K-Cup® filter or similar option, pre-warm it before adding coffee grounds. This can help maintain the temperature of the coffee during the brewing process, enhancing the overall experience.
  1. Add Pre-ground Coffee:

  • Instead of using espresso-specific K-Cups, you can experiment with using pre-ground espresso coffee in a reusable filter or K-Cup pod. This allows you to control the grind size and coffee-to-water ratio more precisely to achieve a stronger and more authentic espresso-like flavor.
  1. Practice Tamping Techniques:

  • For a more traditional espresso experience, consider applying slight pressure to the coffee grounds in your reusable filter before brewing. Use a level, gentle tamp to create a compact puck, which can contribute to better extraction and crema formation.

keurig coffee maker

VII. Conclusion: Exploring Espresso with Your Keurig

While Keurig machines aren’t designed specifically for espresso, with the right equipment and coffee selection, you can create espresso-like drinks that capture some of the qualities of traditional espresso. By selecting espresso-compatible K-Cups, adjusting your brewing settings, and experimenting with techniques to enhance your brew, you can enjoy flavorful and concentrated beverages reminiscent of espresso.

Remember to properly clean and maintain your Keurig to ensure consistent performance. While it may not be a perfect substitute for a traditional espresso machine, your Keurig can still offer a delightful and satisfying espresso-like experience in the comfort of your own home.

Posted on Leave a comment

Descaling Guide: Using Vinegar to Descale Your Keurig 2.0

keurig coffee maker

Introduction

Descaling your Keurig 2.0 using vinegar is a cost-effective and straightforward method to remove mineral deposits and restore your machine’s performance. Over time, mineral buildup can occur in the internal components of your Keurig, affecting the taste and quality of your brewed beverages. In this comprehensive guide, we will take you through a step-by-step process to descale your Keurig 2.0 using vinegar, discuss the benefits of descaling, and provide tips for a successful descaling experience. Get ready to rejuvenate your Keurig 2.0 and enjoy better-tasting coffee and tea.

keurig coffee maker

Effective Descaling Guide: Using Vinegar to Descale Your Keurig 2.0

I. Importance of Descaling

Discover the significance of descaling your Keurig 2.0 machine:

  1. Removes Mineral Deposits:

  • Descaling eliminates mineral deposits, such as calcium and limescale, that can accumulate in the water reservoir and internal components of your Keurig 2.0. These deposits can affect the taste, quality, and performance of your brewed beverages.
  1. Restores Brewing Efficiency:

  • Regular descaling helps restore your Keurig’s brewing efficiency by unclogging water lines, ensuring a smooth and consistent flow of water, and producing better-tasting coffee and tea.
  1. Prolongs Machine Lifespan:

  • By removing mineral deposits, descaling helps maintain the optimal functioning of your Keurig 2.0. This leads to a longer lifespan for your machine, reducing the need for expensive repairs or replacement.
  1. Preserves Flavor Profiles:

  • Descaling ensures that your coffee and tea retain their intended flavors, free from any unwanted mineral taste caused by buildup in the machine. It allows you to fully enjoy the rich and authentic flavors of your favorite beverages.

keurig coffee maker

II. Understanding Vinegar as a Descaling Agent

Explore why vinegar is a popular choice for descaling Keurig 2.0 machines:

  1. Acidic Properties:

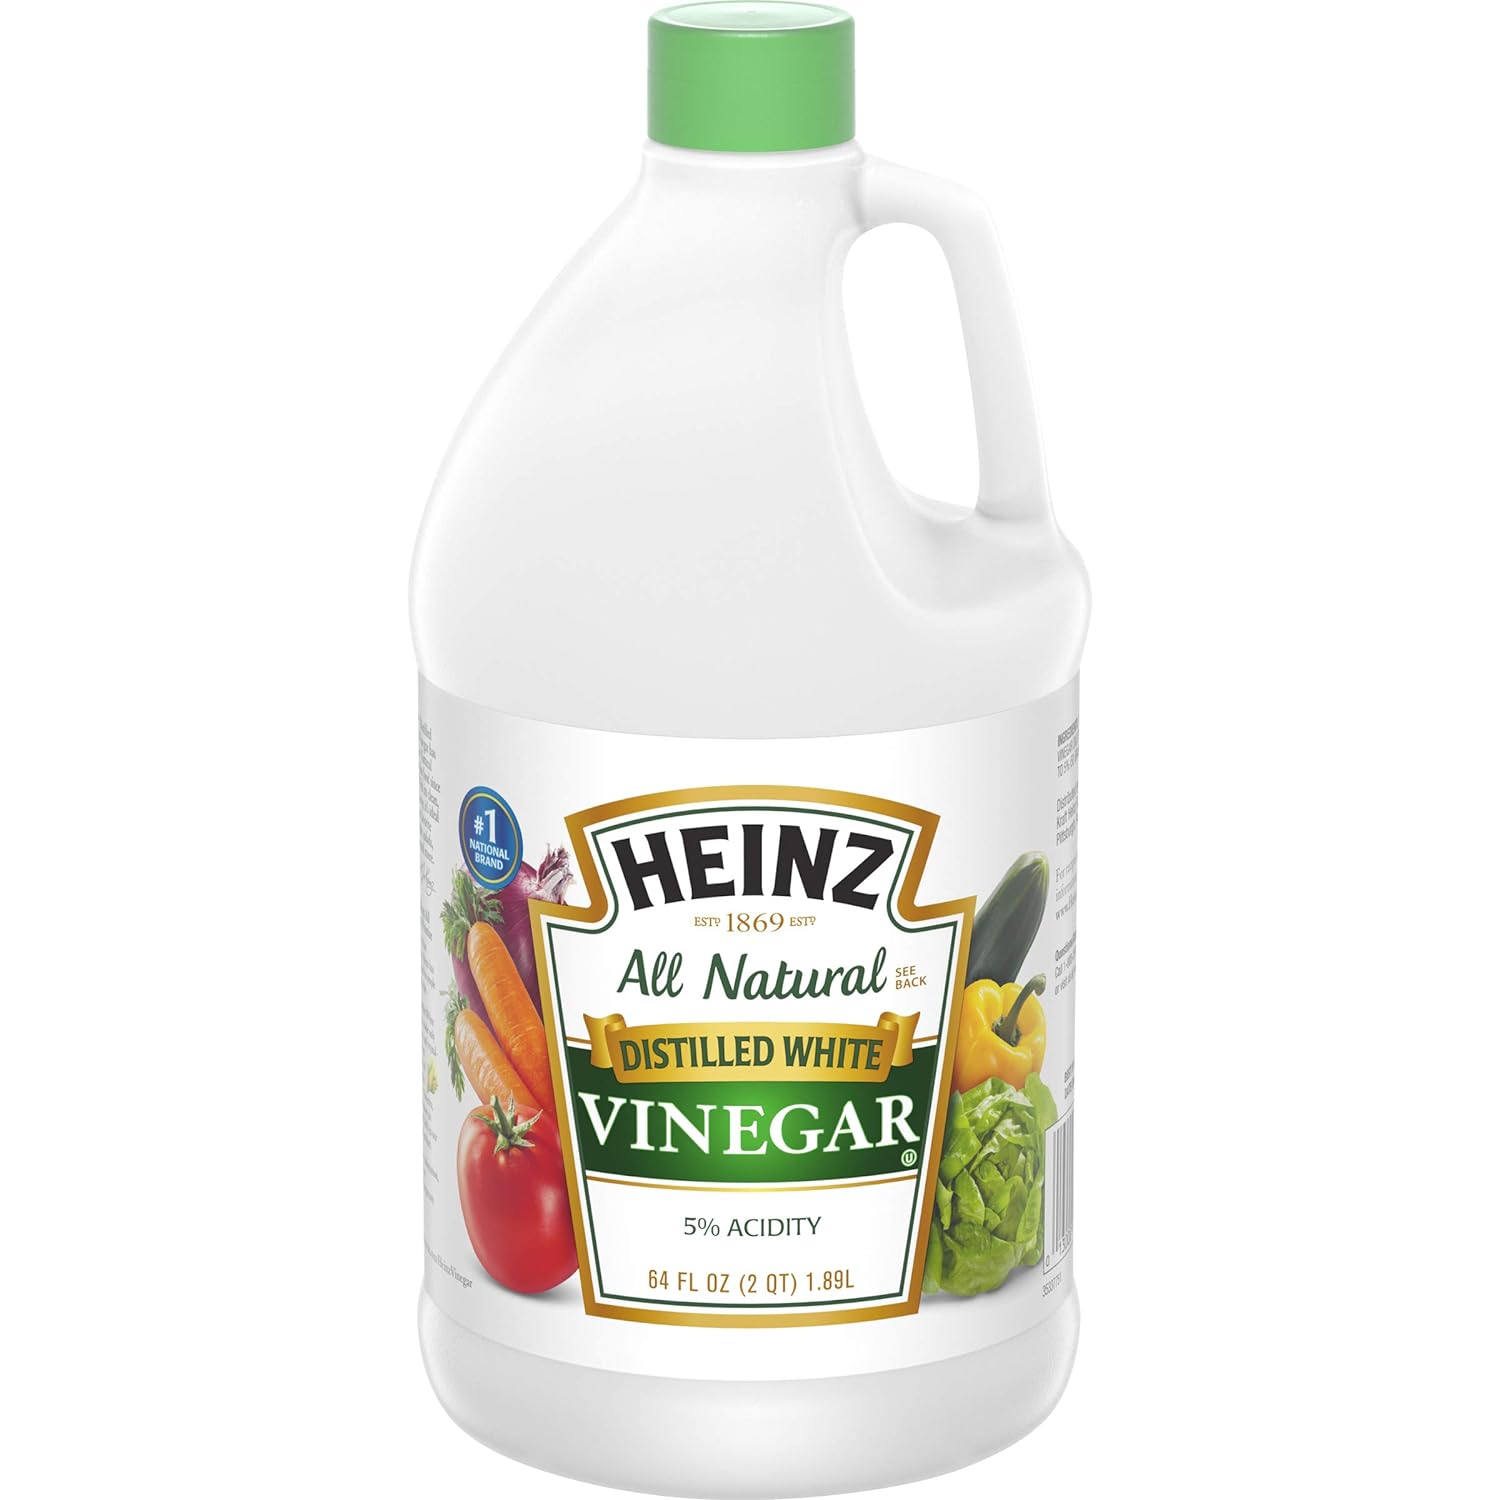
  • Vinegar, particularly white distilled vinegar or apple cider vinegar, contains acetic acid, which effectively breaks down mineral deposits and limescale buildup.
  1. Natural and Safe:

  • Vinegar is a natural and food-safe option for descaling your Keurig. It does not contain harsh chemicals that may be harmful to you or your machine.
  1. Cost-Effective:

  • Compared to commercial descaling solutions, vinegar is an inexpensive alternative that can effectively remove mineral deposits and restore your Keurig’s performance.

III. Steps to Descale Your Keurig 2.0 with Vinegar

Follow these steps to descale your Keurig 2.0 using vinegar:

  1. Gather Supplies:

  • Before you begin, gather the necessary supplies, including white distilled vinegar or apple cider vinegar, fresh water, a ceramic mug or bowl, and a clean, lint-free cloth.
  1. Empty the Water Reservoir:

  • Ensure the water reservoir is empty. If there is water in the reservoir, carefully empty it into the sink or a container.
  1. Prepare the Vinegar Mixture:

  • Fill the water reservoir halfway with vinegar. For a standard 48-ounce water reservoir, use around 24 ounces of vinegar. You can adjust the amount of vinegar depending on the size of your machine.
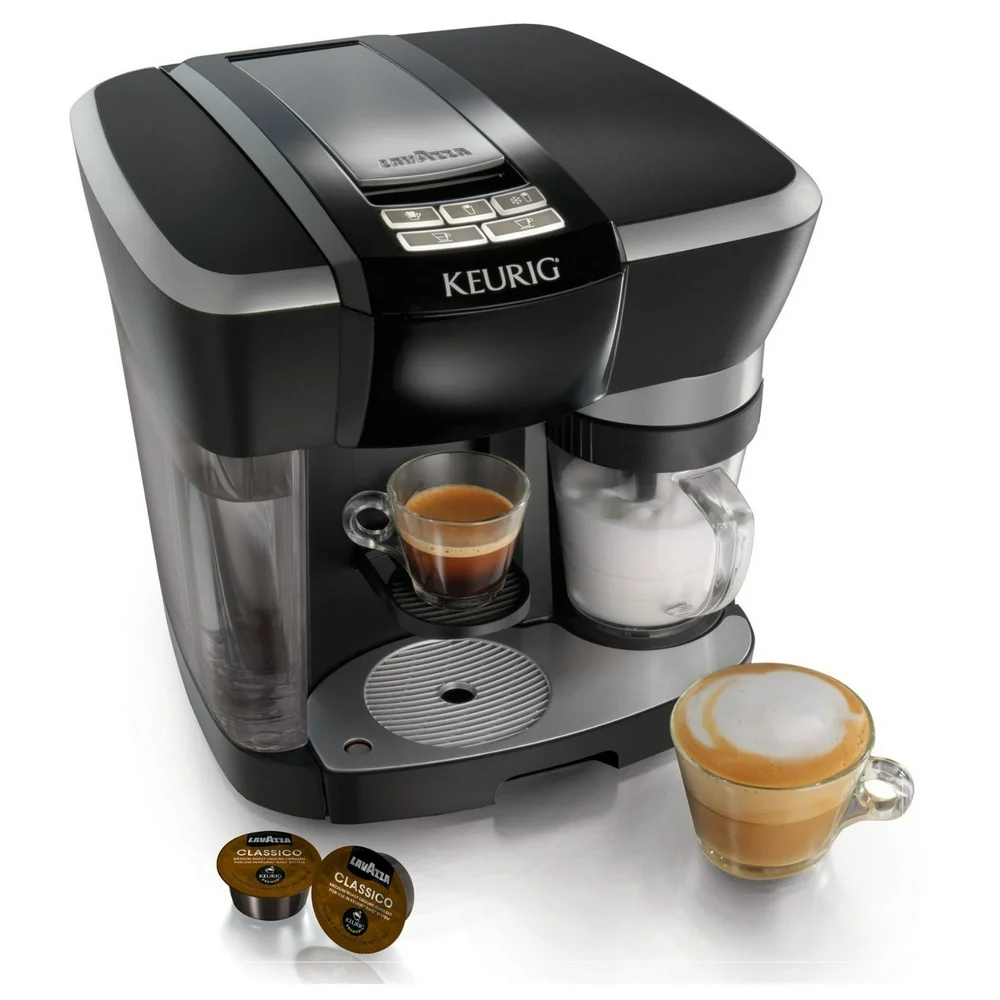
  1. Run Brewing Cycle(s):

  • Place a ceramic mug or bowl on the drip tray to catch the vinegar solution. Start a regular brewing cycle without inserting a K-Cup. Allow the vinegar mixture to flow through the system until the reservoir is empty. Repeat this step if necessary.

keurig coffee maker

  1. Soak and Clean Removable Parts:

  • While the machine is off and unplugged, detach the removable parts, such as the water reservoir, the lid, and the drip tray. Soak these parts in a mixture of warm water and a few drops of dish soap. Rinse them thoroughly and wipe them dry with a clean cloth.
  1. Rinse with Fresh Water:

  • Fill the water reservoir with fresh water, ensuring it is properly positioned and fully inserted. Run multiple brewing cycles without a K-Cup to flush out any remaining vinegar residue or taste. Repeat this step until there is no vinegar odor or taste.
  1. Clean and Reinstall Removable Parts:

  • Clean the exterior of the machine with a damp, clean cloth. Reinstall the removable parts, such as the water reservoir, drip tray, and lid, ensuring they are securely in place.

IV. Tips for Successful Descaling

Consider the following tips to enhance your descaling experience:

  1. Vinegar Dilution:

  • If you find the smell or taste of vinegar too strong, you can dilute the vinegar with an equal amount of water. This will help lessen the odor and make the rinsing process quicker.
  1. Use Distilled or Filtered Water:

  • To minimize future mineral buildup, consider using distilled or filtered water in your Keurig as it contains fewer minerals that can contribute to scaling.
  1. Regular Descaling Schedule:

  • Establish a descaling schedule based on the level of mineral hardness in your water supply. If your water is particularly hard, you may need to descale every three to six months. For softer water, descaling every six to twelve months may be sufficient.

keurig coffee maker

VI. Alternative Descaling Solutions

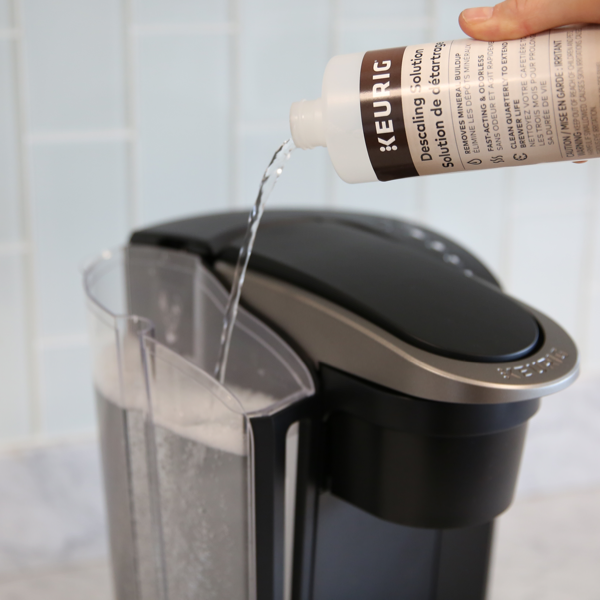
If you prefer to use an alternative to vinegar, several commercial descaling solutions are available that are specifically formulated for Keurig machines. These solutions are designed to effectively remove mineral deposits and limescale buildup. Follow the instructions provided on the descaling solution packaging for best results.

VII. Important Safety Considerations

Keep the following safety considerations in mind while descaling your Keurig:

  1. Ventilation:

  • Ensure proper ventilation in the area where you are descaling your Keurig. Vinegar has a strong smell, so opening windows or turning on a fan can help dissipate the odor.
  1. Protect Surfaces:

  • While descaling, be cautious as vinegar or descaling solution may drip or spill. Place a towel or protective surface underneath your Keurig to catch any liquid.
  1. Rinse Thoroughly:

  • After descaling, make sure to rinse your Keurig thoroughly to remove any remaining vinegar or descaling solution. This step is crucial to prevent vinegar or descaling solution from mixing with your brewed beverages.

VIII. Maintenance Tips for Preventing Buildup

To minimize mineral deposits and prolong the effectiveness of your Keurig descaling, consider the following maintenance tips:

  1. Regularly Clean Removable Parts:

  • Clean the removable parts, such as the water reservoir, lid, and drip tray, every one to two weeks to prevent any buildup or residue. Wiping them with warm, soapy water or running them through the dishwasher can help maintain their cleanliness.
  1. Clean the Needle:

  • Regularly clean the entrance needle of your Keurig 2.0 to prevent any clogs or blockages. Use a paperclip or the Keurig cleaning tool to gently clear any debris from the needle.

keurig coffee maker

V. Conclusion: Revive Your Keurig with Vinegar Descaling

Regular descaling is an essential maintenance task to keep your Keurig 2.0 running smoothly and producing great-tasting coffee and tea. By using vinegar as a natural and cost-effective descaling agent, you can effectively remove mineral deposits and revive your machine’s performance.

Remember to follow each step diligently, from emptying the water reservoir to cleaning and reinstalling removable parts. Implement a regular descaling schedule to prevent scale buildup and maintain the optimal functioning of your Keurig 2.0.

With a little care and the power of vinegar, you can enjoy cup after cup of deliciously brewed beverages from your freshly descaled Keurig 2.0.

Posted on Leave a comment

Troubleshooting Guide: Restoring Your Non-functioning Keurig

keurig coffee maker

Introduction

Discovering that your Keurig coffee machine has stopped working can be frustrating, especially when you rely on it for your daily coffee routine. However, before panicking or considering replacing your beloved appliance, it’s worth exploring some troubleshooting steps to diagnose and potentially fix the issue. In this comprehensive guide, we will provide a step-by-step process to identify common problems with non-functioning Keurig machines, offer solutions to resolve these issues, and share tips for regular maintenance to prevent future problems. Get ready to restore your Keurig to its former glory, as we address the most common causes of malfunction and guide you towards a possible resolution.

keurig coffee maker

Troubleshooting Guide: Restoring Your Non-functioning Keurig

I. Power Related Issues

Identify and address power related issues that may be causing your Keurig to stop working:

  1. Check the Power Source:

  • Confirm that your Keurig is properly plugged into a functioning electrical outlet. Ensure the outlet itself is working by testing it with another device or appliance.
  1. Reset the Keurig:

  • If there is power but your Keurig is not responding, try resetting the machine. Unplug it from the power source, wait for a few seconds, and then plug it back in. Press the power button to see if it turns on.
  1. Inspect the Power Cord:

  • Examine the power cord for any visible damage, such as fraying or cuts. If you notice any damage, it’s essential to replace the power cord to avoid potential electrical hazards.

keurig coffee maker

II. Water Flow Problems

Identify and troubleshoot issues related to water flow:

  1. Clear Blockages:

  • Check for any clogs or blockages in the water lines of your Keurig. Inspect the water reservoir for debris, and remove and clean the water filter, if applicable. Using a paperclip or a straightened paperclip end, carefully unclog the needle that pierces the K-Cup or the entrance to the water reservoir.
  1. Descale the Keurig:

  • Mineral deposits can accumulate in the water lines, causing blockages and decreased water flow. Follow the manufacturer’s instructions to descale your Keurig using a descaling solution or vinegar. This process helps remove mineral buildup and improves water flow.
  1. Proper Water Reservoir Placement:

  • Ensure the water reservoir is correctly positioned and fully inserted into the machine. Improper placement may prevent the water from flowing into the internal components, resulting in a non-functioning Keurig.

III. Brewing Issues

Address issues related to brewing, which may prevent your Keurig from working:

  1. Check the K-Cup Holder:

  • Ensure the K-Cup holder is properly aligned and securely installed in the machine. If it is misaligned or loose, the Keurig may not puncture the K-Cup properly and fail to brew.
  1. Brew Setting and Sizes:

  • Confirm that you have selected the appropriate brew setting and cup size for your desired coffee strength and quantity. Incorrect settings may result in a non-functioning or incomplete brew.
  1. Maintenance Reminder:

  • Keurig machines often have maintenance reminder indicators that alert you when it’s time to clean or descale the appliance. If this indicator is active, it can affect the brewing process. Clean or descale the machine according to the manufacturer’s instructions to resolve the issue.

keurig coffee maker

IV. Troubleshooting Sensor Errors

Identify and resolve sensor errors that can cause your Keurig to malfunction:

  1. Check the Water Level Sensor:

  • The water level sensor inside the Keurig may not be functioning correctly. Disconnect the machine from the power source and turn it upside down to drain any excess water. Allow it to dry completely before testing it again.
  1. Sensor Cleaning:

  • Dust or debris can accumulate on the sensors, affecting their accuracy and causing the Keurig to stop working. Use a clean, dry cloth or a soft brush to gently clean the sensors, ensuring there is no obstructing material.

V. Regular Maintenance Tips

Follow these maintenance tips to prevent future Keurig problems:

  1. Regular Descaling:

  • Descale your Keurig at least every three to six months, or as recommended by the manufacturer, to prevent mineral buildup that can clog the internal components.
  1. Cleaning Internal Components:

  • Regularly clean the K-Cup holder, the entrance needle, and the drip tray to maintain optimum brewing performance. Rinse these parts in warm, soapy water and let them dry thoroughly before reassembling.
  1. Use Filtered Water:

  • Consider using filtered water for brewing in your Keurig to minimize mineral deposits and prevent clogging of water lines.
  1. Storage and Transportation:

  • When storing or transporting your Keurig, ensure it is completely empty of water and secure all detachable parts. This helps prevent damage and potential issues during storage or transportation.

VI. Contacting Keurig Support

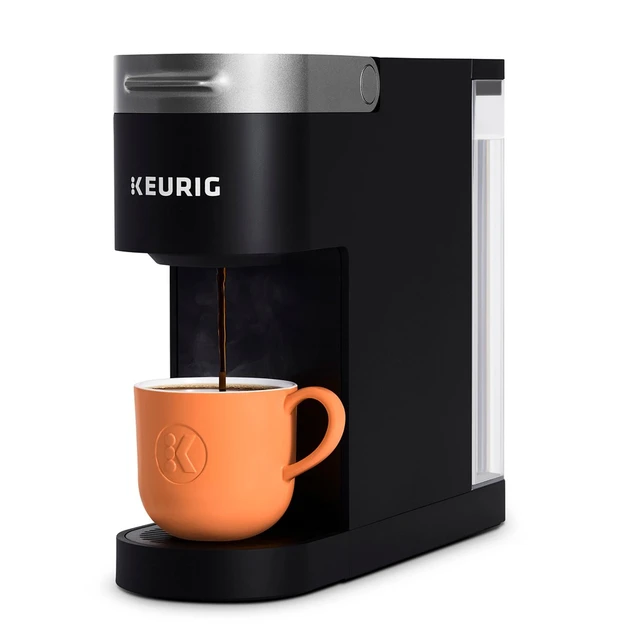
If you have followed all the troubleshooting steps and your Keurig is still not working, it may be necessary to seek assistance from the Keurig customer support team. They can offer personalized guidance, provide warranty information, and offer potential solutions or repairs to address the issue with your machine.
keurig coffee maker

VIII. Safety Precautions

While troubleshooting and attempting to fix your non-functioning Keurig, it’s essential to keep safety in mind:

  1. Unplug the Machine:

  • Before inspecting or performing any maintenance on your Keurig, always unplug it from the power source to minimize the risk of electrical shocks or accidents.
  1. Avoid Forceful Actions:

  • Be gentle when attempting to fix any components or remove blockages. Applying excessive force may cause damage to the machine or result in personal injury.
  1. Be Mindful of Hot Surfaces:

  • Certain parts of the Keurig, such as the brewer or coffee dispense, can become hot during operation. Use caution when handling these surfaces to avoid burns or scalds.
  1. Follow Manufacturer’s Instructions:

  • Always consult the Keurig user manual for specific instructions on troubleshooting and maintenance. Abiding by the manufacturer’s guidelines ensures safe handling and helps prevent any unintended damage.

keurig coffee maker

VII. Conclusion: Restoring Your Keurig’s Functionality

Discovering that your Keurig has stopped working can be an inconvenience, but with a systematic troubleshooting approach, you can often resolve the issue and restore functionality. By examining power-related issues, addressing water flow problems, troubleshooting brewing issues, and resolving sensor errors, you can improve the chances of resolving the problem on your own.

Regular maintenance, including descaling, cleaning, and using filtered water, can prevent future problems and prolong the lifespan of your Keurig. If all else fails, reach out to the Keurig support team for assistance. With perseverance and these troubleshooting steps, you’ll soon be back to enjoying your favorite cup of coffee brewed by your trusty Keurig machine.

Posted on Leave a comment

Reviving Your Keurig 2.0: Descaling for Superior Brewing

keurig coffee maker

Introduction

Descaling is a crucial maintenance task for your Keurig 2.0 coffee maker to ensure optimal performance and consistent taste. Over time, mineral deposits from water, known as scale or limescale, can accumulate in the machine, affecting water flow, temperature, and the flavor of your brewed beverages. In this detailed guide, we will explore various methods for descaling your Keurig 2.0, discuss the importance of descaling, provide step-by-step instructions for different models, and offer tips for a successful and effective descaling process. Unlock the full potential of your Keurig 2.0 and savor every cup of coffee.

keurig coffee maker

Reviving Your Keurig 2.0: Descaling for Superior Brewing

I. Understanding the Necessity of Descaling

  1. Scale Buildup Impact:

  • Scale buildup can clog the water lines, resulting in decreased water flow, slower brewing times, or even machine malfunction. Descaling helps remove these mineral deposits and keeps your Keurig 2.0 performing at its best.
  1. Taste and Aroma:

  • Descaling prevents the accumulation of scale that can affect the flavor and aroma of your coffee. By removing scale, you ensure that each cup tastes as it should, without any unwanted mineral aftertaste.
  1. Machine Longevity:

  • Regular descaling enhances the lifespan of your Keurig 2.0 by reducing strain on internal components and avoiding potential damage caused by long-term scale buildup.

II. Determining Your Descale Frequency

  1. Water Hardness:

  • The hardness of your water depends on your location and water source. Consult your local water provider or use water testing kits to determine the hardness level, which affects how quickly scale accumulates in your coffee maker.
  1. Manufacturer’s Recommendations:

  • Refer to the user manual or the manufacturer’s website for specific guidelines recommended for your Keurig 2.0 model. These recommendations can inform you about how often to descale your machine based on usage and water hardness.

keurig coffee maker

III. Selecting a Descaling Solution

  1. Keurig Descaling Solution:

  • Keurig offers a descaling solution specifically designed for their coffee makers. This solution is efficient at removing scale buildup and ensuring your Keurig 2.0 functions optimally.
  1. DIY Descaling Solutions:

  • If you prefer a natural alternative or can’t access the Keurig descaling solution, you can use white vinegar or citric acid as a homemade descaling solution. These alternatives effectively tackle scale buildup.

IV. Descaling a Keurig 2.0 – Step-by-Step Guide

  1. Prepare the Coffee Maker:

  • Remove any remaining water from the water reservoir and empty the drip tray. Remove the pod from the pod holder and discard it. Ensure the machine is turned off and unplugged.
  1. Mix the Descaling Solution:

  • Follow the manufacturer’s instructions provided with the descaling solution for proper dilution. If using a DIY descaling solution, mix equal parts white vinegar or citric acid and water.
  1. Fill the Water Reservoir:

  • Pour the descaling solution into the water reservoir of your Keurig 2.0. Fill the reservoir up to the maximum capacity indicated. Take care not to exceed the maximum fill line.
  1. Start the Descaling Cycle:

  • Place a large ceramic mug or cup on the drip tray to catch the descaling solution. Turn on the machine and select a regular brew cycle without inserting a K-Cup pod.
  1. Run Multiple Brewing Cycles:

  • Allow the machine to complete the brew cycle, emptying the contents into the mug or cup. Empty the mug and place it back on the drip tray. Repeat this step until you have used up the entire contents of the water reservoir. This ensures the descaling solution reaches all internal components of the machine.
  1. Rinse the Machine:

  • Refill the water reservoir with clean, fresh water and run multiple brewing cycles without a K-Cup pod to thoroughly rinse the internal components. Repeat until the water reservoir is empty and the rinse water is free of any descaling solution.
  1. Clean External Parts:

  • While the water reservoir and internal components are rinsing, take the opportunity to wipe down the external surfaces of your Keurig 2.0 with a damp cloth or sponge. Pay special attention to the area around the pods and the drip tray.

keurig coffee maker

V. Descaling Specific Models

  1. Keurig 2.0 K200, K300, K400, K500 Series:

  • Follow the general descaling steps outlined above. These models may have specific instructions in the user manual for additional features or troubleshooting. Consult the manual for any model-specific guidance.
  1. Keurig 2.0 K575:

  • For the K575 model, refer to the user manual for specific descaling instructions. It may require additional steps or settings for a successful descaling process.

VI. Tips for Ongoing Maintenance

  1. Regular Water Reservoir Cleaning:

  • To prevent any bacterial growth and maintain overall cleanliness, clean the water reservoir regularly with warm, soapy water. Rinse it thoroughly before refilling.
  1. Change Water Frequently:

  • For optimal taste and quality, avoid using stagnant water that has been sitting in the water reservoir for an extended period. Always use fresh water when brewing your beverages.
  1. Remove and Clean Removable Parts:

  • Depending on your Keurig 2.0 model, there may be removable parts such as the drip tray or pod holder. Regularly remove these components and clean them with warm, soapy water to prevent debris buildup.
  1. Check and Replace Water Filters:

  • If your Keurig 2.0 has a water filter, follow the manufacturer’s recommendations for checking and replacing it. This helps maintain the quality of your brewed beverages.
  1. Follow Descale Frequency Guidelines:

  • Adhere to the recommended descale frequency guidelines provided by the manufacturer for your Keurig 2.0 model. Regular descaling helps ensure optimal performance.

keurig coffee maker

VII. Troubleshooting and Additional Considerations

  1. Persistent Scale Buildup:

  • If you find that scale accumulates quickly in your Keurig 2.0 despite regular descaling, consider using a water filter or installing a water softening system to reduce water hardness and scale buildup.
  1. Keurig Error Messages:

  • Error messages related to scale can occasionally appear on your Keurig 2.0. Consult the user manual or Keurig’s customer support for specific troubleshooting steps to address these issues.

keurig coffee maker

VIII. Conclusion: Scale-Free Brewing Rewards

Regular descaling is essential to keep your Keurig 2.0 brewing machine in top condition. By understanding the importance of descaling, selecting the right descaling solution, following the step-by-step guide tailored to your Keurig 2.0 model, and maintaining ongoing maintenance practices, you can enjoy scale-free brewing and the delightful flavors it brings.

Embrace the descaling routine as an integral part of your coffee-making ritual and relish the satisfaction of consistently fine-tuned brewed beverages. Unlock the full potential of your Keurig 2.0, ensuring it continues to provide tasteful cups of coffee for years to come.

Posted on Leave a comment

Scale-Free Brewing: Descaling Your Keurig Coffee Maker

keurig coffee maker

Introduction

Regular descaling is essential for the optimal performance and longevity of your Keurig coffee maker. Over time, mineral deposits from water, known as scale or limescale, can build up inside the machine, affecting its efficiency and the taste of your brewed coffee. In this comprehensive guide, we will explore various methods for descaling your Keurig coffee maker, discuss the importance of descaling, provide step-by-step instructions, and share tips for maintaining a scale-free brewing experience. Let’s dive into the world of descaling and ensure the deliciousness of every cup of coffee.

keurig coffee maker

Scale-Free Brewing: Descaling Your Keurig Coffee Maker

I. Understanding the Importance of Descaling

  1. Scale Buildup Impact:

  • Scale buildup can clog the water reservoir, impede water flow, and affect the temperature and brewing process. This can lead to issues such as incomplete brewing, slow brewing, or even machine malfunction.
  1. Taste and Aroma:

  • Descaling ensures the removal of mineral deposits that can negatively impact the taste and aroma of your coffee. Regular descaling helps maintain the true flavor profile of your brewed beverages.
  1. Prolonging Appliance Lifespan:

  • Proper descaling enhances the longevity of your Keurig coffee maker by reducing the strain on internal components and preventing potential damage caused by scale buildup.

II. Determining Your Descale Frequency

  1. Water Hardness:

  • The hardness of your water supply influences how quickly scale accumulates in your coffee maker. Refer to your local water provider or use water testing kits to determine the hardness of your water.
  1. Manufacturer’s Recommendations:

  • Check the user manual or the manufacturer’s website for specific descaling guidelines and recommended descale frequency for your Keurig coffee maker model.
  1. Descale Indicators:

  • Some Keurig models have descale indicators that illuminate or display a notification when it’s time to descale the machine. Follow the indications provided by the machine to ensure timely descaling.

keurig coffee maker

III. Selecting a Descale Solution

  1. Manufacturer-Recommended Solutions:

  • Keurig offers descaling solutions specifically designed for their coffee makers. These solutions are formulated to effectively remove scale buildup and ensure the best performance of the machine.
  1. DIY Descaling Solutions:

  • You can also make a descaling solution at home using white vinegar or citric acid. These natural alternatives can be just as effective in descaling your Keurig coffee maker.

IV. Descaling Step-by-Step Guide

  1. Empty and Clean the Water Reservoir:

  • Start by emptying the water reservoir and removing any water filters or cartridges, if applicable. Discard any remaining water and clean the reservoir using warm, soapy water and a gentle brush or sponge. Rinse thoroughly.
  1. Prepare the Descale Solution:

  • Follow the instructions provided with the manufacturer-recommended descaling solution or measure the DIY descaling solution. Mix the solution with the appropriate amount of clean water, ensuring the solution ratio is as recommended.
  1. Fill the Water Reservoir:

  • Pour the descale solution into the water reservoir of your Keurig coffee maker. Fill the reservoir to the maximum capacity indicated. Do not exceed the maximum fill line.
  1. Start the Brewing Cycle:

  • Place a large ceramic mug or a cup on the drip tray of the machine. Start a brewing cycle without inserting a K-Cup pod. Select the largest brew size available to maximize the descaling effectiveness.
  1. Complete the Descaling Process:

  • Allow the machine to fully complete the brewing cycle, which involves heating and dispensing the descale solution. Depending on your Keurig model, this process may take several minutes. Do not interrupt it.

keurig coffee maker

  1. Discard the Solution and Rinse:

  • After the brewing cycle is complete, carefully remove the mug and discard the descale solution. Rinse the mug thoroughly, and then place it back onto the drip tray.
  1. Rinse the Water Reservoir:

  • Rinse the water reservoir with clean water several times to remove any traces of the descale solution. This ensures that there won’t be any residual taste or odor in your brewed beverages.
  1. Repeat the Rinse Cycle:

  • Fill the water reservoir with fresh water and start a brewing cycle without a K-Cup pod. Repeat this process multiple times to thoroughly rinse the internal components of the coffee maker.
  1. Clean External Parts:

  • While descaling the internal components, take the opportunity to wipe down the external surfaces of your Keurig coffee maker using a damp cloth or sponge. Ensure the machine is unplugged during this process.

V. Tips for Ongoing Maintenance

  1. Regular Water Reservoir Cleaning:

  • To prevent bacterial growth and maintain the cleanliness of your coffee maker, clean the water reservoir regularly with warm, soapy water. Rinse it thoroughly before refilling.
  1. Change Water Frequently:

  • For optimal taste and quality, avoid using stagnant water that has been sitting in the water reservoir for an extended period. Always use fresh water when brewing your beverages.
  1. Remove and Clean Removable Parts:

  • Depending on your Keurig model, there may be removable parts such as drip trays and K-Cup holders. Regularly remove them and clean them with warm, soapy water to prevent debris buildup.
  1. Check and Replace Water Filters:

  • If your Keurig coffee maker is equipped with a water filter, follow the manufacturer’s recommendations for checking and replacing the filters regularly. This helps maintain the quality of your brewed beverages.
  1. Follow Descale Frequency Guidelines:

  • Adhere to the descale frequency guidelines provided by the manufacturer for your specific Keurig model. Regular descaling, even if not indicated by a descale indicator, helps ensure optimal performance.

keurig coffee maker

VI. Troubleshooting and Additional Considerations

  1. Keurig Error Messages:

  • If your Keurig displays error messages related to scale or descaling, consult the user manual or Keurig’s customer support for guidance on troubleshooting and addressing the issue.
  1. Vinegar Odor Removal:

  • If you experience residual vinegar odor after descaling with vinegar, run additional brewing cycles with fresh water to minimize and eliminate the scent.
  1. Water Hardness Management:

  • If you live in an area with particularly hard water, consider using a water filter, either in the coffee maker or at the point of water entry into your home, to reduce the scale buildup.
  1. Follow Manufacturer Instructions:

  • Always refer to the manufacturer’s instructions and guidelines for descaling, as different Keurig models may have specific steps or requirements.

keurig coffee maker

VII. Conclusion: Scale-Free Brewing Delight

Descaling your Keurig coffee maker is essential to ensure the longevity of the machine and the quality of your brews. By understanding why descaling is important, selecting the right descale solution, following the step-by-step guide for descaling, and maintaining ongoing maintenance, you can enjoy scale-free brewing and consistently delicious cups of coffee.

Remember to regularly check for descale indicators, consider water hardness in your area, and adhere to the manufacturer’s recommendations for descaling frequency. Embrace the process of descaling as an integral part of your coffee-making routine and relish the flavorful results it yields.

Posted on Leave a comment

What are the benefits of an immersion blender?

immersion blender

Introduction

An immersion blender, also known as a hand blender or stick blender, is a versatile kitchen tool that offers a range of benefits. With its compact design and handheld operation, an immersion blender provides convenience, ease of use, and versatility in various culinary tasks. In this guide, we will explore the benefits of an immersion blender, discussing its functionality, simplicity, and advantages over other types of blenders.

immersion blender

What are the benefits of an immersion blender?

I. Versatility in the Kitchen

  1. Blending and Pureeing:

  • One of the primary functions of an immersion blender is blending and pureeing ingredients. It can effortlessly transform cooked fruits, vegetables, or even soups into smooth textures, allowing you to create silky smooth sauces, dips, marinades, and soups without transferring ingredients to a separate blender or food processor.
  1. Emulsifying Dressings and Sauces:

  • Immersion blenders excel in emulsifying dressings and sauces. With their powerful motor and blade design, they can quickly and thoroughly combine oil and vinegar or other ingredients, creating creamy and well-incorporated dressings, mayonnaise, or vinaigrettes.
  1. Whipping Cream and Beating Eggs:

  • Some immersion blenders come with additional whisk attachments, enabling them to whip cream, beat eggs, or create light and fluffy batters for pancakes, waffles, or desserts. This versatility eliminates the need for a separate hand mixer, saving both time and storage space.
  1. Chopping and Grinding:

  • Some immersion blenders offer attachments such as choppers or mini food processors that can chop onions, herbs, nuts, or grinding spices like cinnamon or coffee beans. This feature provides added versatility in food preparation, eliminating the need for additional kitchen gadgets.

immersion blender

II. Convenience and Portability

  1. Compact Size:

  • Immersion blenders have a compact and streamlined design, taking up minimal space in the kitchen. Unlike bulky countertop blenders or food processors, they can be easily stored in a drawer or cabinet, making them an ideal choice for those with limited kitchen space.
  1. Portability:

  • The handheld nature of immersion blenders enhances their portability. They are lightweight, making them convenient for travel or outdoor use, such as tailgating, camping, or preparing meals in vacation rentals.
  1. Easy Handling:

  • Immersion blenders are user-friendly and straightforward to operate. They have a comfortable grip and ergonomic design, allowing you to easily control and maneuver the blender throughout various kitchen tasks.
  1. Avoiding Transfer of Ingredients:

  • With an immersion blender, you can blend ingredients directly in the container they are being prepared in, eliminating the need to transfer hot soups or liquids between different vessels. This not only saves time but also reduces the risk of spills and messy cleanup.

immersion blender

III. Simple Operation

  1. One-Handed Operation:

  • Immersion blenders can be operated with one hand, leaving your other hand free to hold the container or perform other tasks. The single-handed operation allows for greater control and flexibility during blending.
  1. Variable Speed Settings:

  • Many immersion blender models offer variable speed settings, allowing you to adjust the blending speed to suit different recipes or ingredients. This flexibility is particularly beneficial when blending delicate or thick substances, ensuring optimal results.
  1. Quick and Easy Cleanup:

  • Cleaning an immersion blender is often as simple as detaching the blending shaft and rinsing it under water or placing it in the dishwasher. This easy cleanup process saves time and effort compared to cleaning a larger countertop blender or food processor.

IV. Cost-Effective Option

  1. Affordability:

  • Immersion blenders are generally more affordable than larger countertop blenders or food processors. They offer a cost-effective option for those who want the convenience and functionalities of a blender without investing in a more expensive appliance.
  1. Space and Multifunctional Savings:

  • By combining multiple functions in one handheld device, immersion blenders help save space in the kitchen and eliminate the need for purchasing additional kitchen gadgets or appliances like food processors or hand mixers.

V. Comparison to Countertop Blenders

  1. Versatile and Quick:

  • Immersion blenders provide versatility and quick operation compared to countertop blenders. They eliminate the need for transferring ingredients and offer precise control over blending consistency. Countertop blenders may be better suited for larger batches or heavy-duty blending tasks.
  1. Convenience and Ease of Cleanup:

  • Immersion blenders excel in terms of convenience and cleanup. Their compact size and handheld operation make them easy to handle, store, and clean. Countertop blenders often require more effort and time for assembly, operation, and cleanup.

immersion blender

VII. Tips for Using an Immersion Blender

  1. Choose the Right Container:

  • When using an immersion blender, ensure that the container or vessel you’re blending in has sufficient depth and capacity to accommodate the blending attachment. Avoid using shallow or narrow containers that may cause splattering or hinder effective blending.
  1. Immerse the Blender Fully:

  • For optimal blending results, immerse the blending attachment fully into the ingredients. This allows the blades to reach all the ingredients, ensuring even blending and avoiding pockets of unblended or lumpy textures.
  1. Use the Correct Speed:

  • Depending on the ingredients and the desired texture, adjust the speed setting of the immersion blender accordingly. Start with a lower speed and gradually increase if needed. This helps prevent splattering and allows for better control over blending consistency.
  1. Blend in Short Bursts:

  • Instead of continuously blending for long periods, apply the blender in short bursts. This technique helps prevent overheating of the motor and gives you more control over the blending process. Pause between bursts to assess the texture and make any necessary adjustments.
  1. Tilt the Blender for Aerating:

  • If you want to incorporate air into your mixture, such as when making whipped cream or frothy drinks, tilt the immersion blender to the side during blending. This technique helps aerate the mixture and achieve a lighter texture.
  1. Avoid Over-Blending:

  • Be cautious not to over-blend ingredients with an immersion blender, especially when it comes to delicate foods like fruits or herbs. Over-blending can lead to excessive oxidation or release of unwanted flavors, affecting the overall taste and appearance of the final dish.

immersion blender

VI. Conclusion: Enhancing Culinary Experiences with an Immersion Blender

The benefits of an immersion blender are manifold. It offers versatility in the kitchen, allowing you to blend, puree, emulsify, chop, and grind ingredients with ease. The convenience and portability of the immersion blender, along with its simple operation and quick cleanup, make it a favorite among home cooks and professional chefs alike.

Whether you’re preparing soups, sauces, dressings, or even whipping cream, an immersion blender provides a cost-effective and space-saving solution. While countertop blenders excel in larger batches and heavy-duty blending, an immersion blender offers simplicity, precision, and efficiency for a wide range of culinary tasks.

Consider the versatility and convenience of an immersion blender when looking to streamline your kitchen tools and enjoy effortless blending experiences. With an immersion blender in your culinary arsenal, you can enhance your cooking creations and explore new possibilities in the realm of homemade sauces, soups, smoothies, and more.

Posted on Leave a comment

Can you use immersion blender for smoothie?

immersion blender

Introduction

When it comes to making smoothies, traditional countertop blenders are often the go-to appliance. However, you may wonder if an immersion blender, also known as a hand blender or stick blender, can be used as an alternative. In this guide, we will explore whether you can use an immersion blender for making smoothies, discussing the benefits, limitations, and techniques for achieving smooth and creamy results.

immersion blender

Can you use immersion blender for smoothie?

I. Understanding Immersion Blenders

  1. Versatile Kitchen Tool:

  • An immersion blender is a handheld appliance consisting of a motor at one end and a blending attachment at the other. It is convenient for pureeing, blending, and emulsifying various ingredients, providing flexibility in the kitchen.
  1. Key Components:

  • Immersion blenders typically consist of a motor housing, a removable blending shaft, and different types of blades or attachments. Some models also offer additional features, such as variable speed settings or attachments for chopping or whisking.

II. Benefits of Using an Immersion Blender for Smoothies

  1. Convenience and Portability:

  • Compared to countertop blenders, immersion blenders are more compact and portable, making them ideal for small kitchens or on-the-go use. They can be easily stored and require less countertop space.
  1. Quick and Easy Operation:

  • Immersion blenders offer a straightforward and hassle-free blending experience. With a simple press of a button, you can blend ingredients directly in the container, minimising the need to transfer liquids and clean multiple components.
  1. Smoothie Customization:

  • Immersion blenders allow you to have greater control over the texture of your smoothie. You can easily adjust the blending time and immersion depth to achieve your desired consistency, whether you prefer a smooth and creamy texture or a chunkier blend.

immersion blender

III. Limitations of Using an Immersion Blender for Smoothies

  1. Capacity:

  • Immersion blenders are generally suited for blending smaller quantities of ingredients. If you frequently make large batches of smoothies or have several servings to prepare, a countertop blender may be a more suitable choice due to its larger capacity.
  1. Ice and Frozen Ingredients:

  • Immersion blenders may have difficulty handling large ice cubes or frozen ingredients effectively. The blades and motor of immersion blenders are not always as robust as those of countertop blenders, making it more challenging to crush ice or blend frozen ingredients into a smooth texture.
  1. Fiber and Seeds:

  • Some immersion blender blades may struggle with tougher ingredients, such as fibrous fruits, tough greens, or small seeds. Inadequate blending can result in a grainy or less than desirable texture in your smoothie.

immersion blender

IV. Tips for Achieving Smooth and Creamy Smoothies

  1. Prepping Ingredients:

  • To ensure smoother blending, pre-cut ingredients into smaller pieces. This step is particularly important for denser foods like frozen fruits, large chunks of vegetables, or fibrous greens.
  1. Liquid Base:

  • Add a sufficient amount of liquid to the blending container before adding the other ingredients. This will aid the blending process and prevent the immersion blender from stalling or splattering.
  1. Blending Technique:

  • When using an immersion blender, it is advisable to move the blender up and down in a gentle, slow, and steady motion. This technique allows the blades to blend evenly and helps achieve a smoother consistency.
  1. Gradual Blending:

  • Start by blending the liquid and soft ingredients before gradually adding the more solid or challenging ingredients. This approach helps prevent strain on the immersion blender and ensures thorough blending.
  1. Use Pre-Frozen or Smaller Ice:

  • If you want to incorporate ice into your smoothie, consider using pre-crushed ice or smaller ice cubes. This choice makes it easier for the immersion blender to blend the ice effectively without straining the motor.
  1. Soaking Seeds or Nuts:

  • If you plan to blend seeds or nuts into your smoothie, consider soaking them in water beforehand. Soaking helps soften their texture and makes them easier to blend with the immersion blender.

V. Optional Accessories and Attachments

  1. Blending Containers:

  • Some immersion blender models come with additional blending containers or cups, allowing you to blend directly into a portable container for on-the-go convenience.
  1. Whisk Attachment:

  • Certain immersion blenders offer a whisk attachment that can be useful for incorporating air into your smoothies or whisking ingredients such as egg whites or cream.

immersion blender

VI. Cleaning and Maintenance

  1. Detachable Parts:

  • Most immersion blenders have detachable blending shafts or blades that can be easily removed for cleaning. Follow the manufacturer’s instructions for cleaning and maintaining these parts.
  1. Motor Housing:

  • Clean the motor housing of the immersion blender by wiping it with a damp cloth. Avoid submerging the motor housing or exposing it to water.

VIII. Comparing Immersion Blenders and Countertop Blenders

  1. Immersion Blenders vs. Countertop Blenders:

  • It is worth comparing the capabilities and features of immersion blenders with those of countertop blenders to determine which option better suits your smoothie-making needs.
  1. Capacity and Batch Size:

  • Countertop blenders generally have larger capacity jars, making them suitable for preparing multiple servings or larger batches of smoothies. If you frequently make smoothies for multiple people, a countertop blender may be more efficient.
  1. Power and Motor Strength:

  • Countertop blenders typically have more powerful motors compared to immersion blenders. This allows them to handle tougher ingredients, crush ice more effectively, and maintain consistent blending power throughout the entire jar.
  1. Texture and Consistency:

  • Countertop blenders tend to provide smoother and velvety textures due to their powerful blades and higher speed settings. If achieving a perfectly smooth texture is crucial to your smoothie enjoyment, a countertop blender may be the preferable choice.
  1. Additional Functions:

  • Countertop blenders often offer more versatility with various speed settings, pre-programmed cycles, and additional functions such as grinding spices, making nut butters, or even heating soups. If you require a blender that can handle multiple tasks beyond smoothie making, a countertop blender might be the better option.

immersion blender

VII. Conclusion: Immersion Blenders and Smoothie Making

Using an immersion blender for making smoothies is possible, but it comes with certain limitations. While immersion blenders offer convenience, portability, and customization options, they may struggle with large batches, ice crushing, and blending tougher ingredients.

To achieve smooth and creamy smoothies with an immersion blender, ensure proper ingredient preparation, use a liquid base, employ blending techniques, and consider optional accessories or attachments. While immersion blenders may not match the power or capacity of countertop models, they can still provide satisfactory results for smaller quantities and simpler recipes.

Consider your specific smoothie-making needs, the desired texture, and the frequency of use before deciding whether an immersion blender is the right choice for you. By understanding their capabilities and following the provided tips, you can enjoy the convenience and versatility of an immersion blender for your smoothie creations.

Posted on Leave a comment

How do you use a bionic blender?

bionic blade blender

Introduction

The Bionic Blender is a versatile and efficient kitchen appliance designed to simplify your food preparation tasks. Whether you’re blending smoothies, creating sauces, or crushing ice, understanding how to use the Bionic Blender properly will enhance your blending experience. In this article, we will provide specific and detailed instructions on how to use a Bionic Blender effectively, allowing you to unlock its full potential and achieve fantastic blending results.

bionic blade blender

How do you use a bionic blender?

I. Familiarizing Yourself with the Components

Understanding the Blender Components:

  • Take a moment to familiarize yourself with the various parts of the Bionic Blender. These typically include the base unit, blender jar, lid, blade assembly, and control panel. Refer to the user manual provided by the manufacturer for specific details on your blender model.

II. Preparing the Blender for Use

  1. Choosing the Right Location:

  • Select a sturdy and flat surface in your kitchen to place the Bionic Blender. Ensure that it is near an electrical outlet for easy access.
  1. Assembling the Blades and Jar:

  • Prior to use, assemble the blade assembly onto the blender jar. Place the blade assembly securely onto the jar, ensuring it is properly aligned with the jar’s bottom.

bionic blade blender

III. Adding Ingredients and Liquid in the Blender Jar

  1. Check the Capacity:

  • Ensure that the amount of ingredients you plan to blend does not exceed the maximum capacity recommended by the manufacturer. Overfilling the blender jar can hinder proper blending and lead to spillage.
  1. Add Ingredients:

  • Place the desired ingredients into the blender jar. This can include fruits, vegetables, liquids, or any other ingredients specified by your recipe.
  1. Adding Liquid:

  • To aid in the blending process, it is recommended to add a sufficient amount of liquid, such as water, milk, juice, or any other liquid suitable for your recipe. The specific amount of liquid required will depend on the recipe and desired consistency.

IV. Lid Placement and Safety Precautions

  1. Securing the Lid:

  • Place the lid securely onto the blender jar, ensuring it is properly locked in place. The lid should have a rubber gasket or seal to prevent leaks during blending.
  1. Safety Lock Features:

  • Many Bionic Blender models have safety lock features. Make sure the lid is correctly aligned with the blender jar and the safety lock is engaged before operating the blender. This prevents the blender from starting unless all components are correctly assembled.
  1. Holding the Lid:

  • For added safety, it is recommended to hold the lid firmly while operating the blender. This ensures that the lid remains in place and prevents any accidental opening or splattering of contents.

bionic blade blender

V. Operating the Bionic Blender

  1. Selecting Blending Modes or Speeds:

  • Depending on your blender model, choose the appropriate blending mode or speed setting for your desired result. Settings may include options for ice crushing, smoothies, sauces, or manual speed control.
  1. Starting the Blender:

  • Once you have selected the desired blending mode or speed, press the power button or start button to begin blending. The blender will initiate the blending process.
  1. Monitoring the Blending Process:

  • Keep an eye on the blending process to ensure that the ingredients are being properly blended. Depending on your recipe and desired consistency, you may need to adjust the blending time or speed.
  1. Utilizing Pulse Mode:

  • Many Bionic Blenders feature a pulse mode that allows for quick bursts of blending power. Use the pulse mode for precise blending control, especially when dealing with ingredients that require shorter blending durations or a coarse texture.

VI. Adjusting Speeds and Durations

  1. Increasing or Decreasing Speed:

  • Some recipes may require adjustments to the blending speed during the process. Most Bionic Blenders offer speed control options that allow you to increase or decrease the blending speed as needed.
  1. Blending Duration:

  • The duration of the blending process will depend on the specific recipe and desired consistency. Follow the instructions provided in your recipe, or use your judgment based on the desired outcome.

bionic blade blender

VII. Pausing and Scraping Down the Sides

  1. Pausing the Blender:

  • If needed, pause the blender during the blending process to check the consistency or scrape down the sides of the blender jar. This ensures that all ingredients are evenly blended.
  1. Scraping Down the Sides:

  • Use a spatula or spoon to scrape down the sides of the blender jar, especially if any ingredients have stuck to the sides. This helps incorporate any particles that may not have been fully blended.

VIII. Testing and Adjusting Consistency

  1. Testing the Blend:

  • After the initial blending process, stop the blender and carefully remove the lid. Test the blend’s consistency by observing its texture, smoothness, and taste.
  1. Adjusting the Blend:

  • If the blend is too thick, add small amounts of liquid and blend again until you reach the desired consistency.

IX. Safety Precautions and Cleaning

  1. Unplugging the Blender:

  • Once you have finished using the Bionic Blender, unplug it from the power source for safety.
  1. Cleaning the Blender:

  • Refer to the manufacturer’s instructions and our separate guide on how to clean a Bionic Blender effectively. Proper cleaning ensures hygiene, longevity, and optimal performance.


XI. Tips for Getting the Best Results

  1. Start with Liquid:

  • When blending, it is often helpful to start with the liquid ingredients at the bottom of the blender jar. This allows for easier blending and smoother results.
  1. Gradually Add Ingredients:

  • For better blending and to prevent overloading the blender, gradually add solid ingredients to the blender jar. This ensures that everything is evenly blended and prevents the motor from straining.
  1. Blend in Batches:

  • If your recipe requires blending a large quantity of ingredients, it may be necessary to blend in batches. Overfilling the blender jar can hinder the blending process and result in an inconsistent blend.
  1. Use the Pulse Function for Control:

  • The pulse function on the Bionic Blender provides short bursts of blending power, allowing for precise control over the texture of your blend. Utilize this function when you need to create a coarse texture or incorporate mix-ins, such as nuts or chocolate chips.
  1. Avoid Over-Blending:

  • Be mindful not to over-blend your ingredients as this can result in a loss of texture or flavor. Stop the blending process once you achieve the desired consistency, taste, and texture.
  1. Blend with Care:

  • While the Bionic Blender is a powerful appliance, it is essential to handle it with care. Avoid excessive force or aggressive movements while operating the blender to prevent damage to the blades or motor.

XII. Common Troubleshooting Tips

  1. Blender Not Starting:

  • If the blender does not start when the power button is pressed, ensure that all components are securely assembled, including the lid and safety lock. Check that the power cord is properly plugged into an electrical outlet.
  1. Food Not Blending Properly:

  • If your ingredients are not blending evenly or there are large chunks remaining, stop the blending process and scrape down the sides of the blender jar. Adjust the speed or blending time if necessary.
  1. Unusual Noises or Vibrations:

  • If you encounter unusual noises or excessive vibrations during blending, stop the blender immediately.

bionic blade blender

X. Conclusion: Mastering the Art of Blending

By following these specific instructions and guidelines, you can effectively utilize your Bionic Blender and achieve fantastic blending results in your culinary endeavors. Remember to read the user manual provided by the manufacturer for model-specific instructions and safety precautions.

From assembling the blender and adding ingredients to utilizing different speeds and monitoring the blending process, you now have the knowledge to make the most of your Bionic Blender. Embrace creativity, experiment with recipes, and enjoy the convenience and versatility of this innovative kitchen appliance.

Posted on Leave a comment

How do you clean a bionic blade blender?

bionic blade blender

Introduction

The Bionic Blade Blender is an innovative kitchen appliance designed to make blending tasks effortless. To ensure optimal performance and longevity, regular cleaning is crucial. Understanding how to clean a Bionic Blade Blender properly will help you maintain its functionality and hygienic standards. In this article, we will provide specific and detailed cleaning tips to keep your Bionic Blade Blender in top condition.

bionic blade blender

How do you clean a bionic blade blender?

I. Safety Precautions

  1. Unplug the Blender:

  • Before cleaning the Bionic Blade Blender, always make sure it is unplugged from the power source. This ensures your safety and prevents accidental operation during the cleaning process.

II. Cleaning the Blade Assembly

  1. Disassemble the Blade Assembly:

  • Start by carefully removing the blade assembly from the blender jar. Most Bionic Blade Blenders have a removable blade assembly for easier cleaning.
  1. Rinse Under Warm Water:

  • Rinse the blade assembly under warm running water to remove any leftover food particles or residue. Use your fingers or a soft brush to gently scrub the blades and remove any stubborn debris.
  1. Use Dish Soap:

  • Apply a small amount of mild dish soap to a sponge or brush. Gently clean the blade assembly, paying attention to the blades themselves and the areas around them. Ensure that all surfaces are thoroughly cleaned, including any small crevices or nooks.
  1. Rinse Thoroughly:

  • Rinse the blade assembly under warm water to remove any soap residue. Ensure there is no leftover soap, as it can affect the taste and odor of future blends.
  1. Air Dry or Towel Dry:

  • After cleaning, allow the blade assembly to air dry completely before reassembling. Alternatively, you can use a clean, dry cloth or towel to carefully dry the blades and assembly.

bionic blade blender

III. Cleaning the Blender Jar

  1. Empty and Rinse:

  • Empty the blender jar of any remaining contents. Rinse the jar thoroughly under warm water to remove any residue or food particles.
  1. Use Warm, Soapy Water:

  • Fill the blender jar with warm water and add mild dish soap. Swirl the water around to create a soapy solution that will help break down any stuck-on residue.
  1. Scrub with a Sponge or Brush:

  • Use a sponge or soft brush to scrub the inside of the blender jar, paying special attention to the bottom and sides. Scrubbing in gentle circular motions helps dislodge any stubborn residue or stains.
  1. Rinse Thoroughly:

  • Rinse the blender jar under warm water to remove any soap residue. It’s important to ensure that no soap remains, as it can affect the taste and odor of future blends.
  1. Air Dry or Towel Dry:

  • Allow the blender jar to air dry completely before using it or reassembling the Bionic Blade Blender. Alternatively, use a clean, dry cloth or towel to ensure it is thoroughly dried.

bionic blade blender

IV. Wiping the Base Unit

  1. Unplug the Blender:

  • Before cleaning the base unit of the Bionic Blade Blender, make sure it is unplugged from the power source.
  1. Use a Damp Cloth:

  • Dampen a clean cloth with warm water and wring out any excess moisture. Gently wipe the base unit exterior, taking care to remove any spills, stains, or fingerprints.
  1. Dry the Base Unit:

  • Use a clean, dry cloth to wipe and dry the base unit thoroughly. This ensures the prevention of any water damage and helps maintain the appearance of the blender.

V. Additional Cleaning Tips

  1. Clean Immediately After Use:

  • To prevent food residue from drying and becoming harder to remove, it is best to clean the Bionic Blade Blender immediately after each use. This ensures easier and more efficient cleaning.
  1. Avoid Immersing the Base Unit in Water:

  • The base unit of the Bionic Blade Blender contains electrical components and should never be submerged in water. Always clean the base unit using a damp cloth and avoid any contact with water.
  1. Avoid Harsh Abrasives or Chemicals:

  • When cleaning the Bionic Blade Blender, refrain from using harsh abrasives, scouring pads, or aggressive chemicals. These can damage the blender’s surfaces and compromise its functionality.
  1. Clean the Rubber Seal:

  • If your Bionic Blade Blender has a rubber seal, regularly inspect and clean it. Remove the seal if possible and wash it with warm, soapy water. Rinse thoroughly and allow it to dry completely before reinserting it into the blender jar.

VI. Regular Maintenance

  1. Blade Lubrication:

  • Periodically lubricate the Bionic Blade Blender’s blade assembly according to the manufacturer’s instructions. This helps maintain smooth rotation and optimal blending performance.
  1. Check for Wear and Tear:

  • Regularly inspect the blade assembly, blender jar, and base unit for any signs of wear and tear. If you notice any damaged or worn parts, contact the manufacturer for replacement options. If it is under warranty, you can contact customer service for prompt repair.

bionic blade blender

VIII. Troubleshooting Cleaning Challenges

  1. Removing Stains or Discoloration:

  • If you encounter stubborn stains or discoloration on the blade assembly, blender jar, or base unit, there are a few methods you can try:
    • Baking Soda Paste: Create a paste using baking soda and water. Apply it to the stained area, let it sit for a few minutes, then scrub gently with a sponge or brush. Rinse thoroughly.
    • Lemon Juice: Squeeze fresh lemon juice onto the stained area and let it sit for a few minutes. Scrub the area gently with a sponge or brush before rinsing with warm water.
    • Vinegar Solution: Mix equal parts of vinegar and water in a spray bottle. Spray the solution onto the stained area and let it sit for a few minutes. Scrub gently and rinse thoroughly.
  1. Dealing with Lingering Odors:

  • If your Bionic Blade Blender retains unpleasant odors, you can use these methods to freshen it up:
    • Lemon or Citrus Solution: Squeeze fresh lemon juice or add a few drops of lemon essential oil into the blender jar. Fill the jar with warm water and blend for a few seconds. Rinse thoroughly.
    • Baking Soda: Place a tablespoon of baking soda into the blender jar. Add warm water and allow the mixture to sit for a few hours or overnight. Rinse thoroughly.

IX. Deep Cleaning and Descaling

  1. Deep Cleaning:

  • Periodically, it is recommended to perform a more thorough deep cleaning of your Bionic Blade Blender. This process helps remove any buildup or residue that may have accumulated over time.
    • Fill the blender jar halfway with warm water and add a few drops of dish soap. Blend the mixture for a few seconds, then let it sit for a few minutes.
    • Scrub the blender jar, blade assembly, and base unit with a soft brush or sponge. Pay careful attention to any areas with stubborn residue or buildup.
    • Rinse all components thoroughly with warm water to remove any soap or residue.

bionic blade blender

VII. Conclusion: Maintain a Clean and Efficient Bionic Blade Blender

Proper cleaning and maintenance of your Bionic Blade Blender are crucial for its longevity and performance. Following the detailed cleaning tips provided, from disassembling the blade assembly to cleaning the blender jar and wiping the base unit, will help ensure that your blender remains in top condition.

Remember to clean the blender immediately after each use, avoid harsh abrasives or chemicals, and properly maintain the blade assembly. By incorporating these cleaning practices into your routine, you can enjoy a clean, hygienic, and efficient Bionic Blade Blender for all your blending needs.