Milkshakes immersion blender are a classic treat that can be enjoyed in countless flavors and variations. If you want to achieve a smooth, creamy, and perfectly blended milkshake, using an immersion blender can be a game-changer. In this comprehensive guide, we will explore the step-by-step process of making a delicious milkshake using an immersion blender. From selecting high-quality ingredients to incorporating creative flavors, you can create a milkshake masterpiece that will delight your taste buds. Let’s dive into the world of milkshake-making and discover how an immersion blender can revolutionize your culinary adventures.
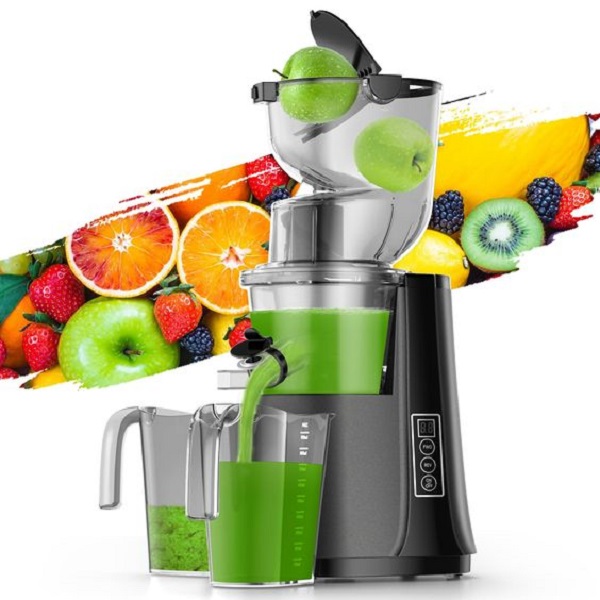
Immersion Blender vs. Traditional Blender: Choosing the Perfect Tool for Milkshakes
While both immersion blenders and traditional blenders can technically create milkshakes, immersion blenders offer distinct advantages:
-
Convenience: Immersion blenders are compact and require minimal prep work. You can blend your milkshake directly in the serving glass, eliminating the need to transfer ingredients and clean an additional container.
-
Control: The handheld design of immersion blenders provides superior control over the blending process. This is especially beneficial for milkshakes, as you can easily achieve the desired consistency without over-blending.
-
Easy Cleaning: Most immersion blender blades and attachments are detachable, making them a breeze to clean compared to traditional blenders with large, cumbersome pitchers.
In 2024, immersion blenders remain a popular choice for home cooks seeking an efficient and versatile kitchen tool. Their space-saving design and ease of use make them ideal for small kitchens or those with limited counter space.
Can you make a milkshake with an immersion blender milkshake?
-
Gathering the essential ingredients
a. Ice cream: Choose your favorite flavor of ice cream as the base for your milkshake. Classic options like vanilla, chocolate, or strawberry work well, but feel free to experiment with unique flavors and combinations.
b. Milk: Select a type of milk that complements the flavor profile of your milkshake. Whole milk provides a richer and creamier texture, while alternatives like almond or oat milk can be used for a dairy-free option.
c. Additional flavorings: Enhance your immersion blender milkshake by adding ingredients such as chocolate syrup, caramel sauce, fresh fruits, or extracts like vanilla or mint. These flavorings add depth and variety to your milkshake creation.

-
Preparing the ingredients
a. Softening the ice cream: Allow the ice cream to soften slightly at room temperature to make it easier to blend. This step ensures a smoother consistency and reduces the strain on the immersion blender.
b. Measuring the ingredients: Measure the desired amount of ice cream and milk based on your preferred milkshake thickness and serving size. Adjust the quantities to achieve the desired balance of creaminess and flavor.
-
Assembling the immersion blender milkshake
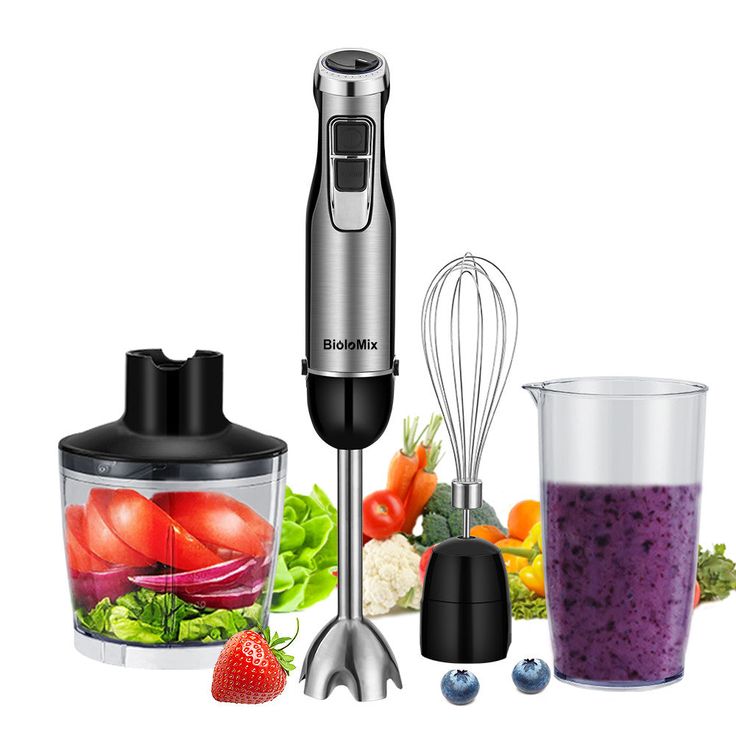
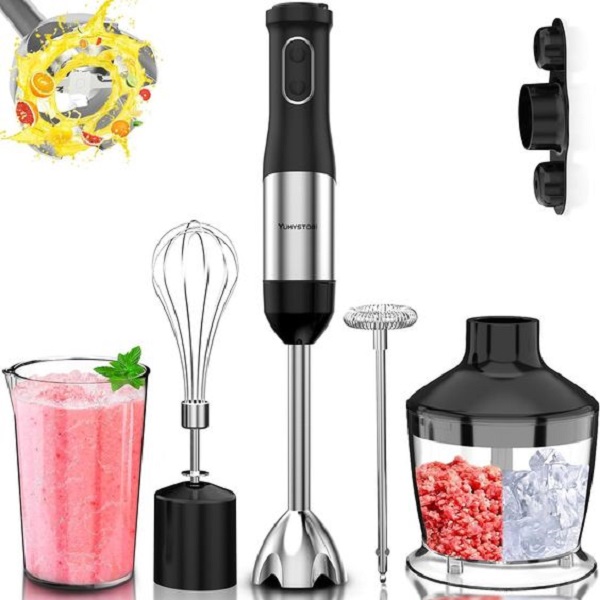
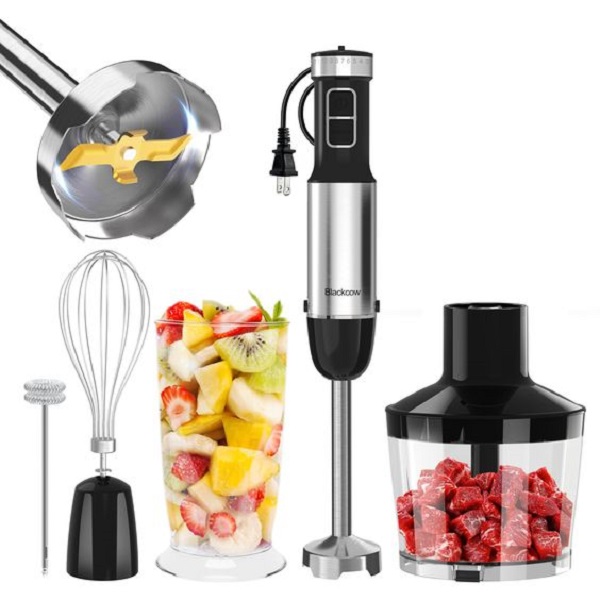
a. Attaching the blending attachment: Connect the appropriate blending attachment to the immersion blender. It typically consists of a stainless-steel shaft with blades at the end.
b. Ensuring the blender is clean and dry: Before using the immersion blender, make sure it is clean and dry. This prevents any unwanted flavors or residues from contaminating your milkshake.
-
Blending the immersion blender milkshake
a. Combining the ingredients: In a tall and narrow container, add the softened ice cream, milk, and any desired additional flavorings. The container’s shape helps prevent splattering and promotes a smooth blending process.
b. Immersion blending technique: Submerge the blending attachment of the immersion blender into the container. Keep the blender at a slight angle and gently move it in an up-and-down motion. This ensures that all the ingredients are thoroughly combined and blended.
c. Adjusting the consistency: If you desire a thicker milkshake, add more ice cream. For a thinner consistency, pour in a bit more milk. Gradually adjust the amounts to achieve the desired thickness and texture.
d. Duration of blending: Blend the ingredients until the desired consistency is reached. The immersion blender quickly blends the ice cream and milk together, saving time and effort compared to traditional blending methods.
-
Incorporating creative variations
a. Adding mix-ins: Stir in mix-ins like crushed cookies, candy pieces, or chopped nuts to add texture and flavor to your milkshake. Fold them in gently after blending to avoid overmixing.
b. Layering flavors: Create visually appealing milkshakes by layering different flavors. Blend each flavor separately and carefully pour them into a glass, creating distinct layers.
c. Drizzling toppings: Finish off your milkshake by drizzling sauces like chocolate, caramel, or fruit syrups over the top. This adds a decorative touch and enhances the overall taste experience.
-
Serving and enjoying the immersion blender milkshake
a. Choosing the right glassware: Select a tall and wide glass to accommodate the milkshake and any additional toppings. A straw or spoon can be used for sipping or scooping up the creamy goodness.
b. Garnishing and presentation: Garnish your milkshake with whipped cream, sprinkles, or a cherry on top. Pay attention to presentation, as a visually appealing milkshake can make the experience even more enjoyable.
c. Savoring the flavors: Take a moment to truly appreciate the flavors and textures of your milkshake. Enjoy its creamy richness, playful mix-ins, and the refreshing burst of flavors that dance on your palate.
-
Cleaning and maintenance
a. Detaching the blending attachment: After blending your milkshake, detach the blending attachment from the immersion blender for cleaning. Follow the manufacturer’s instructions for safe removal.
b. Cleaning the blending attachment: Rinse the blending attachment under running water to remove any residue. Use a mild dish soap and a sponge or brush to gently scrub the blades and shaft. Ensure thorough cleaning to prevent any flavors or odors from transferring to future recipes.
c. Wiping the motor unit: Use a damp cloth to wipe down the motor unit of the immersion blender. Avoid submerging this part in water or exposing it to excessive moisture.
d. Storing the immersion blender: Once clean and dry, store the immersion blender and its attachments in a safe location. Keep it in a place where it is easily accessible for future use.
-
Troubleshooting tips
a. Avoiding splattering: To prevent splattering while blending, start at a lower speed and gradually increase it once the ingredients are partially combined. This will help prevent any overflow or mess.
b. Addressing clumps or chunks: If you encounter clumps or chunks while blending, pause and gently tap the container on the countertop to release any air bubbles. Resume blending, ensuring the immersion blender is fully submerged and using the up-and-down motion to break down any remaining clumps.
c. Adjusting ingredients as needed: If your milkshake turns out too thin or too thick, adjust the proportions of ice cream and milk accordingly. Add more ice cream for a thicker consistency or pour in additional milk for a thinner consistency.
Elevate Your Milkshake Game in 2024: Beyond the Basics
Can you use an immersion blender for milkshakes? As you experiment with milkshake creation in 2024, consider these innovative techniques to take your milkshakes from ordinary to extraordinary:
- Incorporate Textural Delights: Don’t limit yourself to just ice cream and milk. Think beyond the traditional milkshake and add textural elements for a truly unique experience. For a delightful crunch, add chopped nuts, crumbled cookies, or even pretzels. For a touch of decadence, try swirling in some Nutella, caramel sauce, or peanut butter before blending.
- Embrace the Power of Spices: A sprinkle of spice can take your milkshake to surprising new heights. A dash of cinnamon, nutmeg, or even cayenne pepper can add unexpected depth and intrigue. For a chai latte-inspired milkshake, add a pinch of ground cardamom and ginger.
- Go Green with Superfoods: Sneak in some extra nutrients by incorporating healthy greens into your milkshake. Spinach, kale, and avocado can all be surprisingly delicious additions when blended with fruit and ice cream.
- Frozen Yogurt for a Lighter Option: For a slightly lighter and healthier milkshake, substitute frozen yogurt for ice cream. Frozen yogurt offers a similar creamy texture with a touch less fat and calories.
- Salted Caramel Magic: A touch of sea salt can elevate the flavor profile of your milkshake. Add a pinch of flaky sea salt to the finished product for a delightful sweet and salty contrast.
Enhancing milkshake magic with an immersion blender milkshake
Using an immersion blender to make a milkshake brings convenience, efficiency, and creativity to the process. From softening the ice cream to blending the ingredients to perfection, an immersion blender ensures a smooth and velvety texture. By incorporating various flavorings, mix-ins, and toppings, you can unleash your creativity and craft personalized milkshake creations that will impress your friends and family. Whether you prefer classic flavors or want to experiment with unique combinations, an immersion blender elevates the milkshake-making experience to new heights. Embrace the versatility of this kitchen tool, and let your imagination run wild as you indulge in the deliciousness of homemade milkshakes.