Introduction:
Pureeing is a common culinary technique used to create smooth, creamy textures in dishes ranging from soups and sauces to baby food and desserts. While a blender is a convenient tool for pureeing, it is possible to achieve similar results using other kitchen equipment and techniques. Whether you find yourself without a blender or simply prefer alternative methods, this guide provides detailed instructions and tips on how to puree without a blender effectively and effortlessly.
How to Puree Without a Blender?
Using a Food Processor
A food processor is a versatile kitchen appliance that can easily handle pureeing tasks. It might not be a blender, but it certainly comes close in terms of effectiveness.
Steps for Pureeing with a Food Processor:
- Prepare Ingredients: Cut your ingredients into small, evenly-sized pieces to ensure they process evenly.
- Load the Processor: Place the ingredients into the food processor bowl, but avoid overloading it to ensure smooth, consistent processing.
- Pulse and Process: Use the “pulse” button to start breaking down the ingredients. After a few pulses, switch to a continuous process mode. Scrape down the sides of the bowl as needed to ensure thorough blending.
- Check Consistency: Check the texture regularly. If the mixture is too thick, add a small amount of liquid (water, broth, or milk) and continue processing until you achieve the desired smoothness.
Avoiding Overprocessing: Be mindful not to overprocess your mixture, especially if you are pureeing fibrous or starchy ingredients. Overprocessing can result in a gluey texture.
Using a Potato Masher or Fork
A potato masher or a sturdy fork can be an effective tool for pureeing soft fruits and cooked vegetables. This method requires a bit of manual effort but can yield excellent results.
Steps for Pureeing with a Potato Masher or Fork:
- Cook Ingredients Thoroughly: Ensure that your fruits or vegetables are cooked until very soft, as this makes them easier to mash.
- Place in a Large Bowl: Transfer the cooked ingredients to a large mixing bowl to provide ample space for mashing.
- Mash Gradually: Use a potato masher or fork to mash the ingredients, applying steady pressure. Rotate the bowl and scrape the sides to ensure an even mash.
- Add Liquid if Necessary: If the mixture is too thick or dry, add a small amount of cooking liquid or another suitable liquid to help achieve a smoother texture.
Achieving Smooth Texture: While this method may not produce a perfectly smooth puree, it works well for dishes where a slightly textured consistency is acceptable, such as rustic soups or chunky sauces.

Using a Sieve or Food Mill
A sieve or food mill can create a smooth puree by pressing the ingredients through a fine mesh. This technique is particularly useful for removing seeds, skins, and fibrous material.
Steps for Pureeing with a Sieve or Food Mill:
- Cook Ingredients: Ensure that your fruits or vegetables are fully cooked and soft.
- Choose the Right Tool: Select a fine-mesh sieve or a food mill with the appropriate disc size for your desired consistency.
- Press the Ingredients: Place the cooked ingredients into the sieve or food mill. Use a spoon, spatula, or the food mill’s handle to press the contents through the mesh or disc.
- Collect the Puree: Collect the puree in a bowl placed below the sieve or food mill, scraping the underside as needed to gather all the smooth mixture.
Advantages of a Food Mill: Food mills are particularly effective for making baby food, sauces, and soups, as they can easily remove skins and seeds while producing a smooth texture.
Using a Knife and Cutting Board
For certain dishes, a finely chopped or minced texture may be an acceptable alternative to a completely smooth puree. This method relies on precise knife skills.
Steps for Pureeing with a Knife:
- Prepare Ingredients: Clean, peel, and chop your ingredients into small, uniform pieces.
- Cook Until Soft: Cook the ingredients until they are very tender, making them easier to mince.
- Chop Finely: Using a sharp chef’s knife, finely chop the cooked ingredients. Continue chopping until you achieve the desired texture.
- Combine Ingredients: If necessary, combine the minced ingredients with a small amount of liquid or other components to enhance the consistency.
Applications: This method is suitable for making spreads, relishes, or textured sauces where a fully smooth consistency is not required.

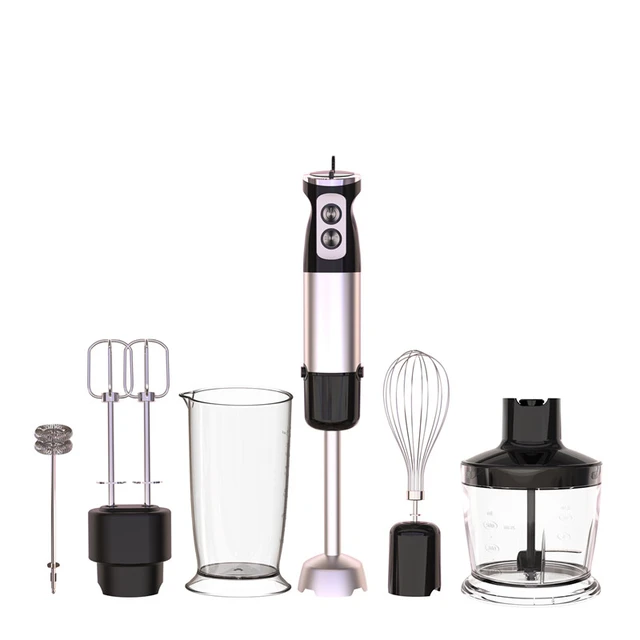
Using an Immersion Blender
An immersion blender, or stick blender, is another handy tool for pureeing. It offers more control compared to traditional blenders and can be used directly in the cooking pot.
Steps for Pureeing with an Immersion Blender:
- Cook Ingredients: Ensure your ingredients are fully cooked and soft.
- Prepare for Blending: Transfer the ingredients to a deep pot or bowl if they are not already in one suitable for blending.
- Submerge and Blend: Submerge the immersion blender into the ingredients, starting on low speed. Move the blender around to ensure even blending.
- Check and Adjust: Stop blending periodically to check the consistency. Add liquid as needed and continue blending until you achieve a smooth puree.
Versatility: Immersion blenders are versatile and can also be used for making smoothies, soups, and emulsifying sauces.
Using a Mortar and Pestle
The traditional mortar and pestle method is excellent for pureeing smaller quantities and creating a smooth paste. This method is particularly effective for herbs, spices, and certain types of cooked vegetables.
Steps for Pureeing with a Mortar and Pestle:
- Prepare Ingredients: Ensure ingredients are chopped into smaller pieces for easier grinding.
- Add Ingredients: Place a small amount of the chopped or cooked ingredients into the mortar.
- Grind and Crush: Use the pestle to grind and crush the ingredients against the sides and bottom of the mortar in a circular motion.
- Continue Until Smooth: Continue grinding until you achieve the desired consistency, adding small quantities of liquid if necessary.
Best Uses: This method is ideal for making pesto, garlic paste, guacamole, and spice blends. It can also be used for small-batch baby food.
Steaming and Pureeing
Steaming works well for softening fruits and vegetables, making them easier to puree using manual methods.
Steps for Steaming and Pureeing:
- Prepare and Steam: Clean, peel, and chop the ingredients. Steam them until they are very tender using a steaming basket or microwave.
- Transfer to Bowl: Remove the steamed ingredients and transfer them to a mixing bowl.
- Mash or Blend: Use a potato masher, fork, or manual grinder to mash the steamed ingredients until smooth. Alternatively, an immersion blender can also be used.
Retaining Nutrients: Steaming helps retain most of the nutrients in the vegetables and fruits, making this a healthy option for preparing purees, especially for baby food.
Using a Ricer
A potato ricer can be an effective tool for pureeing soft vegetables and fruits, providing a smooth, consistent texture.
Steps for Pureeing with a Ricer:
- Cook Ingredients: Cook the ingredients until they are very tender.
- Load the Ricer: Place the cooked ingredients into the ricer’s chamber.
- Press Through: Press the handles together to force the ingredients through the small holes, creating a smooth puree.
- Collect the Puree: Gather the puree from the ricer and mix it to ensure even consistency.
Applications: This method is excellent for potatoes, apples, and other soft fruits and vegetables, providing a smooth texture without lumps.
Combining Techniques
Sometimes, using a combination of these methods can yield the best results for achieving the desired puree consistency.
Steps for Combining Techniques:
- Start with Steaming: Begin by steaming the ingredients to soften them.
- Initial Mashing: Use a potato masher or fork to break down the steamed ingredients.
- Refining Texture: Pass the mashed ingredients through a sieve, food mill, or use an immersion blender for a finer texture.
Advantages: Combining techniques allows you to control the texture more precisely and ensures a smooth, lump-free puree.
Storing Purees
Proper storage of purees ensures they remain fresh and safe for later use.
Steps for Storing Purees:
- Cool Properly: Allow purees to cool to room temperature before storing.
- Use Airtight Containers: Store purees in airtight containers or freezer-safe bags to prevent contamination and freezer burn.
- Label and Date: Label the containers with the contents and the date of preparation for easy identification.
Preserving Freshness: Purees can be refrigerated for up to three days or frozen for up to three months. Thaw frozen purees in the refrigerator or use a gentle heat source for reheating.
Final Tips and Tricks
Achieving the perfect puree without a blender can be perfected with a few additional tips and tricks.
Smooth Texture: Add a small amount of liquid, such as broth, milk, or water, to help achieve a smoother consistency.
Preventing Air Bubbles: Avoid incorporating air into the puree during manual mashing or blending to prevent foam and bubbles.
Season Judiciously: Taste and adjust seasoning after pureeing, as flavors can intensify or need balancing after the texture is adjusted.
Adaptive Techniques: Adjust your techniques based on the ingredients. For example, fibrous vegetables may require more thorough mashing or passing through a sieve.
Conclusion
Pureeing without a blender is entirely achievable using various kitchen tools and techniques. Whether using a food processor, potato masher, sieve, or a combination of methods, you can create smooth, delicious purees for a variety of dishes. Proper preparation, technique, and storage practices ensure your purees are flavorful and consistent. By understanding and utilizing these methods, you can confidently tackle pureeing tasks without relying on a blender, bringing versatility and creativity to your culinary adventures.